

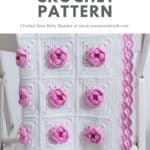
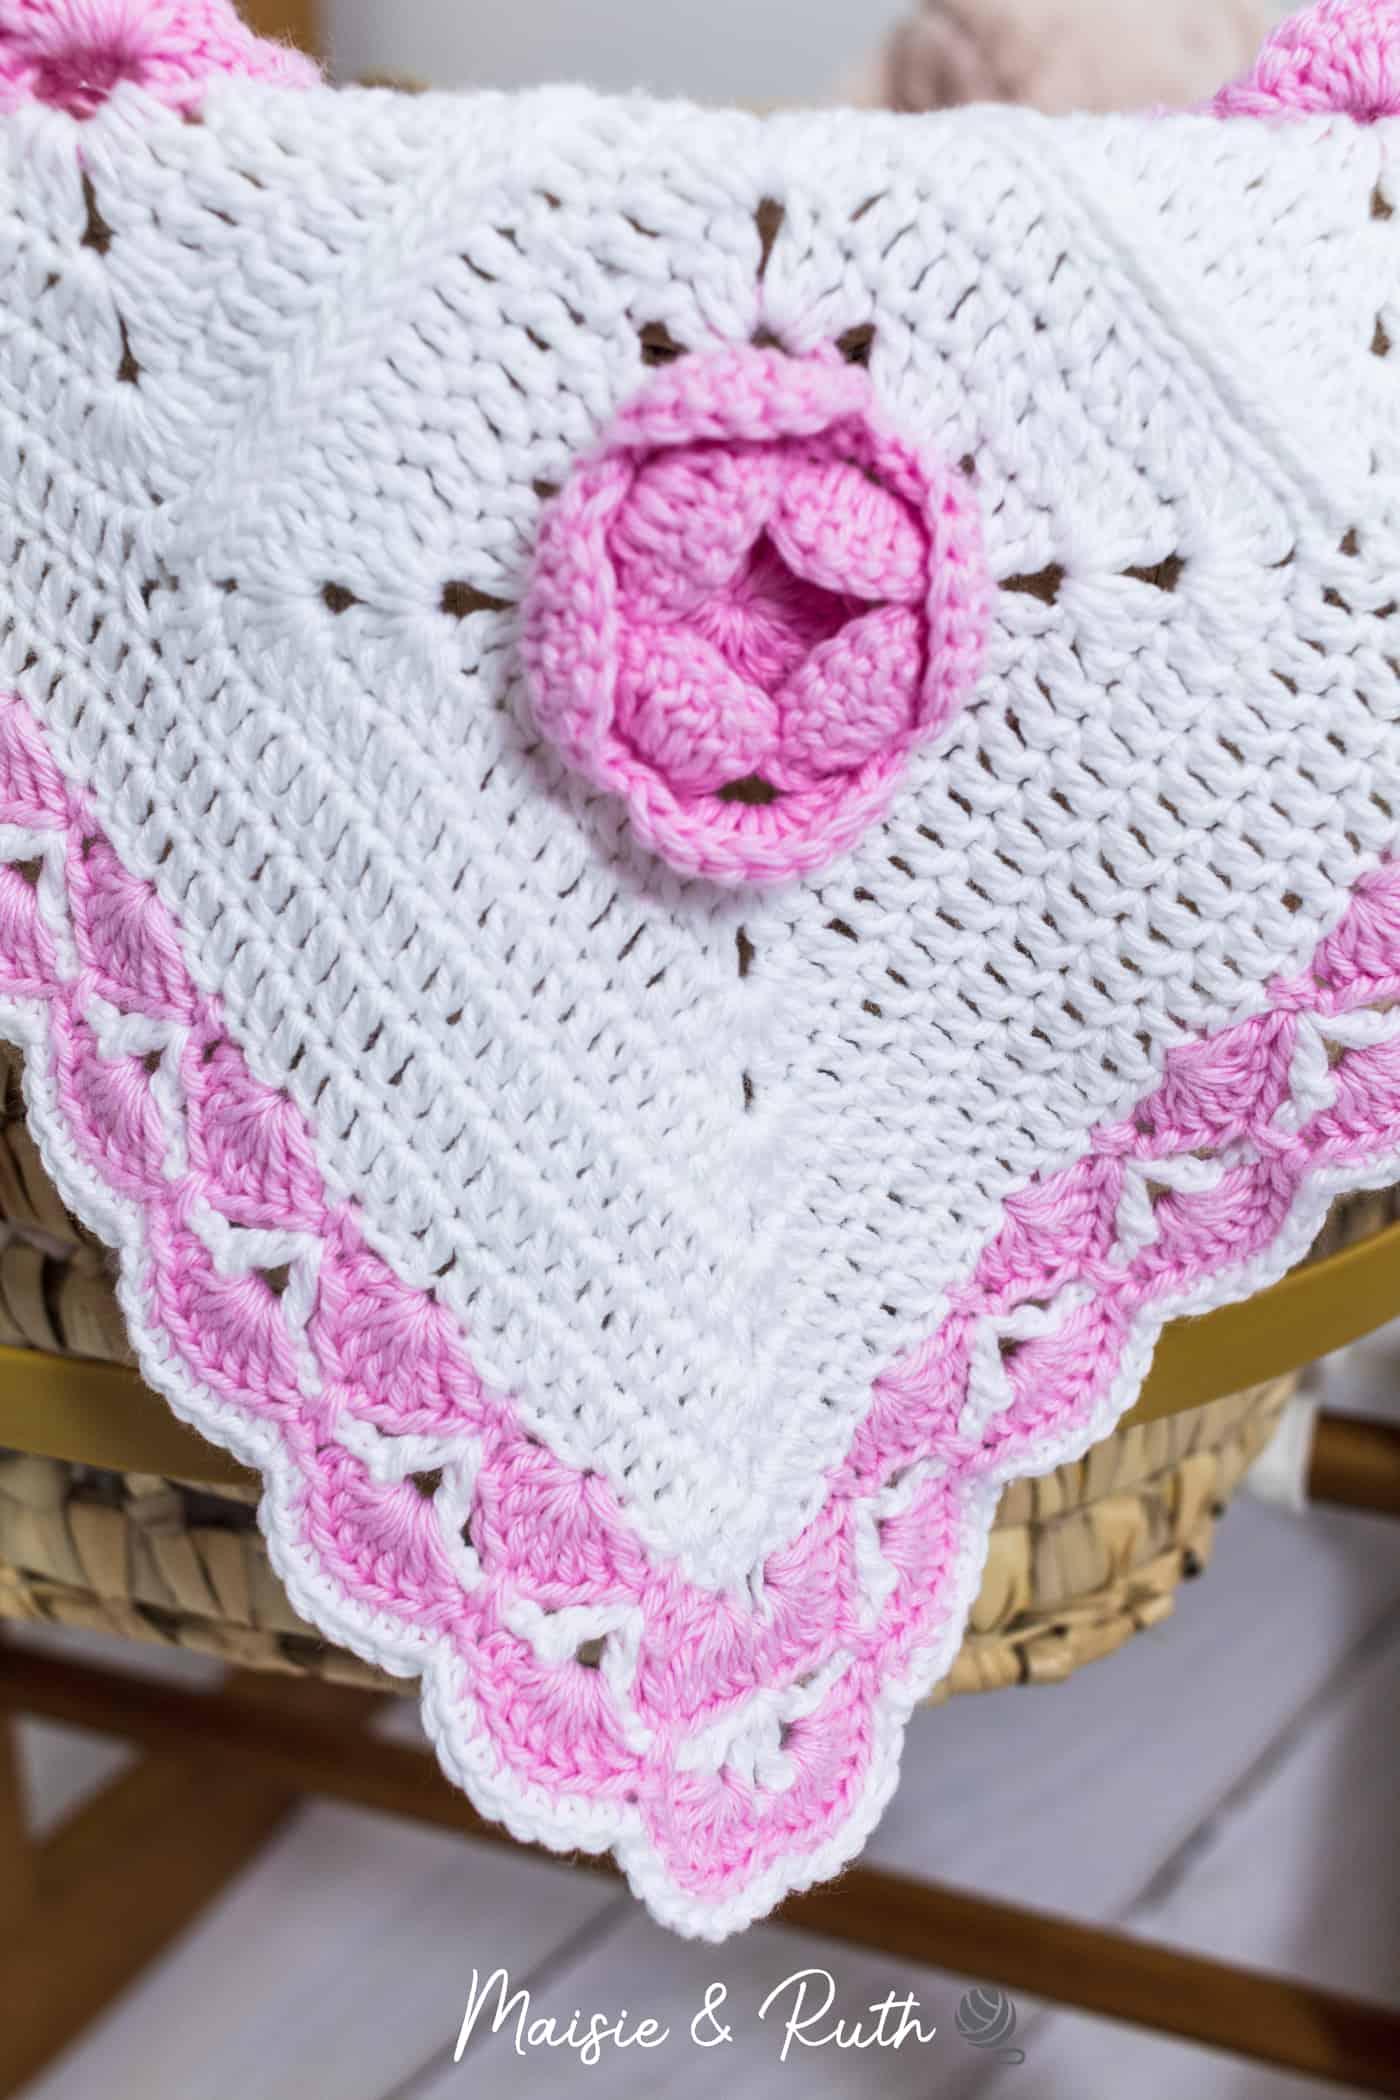
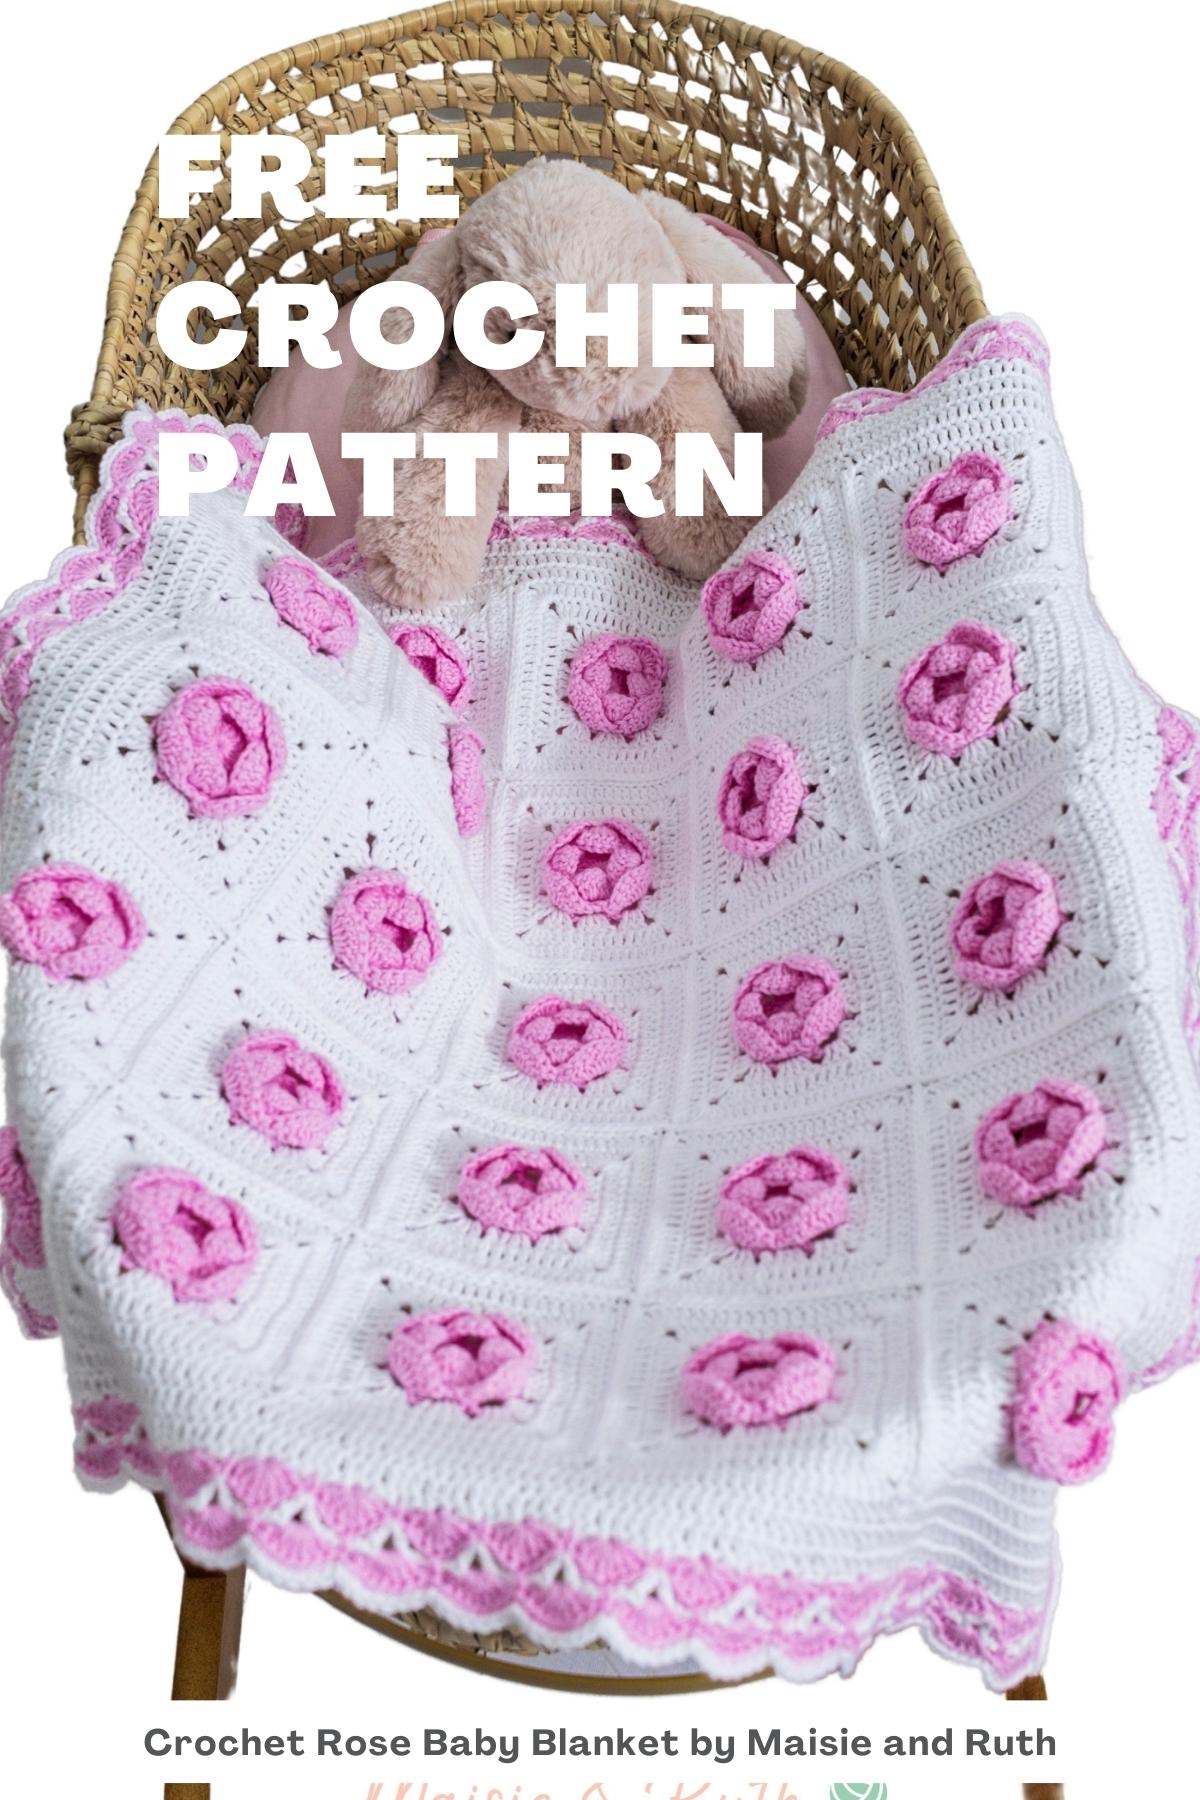
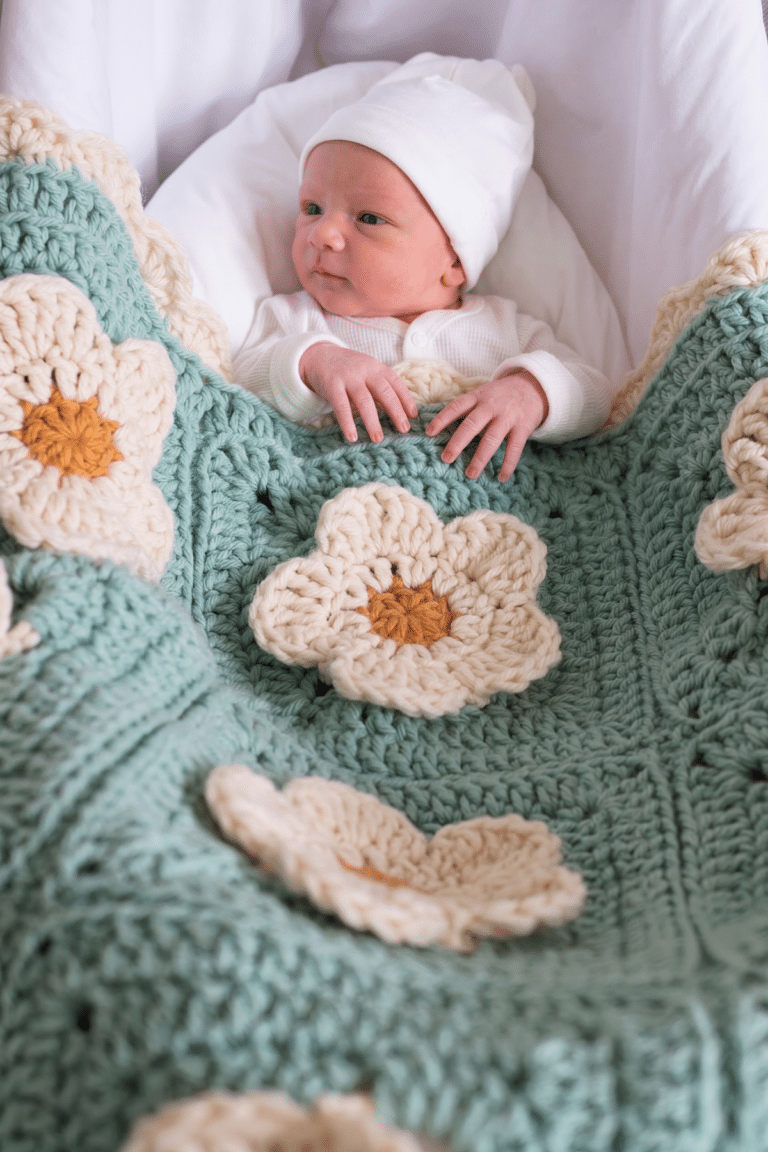
There can be nothing quite as special as spending time making a baby blanket, and this Crochet Rose Baby Blanket will make a really beautiful, unique gift for a new arrival!
In addition to the FREE written pattern, there’s also an in-depth, step-by-step video tutorial. And to purchase an ad-free printable version, please visit the Etsy store HERE
DESIGN OF THE CROCHET ROSE BABY BLANKET
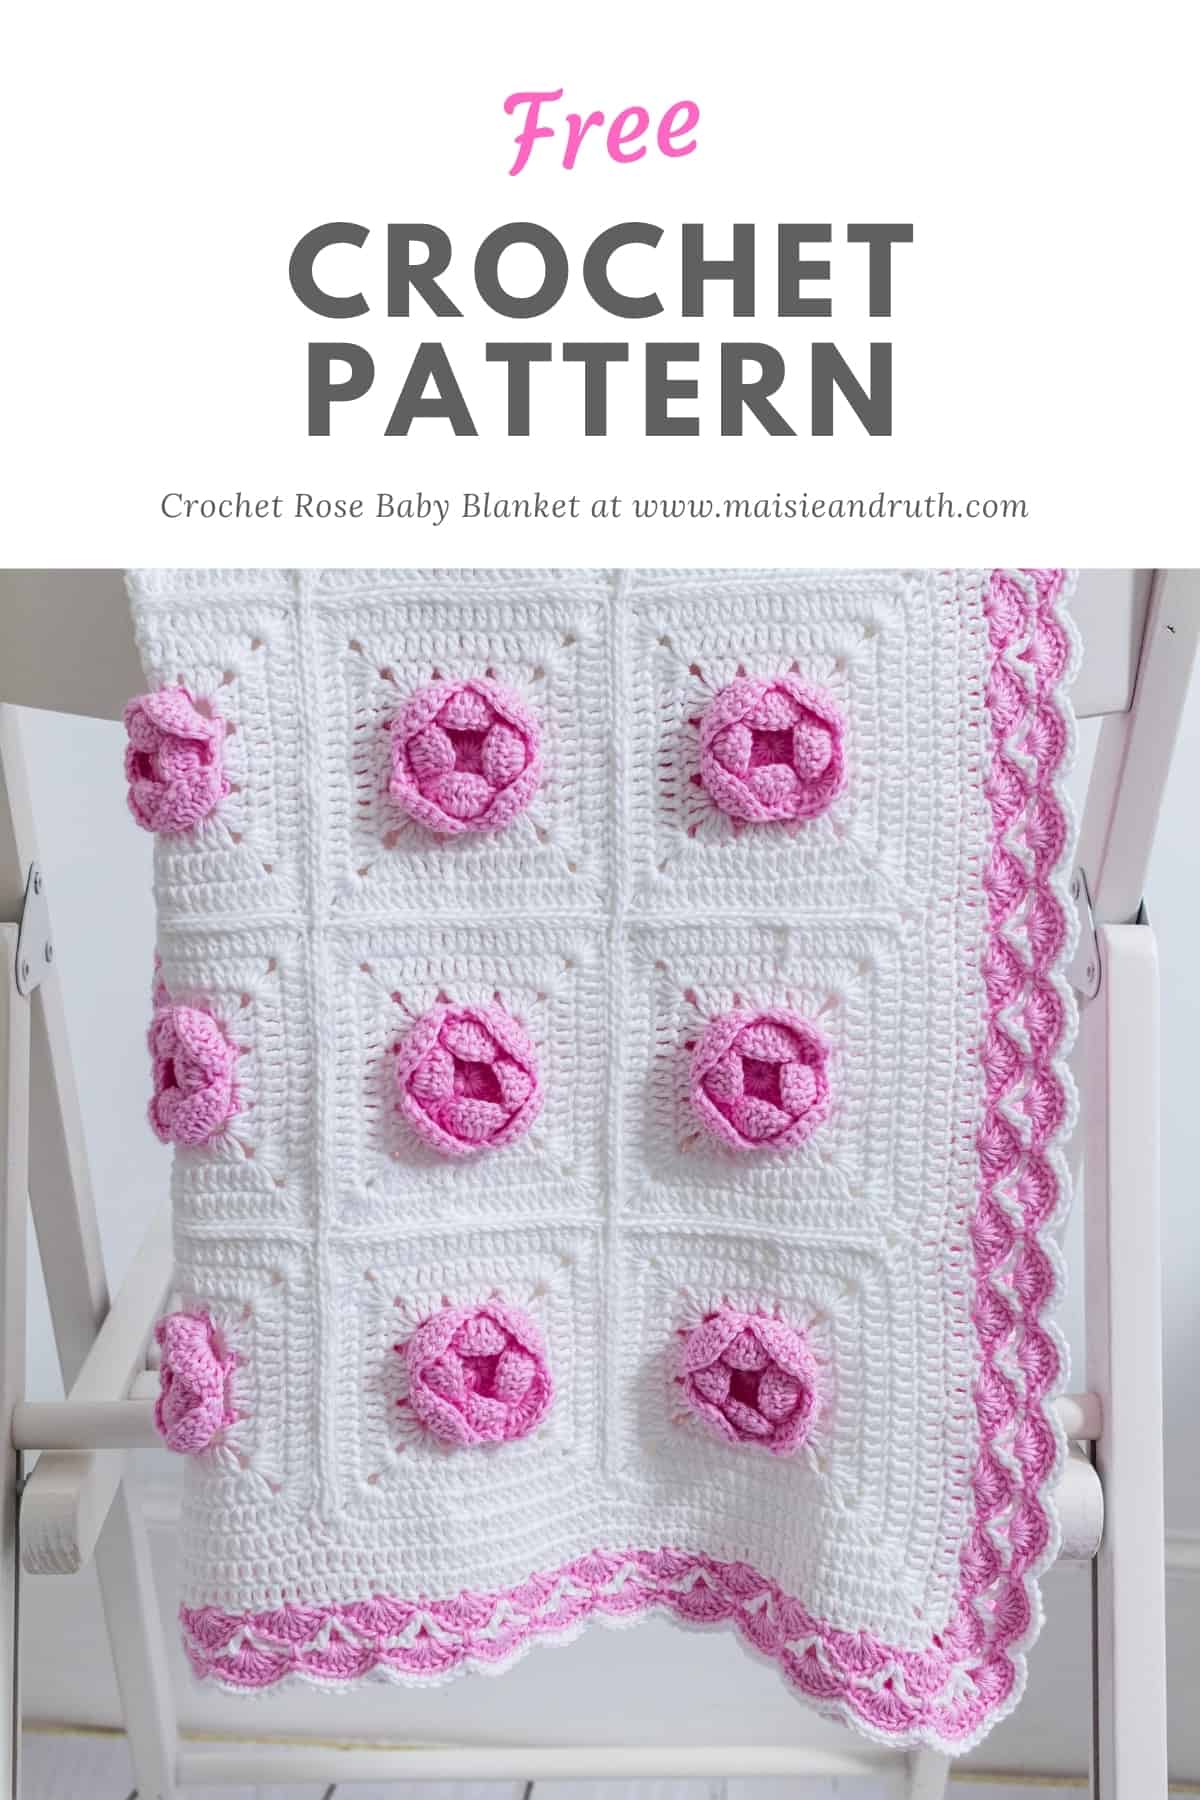
This darling crochet rose baby blanket is made by working up 25 individual squares, then joining them together.
You can use any method to join your squares; I often like to use the flat slip stitch seam and this is the method I opted for when seaming my squares together.
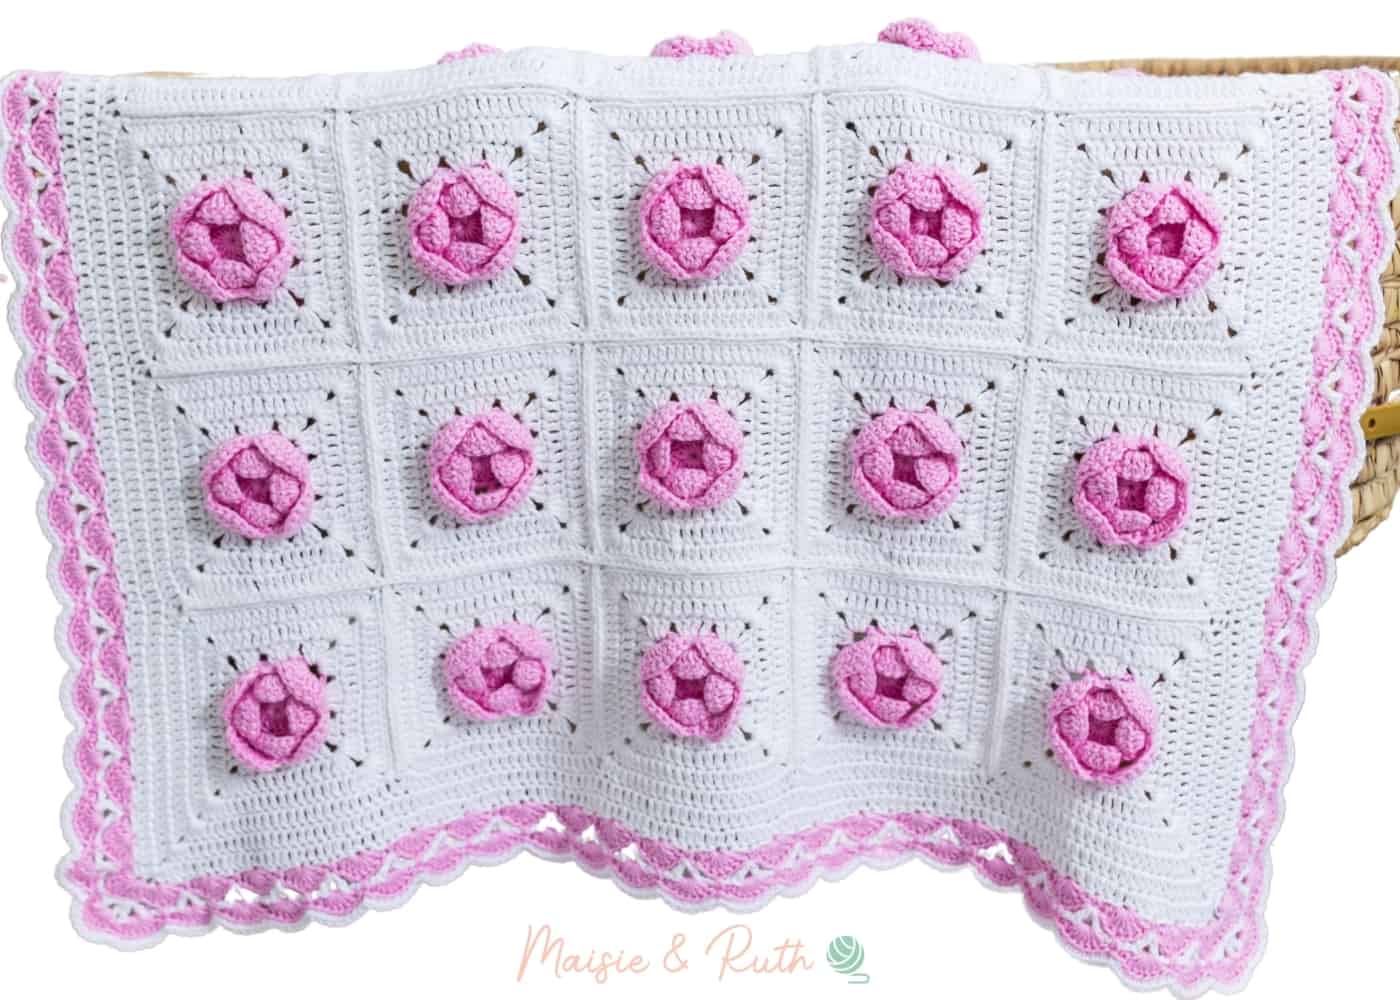
The blanket is then finished off with a border made up of three rows of double crochet and four rows of a beautiful stacked shell stitch pattern. Don’t worry, it’s much easier than it looks!

YARN USED
The blanket is worked in 100% cotton yarn.
I used Hobbii Rainbow Cotton 8/4, which is a wonderfully soft cotton with a luxurious drape.
On their website, Hobbii classify this yarn as a #1 / superfine / fingering yarn, but I would say it’s more of a #2 / sport / 4 ply yarn.
I chose a very pretty shade of pink and a classic white colour to make my blanket, but you can choose any colourway you like – there are over 100 gorgeous shades to pick from on the Hobbii website.
Let’s dive in now and find out how to make this delightful crochet rose baby blanket…
PDF PRINTABLE PATTERNS!
If you would prefer an ad-free, printable version of this pattern, you can purchase it from my Etsy store
Thank you for supporting my shop!
CROCHET ROSE BABY BLANKET: A FREE PATTERN
LEVEL
Intermediate (Advanced Beginner and up). See details of project levels at the Craft Yarn Council.
MATERIALS
Yarn: Category #2 / sport / 4 ply yarn. I used Hobbii Rainbow Cotton 8/4,186yds / 1.75oz (170m / 50g) in the following colours: 3 balls of Colour A – Antique Rose (061); 4 balls of Colour B – White (001)
SUBSTITUTE YARN:
A good alternative to the Hobbii yarn would be Paintbox Yarns Cotton 4 ply, 186yds / 1.75oz (170m / 50g) in the following colours: 3 balls of Colour A – Flamingo (08); 4 balls of Colour B – Paper White (01)
- Crochet hook: 3mm (these hooks are fabulous – the yarn just glides off them!)
- Scissors (super sharp… and pretty)
- Tapestry needle (the bent tip makes sewing and weaving in ends much easier)
- Stitch Marker (these are lightweight and sturdy, and lock securely onto your stitches)
- Optional: Blocking mats (thick, heat resistant and come with non-rust pins too)
GAUGE / TENSION
Each square measures 4″ (10cm).
FINISHED SIZE
24″ x 24″ (61 x 61 cm) approx.
STITCHES & ABBREVIATIONS (US CROCHET TERMS)
beg – beginning
BLO – back loop only
ch(s) – chain(s)
dc – double crochet: Yarn over (yo), insert hook into stitch, yo, pull up a loop (3 loops on hook). Yo, pull through 2 loops (2 loops on hook). Yo, pull through remaining 2 loops. 1 double crochet completed.
dc2tog – double crochet two together (also known as a dc decrease): Yarn over (yo), insert hook into stitch, yo, pull up a loop (3 loops on hook). Yo, pull through 2 loops (2 loops on hook). Yo, insert hook into next st, yo, pull up a loop (4 loops on hook). Yo, pull through 2 loops (3 loops on hook). Yo, pull through remaining 3 loops. Dc2tog completed.
fasten off – To fasten off securely, work one chain, then cut the yarn leaving a 5 – 6” tail. Pull the tail through the loop that is on your hook. Tighten gently.
sc – single crochet: Insert hook into stitch, yarn over (yo), pull up a loop (2 loops on hook). Yo, pull through both loops on hook. 1 single crochet completed.
sk – skip: Do not crochet into this stitch / space.
sl st – slip stitch: Insert hook into stitch, yarn over (yo), pull up a loop, you will have 2 loops on your hook. Pull the first loop through the second loop. 1 slip stitch completed.
sp(s) – space(es)
st(s) – stitch(es)
SPECIAL STITCHES
BPsc – back post single crochet: Insert hook from back to front to back around the post of the next stitch, yarn over (yo), pull up a loop, 2 loops remaining on hook. Yo and pull through both loops on hook. 1 BPsc completed.
Shell – 7dc in the same stitch / space
V-st: (1dc, ch2, 1dc) worked in the same stitch
PATTERN NOTES
- US crochet terms used throughout.
- The blanket is made from 25 crochet squares, which are then sewn together.
- The blanket is worked in rounds, with the right side always facing.
- The rose forms part of the square.
- When working the rose, you may find it helpful to mark the first stitch of the round with a stitch marker.
- If you need help with any part of this pattern, please see the video tutorial below.
- The video is divided up into chapters, so you can jump immediately to whatever section you need.
PATTERN INSTRUCTIONS
ROSE SQUARE (MAKE 25)
Using Colour A:
Ch4 and sl st to the 1st ch to form a circle.
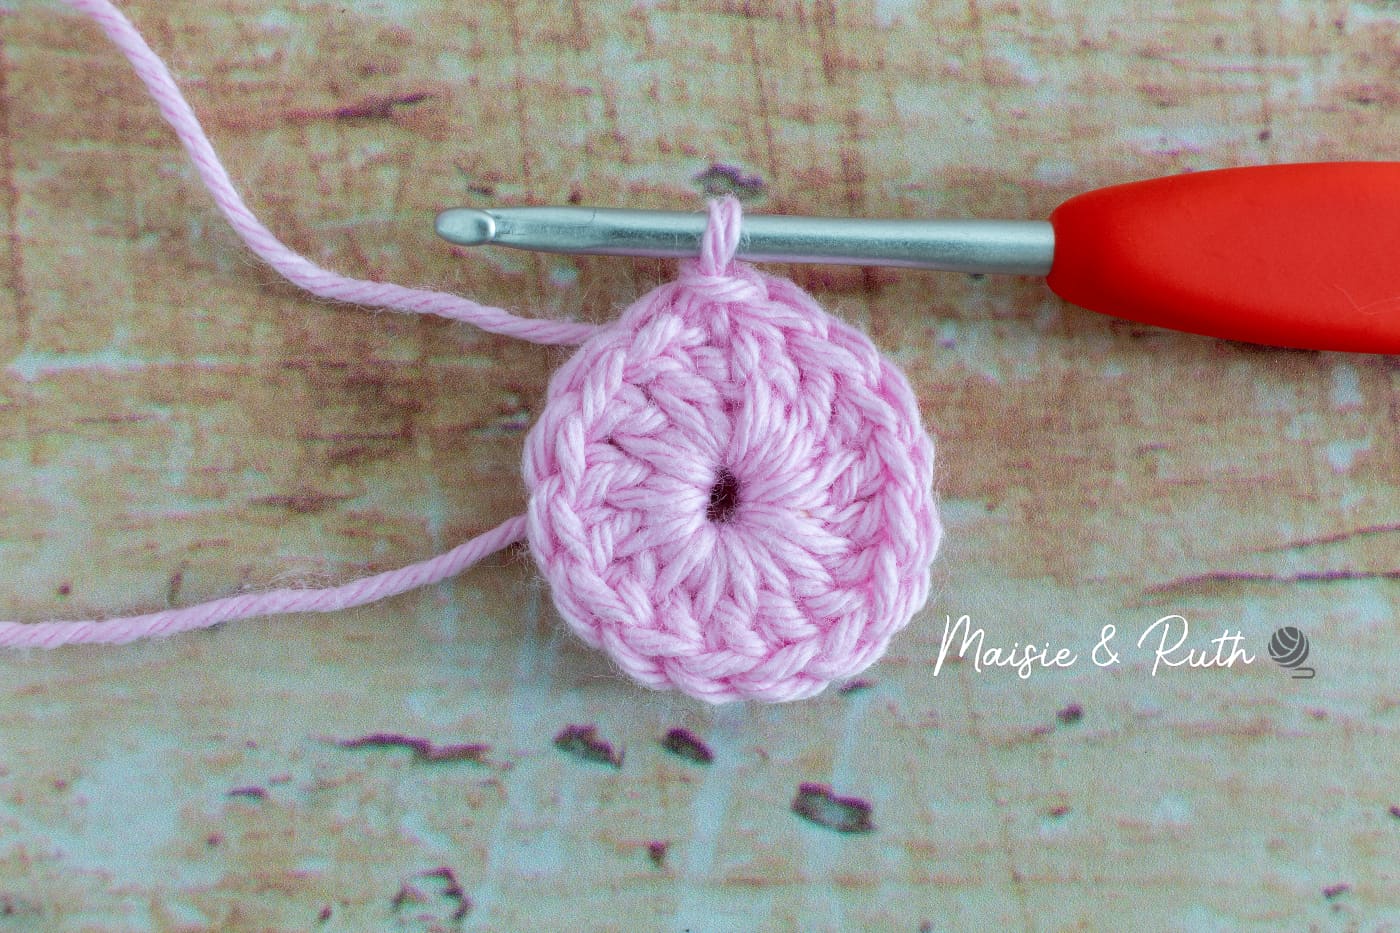
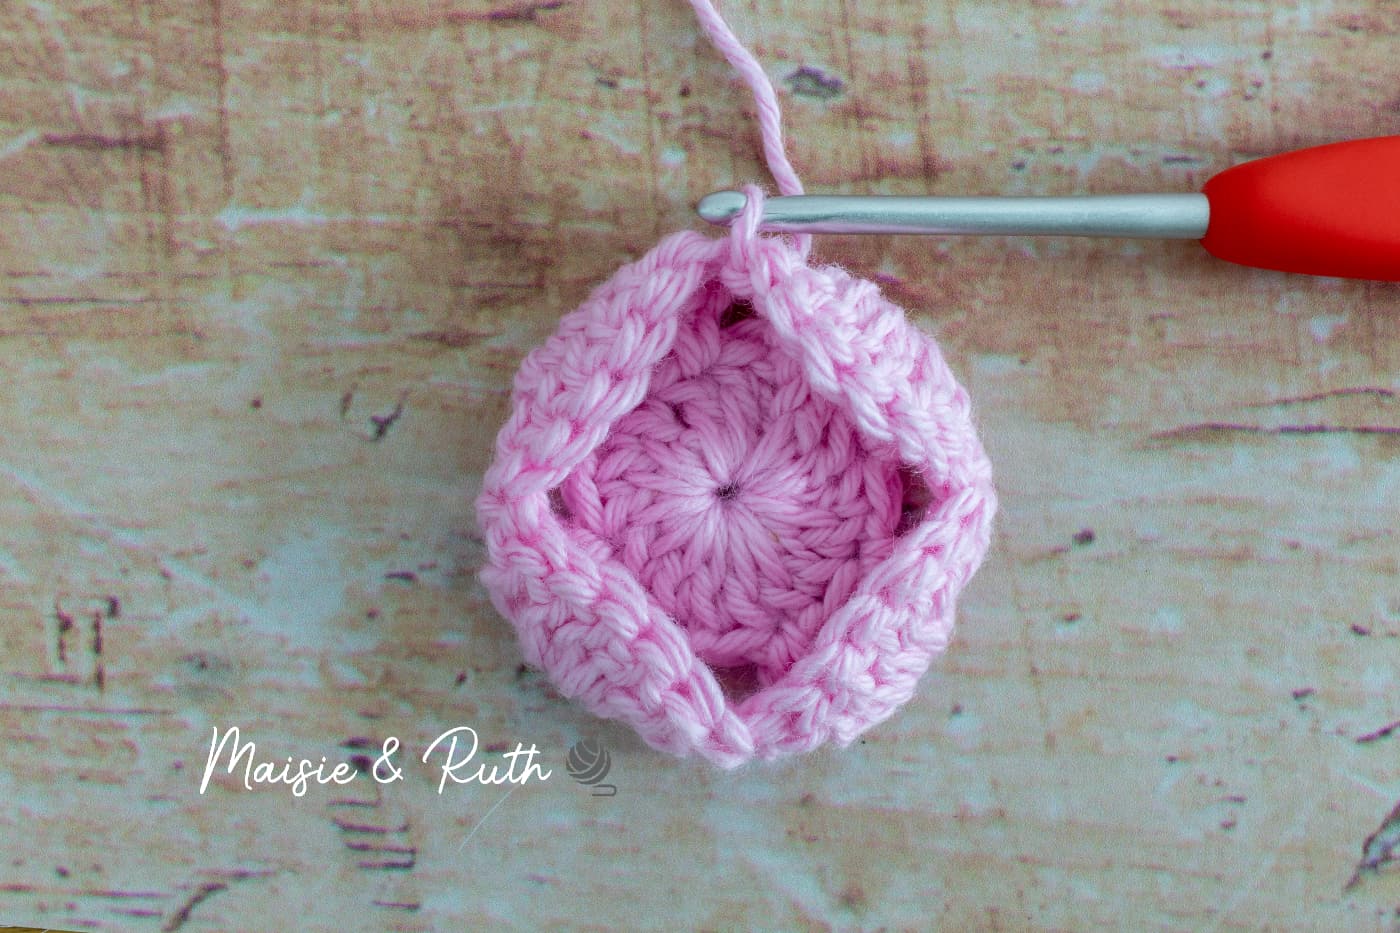
Round 1. Ch3 (counts as your 1st 1dc), 15dc in the circle, sl st to the 3rd ch of beg ch3 to join, [16dc].
In the photo below, the ch3 has been made. Next, work 15dc into the circle (as shown by my needle):

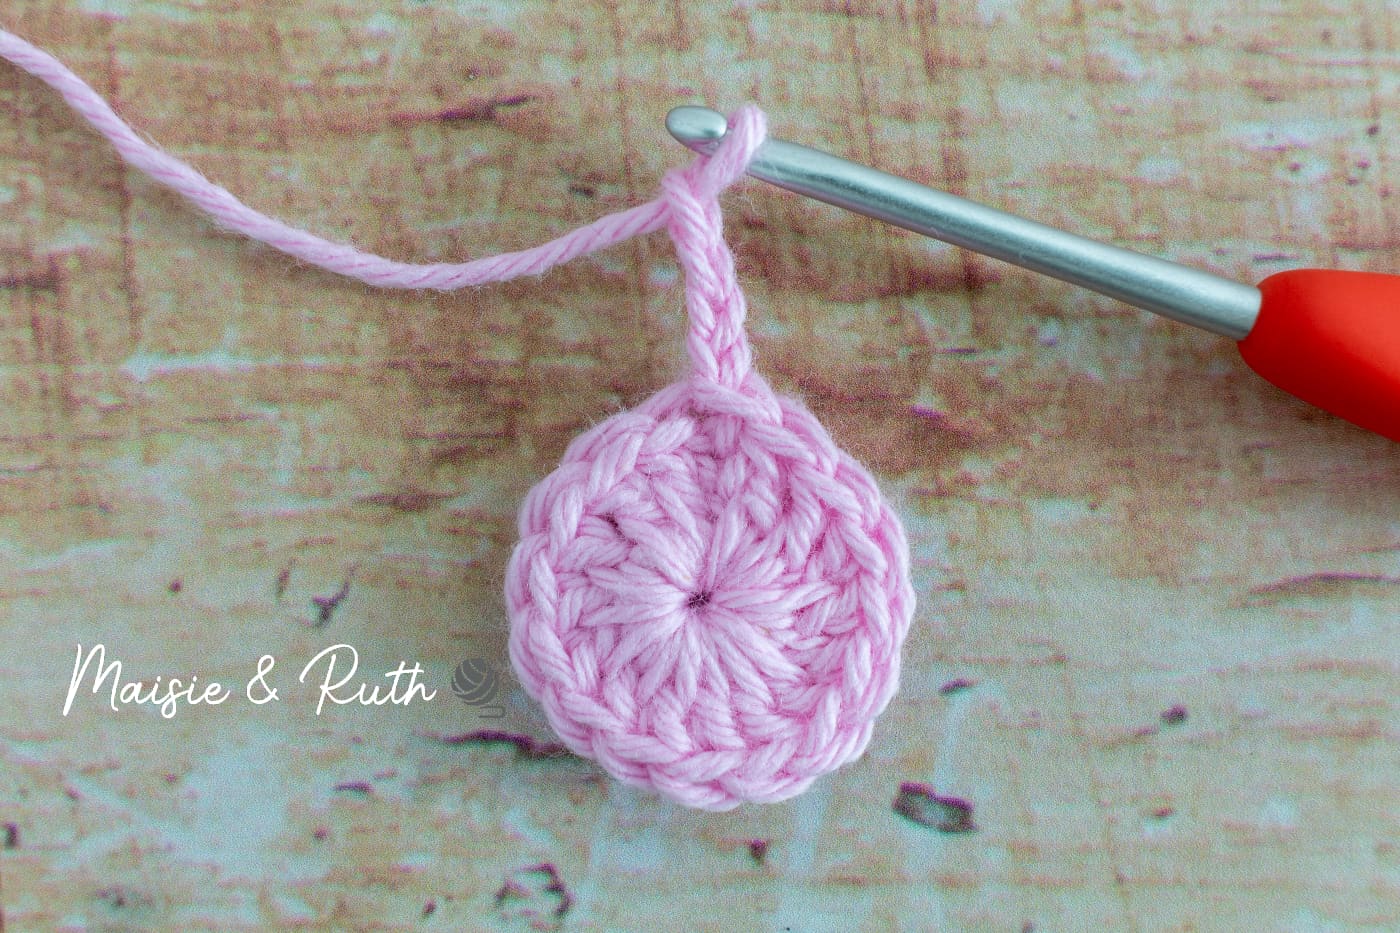
At the end of round 1 you should have 16 stitches (the ch3 counts as your 1st stitch):
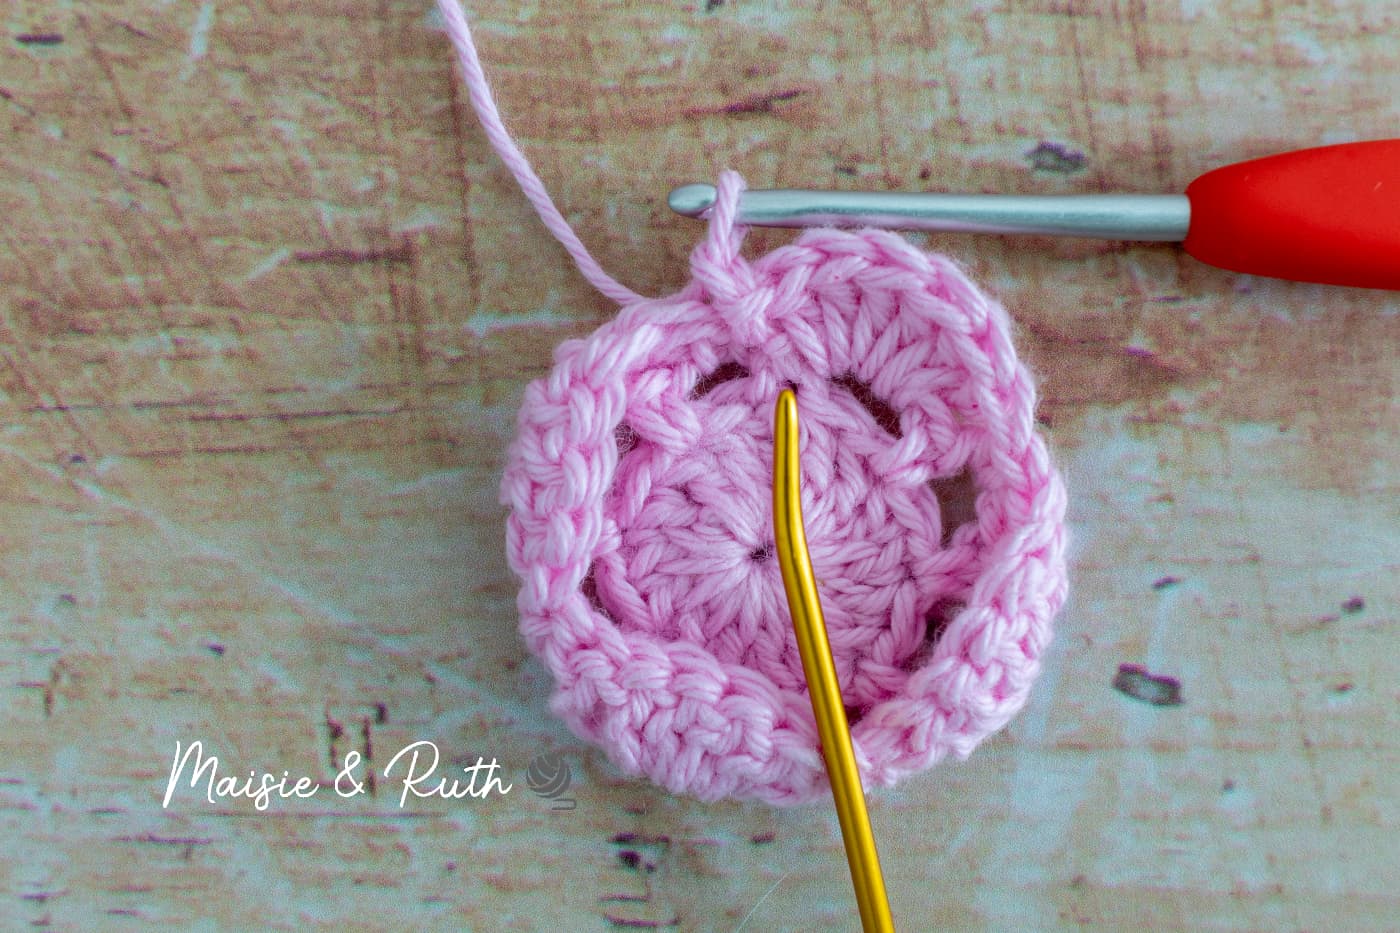
Round 2. *Ch4, sk 1 st, 1sc in next st*, repeat from * to * 7 times, ch4, sk 1 st, sl st to base of ch4 to join, [8 loops].
Ch4:
Skip the next stitch and sc into the next st:

Repeat the above sequence (the instructions between * to *) for a total of 7 times.
Finish the round with a ch4, sk the next st and then sl st to the base of the beginning ch4 to join.
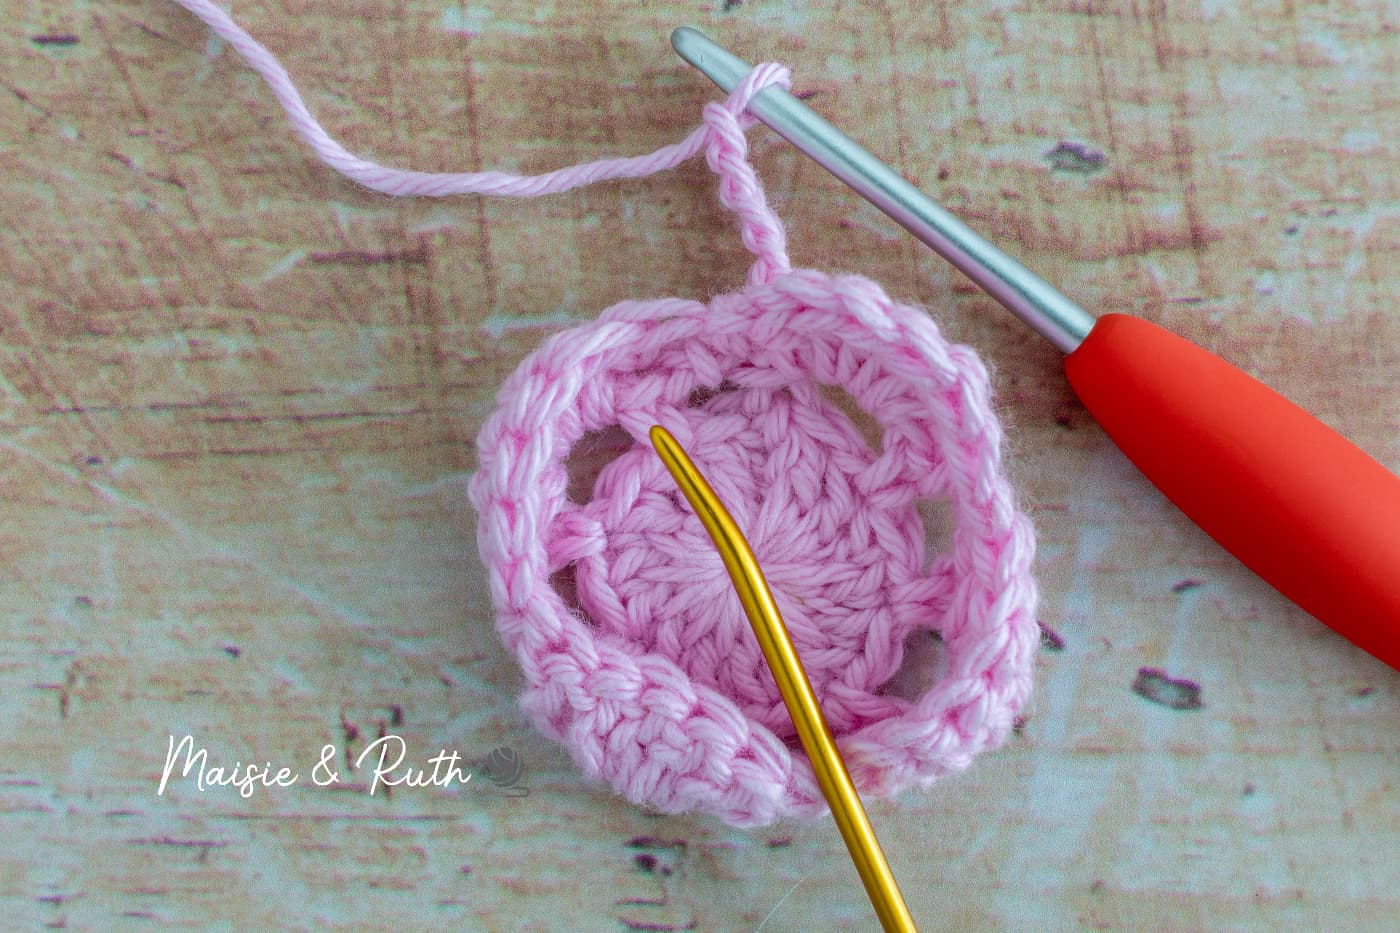
At the end of round 2, you should have 8 loops:
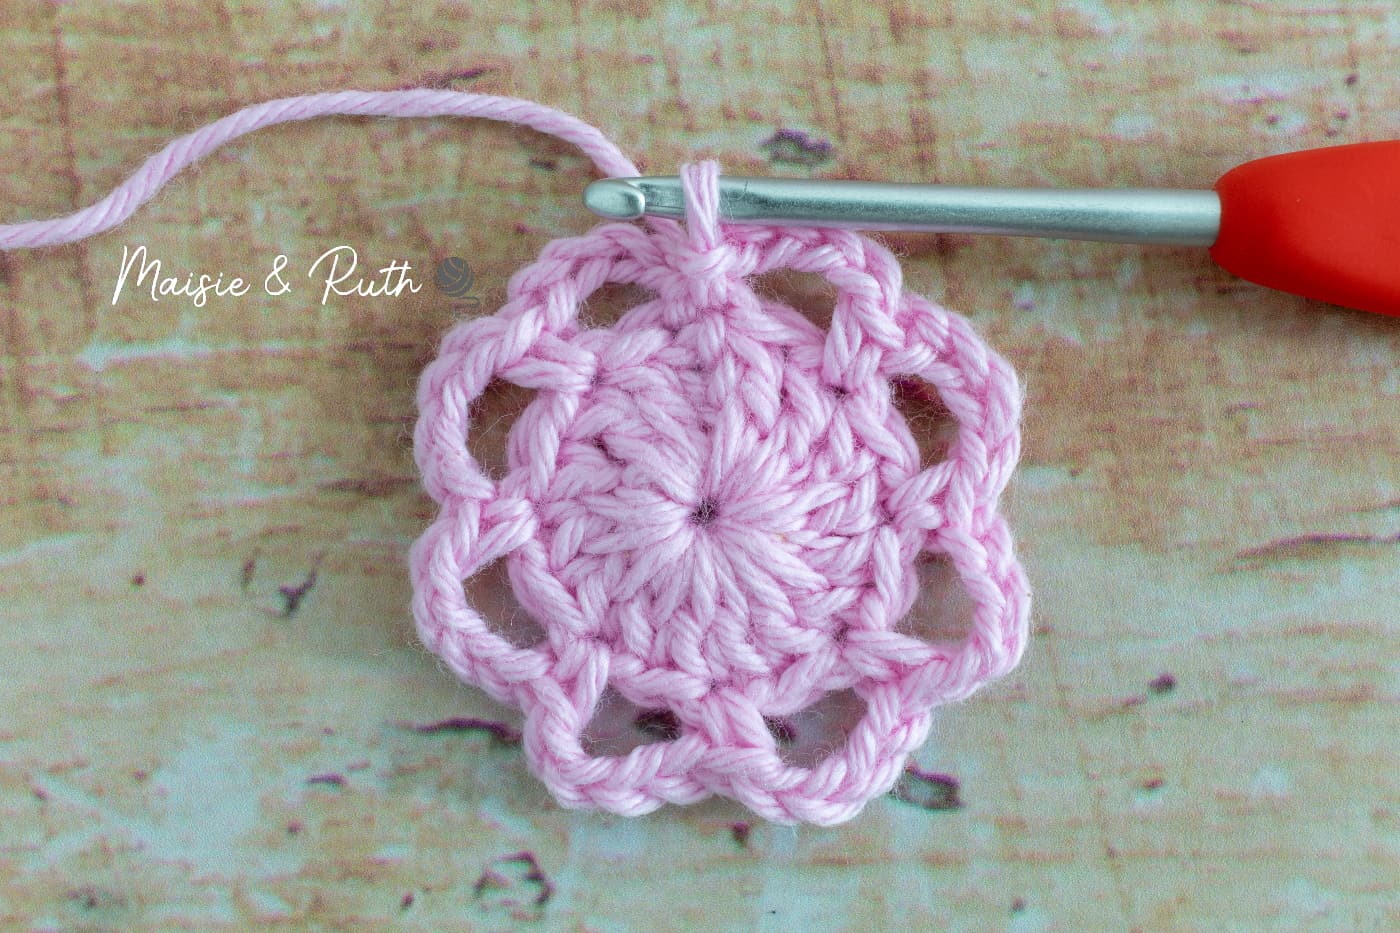
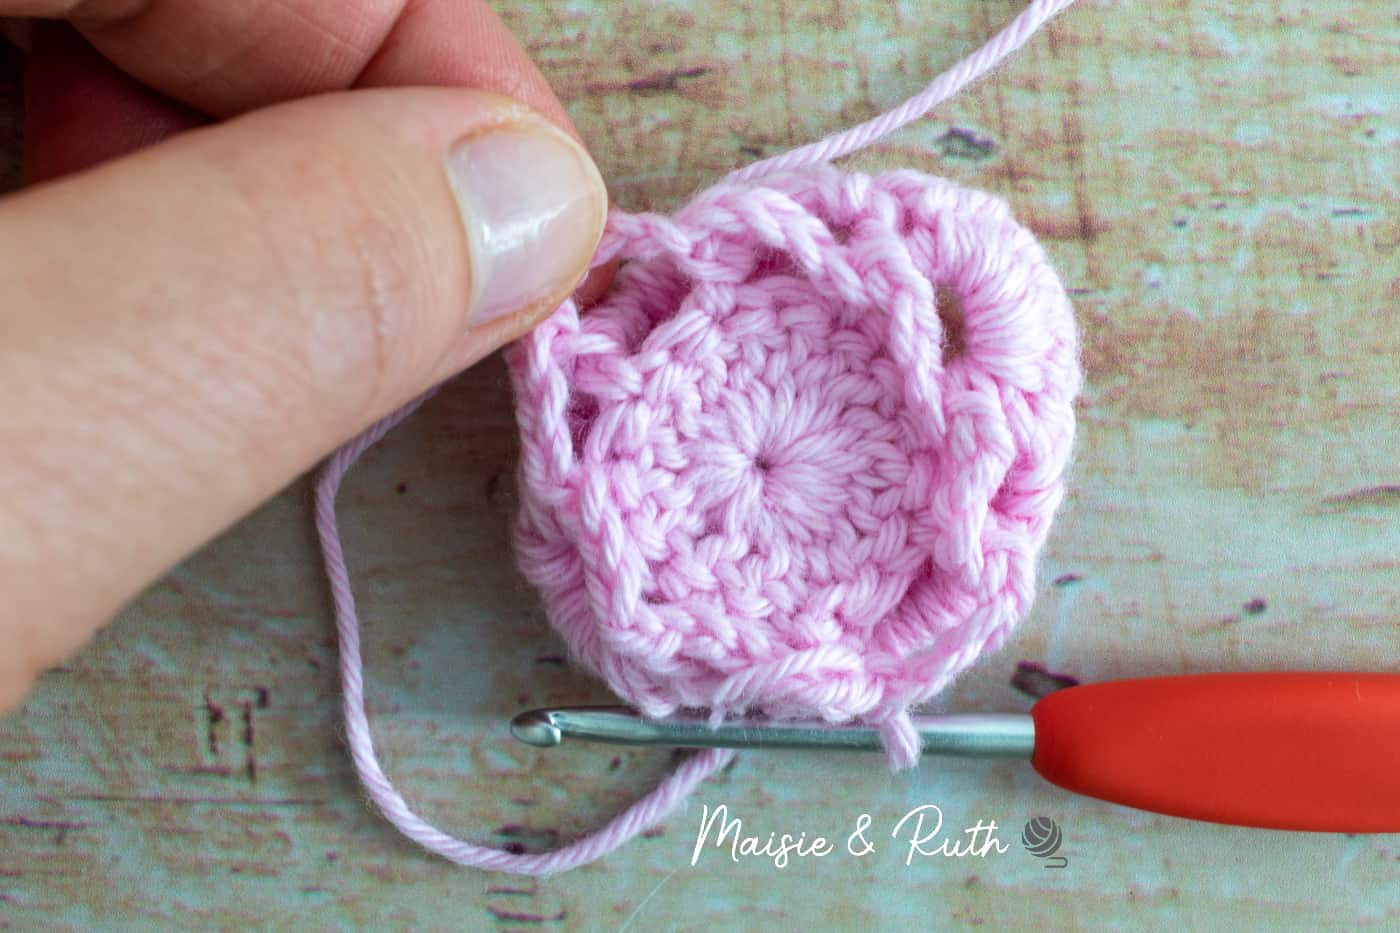
Round 3. *1sc in next ch4 sp, 6dc in next ch4 sp*, repeat from * to * 4 times, sl st to 1st sc to join, [4 petals].
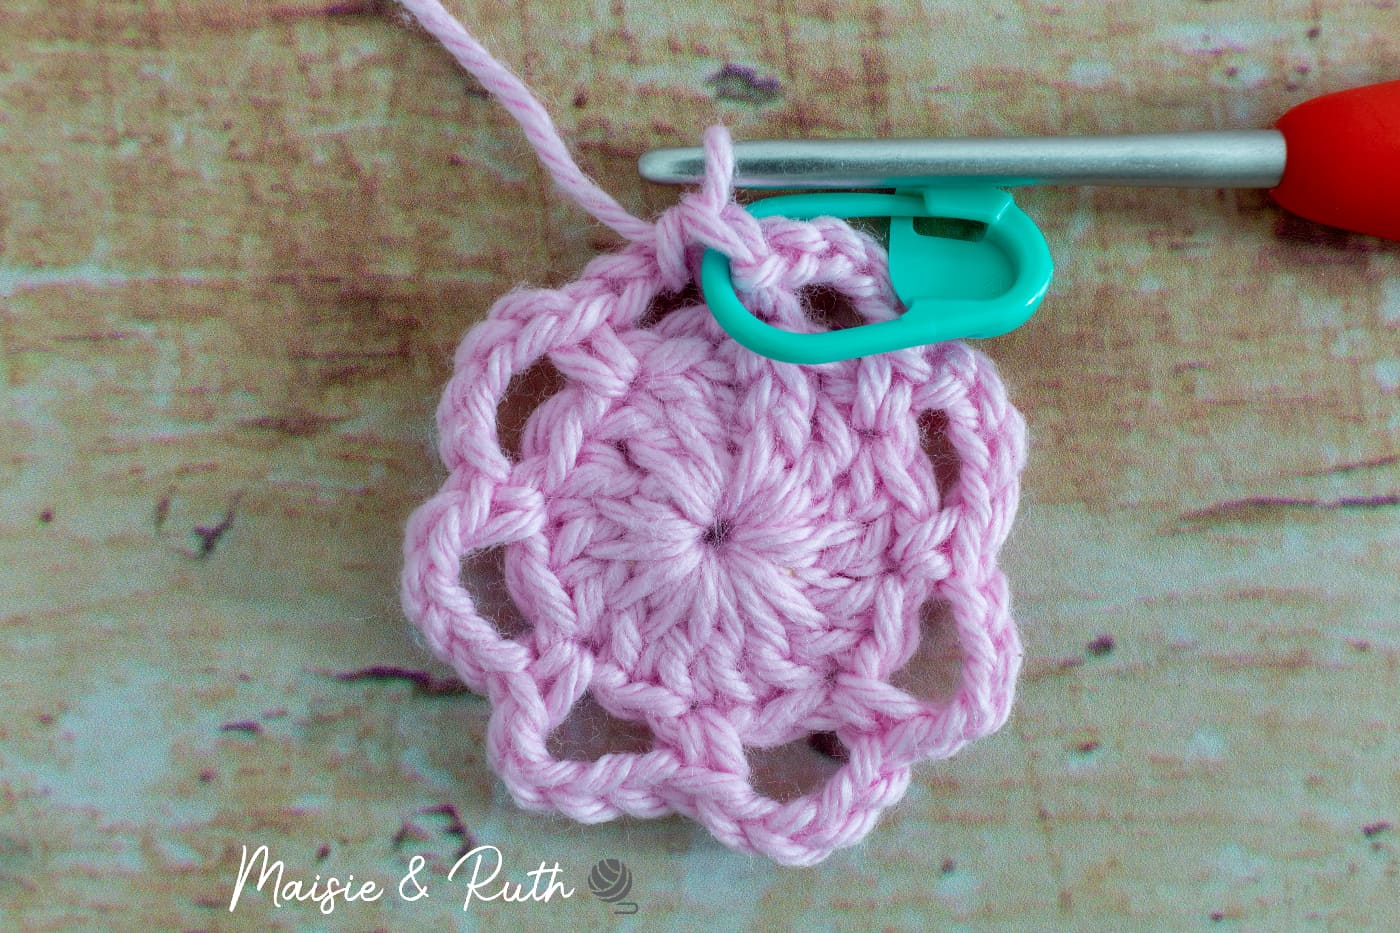
Work 1sc into the next ch4 sp (I added a st marker to this st):
Work 6dc into the next ch4 sp:
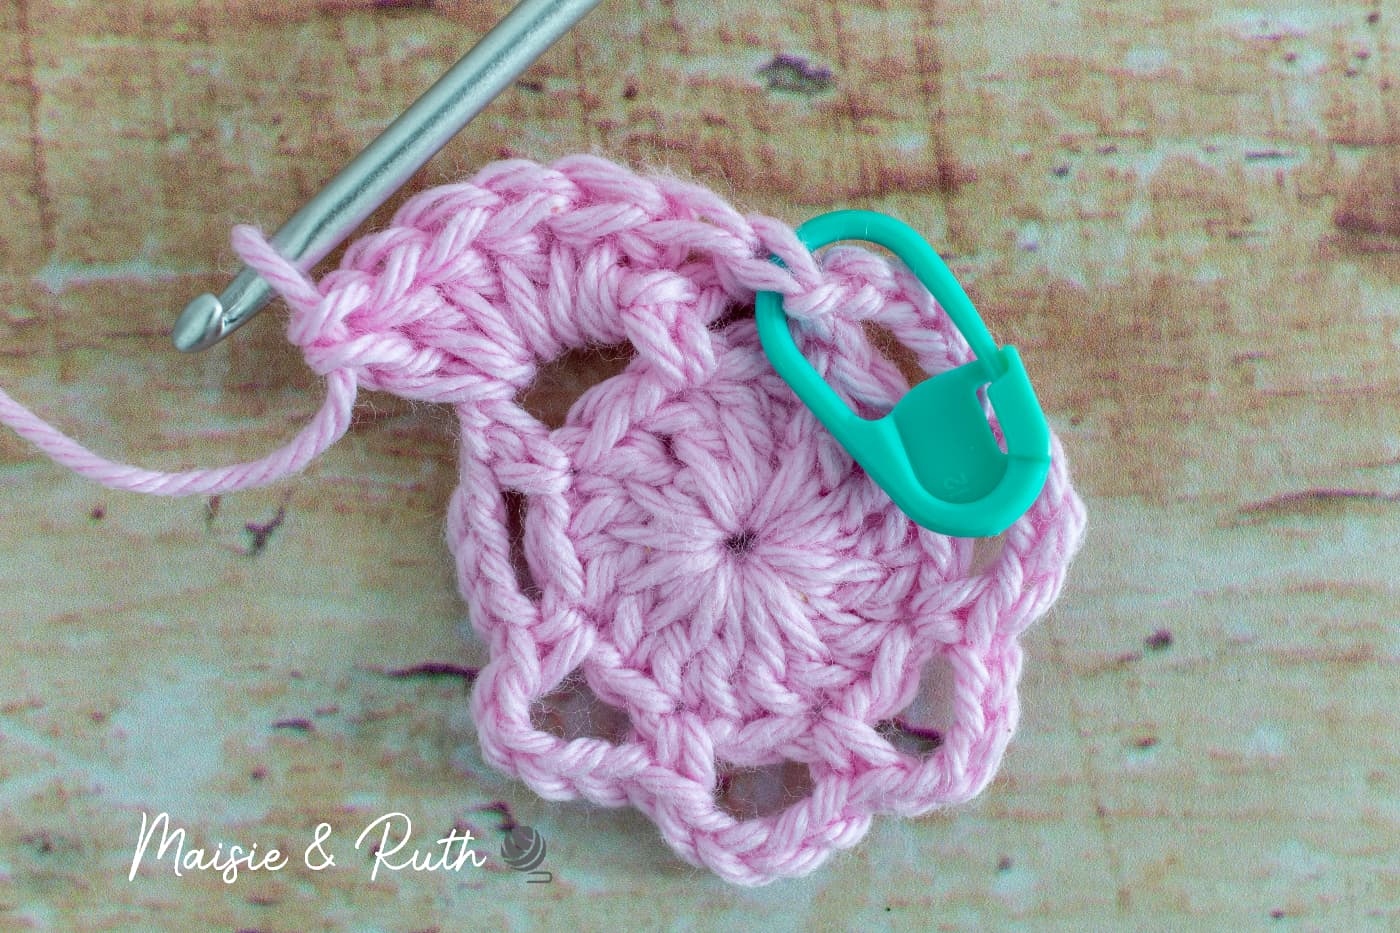
Repeat the above sequence (the instructions between * to *) for a total of 4 times.
To join, sl st to the 1st sc of the round.
At the end of round 3, you should have 4 petals:
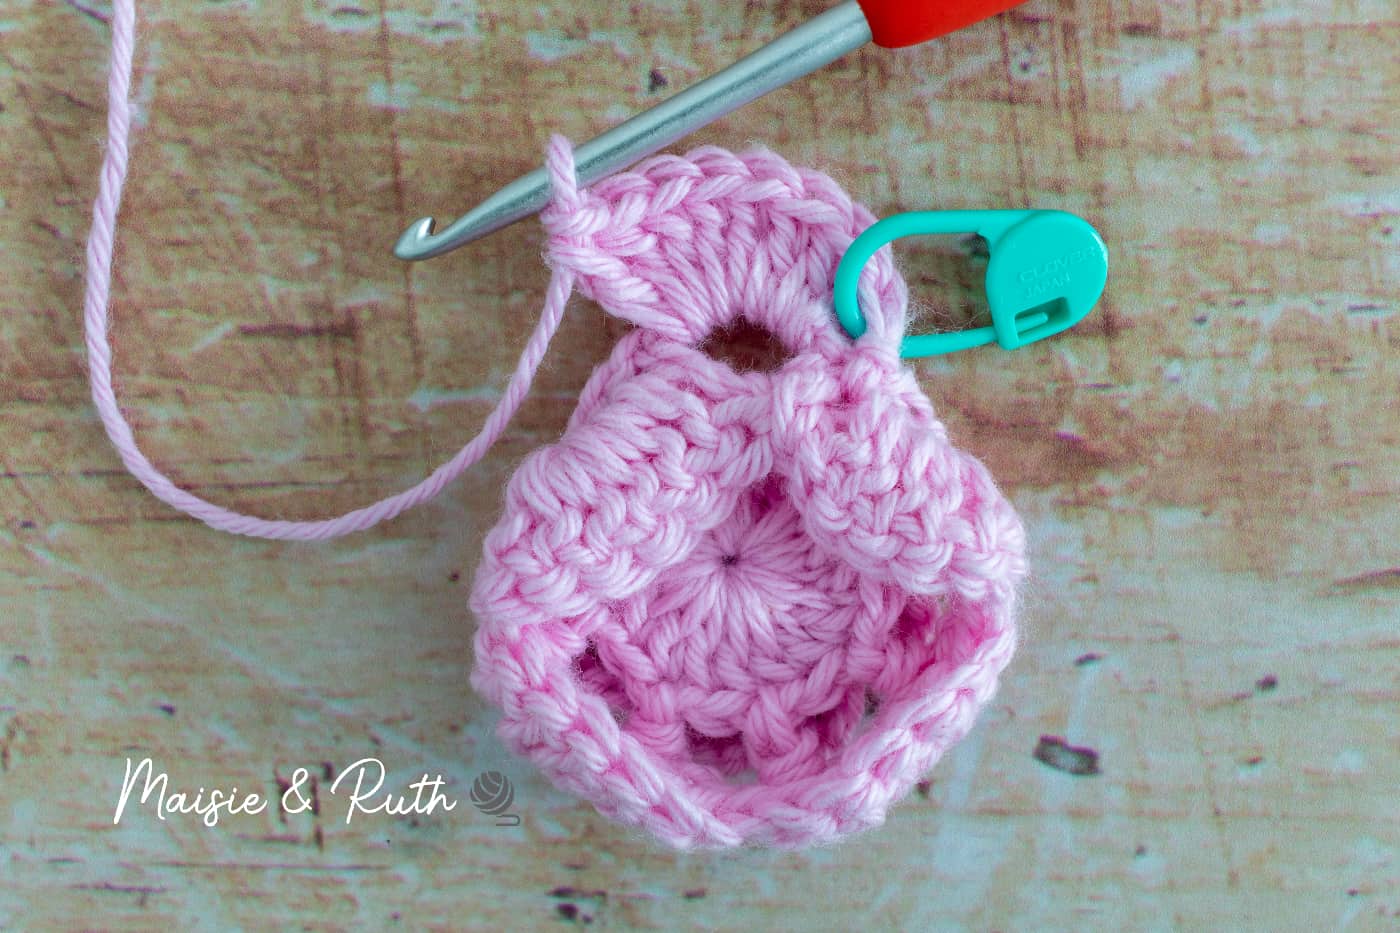
Round 4. Ch1, *BPsc in sc made in row 2, ch4*, repeat from * to * 8 times, sl st to 1st BPsc to join, [8 loops].
Work your 1st BPsc around the sc made in row 2 (as shown by my needle):
Ch4 (my needle shows you where the next BPsc should be worked):
Repeat the above sequence (the instructions between * to *) all around for a total of 8 times.
To join, sl st to the 1st BPSC.
At the end of round 4, you should have 8 loops at the back of your rose:
Round 5. *8dc in next ch4 sp, 1sc in next ch4 sp*, repeat from * to * 4 times, sl st to 1st dc to join, [4 petals].
Work 8dc into the next ch4 sp (I inserted a st marker into the 1st dc):
Make 1sc into the next ch4 sp:
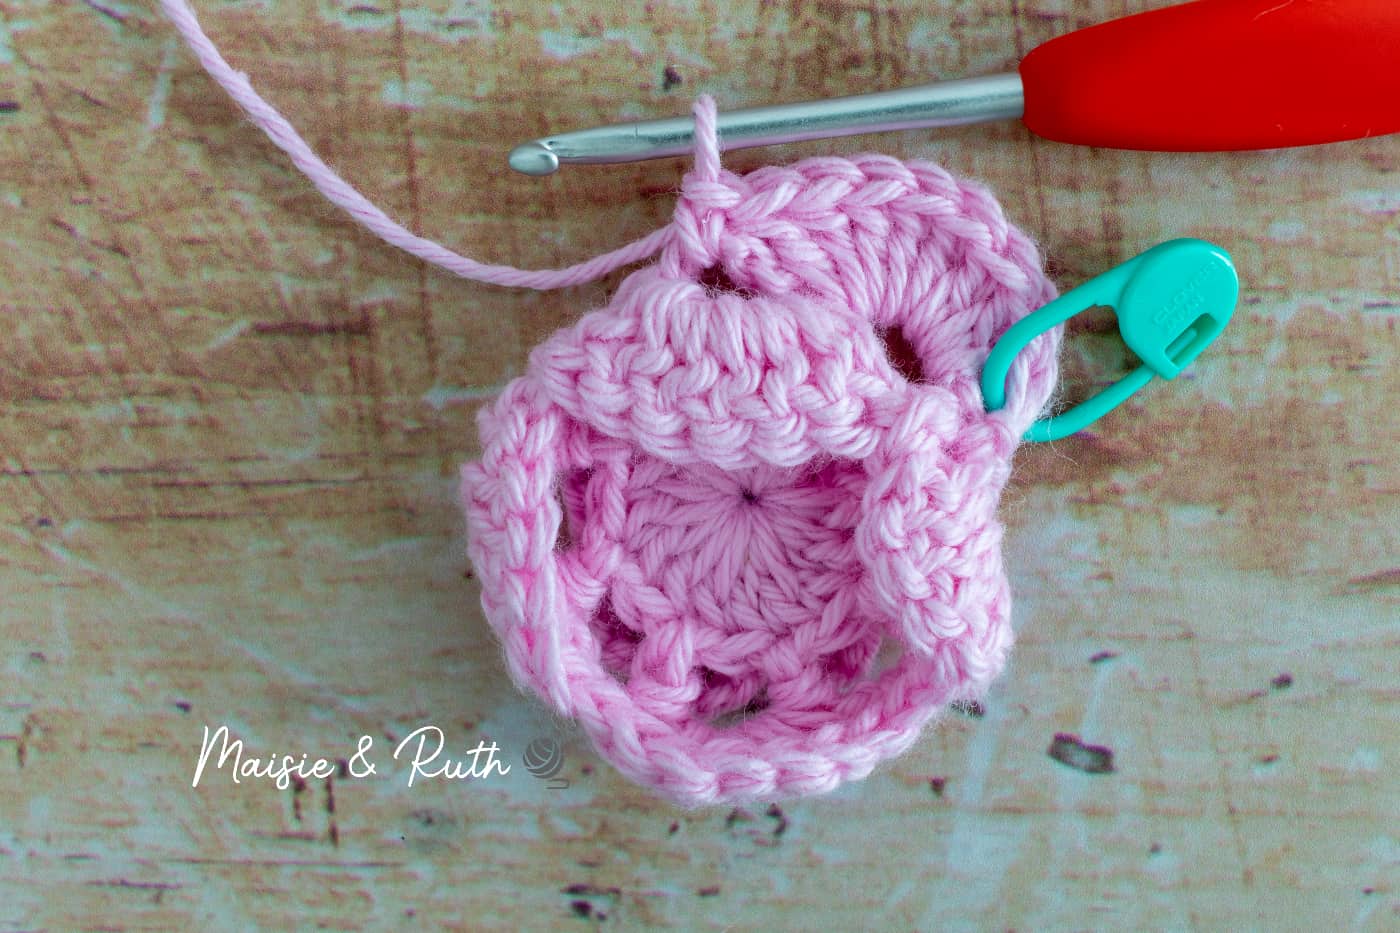
Repeat the above sequence (the instructions between * to *) for a total of 4 times.
To join, sl st to the 1st dc.
At the end of round 5, you should have 4 petals:
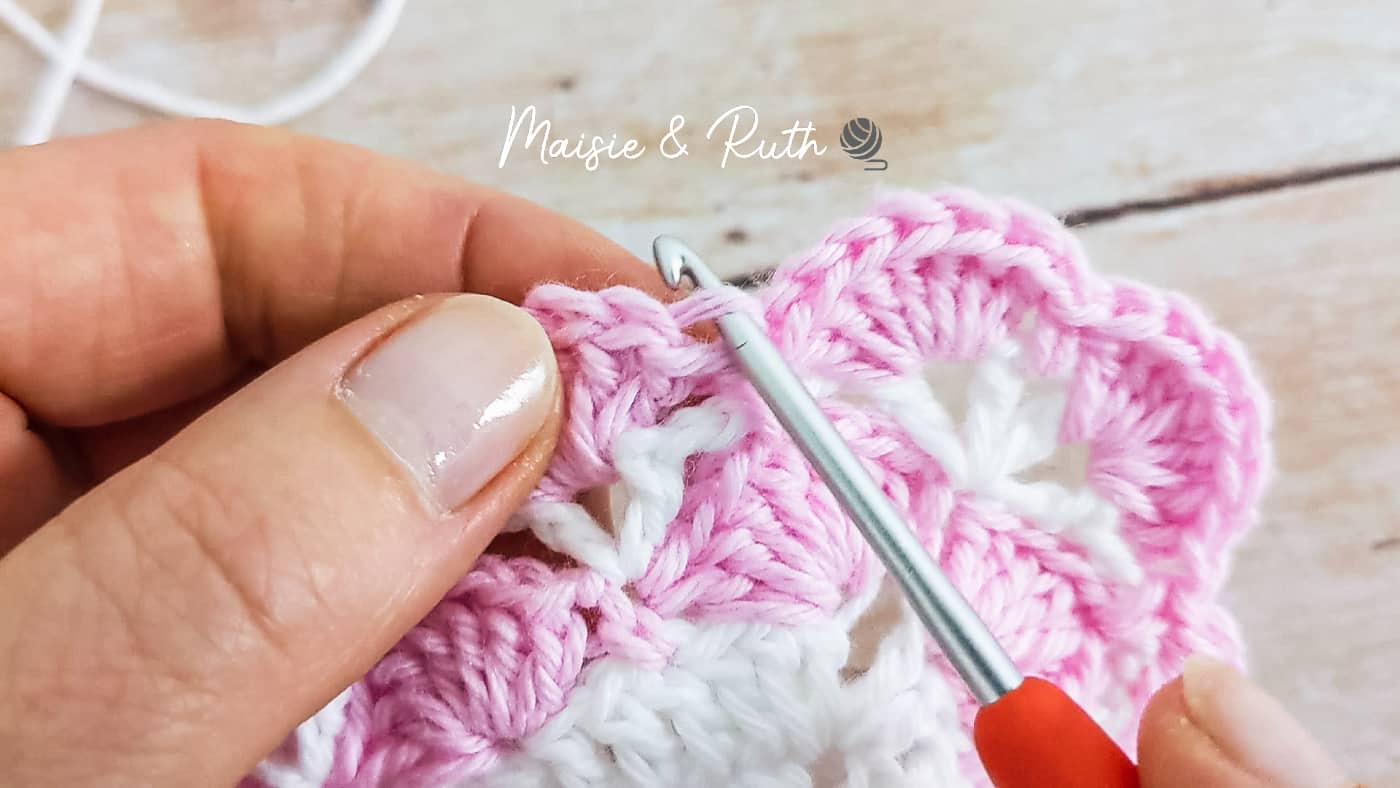
Round 6. Ch1, *BPsc, ch4*, repeat from * to * 8 times, sl st to 1st BPsc to join, [8 loops].
Ch1, then work your 1st BPsc around the st pointed out by my needle below:
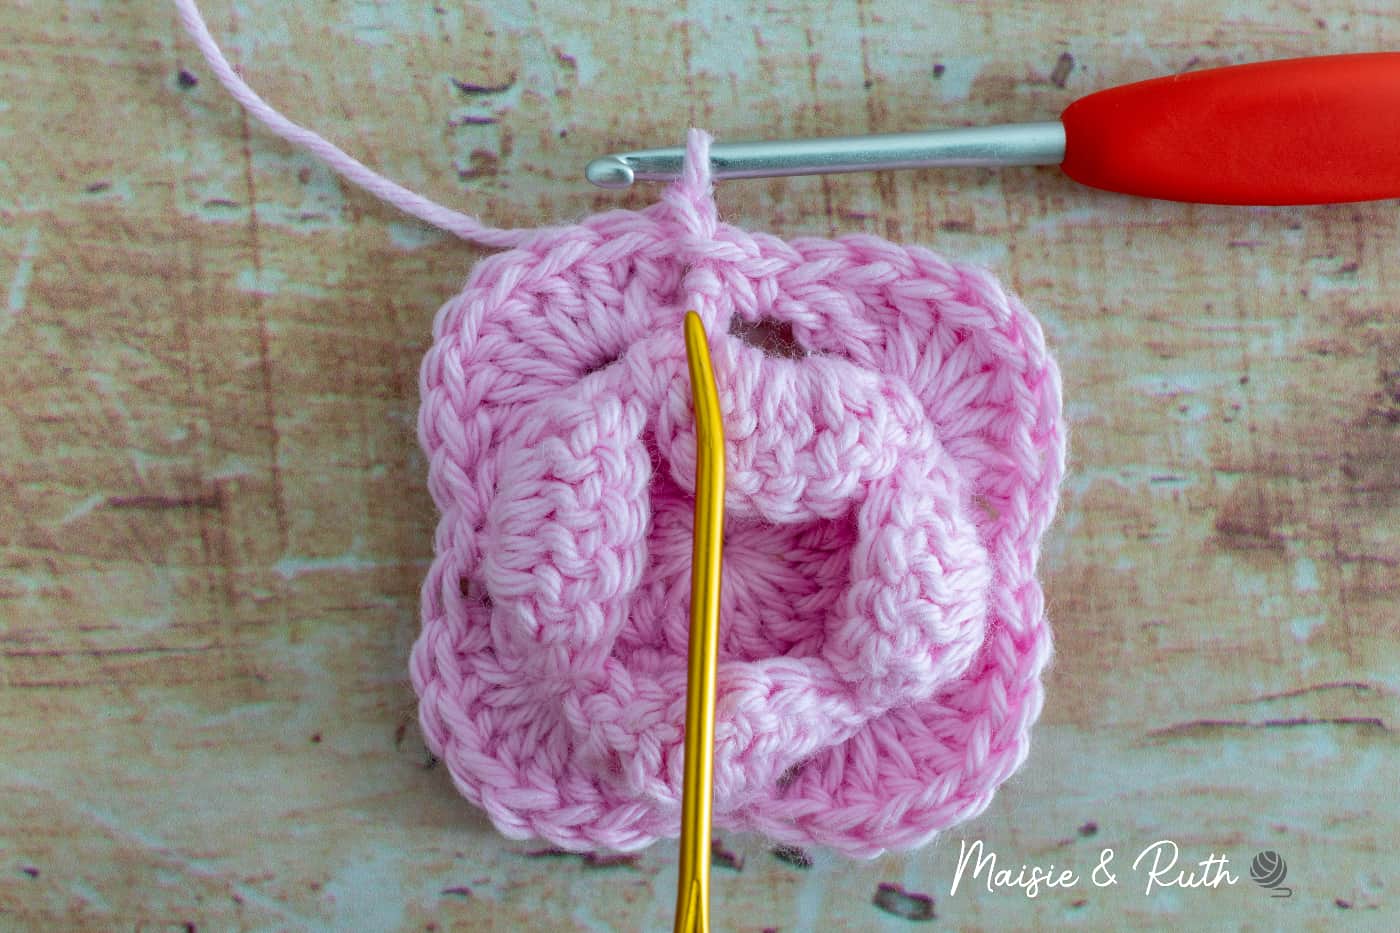
This round is the same as round 4, so you will work your BPsc stitches and ch4 around the rose for a total of 8 times.
To join, sl st to the 1st BPsc that you made at the beginning of the round.
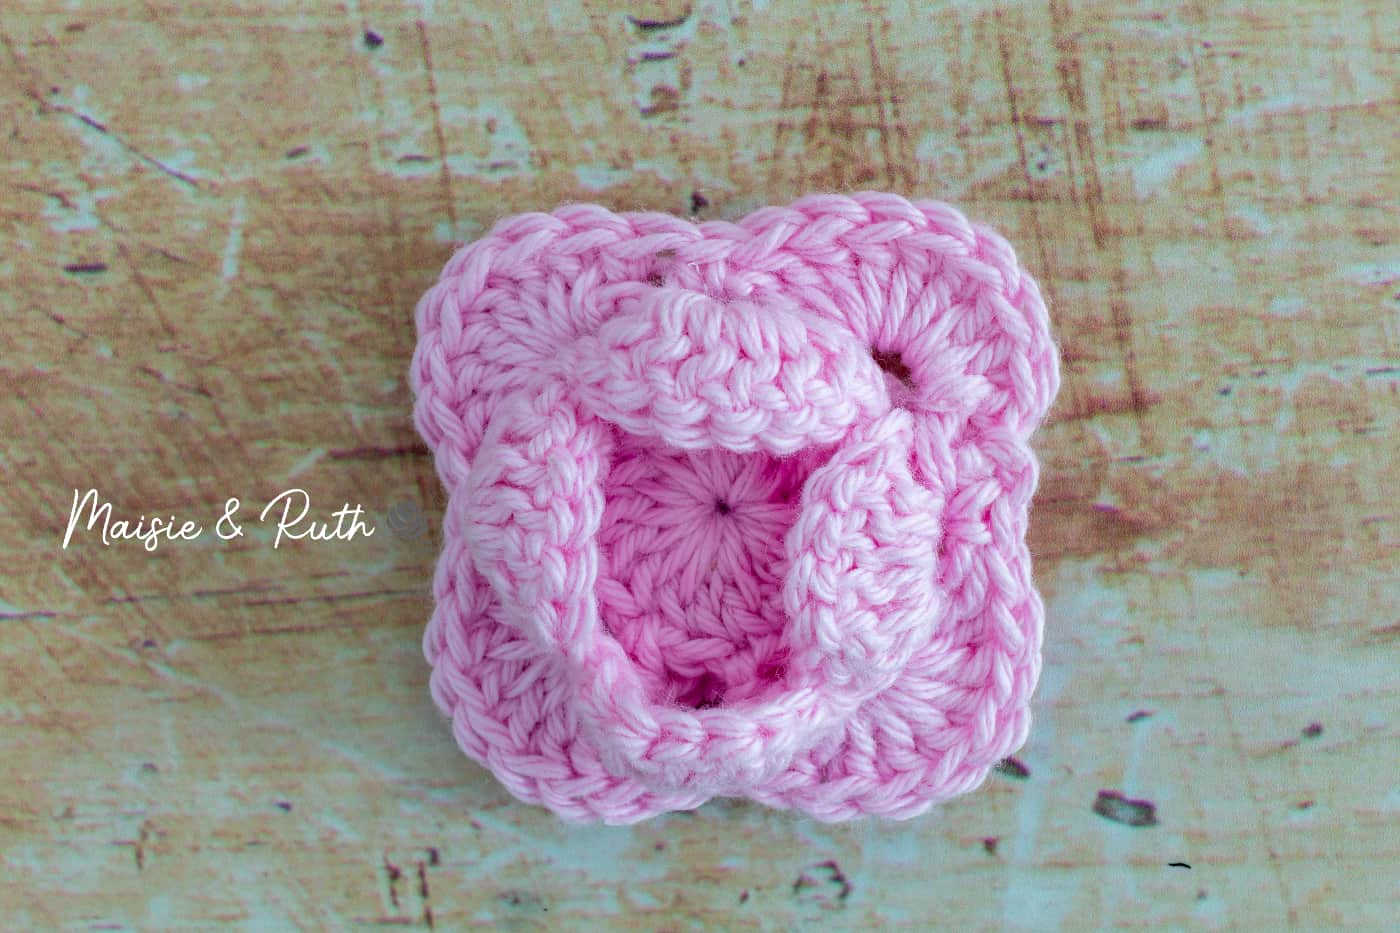
At the end of round 6, you should have 8 loops at the back of your rose:
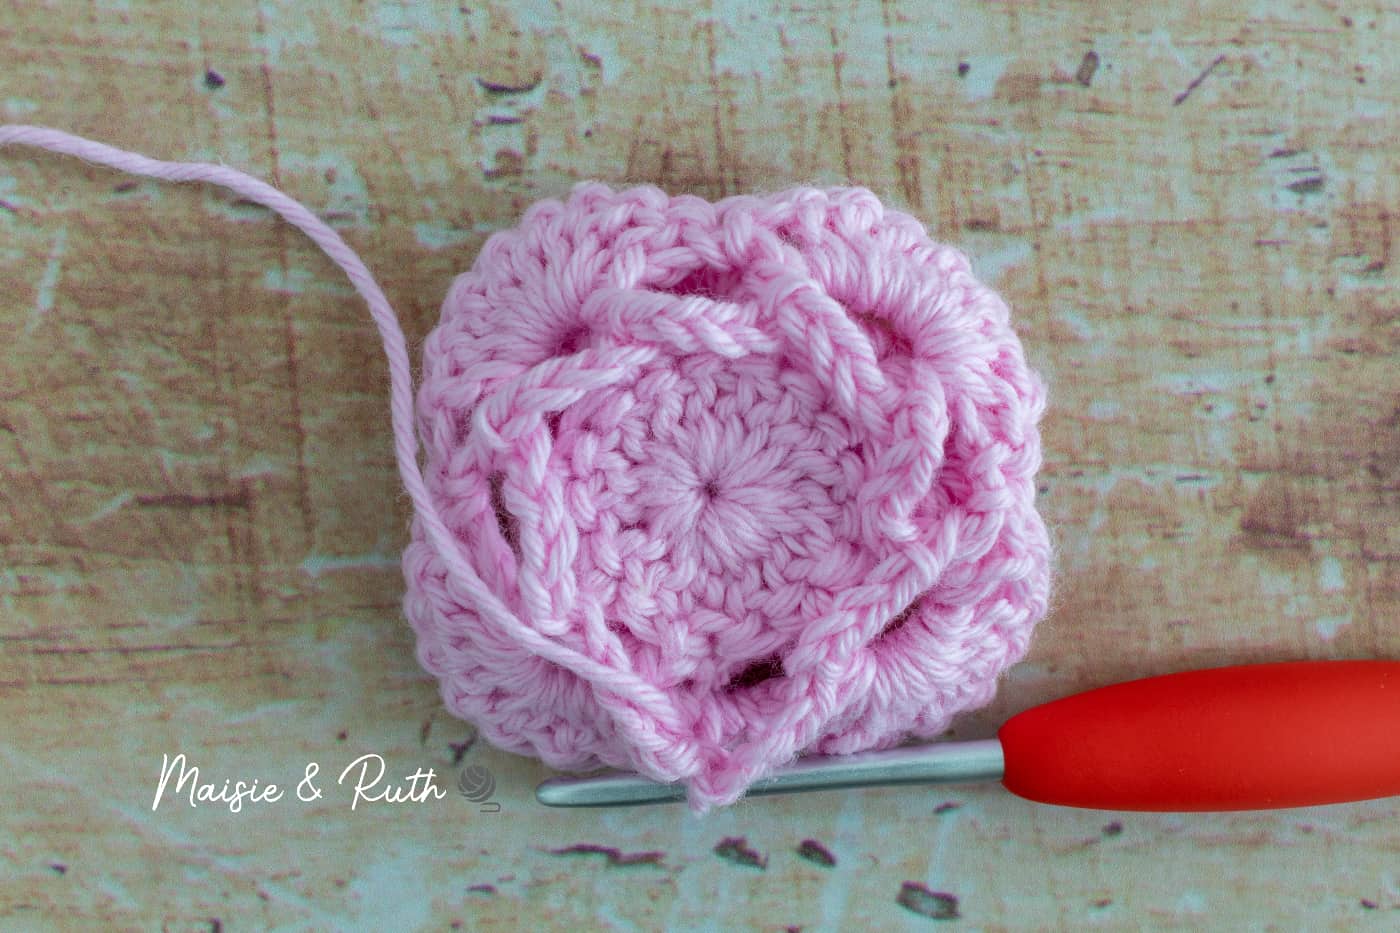
Cut yarn, fasten off and weave in ends.
At this point, your rose should be looking like this:

Change to Colour B
Attach yarn to any ch4 sp between any two petals.
I will attach my new yarn to the ch4 sp that is located behind my rose, between any two petals:
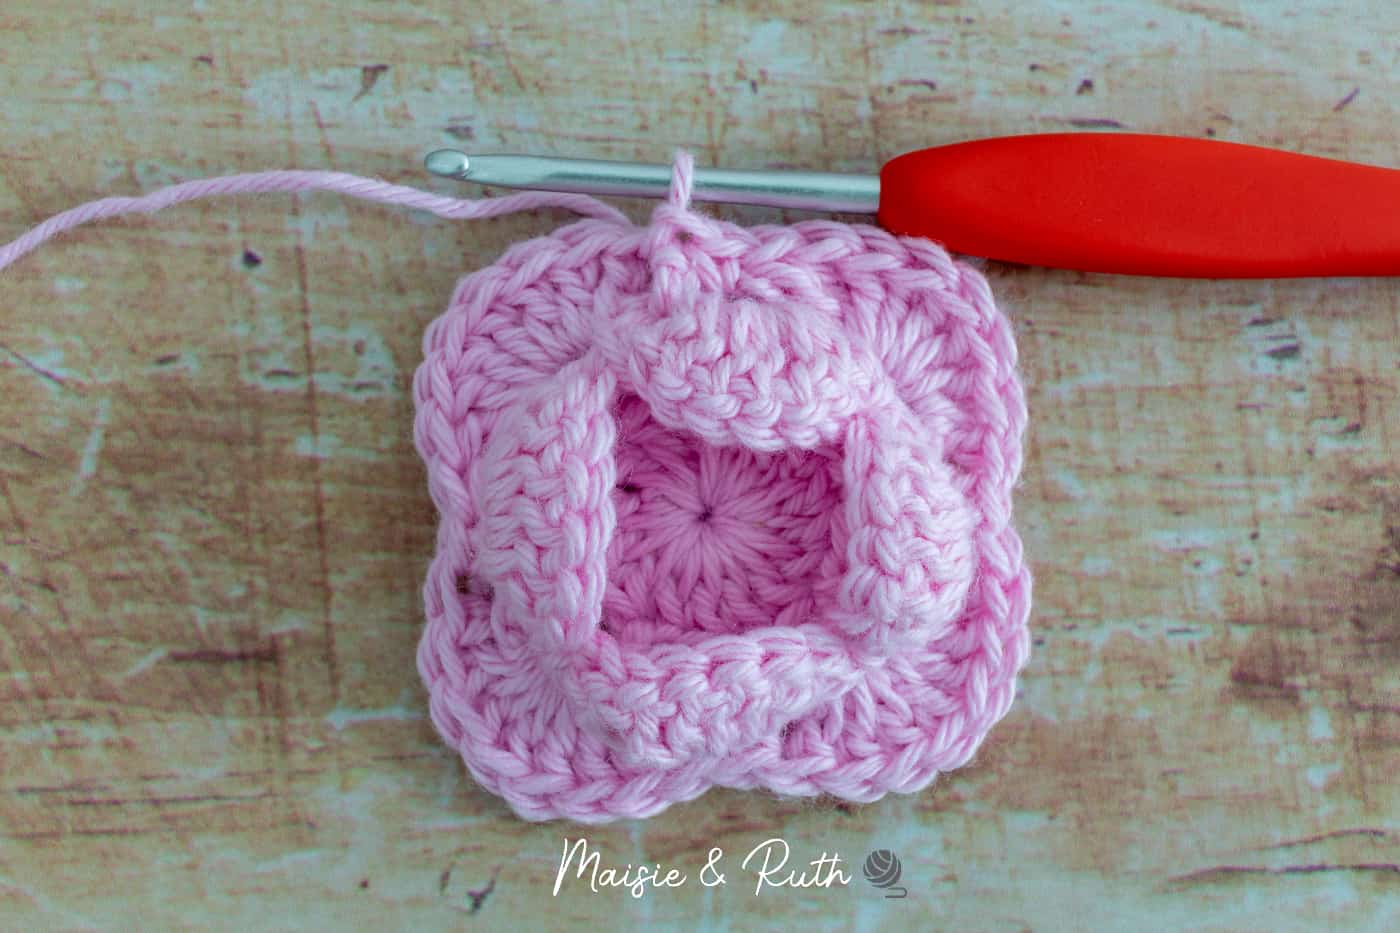
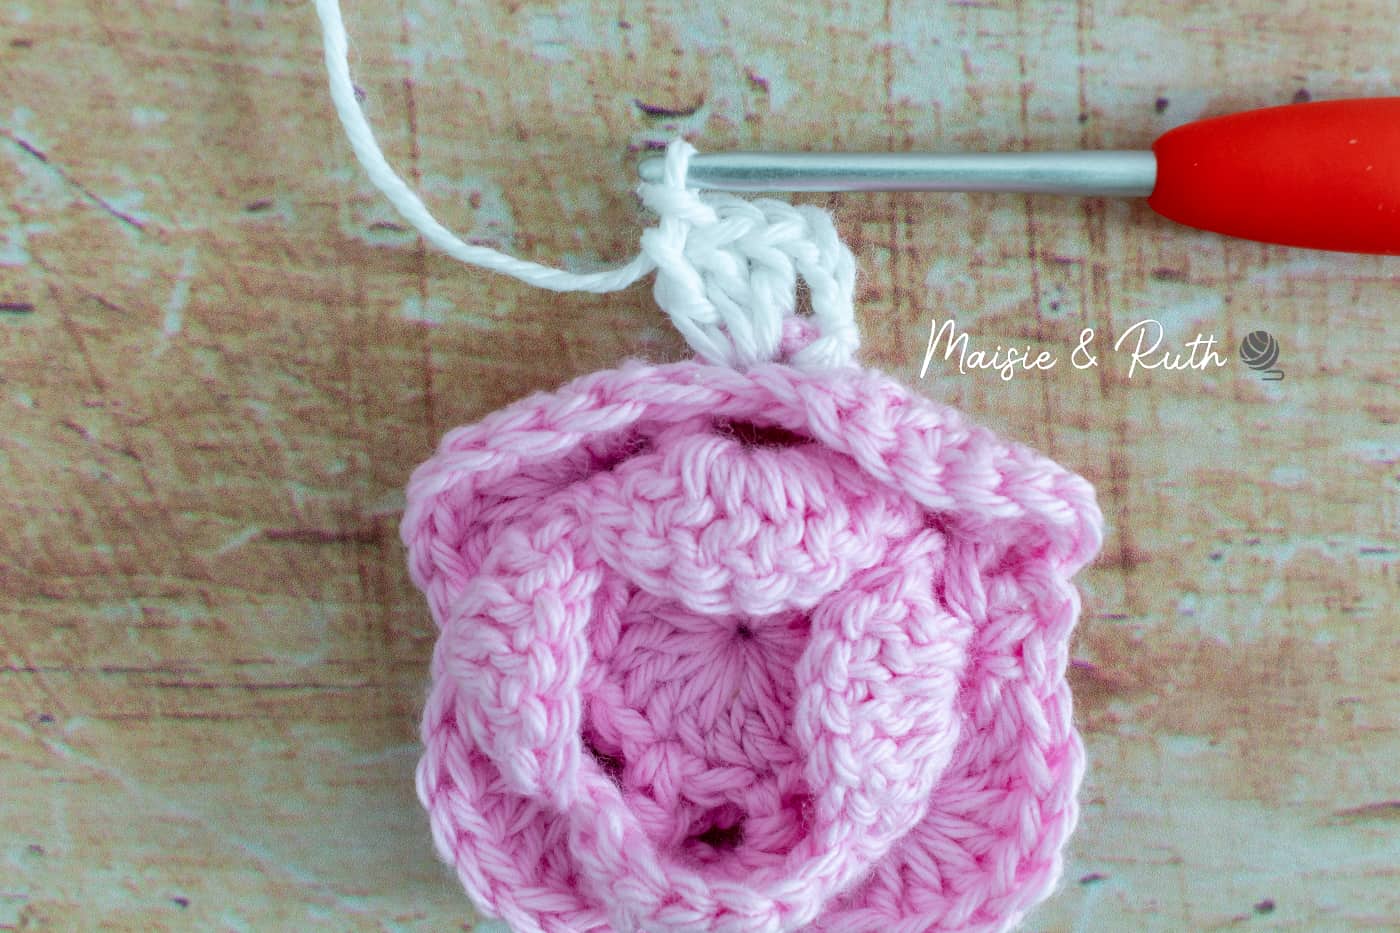
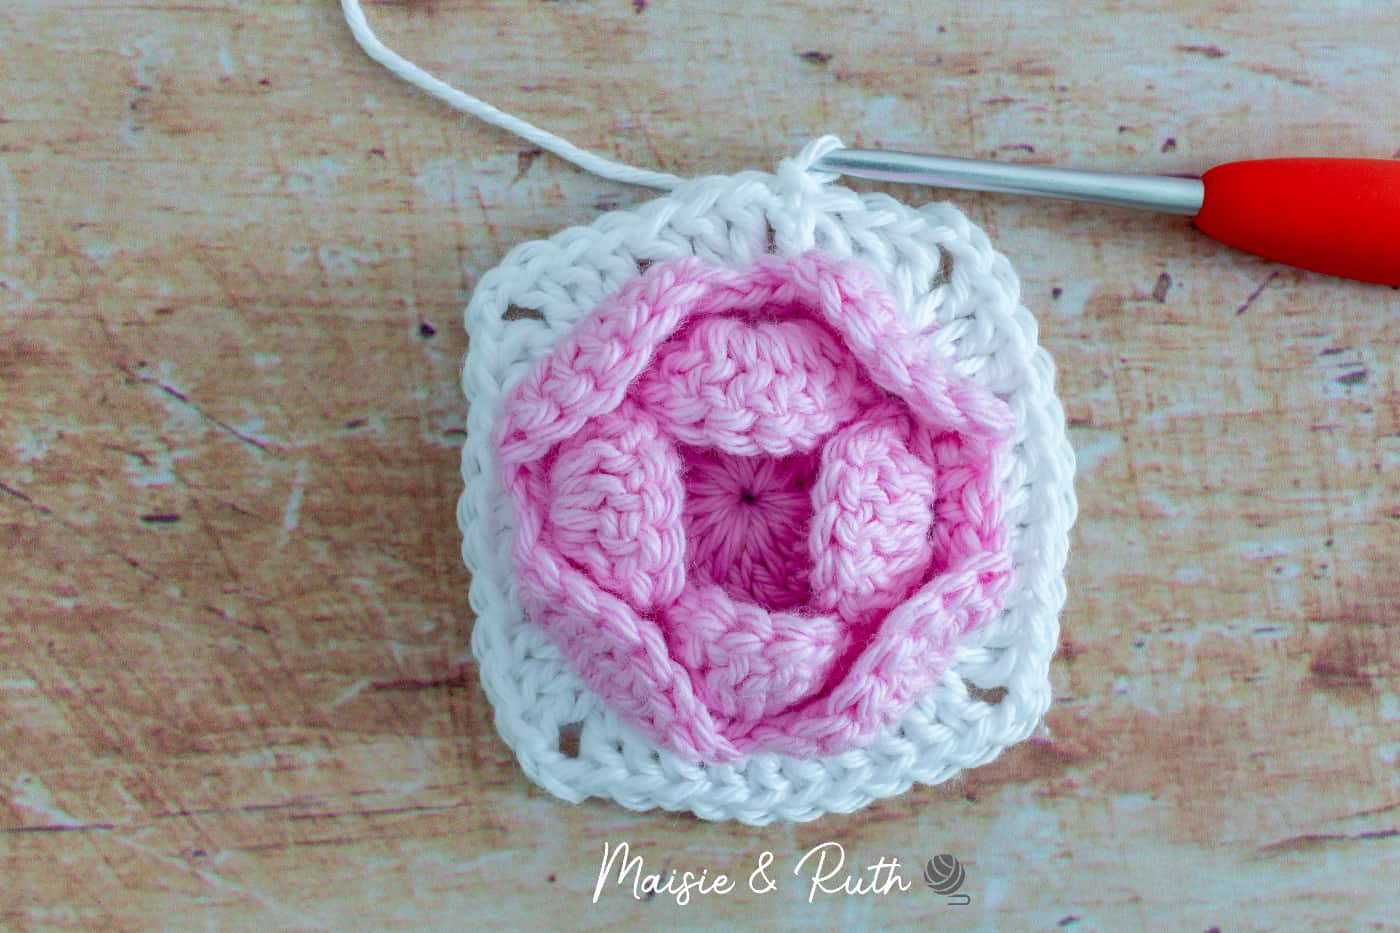
Round 7. Ch3 (counts as your 1st dc here and thereafter), 3dc in same ch4 sp, (3dc, ch2, 3dc) in next ch4 sp, *4dc in next ch4 sp, (3dc, ch2, 3dc) in next ch4 sp * repeat from * to * 3 times, sl st to the 3rd ch of beg ch3 to join, [10dc on each side].
Step 1. Begin with a ch3 and 3dc all into the same ch4 sp:
Step 2. Work (3dc, ch2, 3dc) into the next ch4 sp. This forms your 1st corner (that sits directly behind the petal):
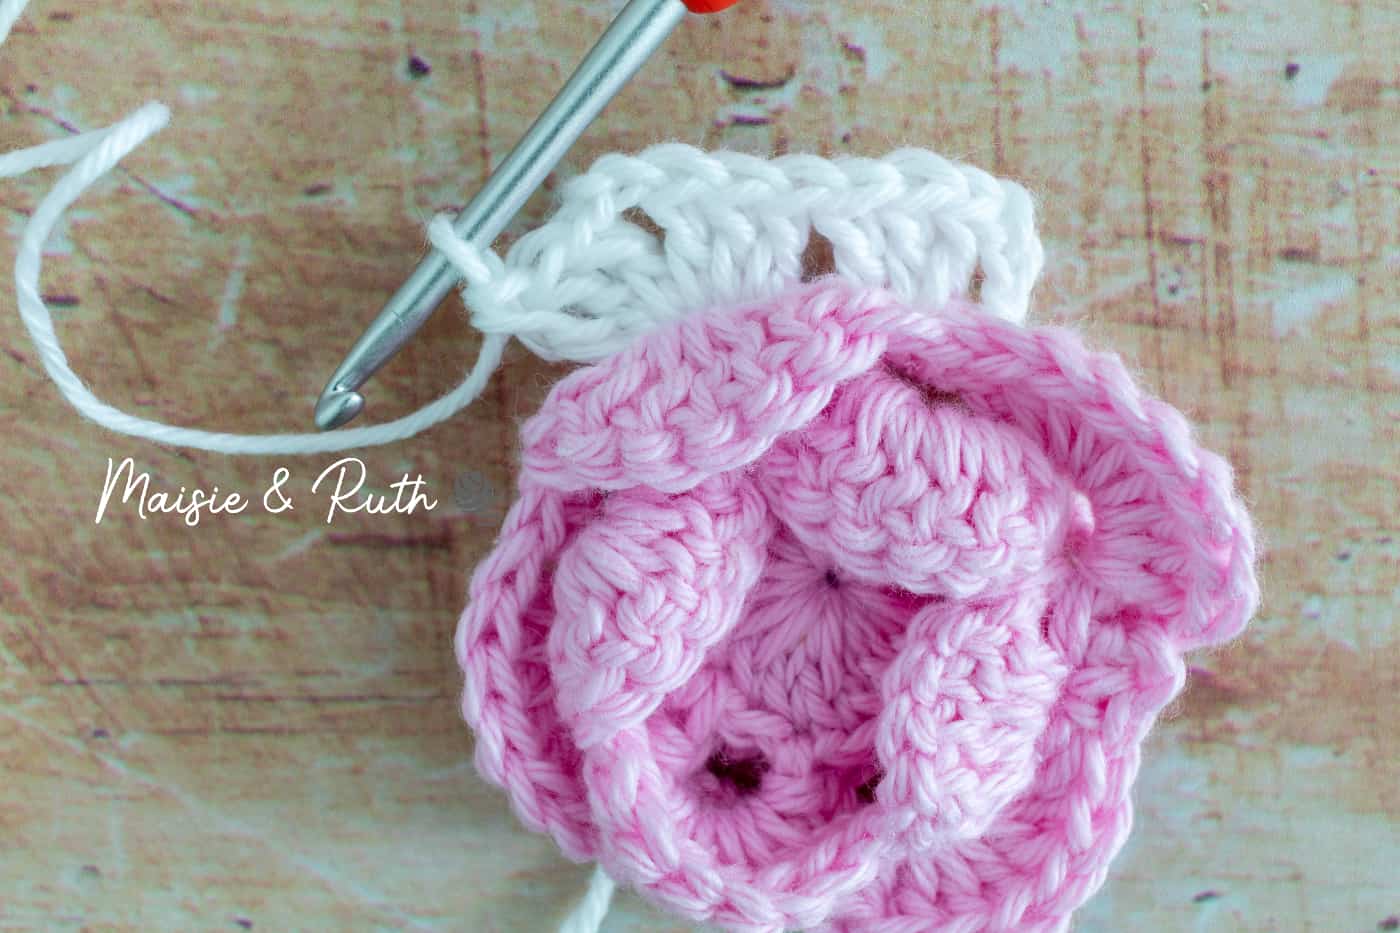
Step 3. Work 4dc in the next ch4 sp:
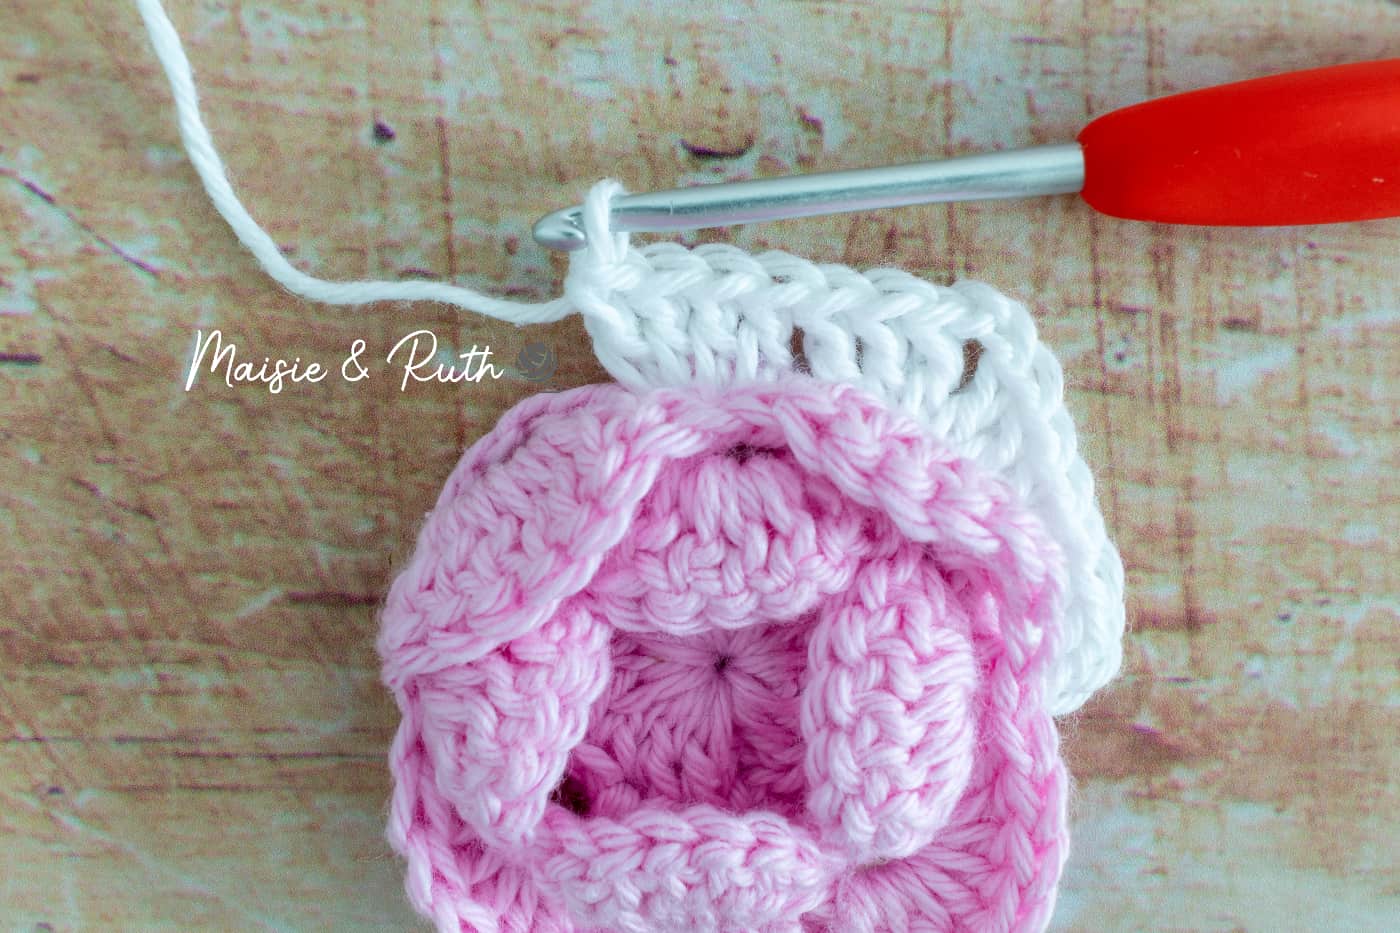
Step 4. Work (3dc, ch2, 3dc) into the next ch4 sp. This forms your 2nd corner:
Repeat steps 3 and 4 above for a total of 3 times.
To join, sl st to the top of the beginning ch3.
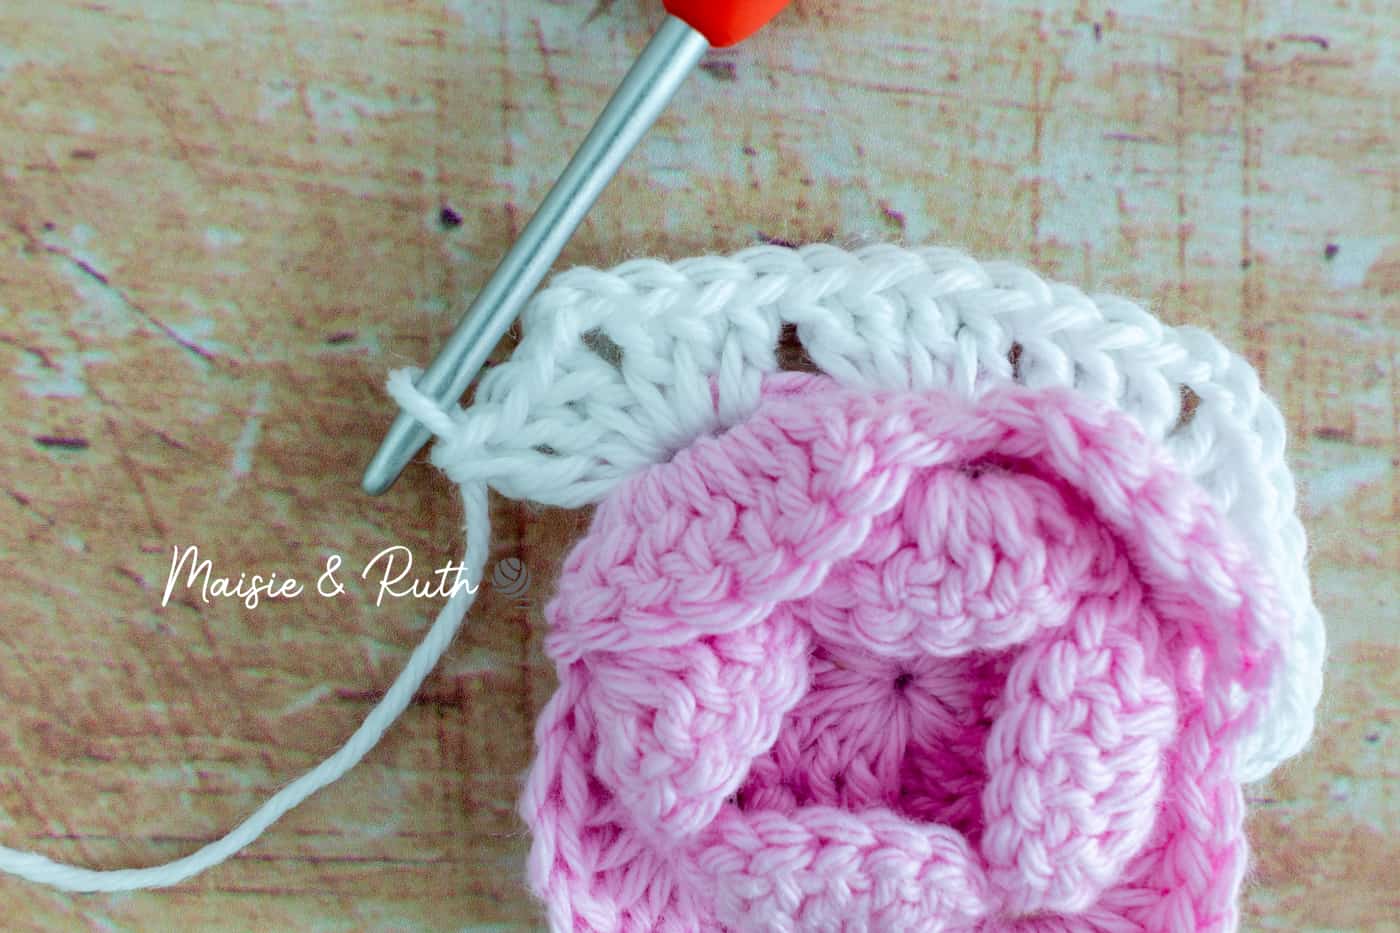
At the end of round 7, you should have 10dc on each side:
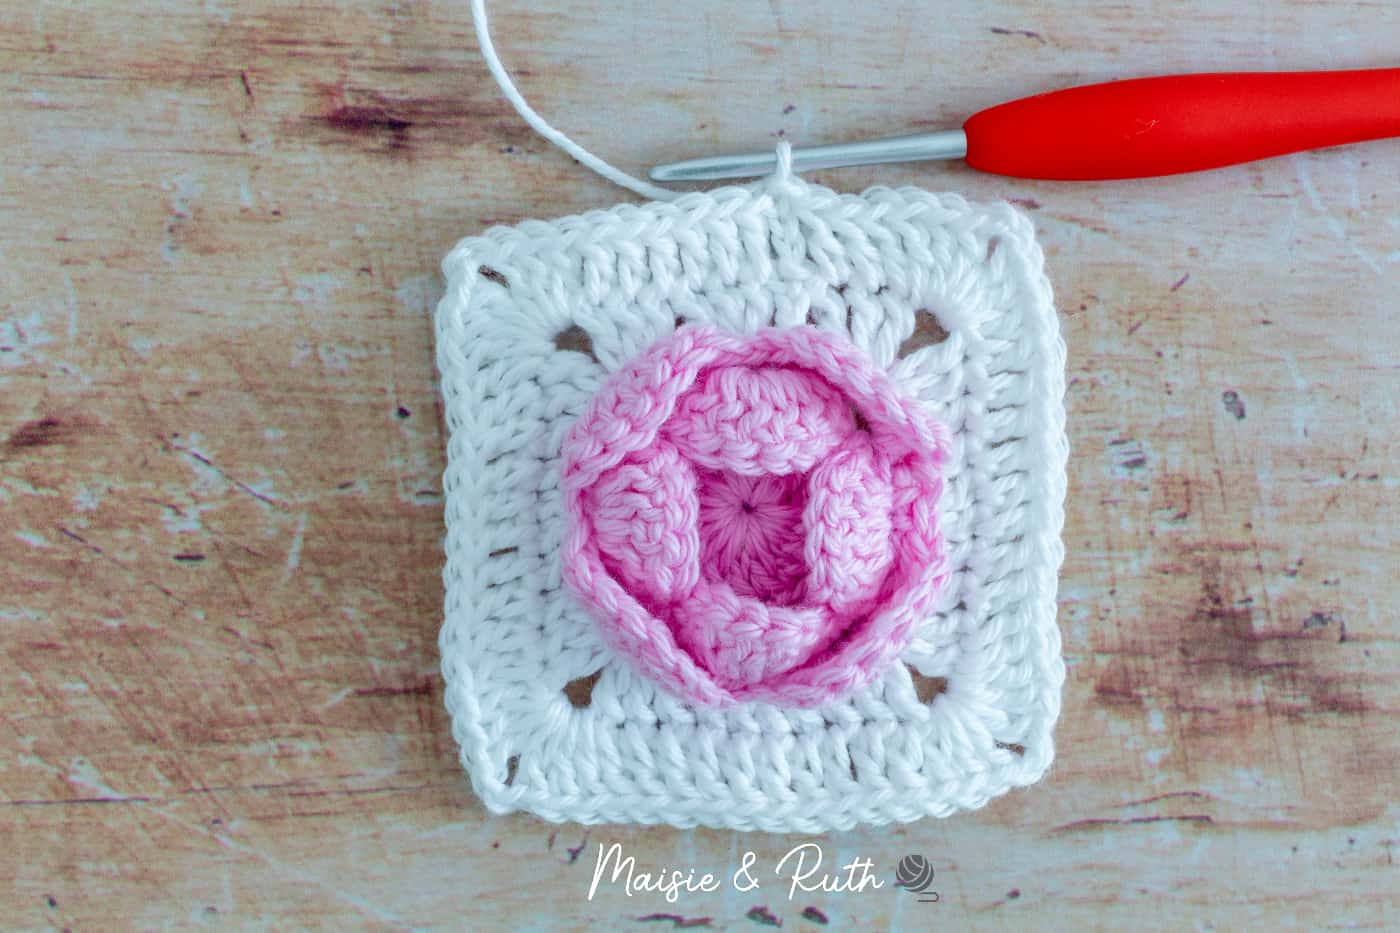
The next two rounds (8 & 9) are pretty straightforward – you will work 1dc in each stitch, working (3dc, ch2, 3dc) in each ch2 corner space.
Round 8. Ch3, 1dc in next 6 sts, (3dc, ch2, 3dc) in next ch2 corner sp, *1dc in next 10 sts, (3dc, ch2, 3dc) in next ch2 corner sp *, repeat from * to * 3 times, 1dc in next 3 sts, sl st to the 3rd ch of beg ch3 to join, [16dc on each side].
At the end of round 8, you should have 16dc on each side:
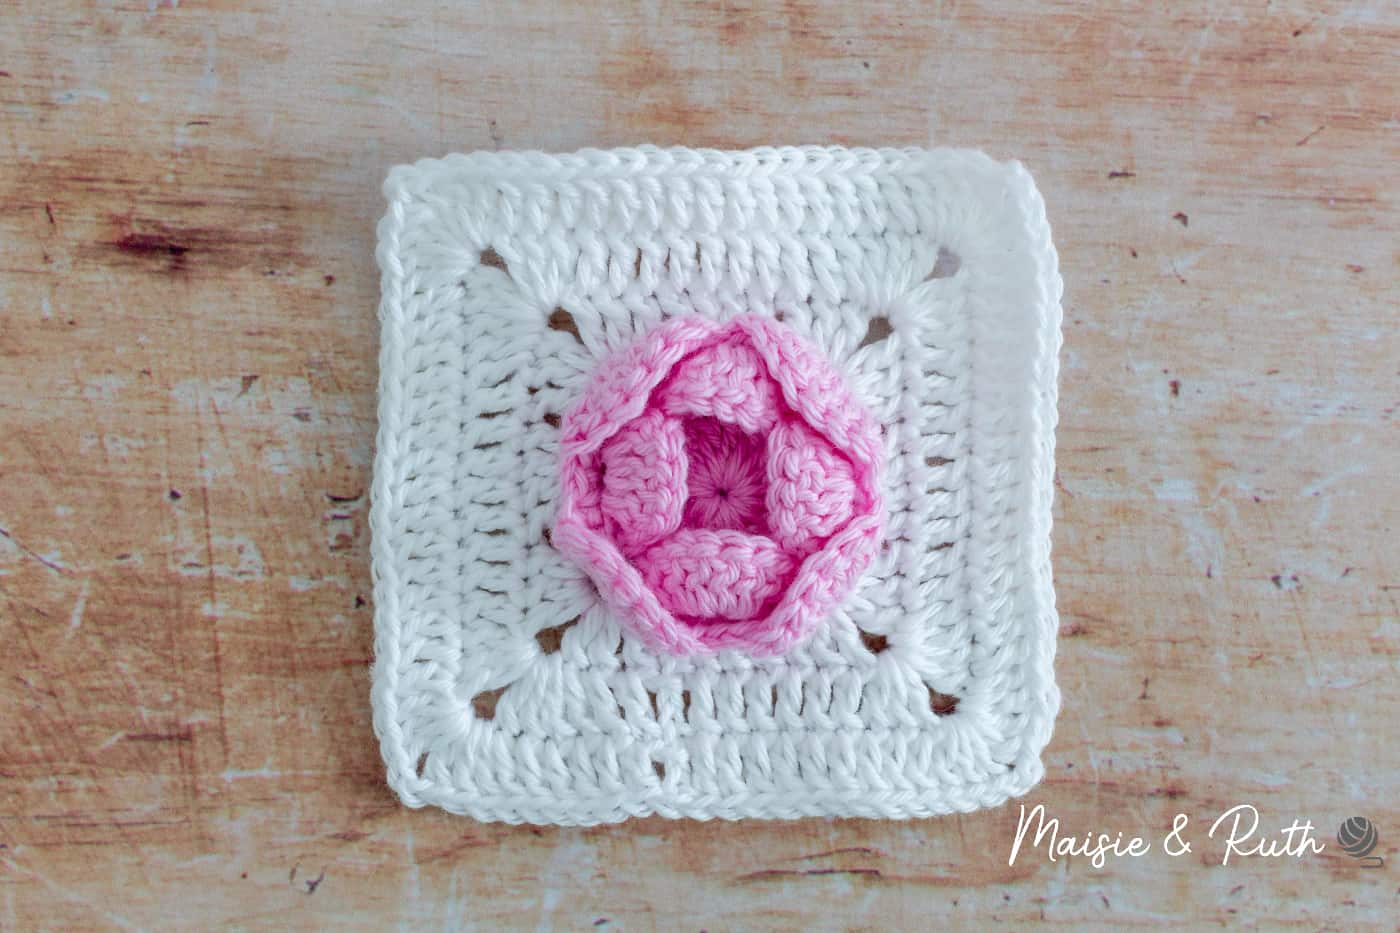
Round 9. Ch3, 1dc in next 9 sts, (3dc, ch2, 3dc) in next ch2 corner sp, *1dc in next 16 sts, (3dc, ch2, 3dc) in next ch2 corner sp *, repeat from * to * 3 times, 1dc in next 6 sts, sl st to the 3rd ch of beg ch3 to join or make an invisible join, [22dc on each side].
Cut yarn, fasten off and weave in ends.
At the end of round 9, you should have 22dc on each side:
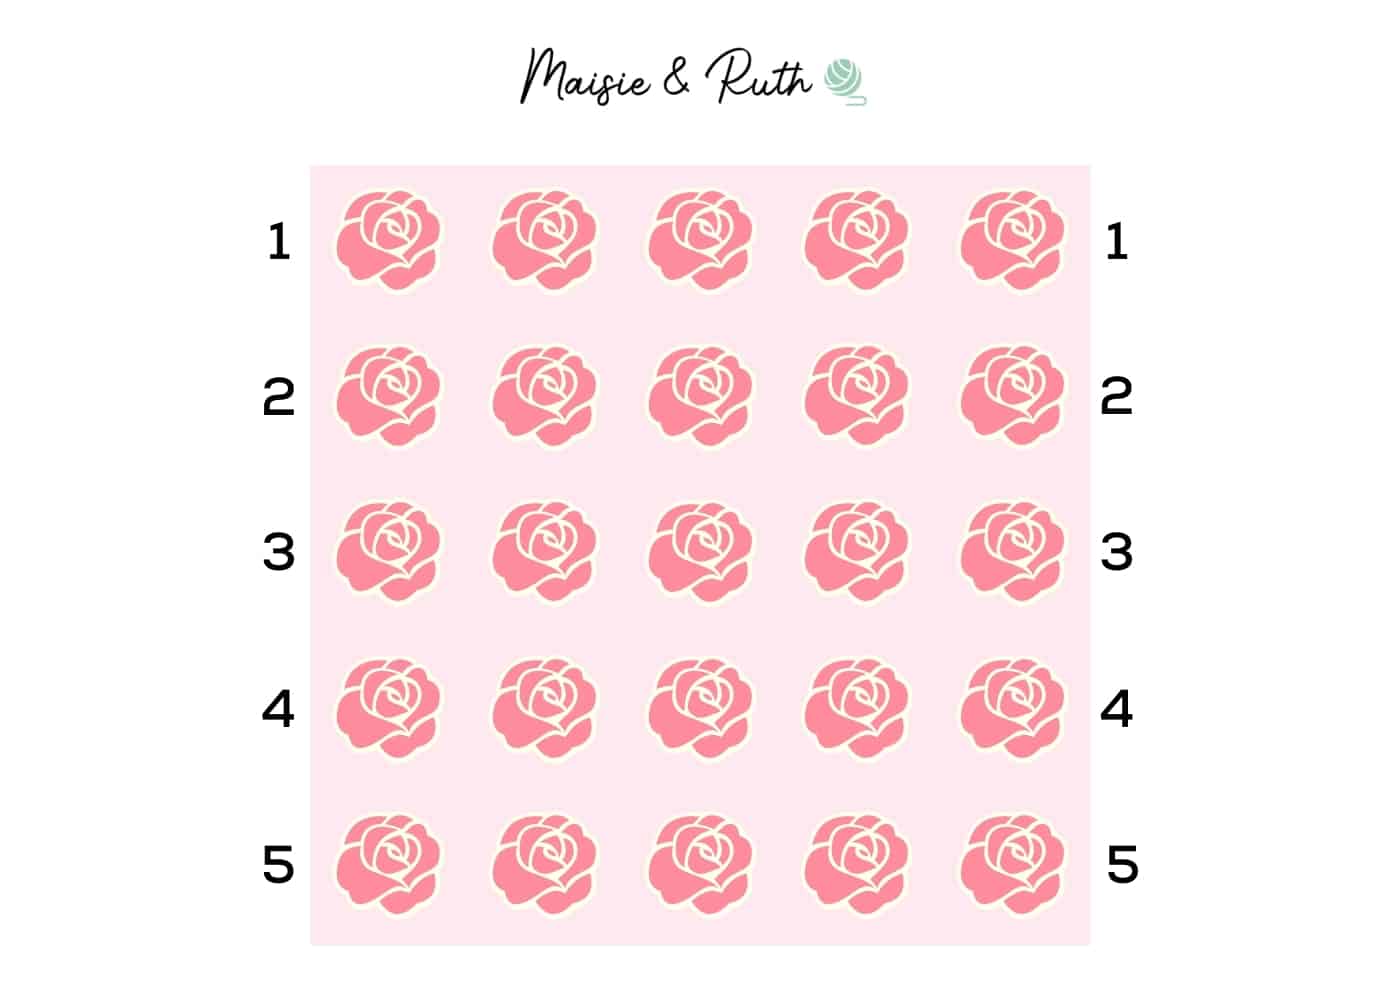
ARRANGEMENT OF CROCHET ROSE BABY BLANKET
Once you’ve made all 25 squares, it’s time to arrange them before joining.
Below is a diagram showing you how I arranged my squares:
JOINING YOUR SQUARES
For this blanket, I used my favourite way of joining granny squares…the flat slip stitch seam.
You can use any method you like to join your squares, but I just love the finished look and how flat the blanket lies with this seam.
You can see the photo and video tutorial for the flat slip stitch seam here.
BORDER
Once the squares have been joined together, you will then finish your blanket off with a border consisting of 7 rounds.
If you need help with the border, please watch the video below (you can skip straight to this part of the tutorial by clicking on the relevant timestamp in the description box below the video).
Using Colour B:
Attach your yarn to any ch2 corner space.
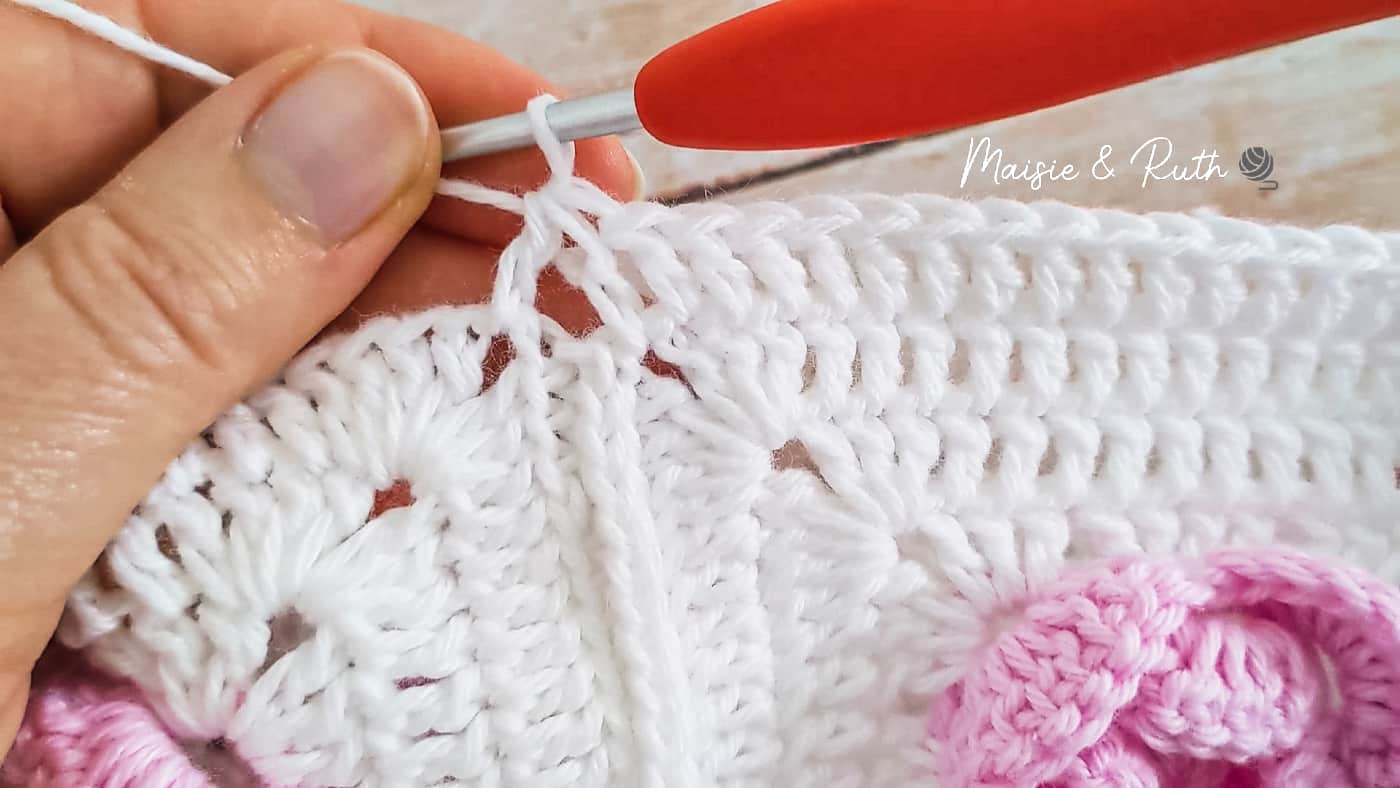
Round 1. *(2dc, ch2, 2dc) in ch2 corner sp, 1dc in each st to next ch2 corner sp, working 1dc2tog over the ch2 sps at each seam*, repeat from * to * 4 times, sl st to 1st dc at beg of round to join, [118 sts on each side of blanket, 4 ch2 corner sps].
Work 1 dc2tog over both ch2 sps at the seam area:
Round 2. (Sl st) twice to the ch2 corner sp, *(2dc, ch2, 2dc) in ch2 corner sp, 1dc in each st to next ch2 corner sp*, repeat from * to * 4 times, sl st to 1st dc at beg of round to join, [122 sts on each side of blanket, 4 ch2 corner sps].
Round 3. Repeat round 2, [126 sts on each side of blanket, 4 ch2 corner sps].
Cut yarn, fasten off and weave in ends.
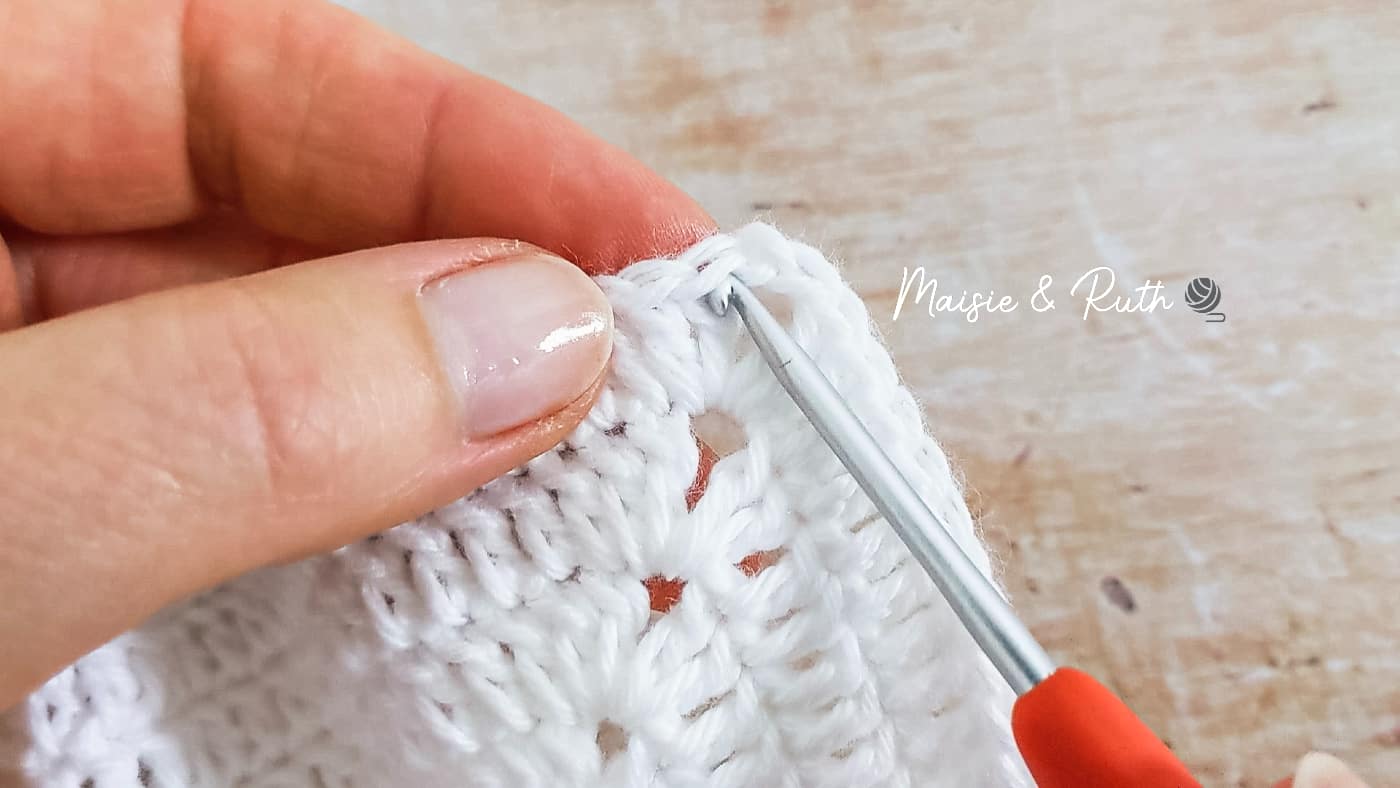
Change to Colour A
Attach the yarn to the dc immediately after any ch2 corner sp (as seen by my hook in the photo below):
Round 4. *Shell in same st, sk next 2 sts, 1sc in next st, **sk next 2 sts, shell in next st, sk next 2 sts, 1sc in next st**, repeat from ** to ** to last 2 sts before next ch2 corner sp, sk 1 st, shell in next st, 1sc in ch2 corner sp*, repeat from * to * 4 times, sl st to 1st dc at beg of round to join, [22 shells on each side].
Cut yarn, fasten off and weave in ends.
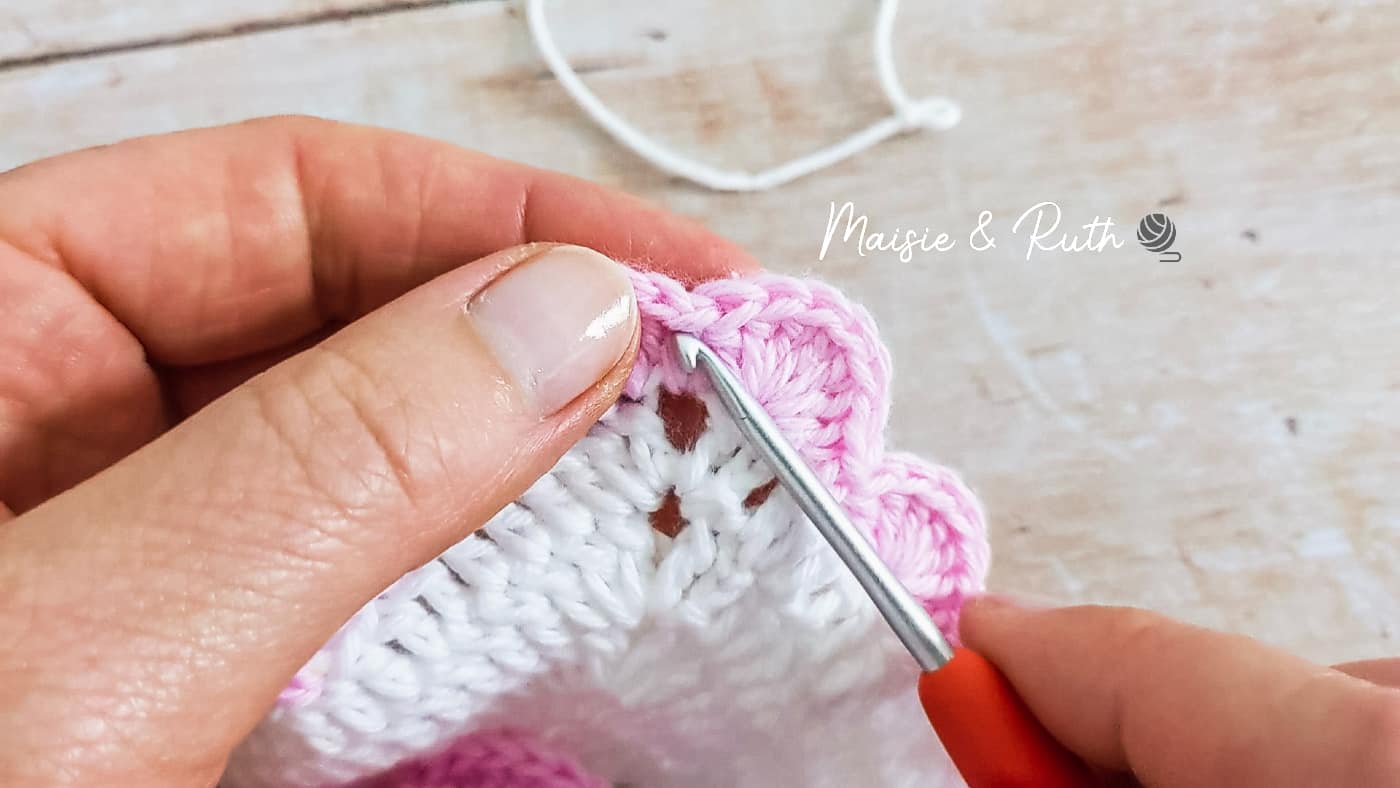
Change to Colour B
Beginning in any corner of the blanket, attach your yarn to the sc between two shells (as shown by my hook below):
Round 5. (Ch5, (1dc, ch2) twice, 1dc) in same st, ch5, sk next shell, *(V-st in next sc, ch5, sk next shell), 21 times to next corner sc, ((1dc, ch2) 3 times, 1dc) in corner sc, ch5, sk next shell*, repeat from * to * 4 times, sl st to 3rd ch of beg ch5 to join, [21 V-sts on each side, 3 V-sts in each corner].
Cut yarn, fasten off and weave in ends.
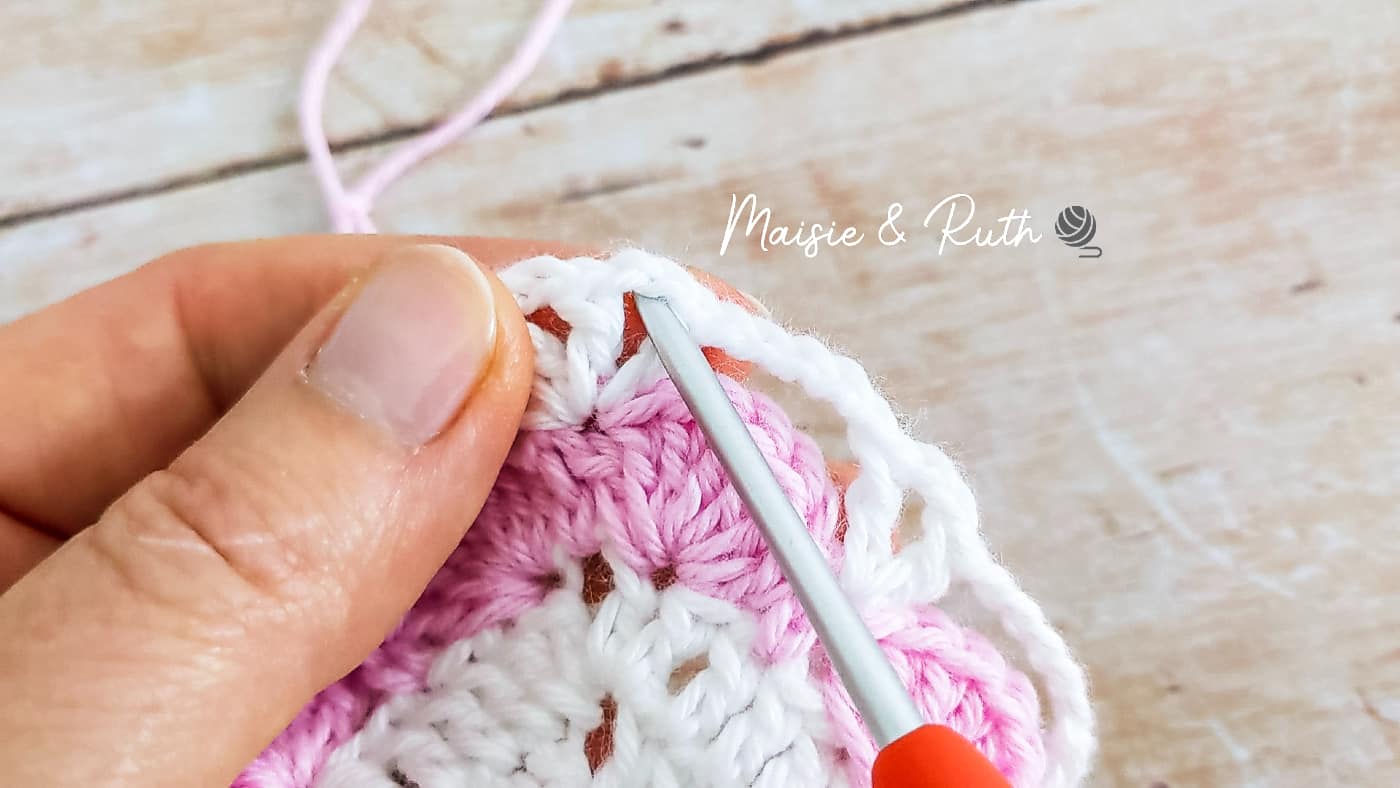
Change to Colour A
Beginning in any corner of the blanket, attach your yarn to the ch2 sp of the first V-st (where my hook is in the photo below):
Round 6. *Shell in 1st V-st, 1sc in next V-st, shell in next V-st, 1sc in centre st of next shell (ensure that you crochet around the ch5 also), **shell in next V-st, 1sc in centre st of next shell (ensure that you crochet around the ch5 also)**, repeat from ** to ** until next corner*, repeat from * to * 4 times, sl st to 1st dc at beg of round to join, [23 shells on each side].
Cut yarn, fasten off and weave in ends.
Change to Colour B
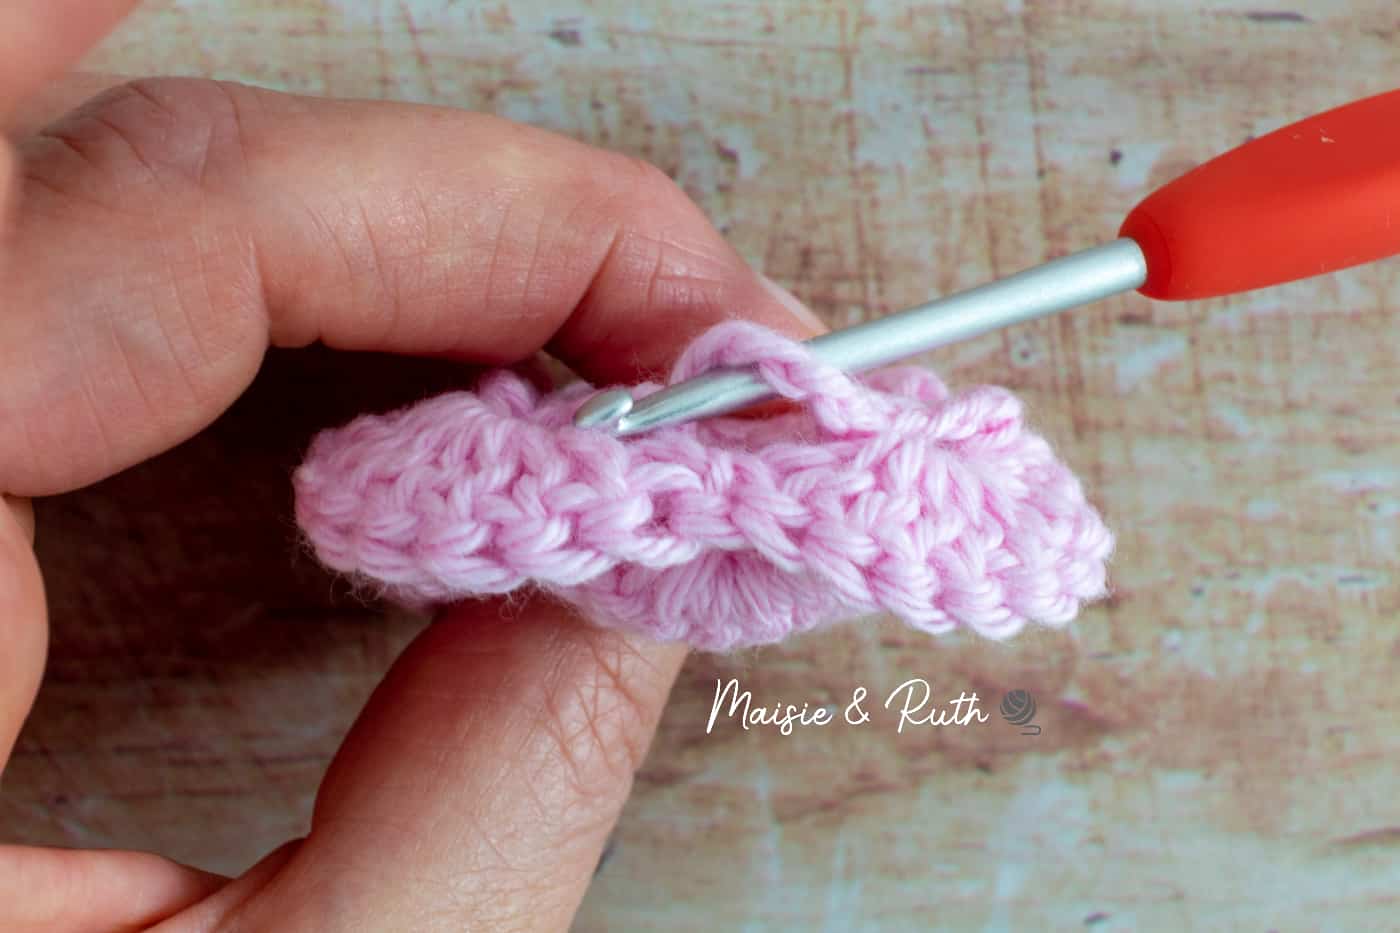
Beginning in any shell, attach your yarn to the BLO of the 1st dc of the shell (as seen by my hook below):
Round 7. Ch1 (does not count as your 1st st), 1sc in BLO of same st, 1sc in BLO of next 6 dc, sl st in BLO of next sc, *1sc in BLO of next 7dc, sl st in BLO of next sc*, repeat from * to * around blanket, sl st to 1st sc of round to join.
Cut yarn, fasten off and weave in ends.
PIN IT FOR LATER!
I hope you enjoyed the pattern for this elegant crochet rose baby blanket… leave me a comment below!
Remember to pin the pattern to your board for later if you can’t make it now 😊
If you’re on Instagram, tag me in your photos of the blanket (work-in-progress or finished items) using @maisieandruth.
Happy crocheting!


Thank you for such a beautiful pattern. I cannot wait to try this one.
You’re most welcome! 😊 I hope you enjoy making it 🌷
This is beautiful. Thanks for designing and sharing this pattern. I could see making this for someone would be a real treasure!
You’re so welcome! Thank you for your lovely feedback 😊💞
This is so beautiful! Thank you very much💕
Thank you very much, I’m so glad you like the design! 🥰