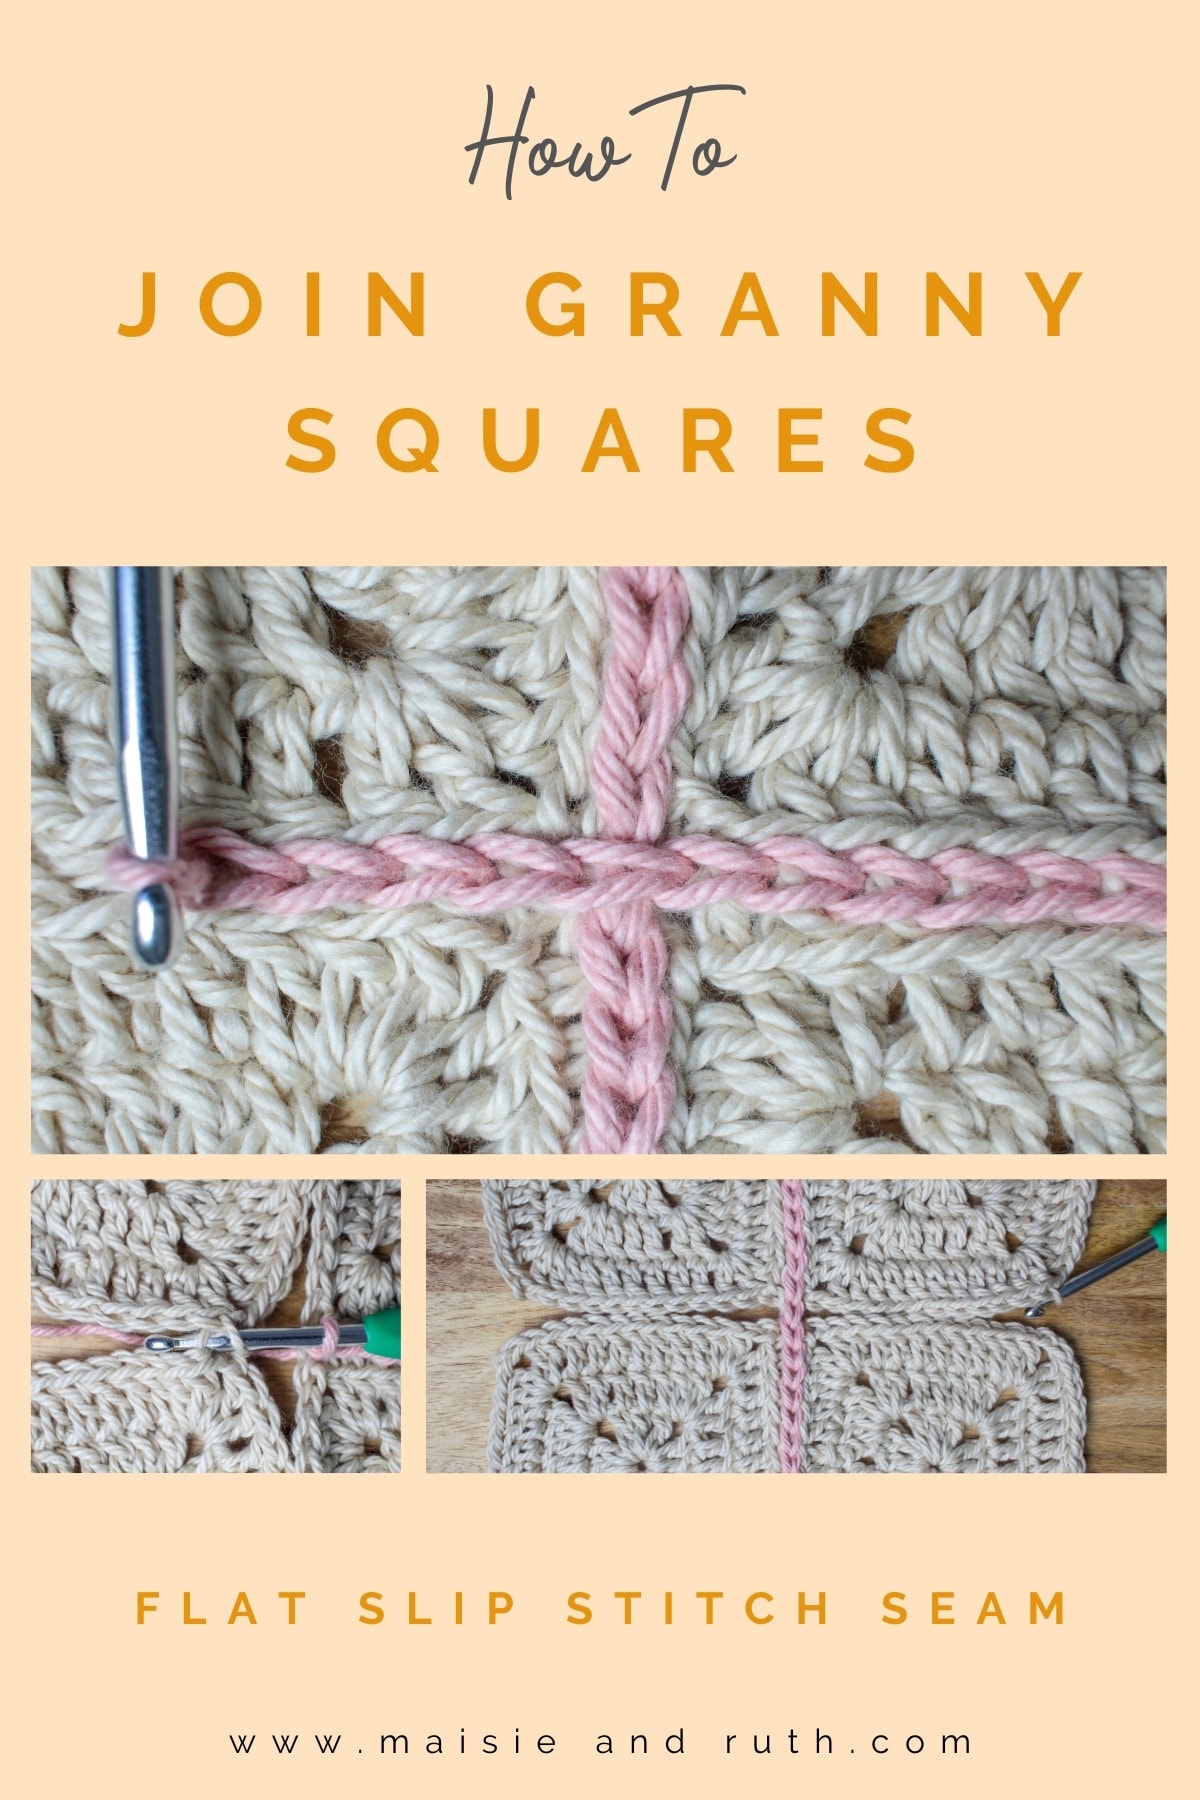
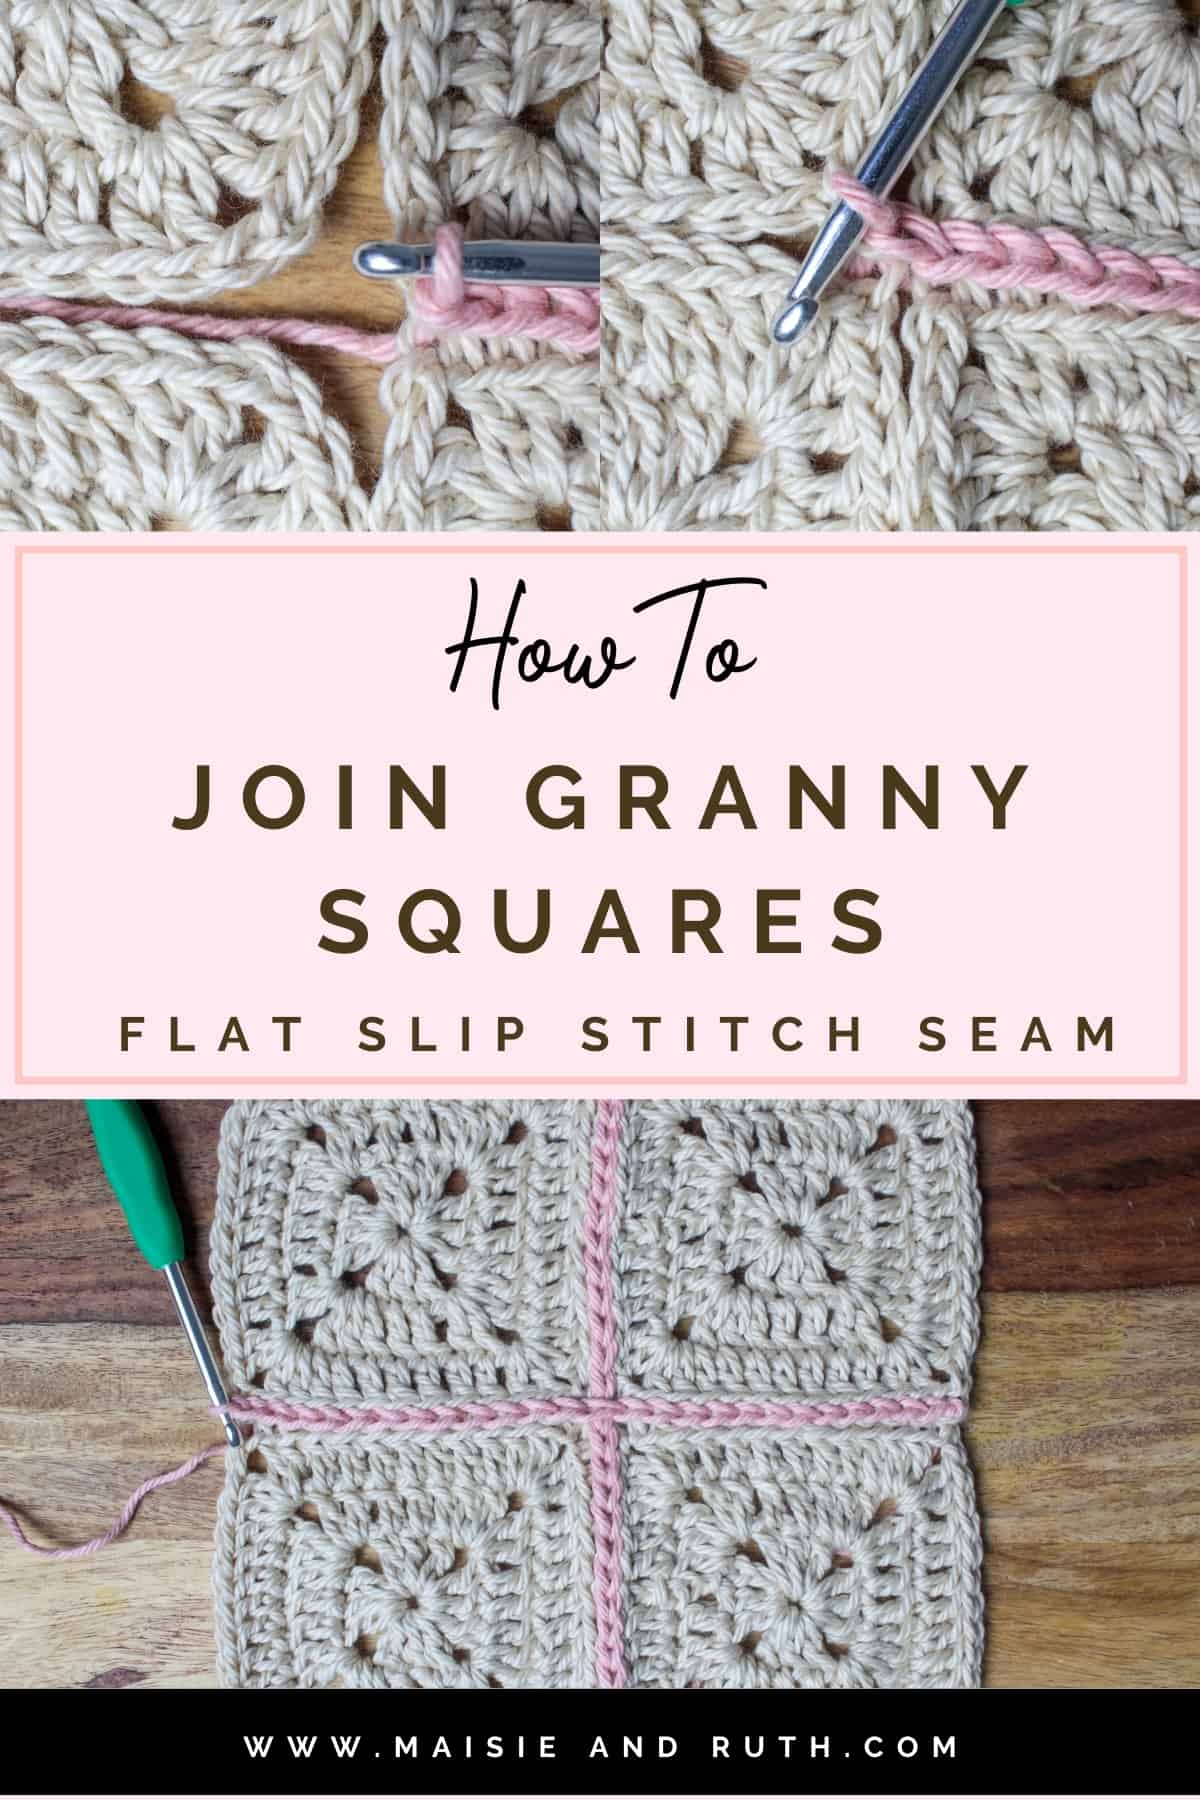
There are several ways to join granny squares, but in this photo tutorial I’m going to show you my favourite method… the flat slip stitch seam!
A VIDEO TUTORIAL is also included!
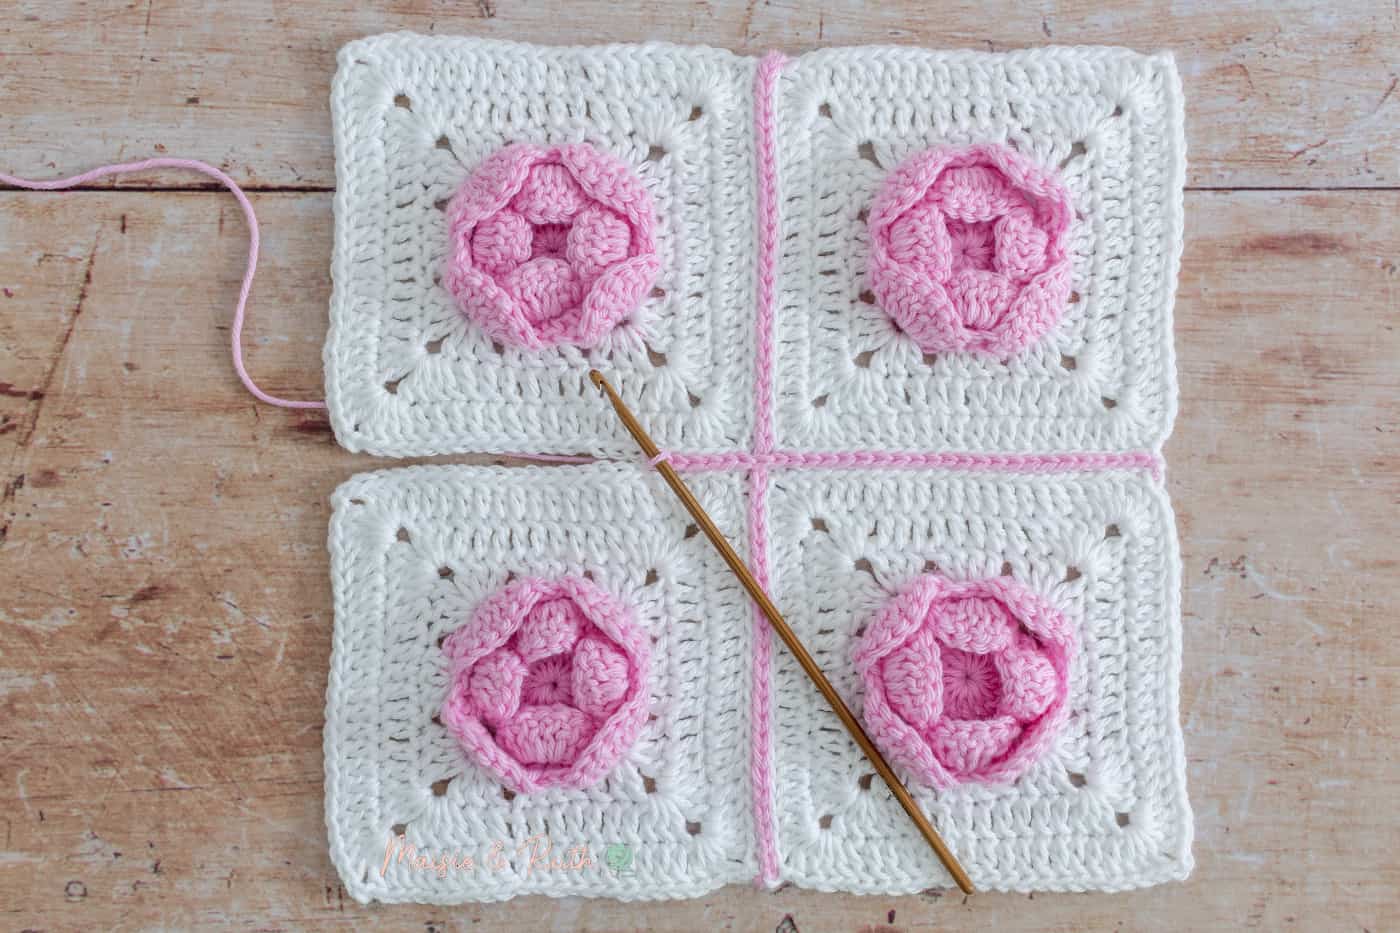
NO-SEW METHOD
For those of you who don’t like to sew, this method will really appeal to you as you will use the simple slip stitch to join your granny squares.
In addition to being an easy method of joining, this seam is also completely flat (achieved by working through the back loops of your stitches).
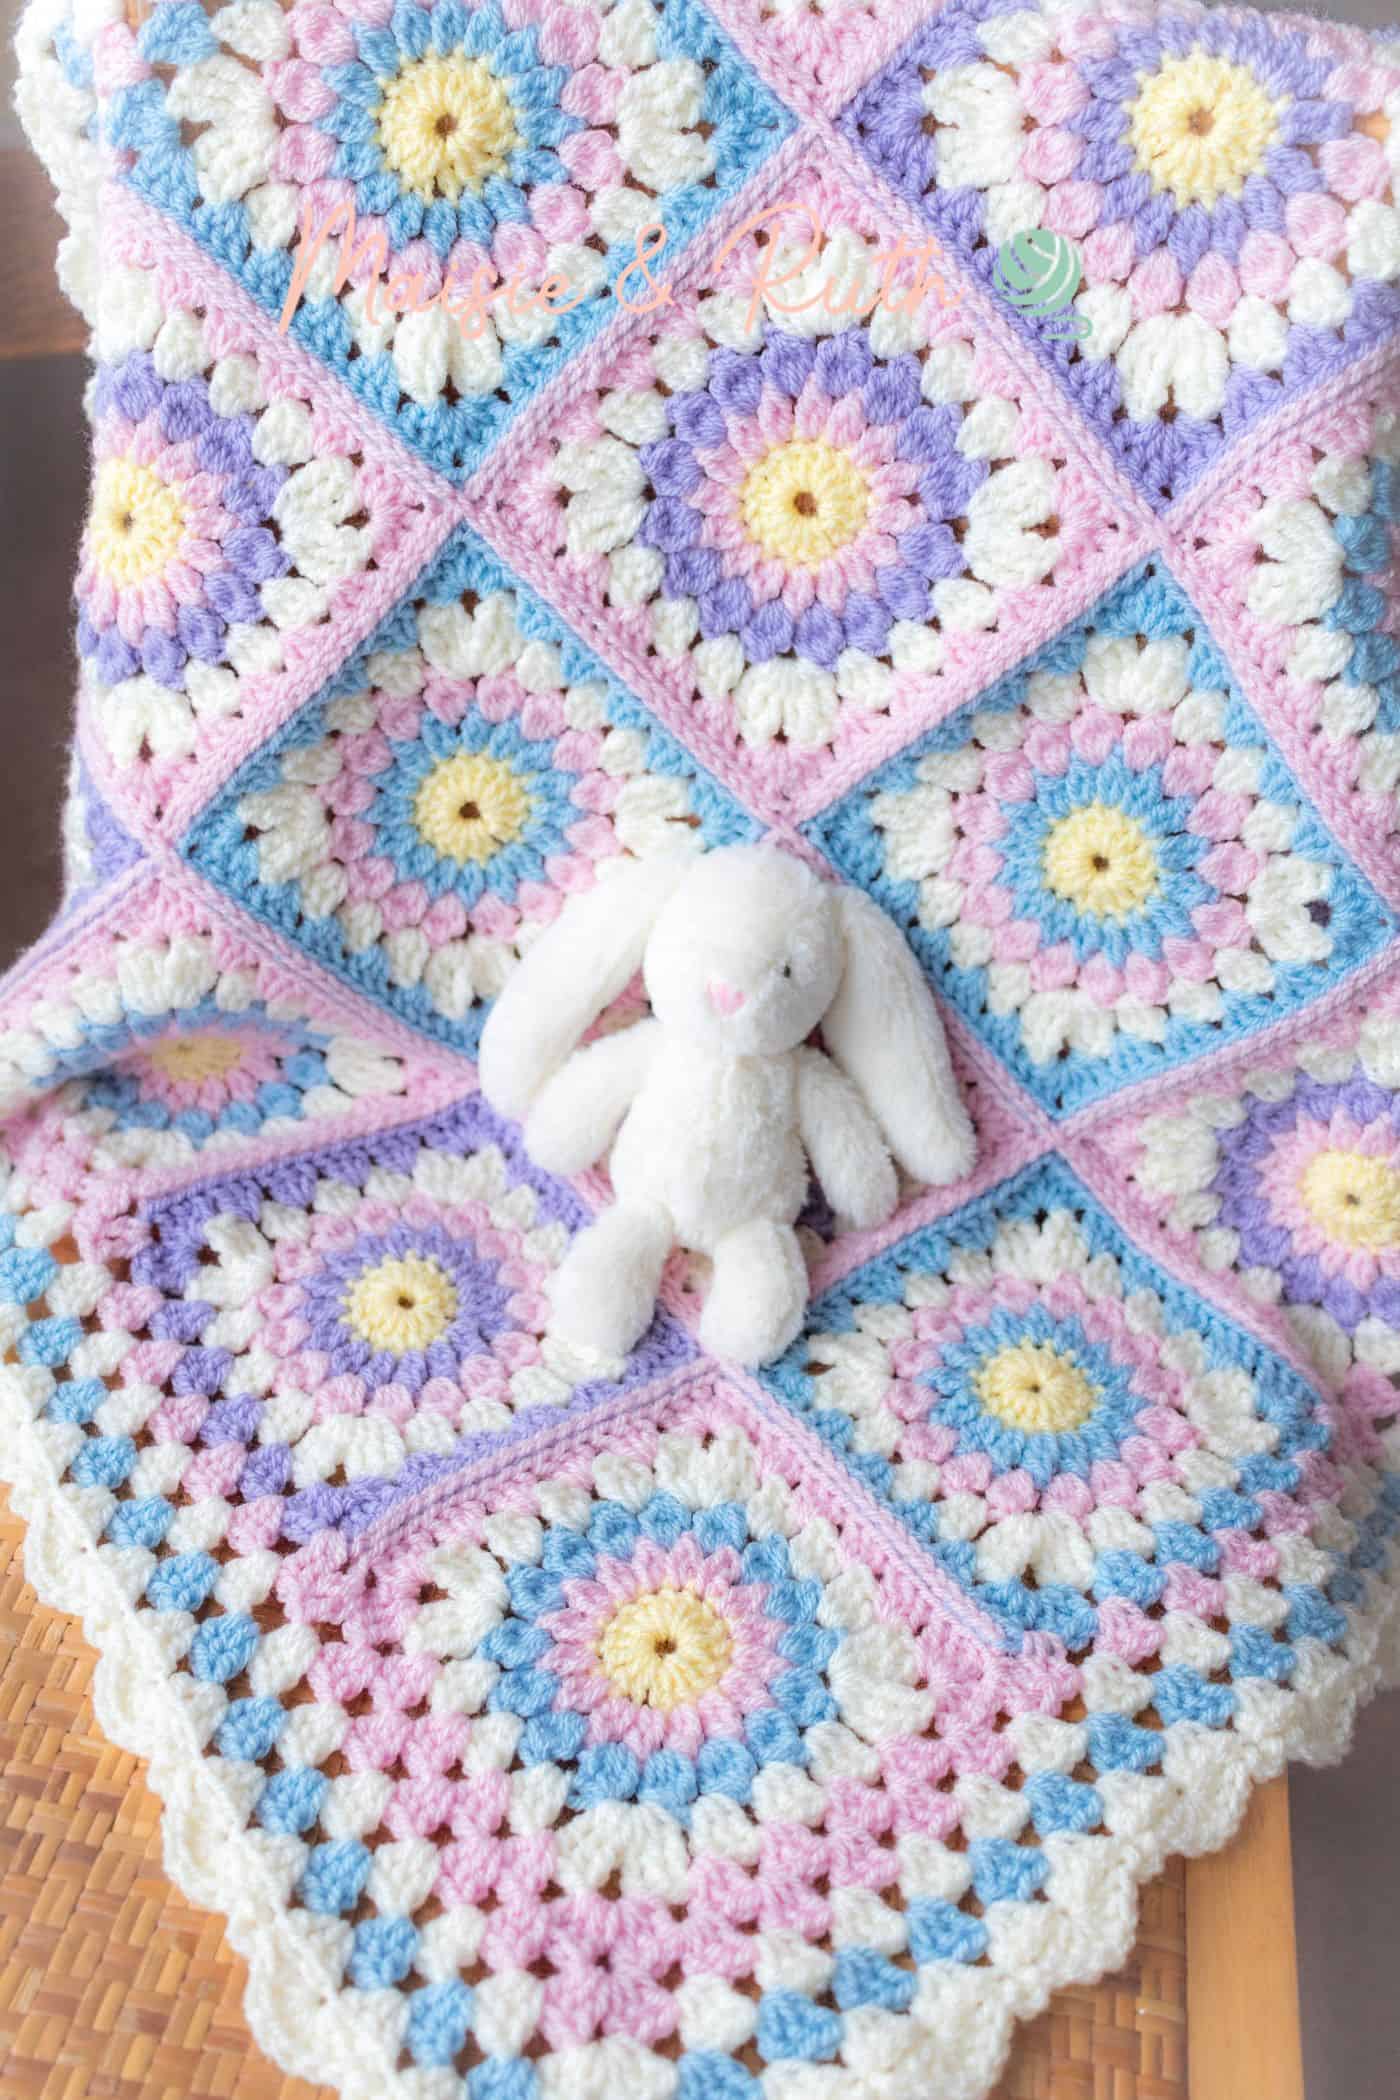
I find this seam to be very attractive and it looks especially pretty when used in a yarn of contrasting colour.
For this reason, I decided to use this seam on my pattern for the Paisley Granny Square Baby Blanket:
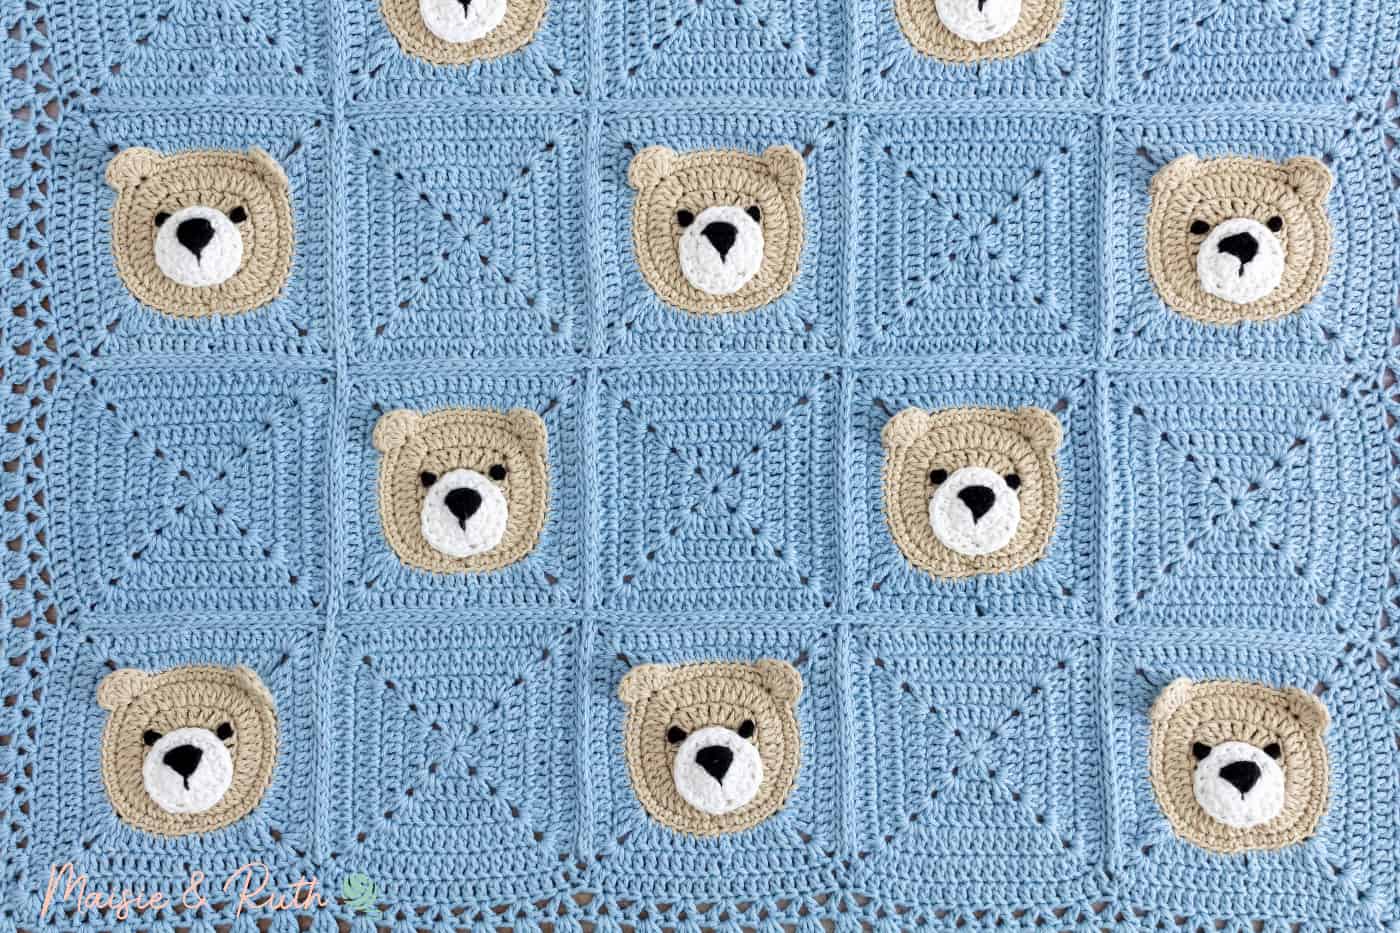
Of course, if you would like an almost invisible join, you can work the seam in the colour that was used for the main body of your work… like I did on my teddy bear baby blanket:
If you’re ready to learn how to work this pretty seam, let’s head to the tutorial now!
JOIN GRANNY SQUARES WITH THE FLAT SLIP STITCH SEAM
HELPFUL NOTES
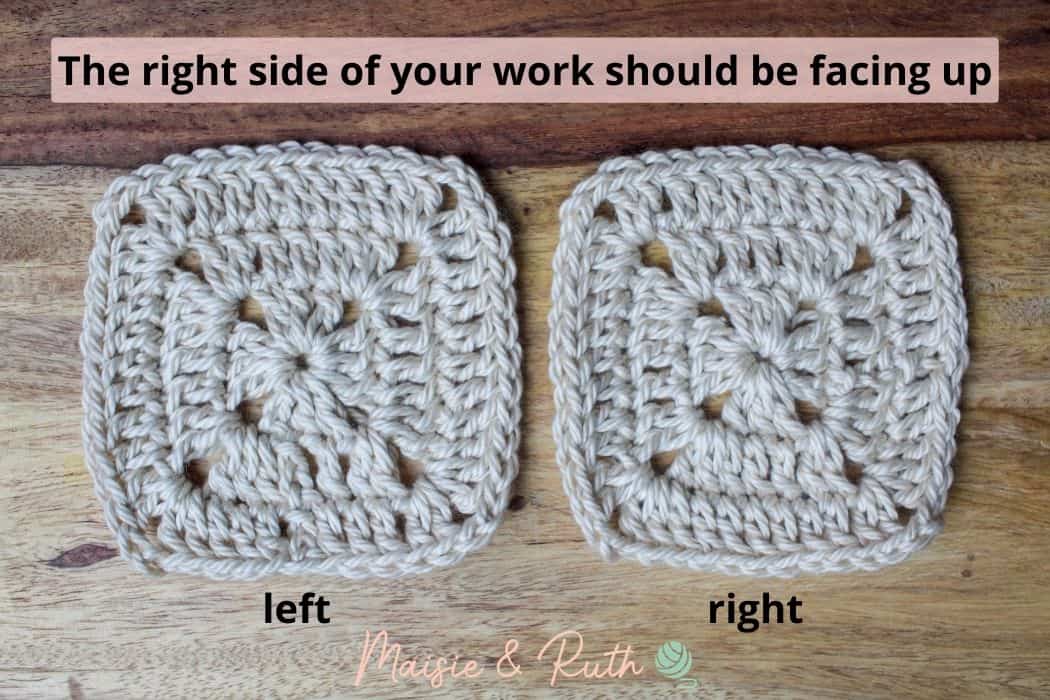
- You will join your granny squares with the right side facing up.
- It is important to ensure that your yarn is always at the back of your work.
- You will join your granny squares by working through the back loops only of your stitches.
- You will insert your hook into the stitch from front to back.
- You will always start with the right square and then move onto the left square to complete the step.
STITCHES AND ABBREVIATIONS (US CROCHET TERMS)
BLO – back loop only. Insert your hook into the back loop only of the stitch or chain (do not insert your hook under both loops)
ch – chain
st(s) – stitch(es)
INSTRUCTIONS
Step 1. Select the first two squares that you wish to join and ensure that the right side (the ‘pretty’ side) of your work is facing up. You will begin working the seam on the right square:
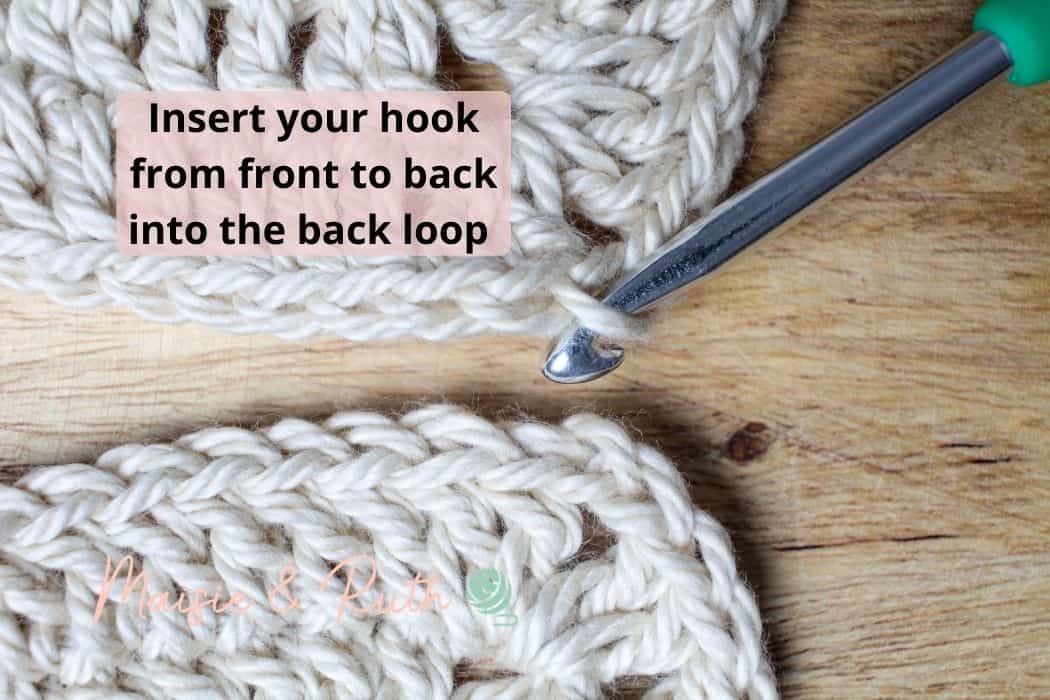
Step 2. Beginning in the ch2 corner of the right square, insert your hook from front to back into the BLO of the 2nd ch (if your square does not have any chains, insert your hook into the corner st):
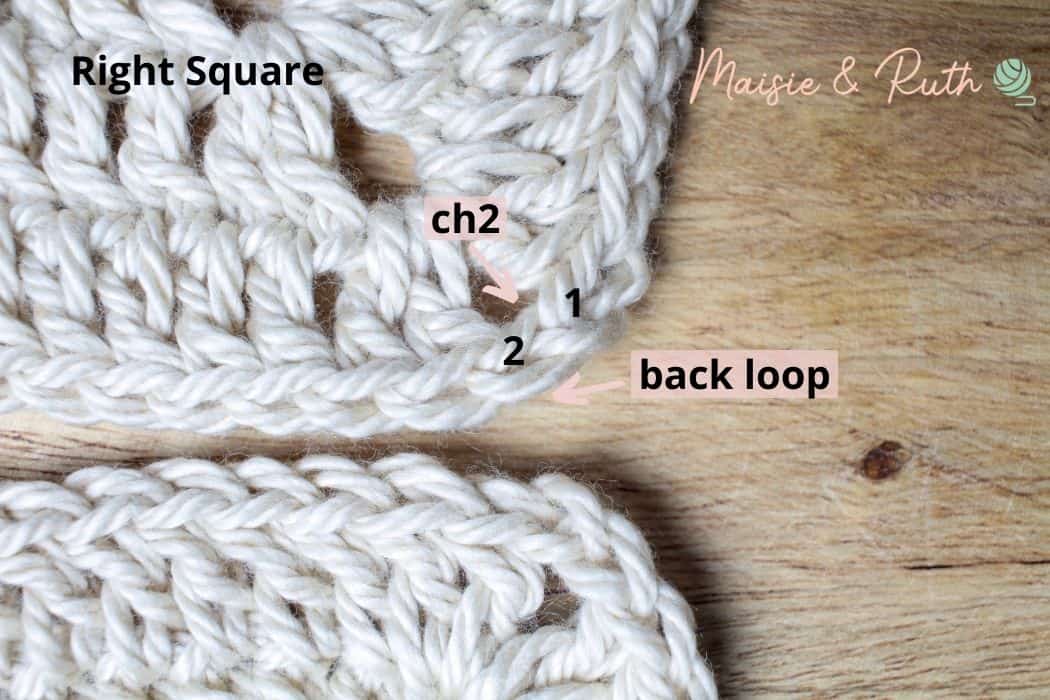
Insert your hook from front to back into the back loop of the 2nd ch:
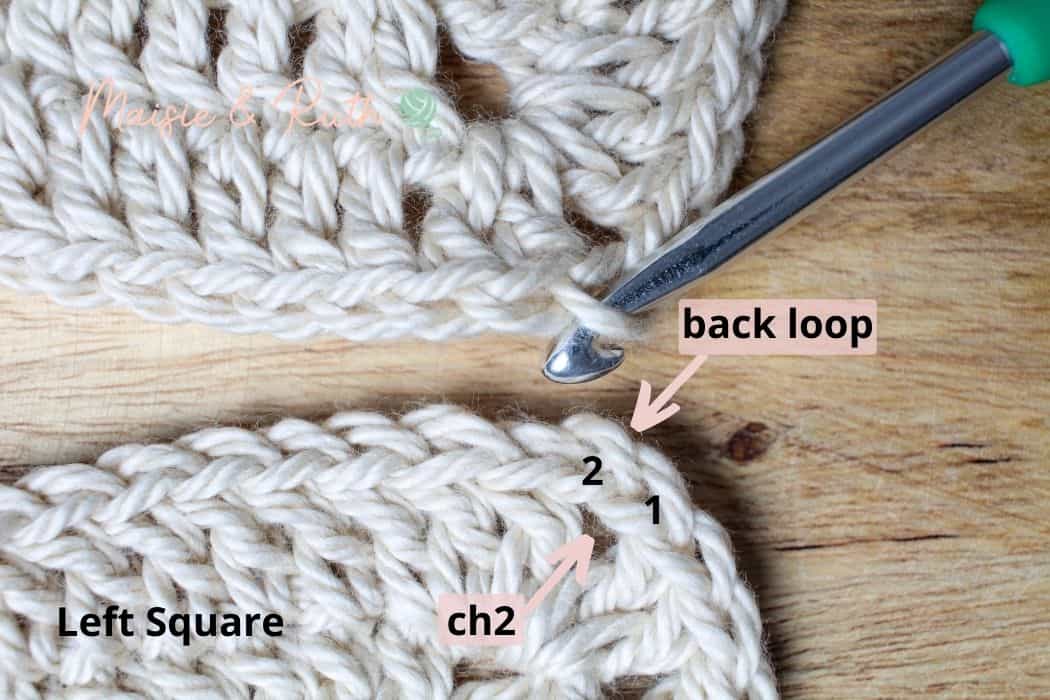
Step 3. Continuing with the ch2 corner of the left square, insert your hook from front to back into the BLO of the 2nd ch:
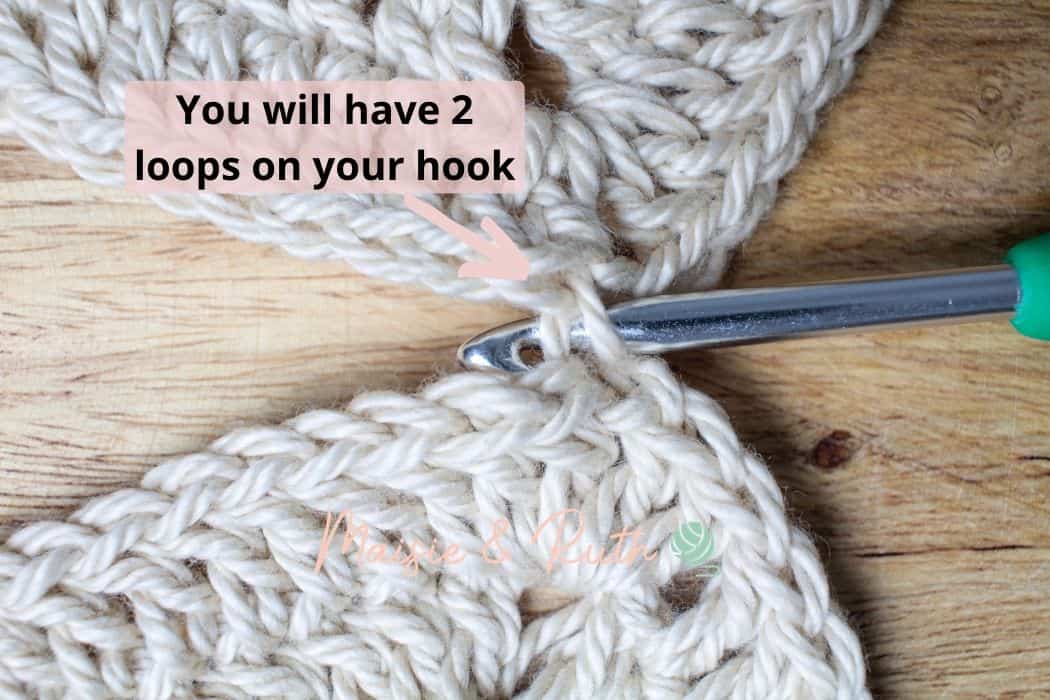
You will now have 2 loops on your hook:
Step 4. Taking your yarn that will be used to join your squares, make a slip knot and place this on your hook. You will have 3 loops on your hook:
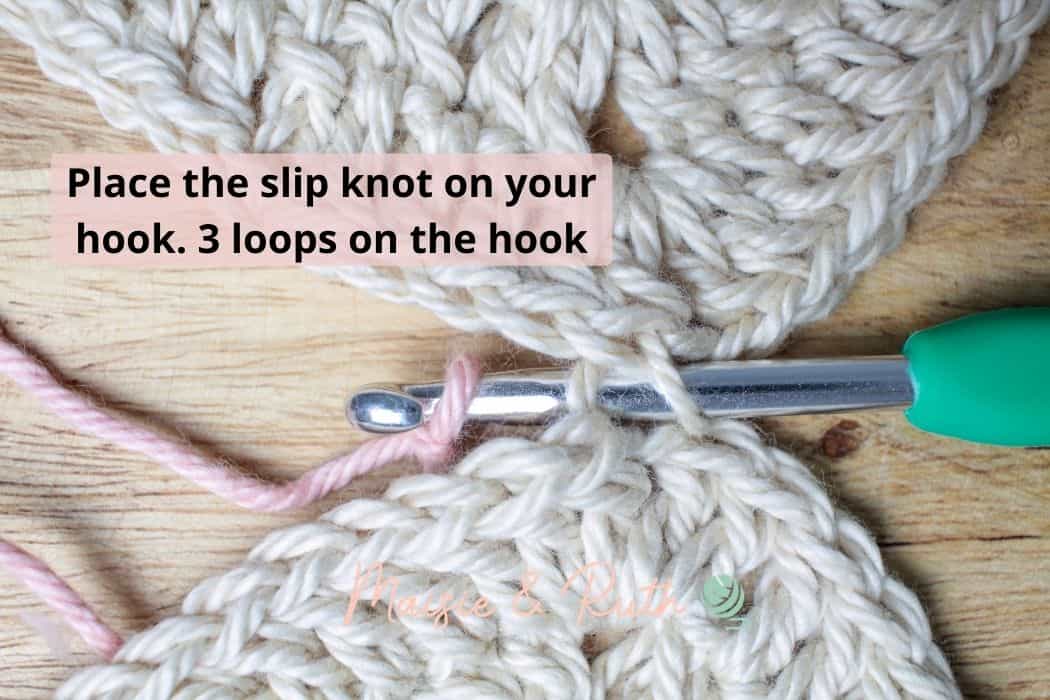
Step 5. Pull the slip knot through both loops on your hook to join the squares together. 1 slip stitch complete:
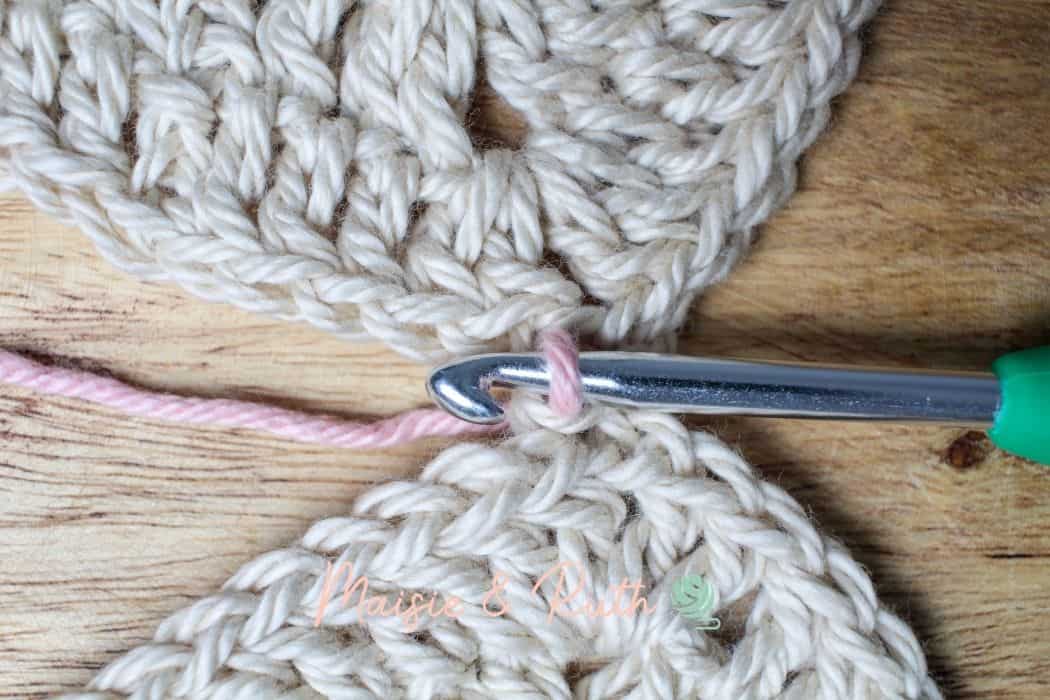
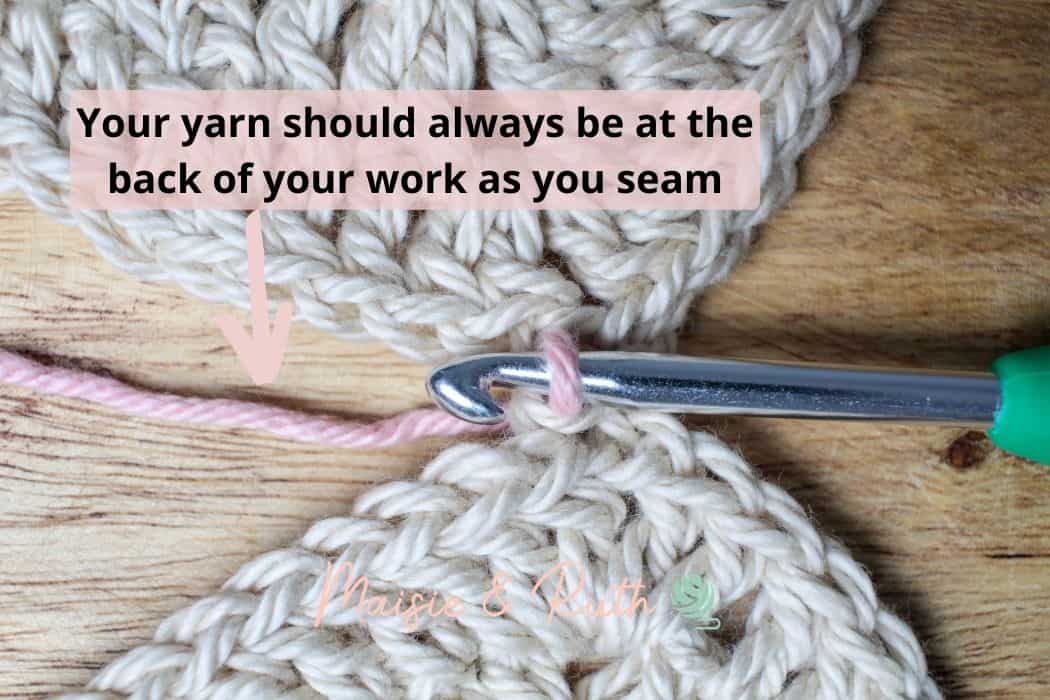
Step 6. Move over to the right square and insert your hook from front to back into the BLO of the next st. You will have 2 loops on your hook:
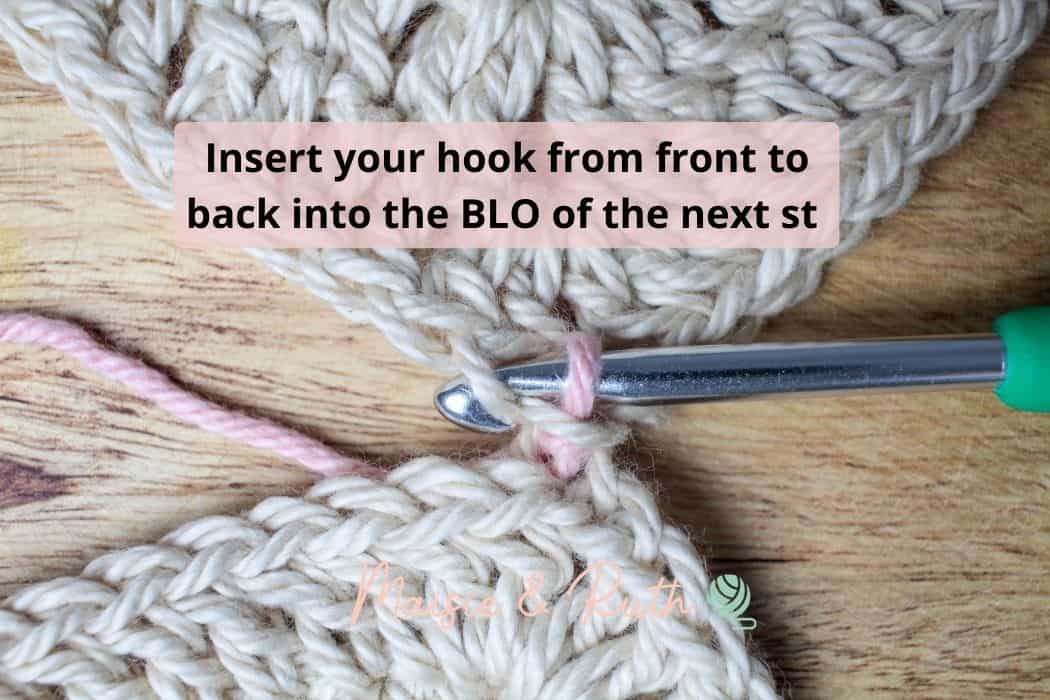
Step 7. Now move over to the left square and insert your hook from front to back into the BLO of the next st:
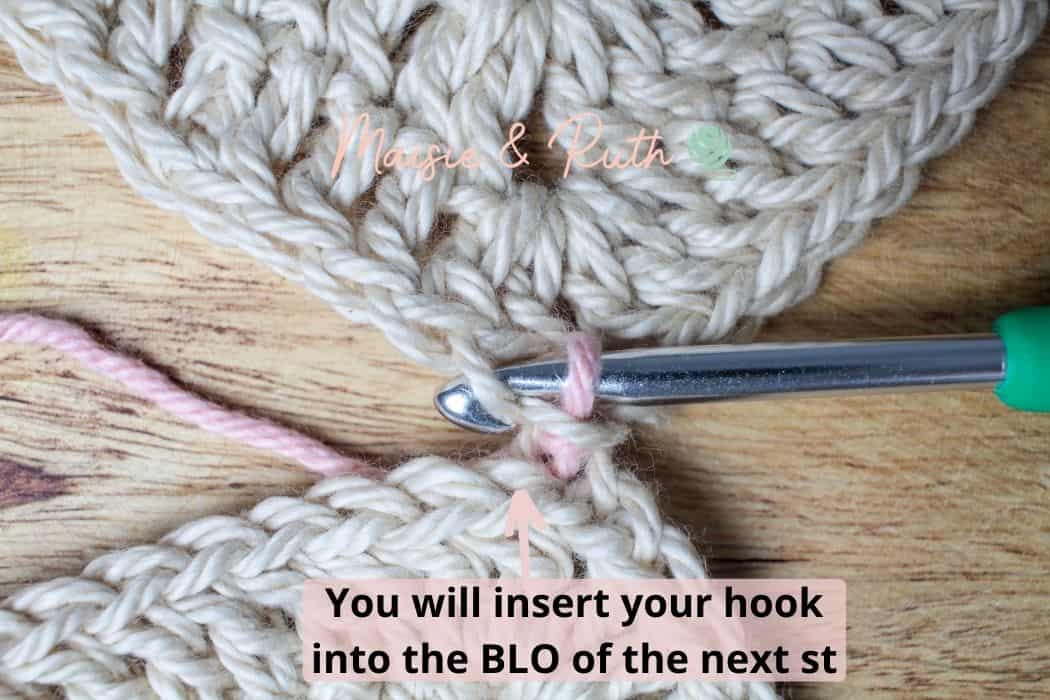
You will now have 3 loops on your hook:
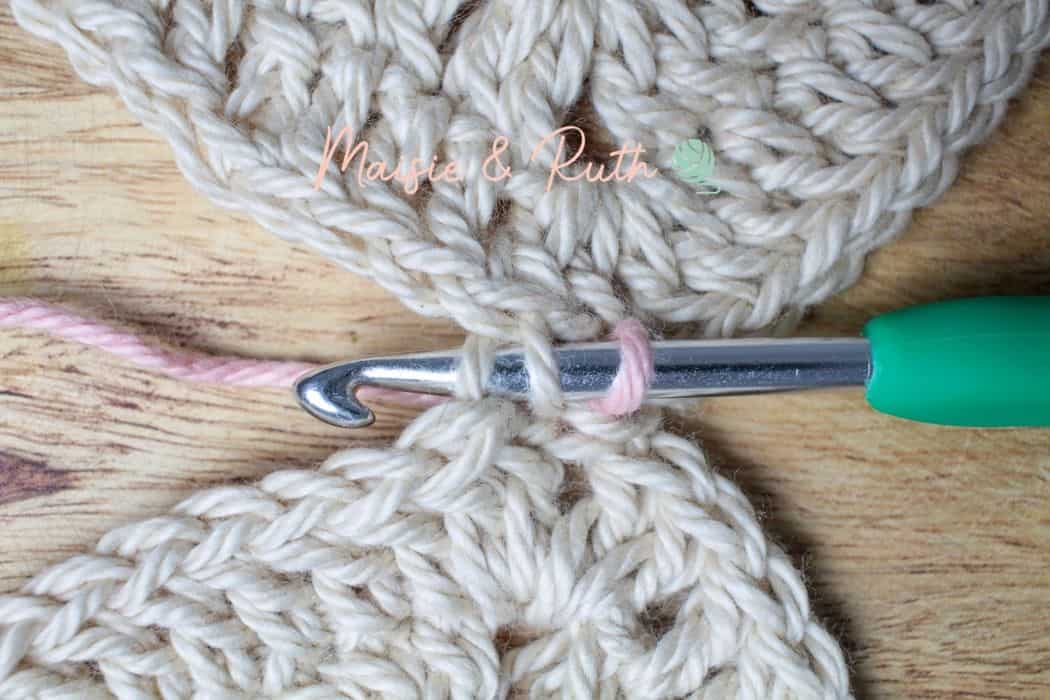
Step 8. Yarn over hook:

Pull yarn through all 3 loops. 1 slip stitch complete:
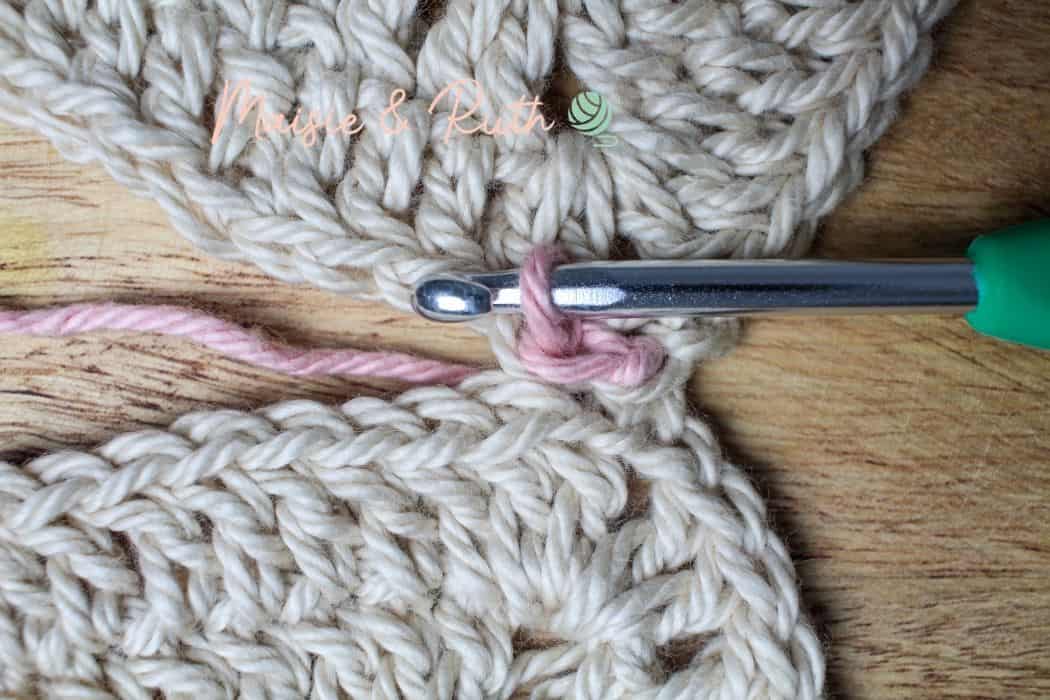
Step 9. Repeat steps 6 -8 until you get to the next ch2 corner space:
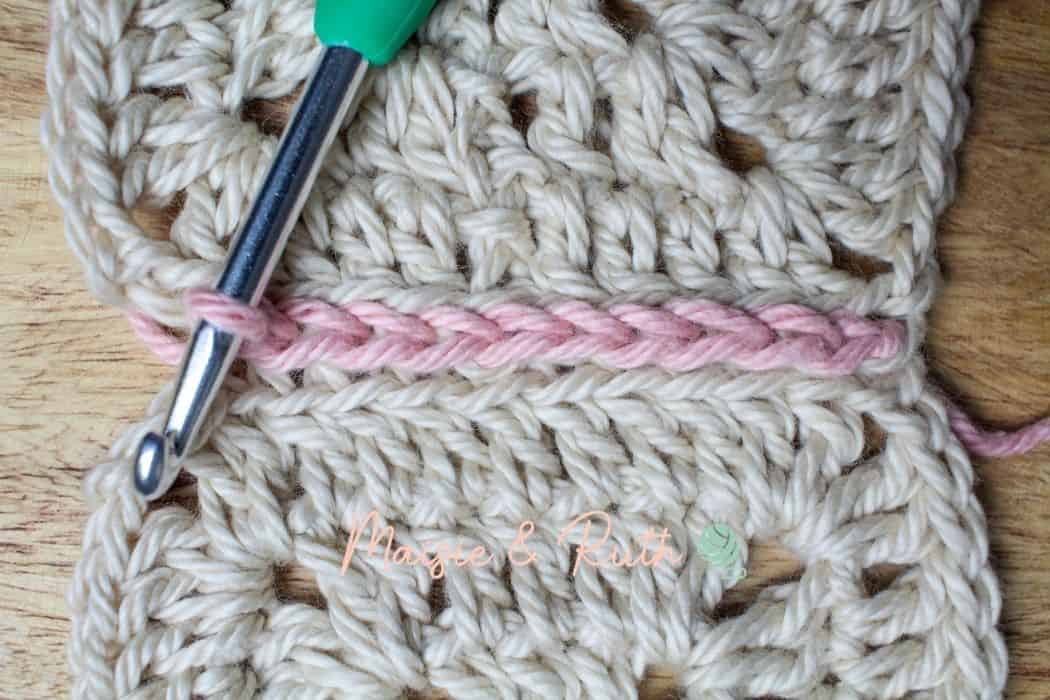
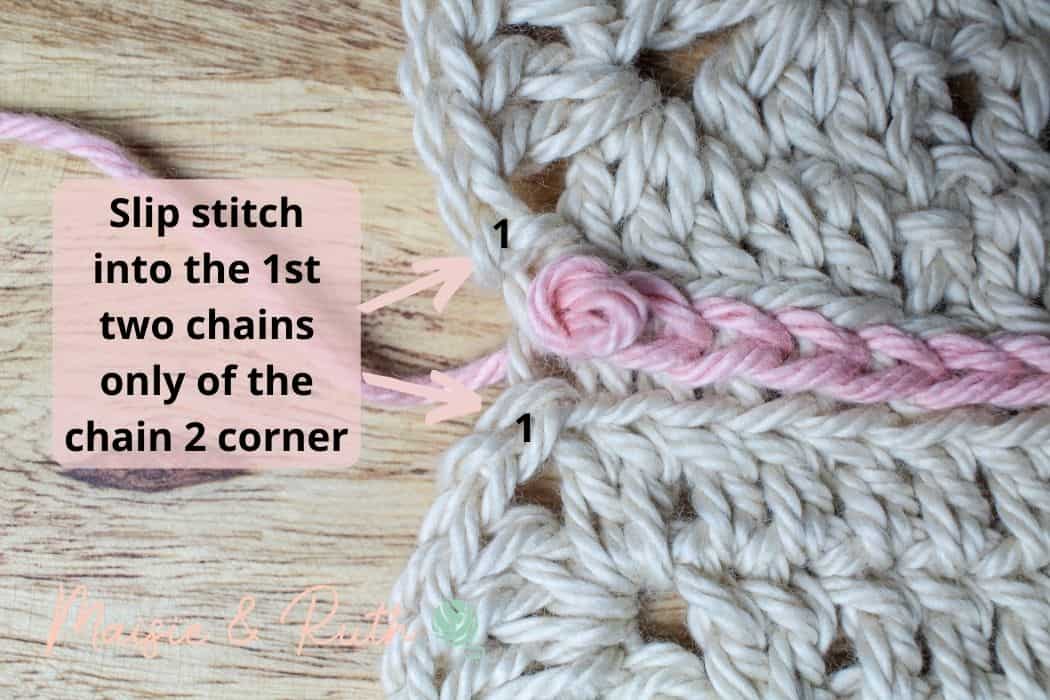
Step 10. When you arrive at the next chain 2 corner, slip stitch into the first two chains only (you will work the remaining chains at a later date):
Step 11. Grab the next 2 squares that you wish to join and lay them out on your work surface:
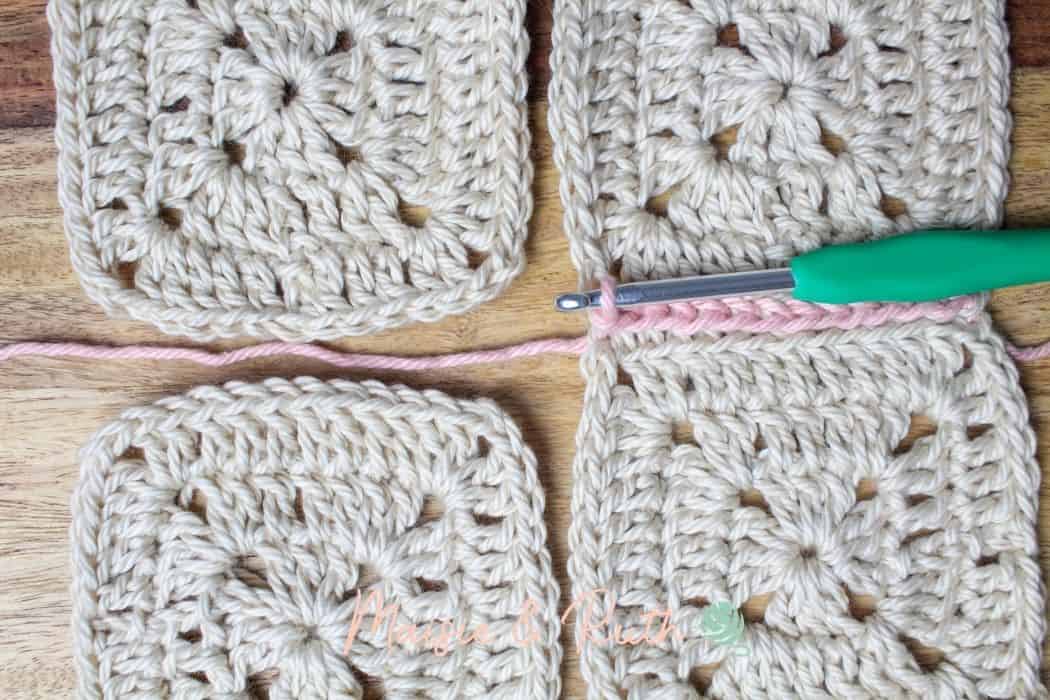
Step 12. Repeat step 2 (beginning in the ch2 corner of the right square, insert your hook from front to back into the BLO of the 2nd ch):
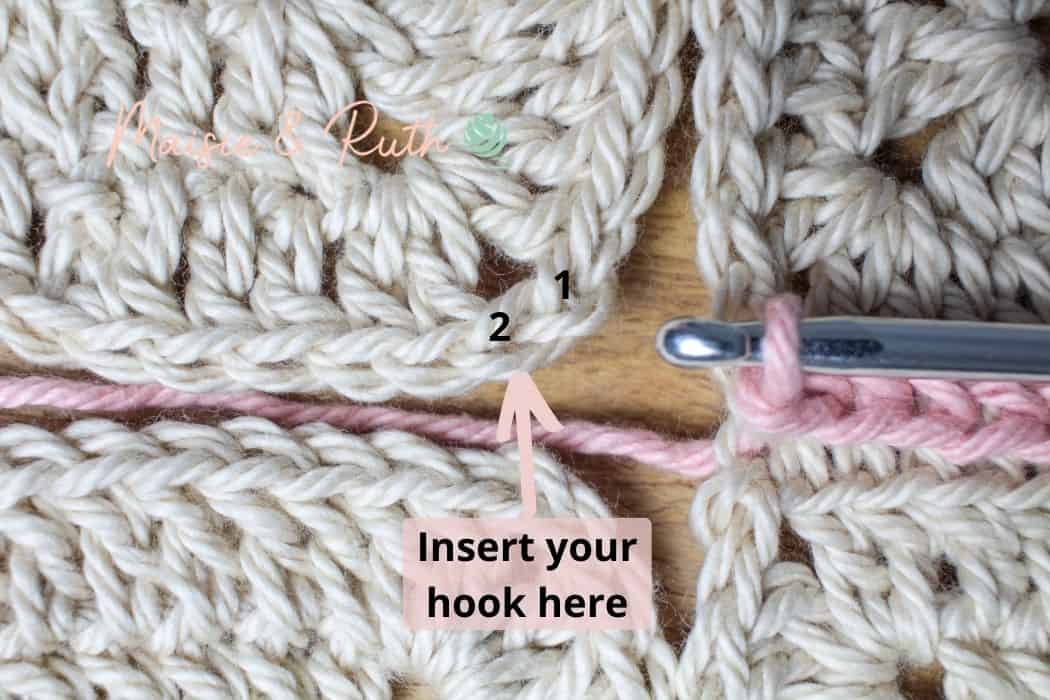
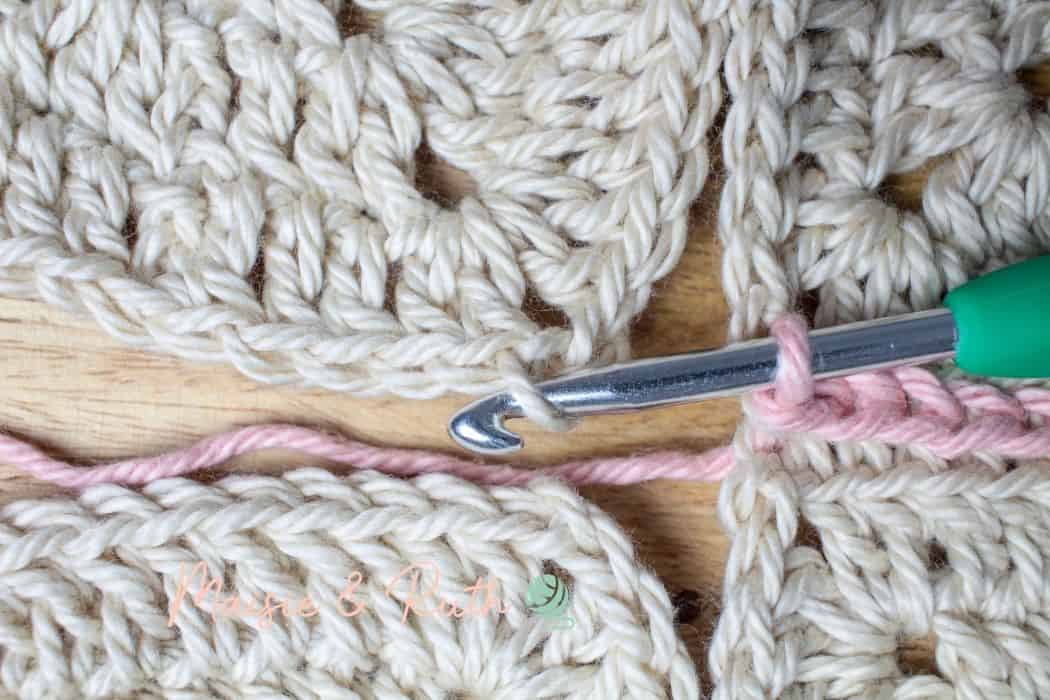
Step 13. Repeat step 3 (continuing with the ch2 corner of the left square, insert your hook from front to back into the BLO of the 2nd ch):
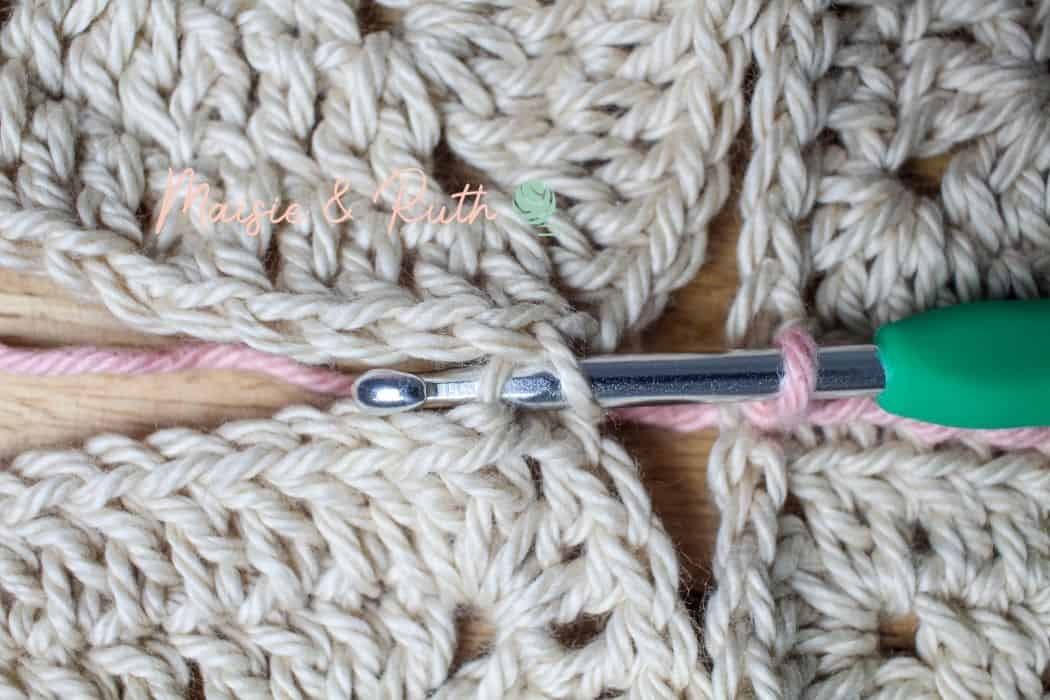
Step 14. Yarn over hook, 3 loops remain on your hook:
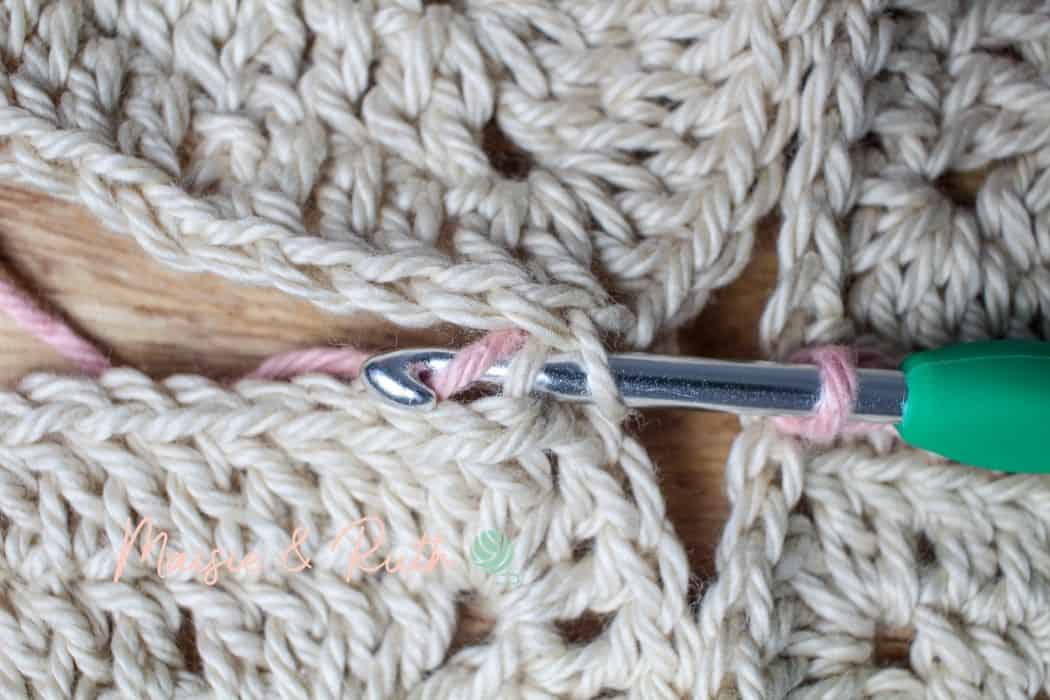
Pull yarn through all 3 loops on hook:
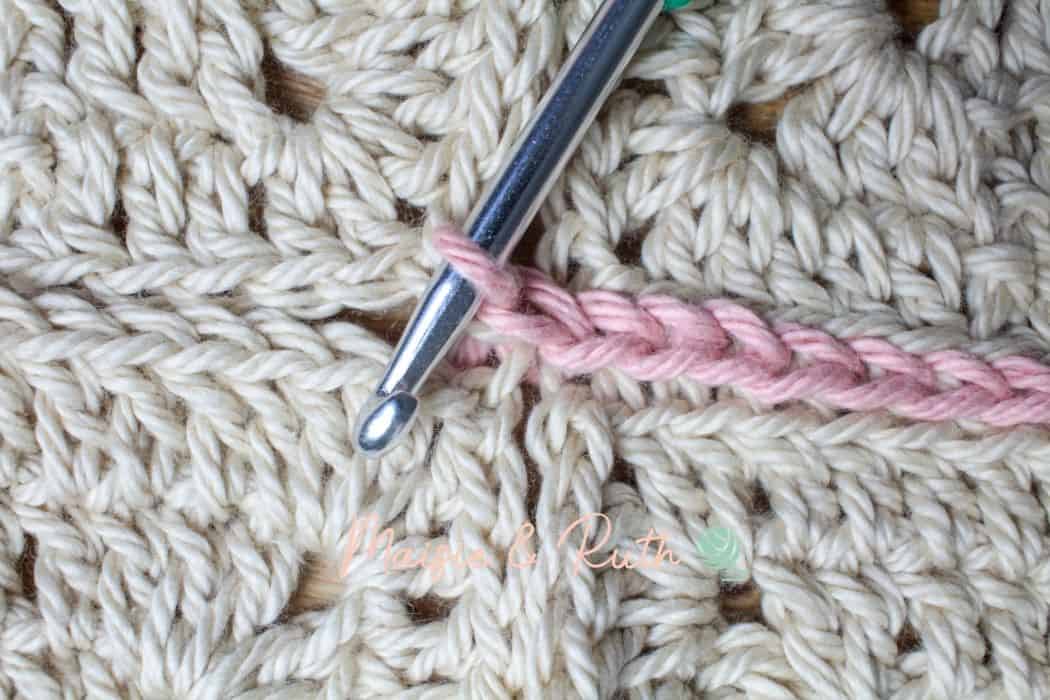
Continue seaming the squares together as previously instructed:
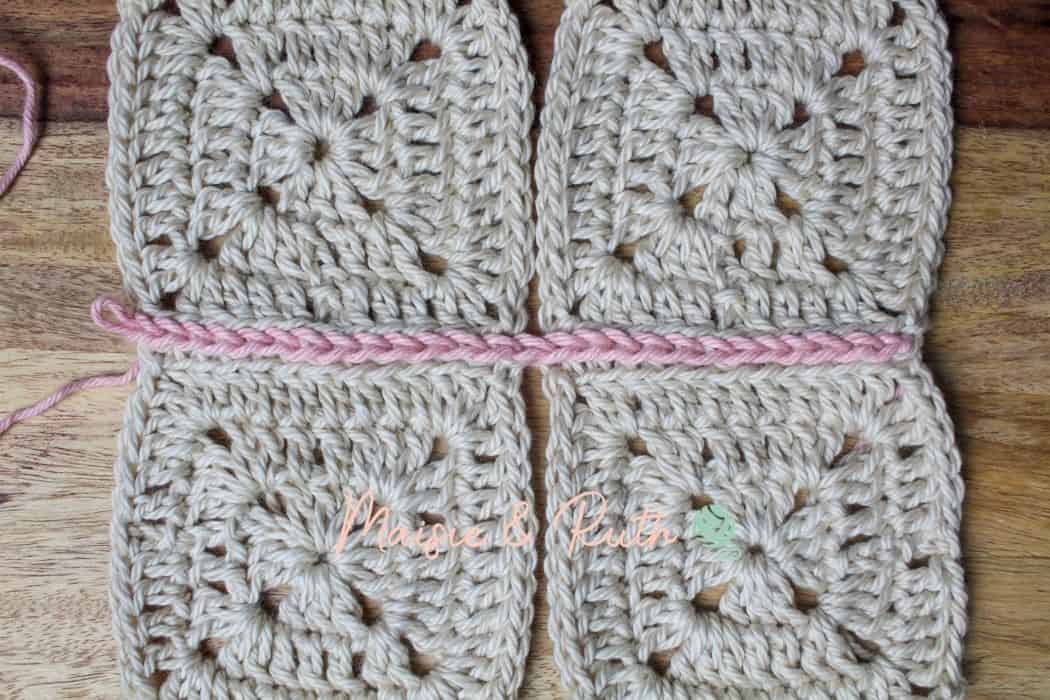
When you get to the end of a row and have no more granny squares to join, slip stitch into both chains of the last chain 2 corner for a more secure seam. Cut yarn, fasten off and weave in ends:
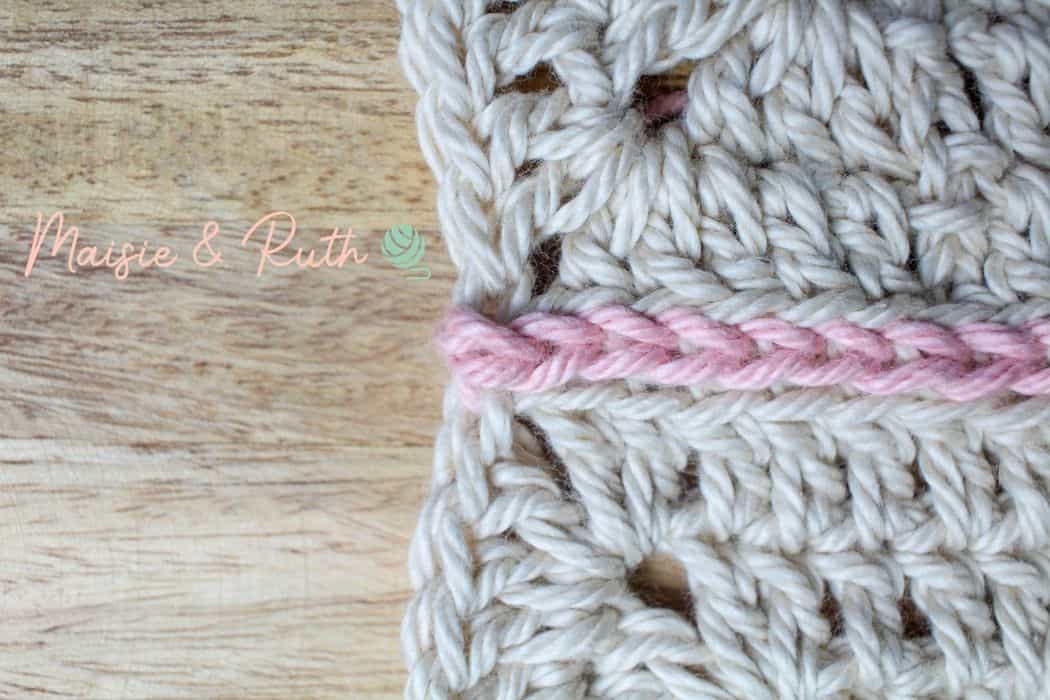
It is now time to seam the squares horizontally (or vertically depending on what way you’re looking at them!):
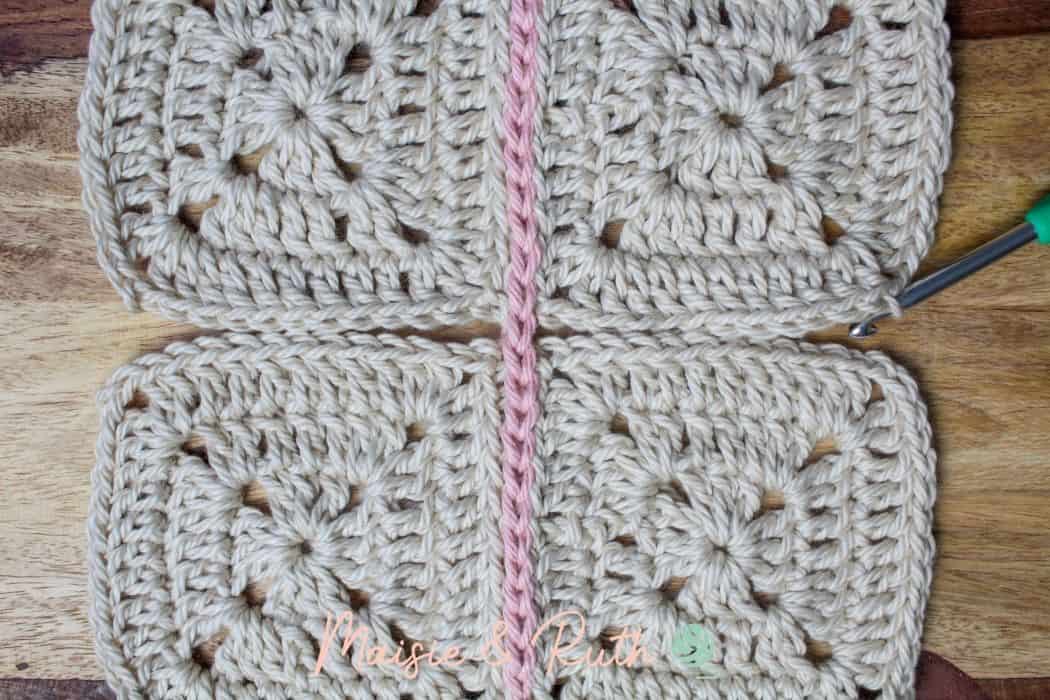
The process is the same as previously shown, so follow the steps beginning from step 2 detailed above.
When you arrive at the intersection, you will see that there are 2 unworked chain stitches of the chain 2 corner:
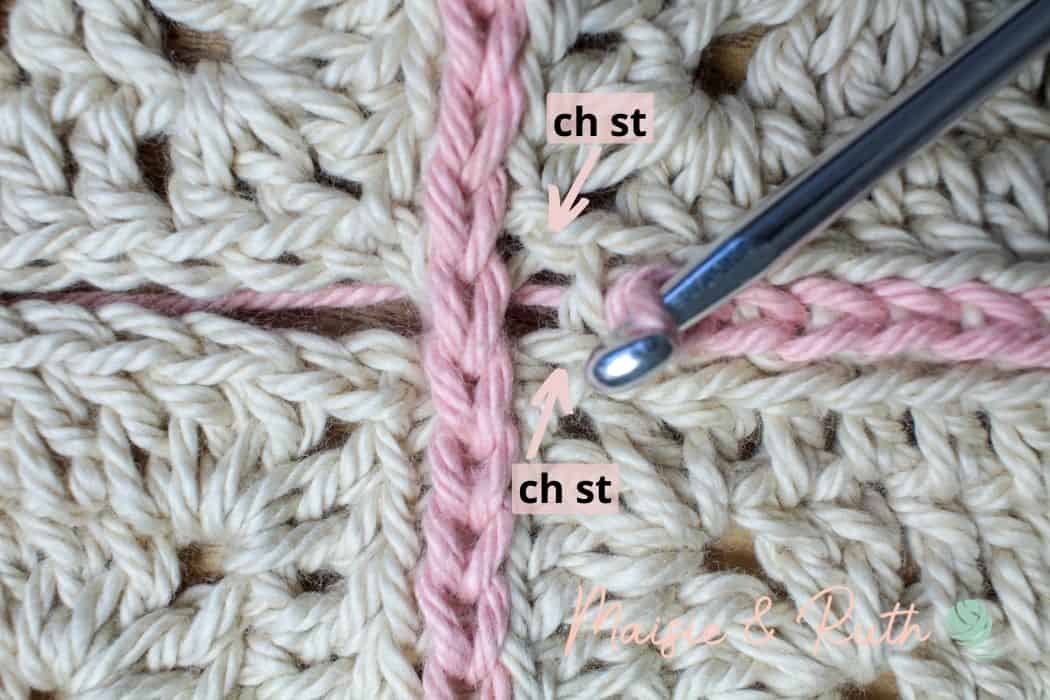
Seam these chains together:
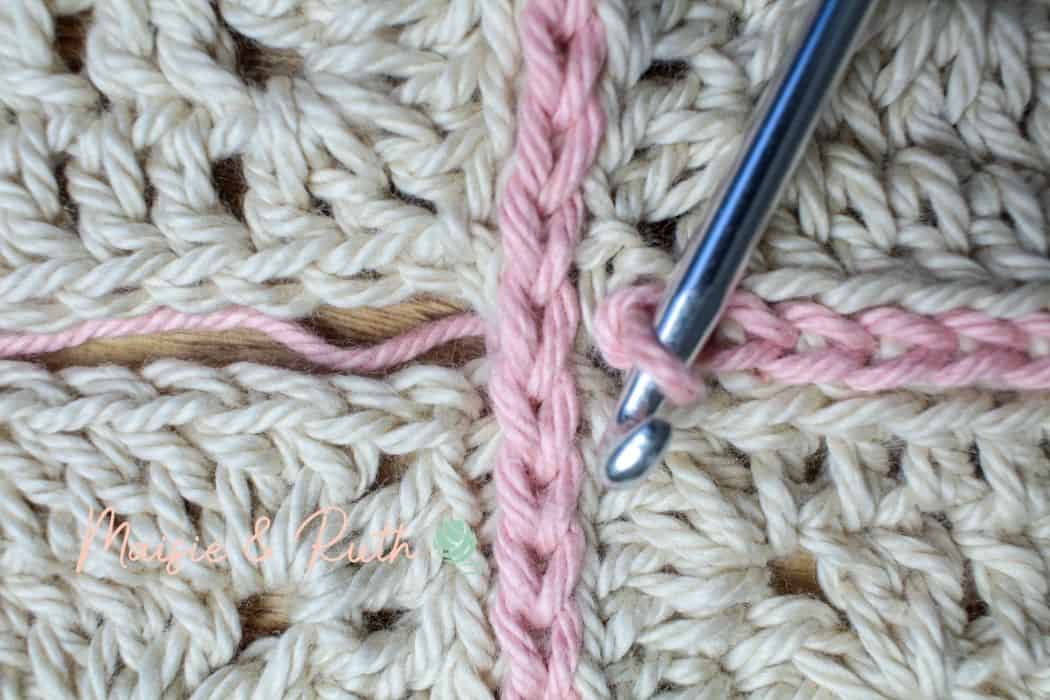
Then chain 1.
On the other side of the intersection, there will be 2 unworked chain stitches:
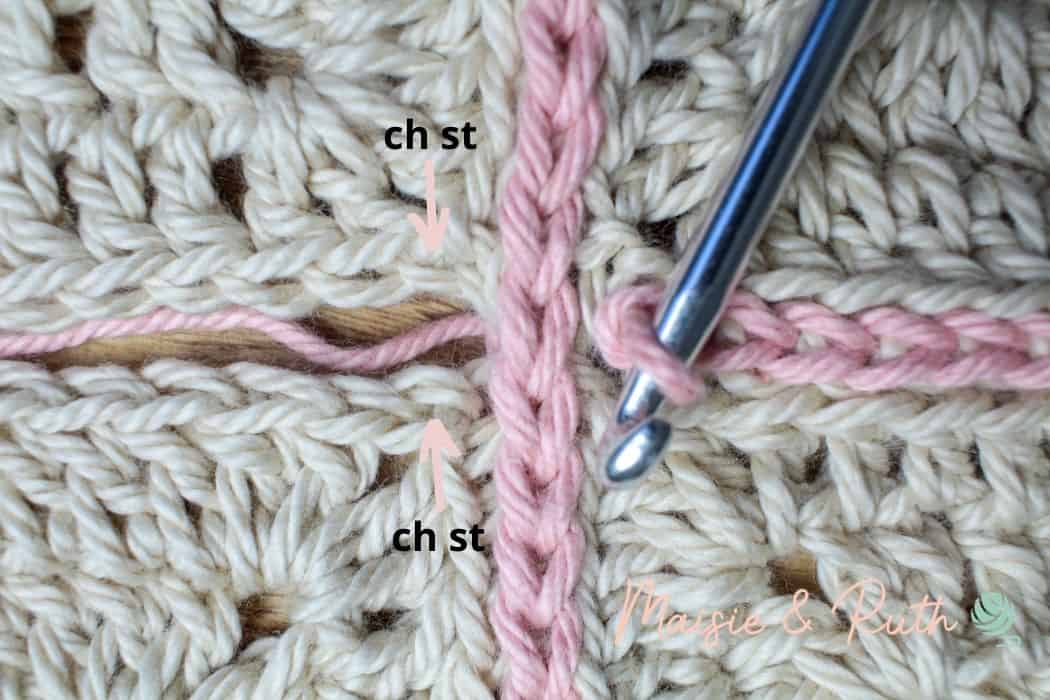
Working over the existing seam, join these 2 chains on the other side of the intersection. Continue working in the same manner as before:
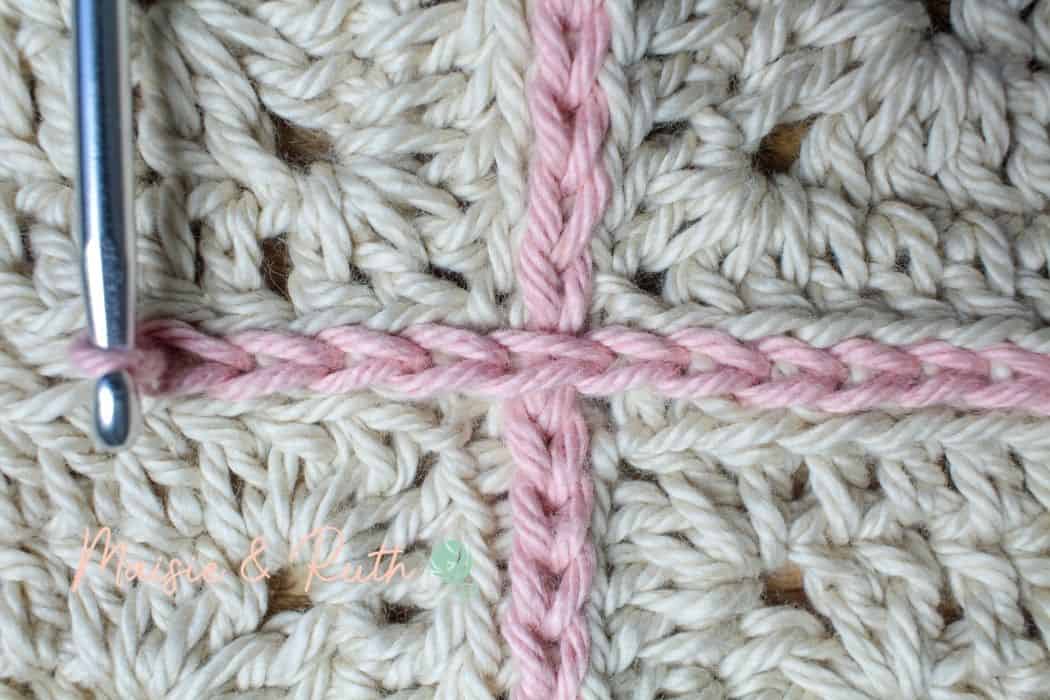
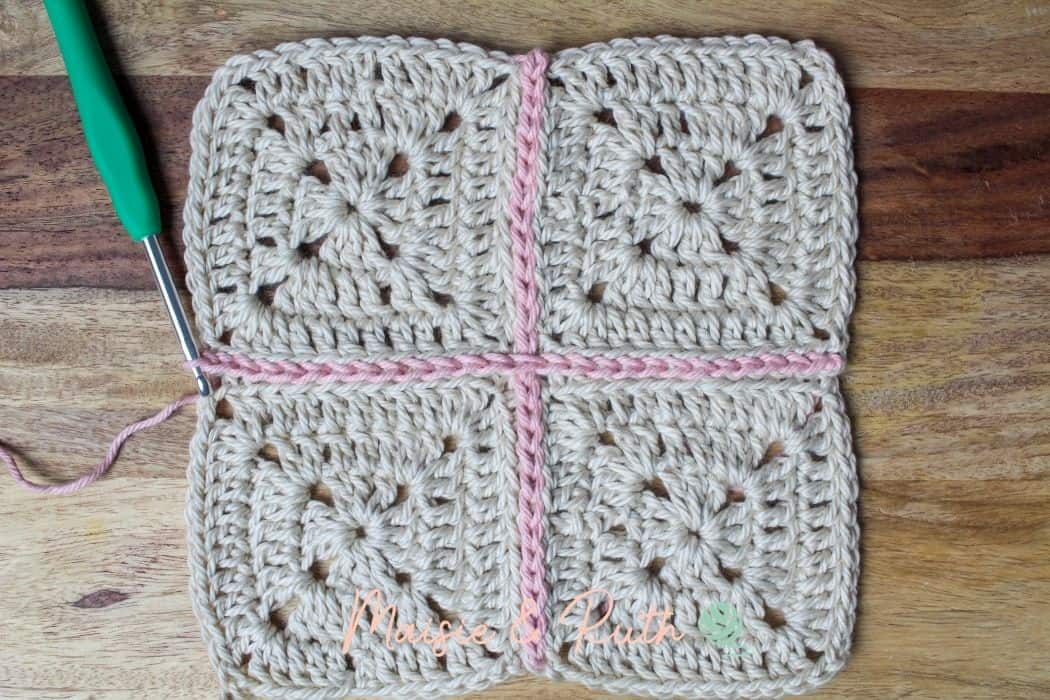
Seam all the necessary squares together and once finished weave in all ends.
VIDEO TUTORIAL
You can view the video for how to join your crochet squares with the flat slip stitch seam here
I’ve divided the tutorial up into sections, so you can jump to whatever part you need immediately (you’ll find the chapters in the description box of the video).
Don’t forget to subscribe to my channel so you don’t miss out on any new videos I upload!
PIN IT FOR LATER!
Did you find this tutorial in how to join granny squares useful?
If you’ve tried this way of joining, how does it compare with the other methods of seaming your granny squares? Leave me a comment below! 😃
MORE CROCHET TUTORIALS
USEFUL RESOURCES
- Warm Up America. This non-profit foundation is always accepting blankets and other knit and crochet items that are then distributed to agencies such as nursing homes, hospitals, hospices and homeless shelters, to name a few.
- Project Linus (UK). Donate your handmade crochet blankets to the project for onwards distribution to local hospitals, children’s hospices, women’s refuges and many other services.
Happy crocheting,

