

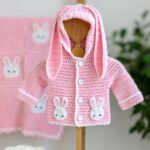
Introducing the perfect addition to any baby’s wardrobe – a cute, quick and easy Crochet Bunny Baby Hoodie Pattern!
This adorable pattern is FREE and comes with a step-by-step video tutorial to help you every step of the way.
Scroll down for the free instructions. However, if you would prefer an ad-free, printable version, then you can purchase it here

EASY & QUICK PROJECT
This sweet crochet bunny baby hoodie is both practical and stylish.
Basic crochet stitches and techniques are used to make this hoodie. And if you do get stuck at any point, don’t worry! The detailed video tutorial will help you every step of the way.

Complete the set: Bunny Baby Blanket, Bunny Booties, Bunny Teether and Baby Hat that can be made alongside your crochet bunny baby hoodie.
SUPER CUTE DESIGN
I’ve showcased this hoodie using pink and white yarn. However, you can choose your own colour scheme and make it using your favourite yarn. With it’s long bunny ears and super cute bunny appliques, this cardigan is sure to delight everyone who sees it!

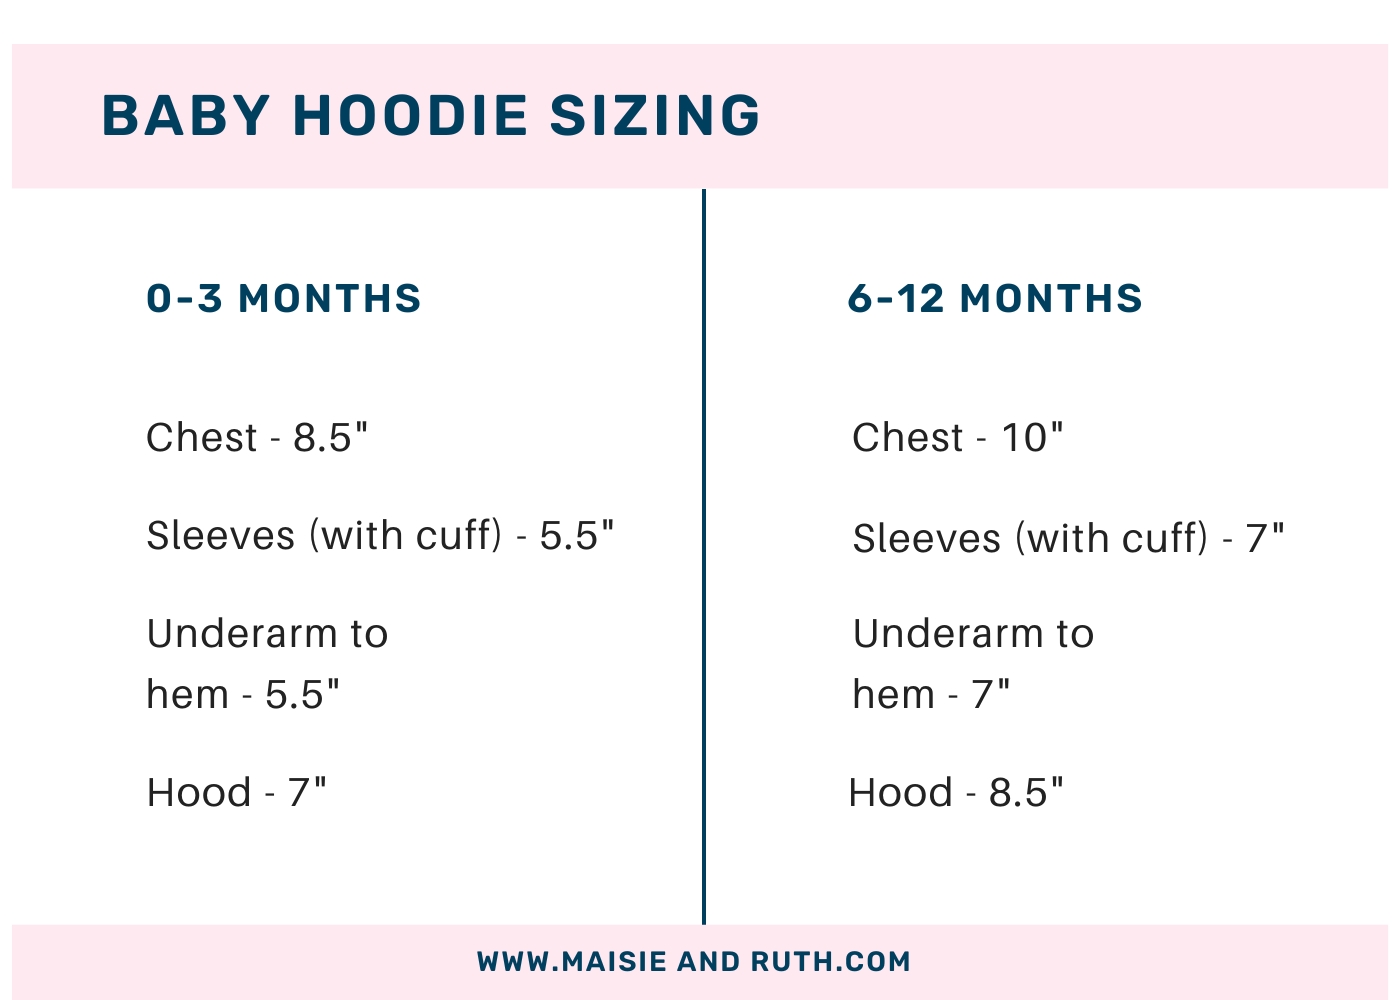
FINISHED SIZES
The pattern for this crochet bunny baby hoodie is available in eight sizes.
The free version below covers ages 0-3 months and 6-12 months.
If you’d like to make sizes newborn, 3-6 months, 1-2 years, 2-3 years, 3-4 years and 4-5 years, you can find the instructions (along with the sizes covered in this article) in the PDF version.

NOVELTY GARMENTS & SAFETY
WARNING: Due to the bunny ears, please monitor baby when they are wearing this hoodie and never leave baby unattended whilst wearing it.

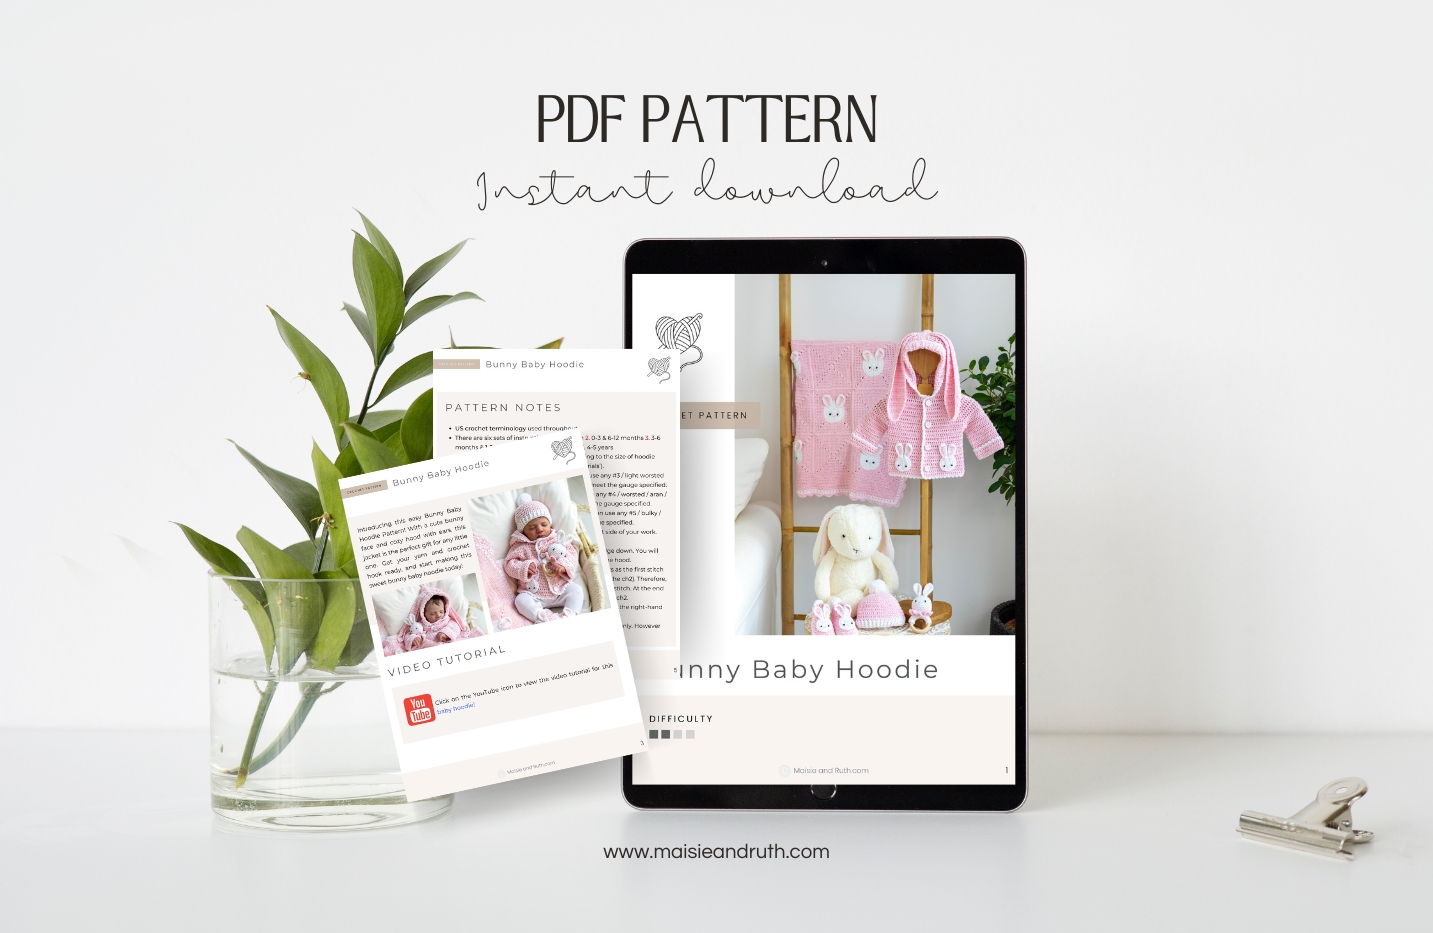
PDF PRINTABLE PATTERNS!
If you would prefer an ad-free, printable version of this crochet bunny baby hoodie, you can purchase it from my Etsy store
This hoodie is also part of a PDF Pattern Bundle! Check it out here
Thank you for supporting my shop!
VIDEO TUTORIAL
Crochet along with me to make this crochet bunny baby hoodie!
Just click on the play button below to start watching the video (you can view the full tutorial on the Maisie and Ruth YouTube channel).
PIN ME FOR LATER!
Follow me on Pinterest

CROCHET BUNNY BABY HOODIE: A FREE PATTERN
This article for a crochet bunny baby hoodie may contain affiliate links, which means I’ll receive a commission if you purchase through my links, at no extra cost to you. Please read full disclosure for more information.
Please carefully read all the information below.

PATTERN NOTES
- US crochet terminology used throughout.
- WARNING: Due to the bunny ears, please monitor baby when they are wearing this hoodie and never leave baby unattended whilst wearing it.
- There is one set of instructions, which cover ages 0-3 months and 6-12 months (the other sizes mentioned above can be found in the ad-free PDF version, which is available for purchase
- Use the weight of yarn and hook size according to the size of hoodie that you wish to make (details below in ‘Materials’).
- For size 0-3 months, you can use any #3 / light worsted / DK / 8 ply yarn for this project, providing you meet the gauge specified.
- For age 6-12 months you can use any #4 / worsted / aran / 10 ply yarn for this project, providing you meet the gauge specified.
- The hoodie is worked in one piece from the neck edge down. You will then re-attach your yarn to work both sleeves and the hood.
- The hoodie is worked in one piece from the neck edge down. You will then re-attach your yarn to work both sleeves and the hood.
- Note 1 on turning chains: when the ch1 or ch2 turning chain counts as the first stitch of the next row (insert a stitch marker into the top of the ch2), you should make the first stitch of the row in the next stitch. At the end of rows, make sure that you crochet into the top of the ch1 or ch2.
- Note 2 on turning chains: when the ch1 or ch2 turning chain does not count as the first stitch of the next row, you should make the first stitch of the row in the same stitch (at the base of the ch1 or ch2). At the end of rows, make sure that you do not crochet into the top of the ch1 or ch2.
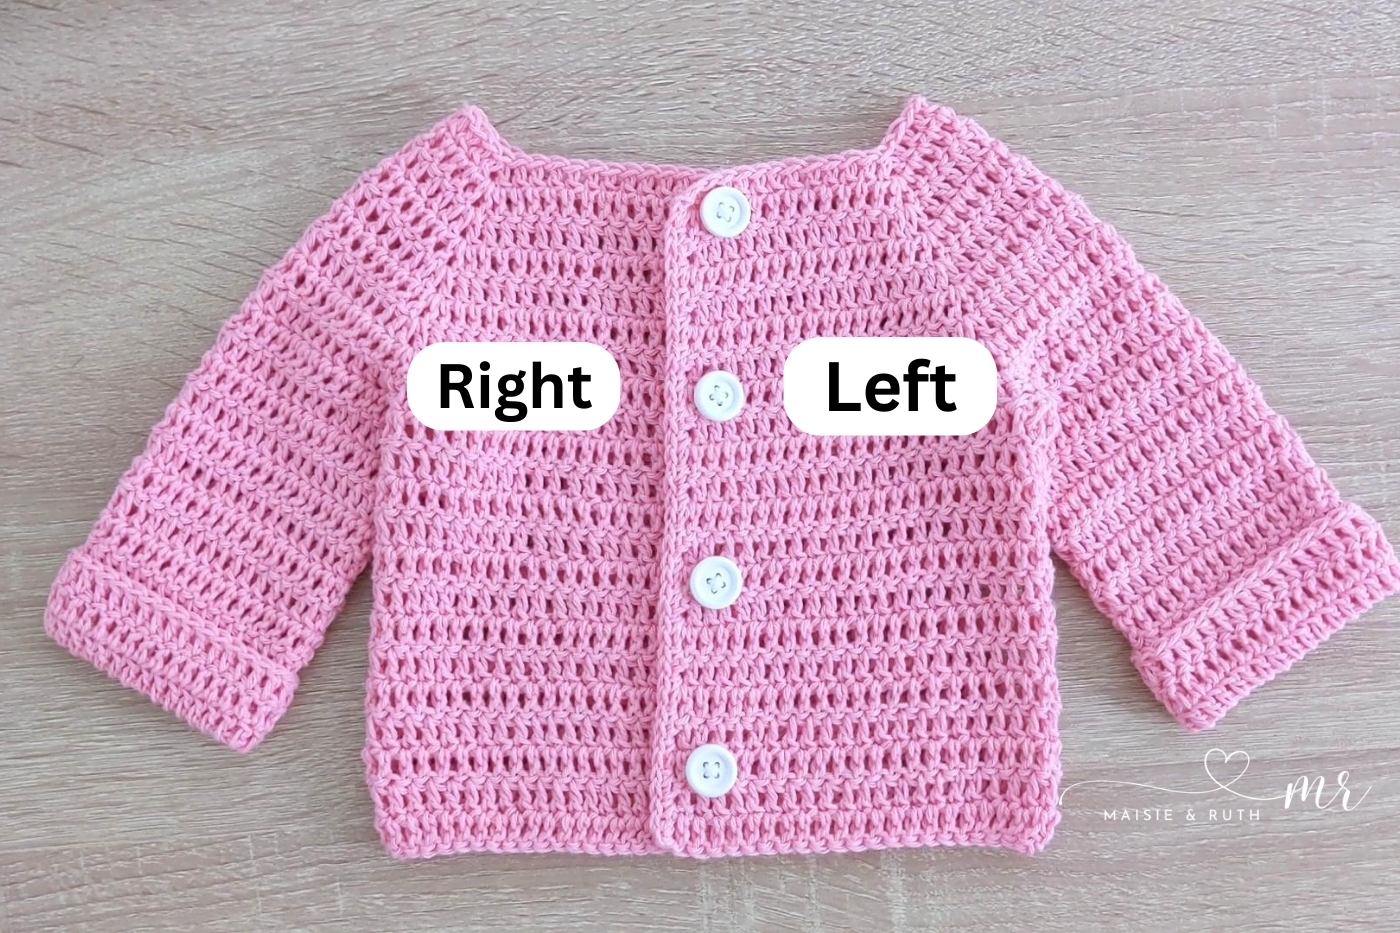
- When working the yoke: there are two extra stitches on the right-hand side as this is where you will sew your buttons on.
- The video tutorial covers size 0-3 months & 6-12 months only. However you can use it as a guide when making the other sizes.
- When working the ears on the bunny applique, you will change from pink to white as follows: Work the last single crochet stitch as normal, up until the point where you have 2 loops left on your hook. Grab the new colour and fold it so that you form a loop (leave a 5 – 6 inch tail for weaving in later). Place the loop on your hook and pull it through the remaining 2 loops on your hook. Cut the yarn in the old colour, again making sure that you leave a 5 – 6 inch tail for weaving in.
- Throughout the pattern, I refer to the left and right side of your work. Please see photo below:
SUPPLIES
- 0-3 MONTHS:
YARN: Any category #3 / light worsted / DK / 8 ply yarn.
YARN FOR HOODIE (COLOUR A):
Stylecraft Naturals Bamboo & Cotton, 273yds / 3.5oz (250m / 100g). Colour shown: Pale Pink (7132). For this size you’ll need:
0-3 months: 3 balls
YARN FOR BUNNY APPLIQUE (COLOURS B & C):
Stylecraft Naturals Bamboo & Cotton, 273yds / 3.5oz (250m / 100g).You’ll need just a scrap amount of yarn from 1x ball in the following colours:
Colour B: Chalk (7127).
Colour C: Pitch (7153)
CROCHET HOOKS:
HOODIE: G (4MM)
BUNNY APPLIQUE: 3MM
BUTTONS:
0-3 months – 4 x 15mm buttons
- Yarn needle
- Scissors
- 2 x stitch markers
- 6-12 MONTHS
YARN: Any category #4 / worsted / aran / 10 ply yarn.
YARN FOR HOODIE (COLOUR A):
Stylecraft Special Aran, 214 yds / 3.5 oz (196m / 100g. For this size you’ll need:
6-12 months: 4 balls
YARN FOR BUNNY APPLIQUE (COLOURS B & C):
Stylecraft Special Aran, 214 yds / 3.5 oz (196m / 100g). You’ll need just a scrap amount of yarn in the following colours:
Colour B. White (1001)
Colour C. Black (1002)
CROCHET HOOKS:
HOODIE: H (5mm)
BUNNY APPLIQUE: G (4mm)
BUTTONS:
6-12 months – 4 x 20mm buttons
GAUGE / TENSION
In order to achieve the correct size and fit, it is important to test your gauge with a sample square before you begin.
If your tension is tight (too many stitches to ″), try using a larger hook.
if your tension is loose (fewer stitches to ″), use a smaller hook.
0-3 months (G / 4mm hook):
26 stitches & 15 rows = 6″ (15cm) in double crochet
6-12 months (H / 5mm hook):
20 stitches & 12 rows = 6” (15cm) in double crochet
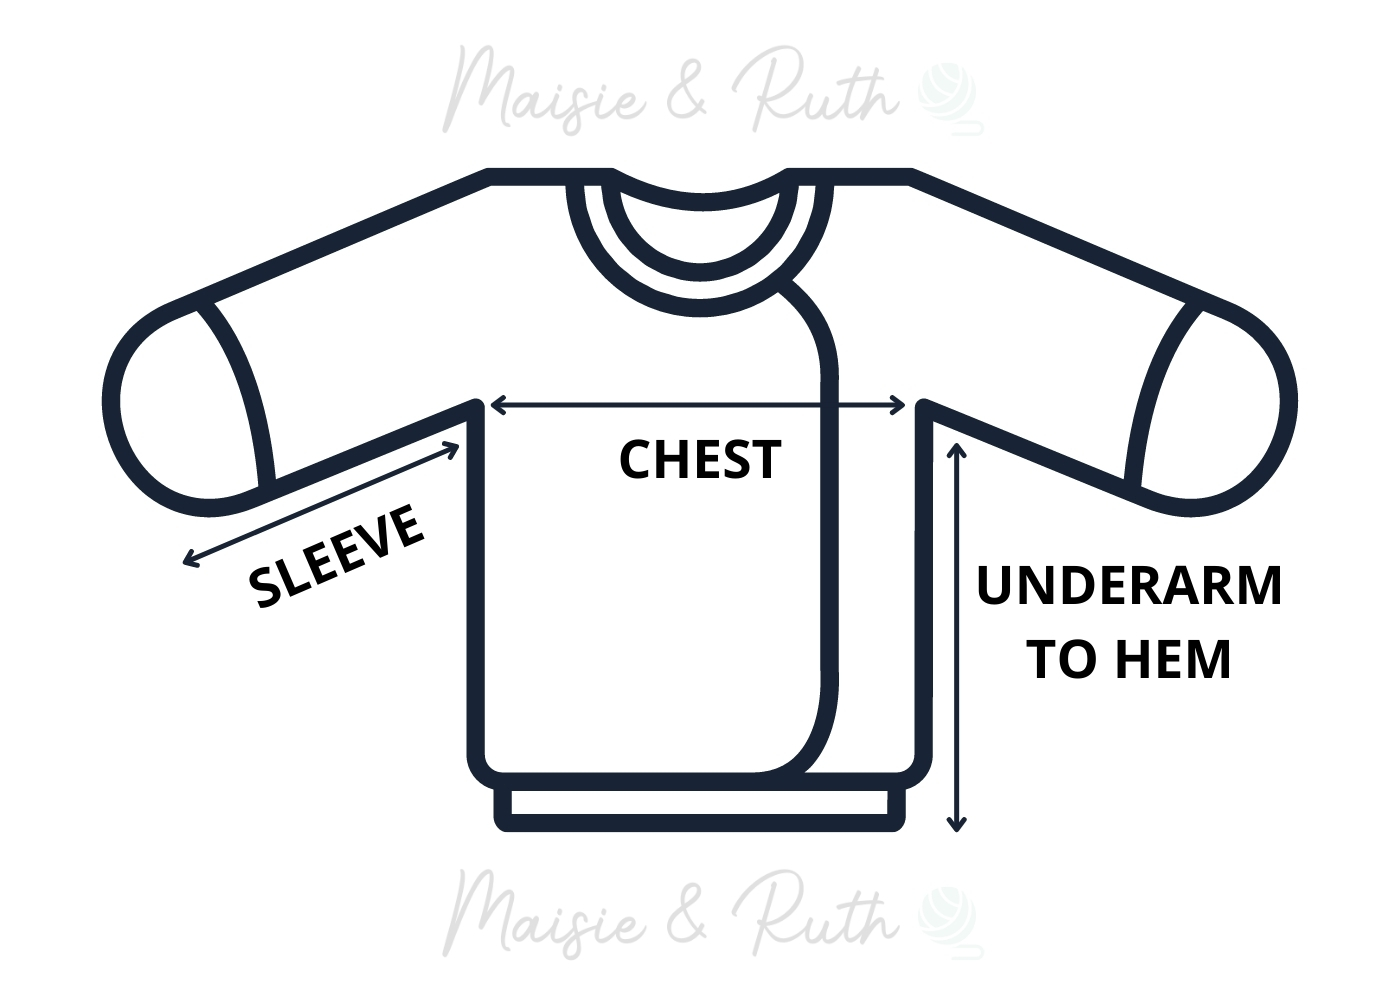
FINISHED SIZE
The sizes given are based on the standard measurements from the Craft Yarn Council. The cardigan has been designed with some positive ease, which means that it will quite comfortably fit over clothing.
STITCHES & ABBREVIATIONS (US CROCHET TERMS)
beg – beginning
BH – buttonhole
ch(s) – chain(s)
dc – double crochet: Yarn over (yo), insert hook into stitch, yo, pull up a loop (3 loops on hook). Yo, pull through 2 loops (2 loops on hook). Yo, pull through remaining 2 loops. 1 double crochet completed.
hdc – half double crochet: Yarn over (yo), insert hook into stitch, yo, pull up a loop (3 loops on hook). Yo, pull through all 3 loops. 1 half double crochet completed.
sc – single crochet: Insert hook into stitch, yarn over (yo), pull up a loop (2 loops on hook). Yo, pull through both loops on hook. 1 single crochet completed.
sc2tog – single crochet two together: Insert your hook into stitch, yarn over (yo) pull up a loop (2 loops on your hook). Insert your hook into the following stitch, yo, pull up a loop (3 loops on your hook). Yarn over, pull through all 3 loops. One sc2tog complete.
sk – skip: Do not crochet into this stitch / space.
sl st – slip stitch: Insert hook into stitch, yarn over (yo), pull up a loop, you will have 2 loops on your hook. Pull the first loop through the second loop. 1 slip stitch completed.
sp(s) – space(es)
st(s) – stitch(es)
Turn: I prefer to turn my work clockwise.
* to * – Repeat instructions between asterisks as many times as directed.
( ) – Sets of stitches to be worked within one stitch or space. Or sets of stitches to be worked as many times as directed.
[ ] – The total number of stitches at the end of a row.
SPECIAL STITCHES
V-st – (1dc, ch1, 1dc) in same stitch
PATTERN INSTRUCTIONS
YOKE
With Colour A
Chain 64
OPTIONAL (for a neater edge): When working on row 1 below, work your stitches through the back bump.
Row 1. 1dc in 3rd ch from hook (skp’d 2 ch count as your 1st dc), 1dc in next 10 ch, V-st in next ch, 1dc in next 9 ch, V-st in next ch, 1dc in next 15 ch, V-st in next ch, 1dc in next 9 ch, V-st in next ch, 1dc in next 14 ch, TURN [67 dc, 4x ch1 sps].
Row 2 (BH). Ch2 (counts as your 1st st here and throughout), 1dc in next 14 sts, V-st in next ch1 sp, 1dc in next 11 sts, V-st in next ch1 sp, 1dc in next 17 sts, V-st in next ch1 sp, 1dc in next 11 sts, V-st in next ch1 sp, 1dc in next 9 sts, ch1, sk next st, 1dc in next 2 sts, 1dc in top of ch2, TURN [74 dc, 5x ch1 sps].
Row 3. Ch2, 1dc in next 2 sts, 1dc in next ch1-sp, 1dc in next 10 sts, V-st in next ch1 sp, 1dc in next 13 sts, V-st in next ch1 sp, 1dc in next 19 sts, V-st in next ch1 sp, 1dc in next 13 sts, V-st in next ch1 sp, 1dc in next 15 sts, 1dc in top of ch2, TURN [83 dc, 4x ch1 sps].
Row 4. Ch2, 1dc in next 16 sts, V-st in next ch1 sp, 1dc in next 15 sts, V-st in next ch1 sp, 1dc in next 21 sts, V-st in next ch1 sp, 1dc in next 15 sts, V-st in next ch1 sp, 1dc in next 14 sts, 1dc in top of ch2, TURN [91 dc, 4x ch1 sps].
Row 5. Ch2, 1dc in next 15 sts, V-st in next ch1 sp, 1dc in next 17 sts, V-st in next ch1 sp, 1dc in next 23 sts, V-st in next ch1 sp, 1dc in next 17 sts, V-st in next ch1 sp, 1dc in next 17 sts, 1dc in top of ch2, TURN [99 dc, 4x ch1 sps].
Row 6. Ch2, 1dc in next 18 sts, V-st in next ch1 sp, 1dc in next 19 sts, V-st in next ch1 sp, 1dc in next 25 sts, V-st in next ch1 sp, 1dc in next 19 sts, V-st in next ch1 sp, 1dc in next 16 sts, 1dc in top of ch2, TURN [107 dc, 4x ch1 sps].
Row 7. Ch2, 1dc in next 17 sts, V-st in next ch1 sp, 1dc in next 21 sts, V-st in next ch1 sp, 1dc in next 27 sts, V-st in next ch1 sp, 1dc in next 21 sts, V-st in next ch1 sp, 1dc in next 19 sts, 1dc in top of ch2, TURN [115 dc, 4x ch1 sps].
Row 8 (BH). Ch2, 1dc in next 20 sts, V-st in next ch1 sp, 1dc in next 23 sts, V-st in next ch1 sp, 1dc in next 29 sts, V-st in next ch1 sp, 1dc in next 23 sts, V-st in next ch1 sp, 1dc in next 15 sts, ch1, sk next st, 1dc in next 2 sts, 1 dc in top of ch2, TURN [122 dc, 5x ch-1 sps].
DIVIDE FOR ARMHOLES
Row 9. Ch2, 1dc in next 2 sts, 1dc in next ch1 sp, 1dc in next 16 sts, (1dc, ch3) in next ch1 sp, sk next 25 sts, 1dc in next ch1 sp, 1dc in next 31 sts, (1dc, ch3) in next ch1 sp, sk next 25 sts, 1dc in next ch1 sp, 1dc in next 21 sts, 1dc in top of ch2, [77 dc, 2x ch3 sps].
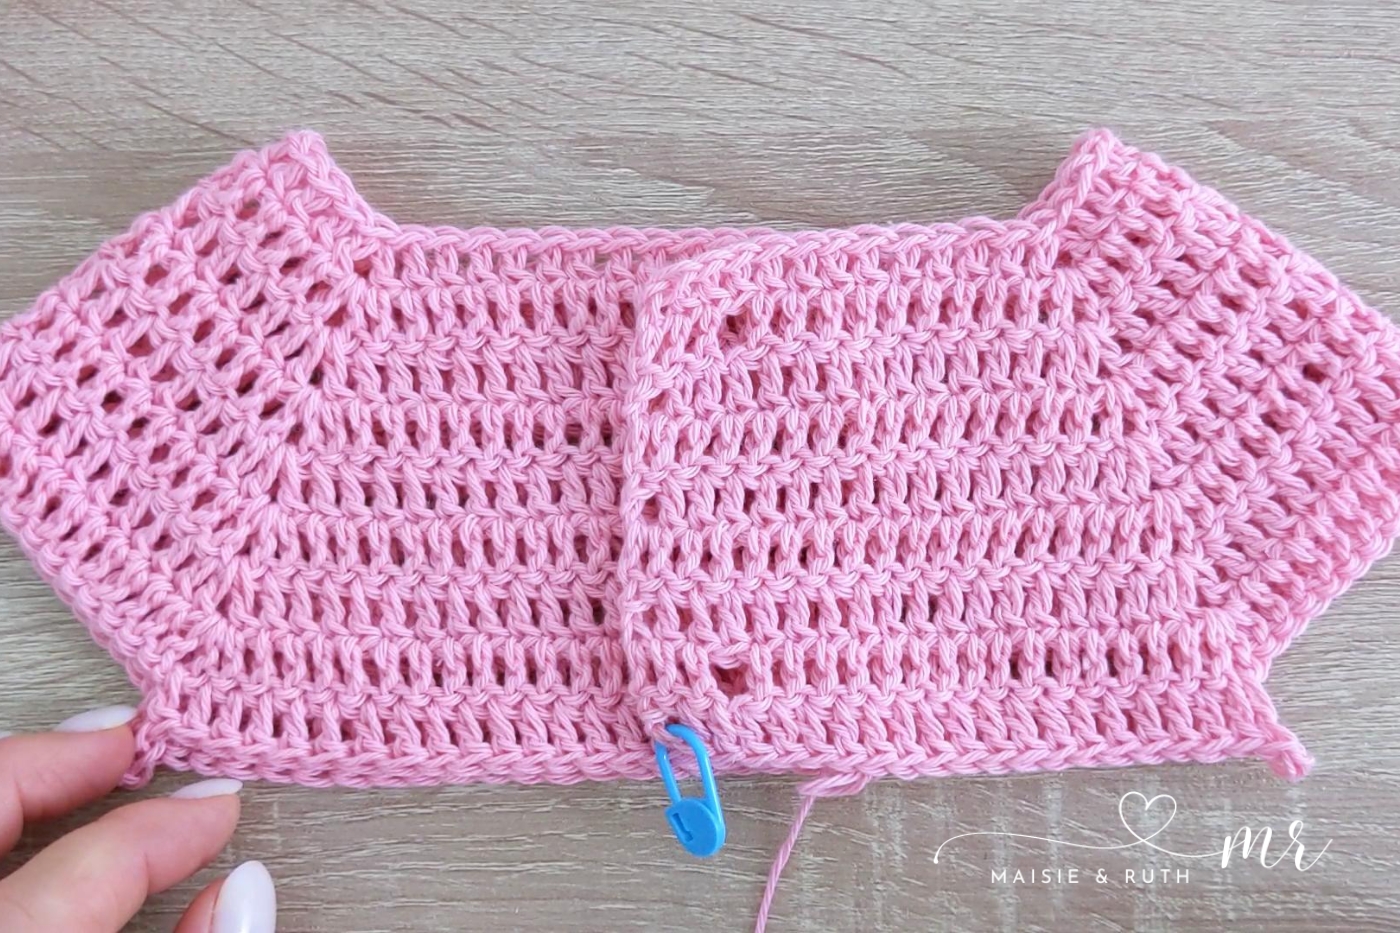
BODY OF HOODIE
Continuing with the body:
Row 10. Ch2, 1dc in next 22 sts, 3dc in next ch3 sp, 1dc in next 33 sts, 3dc in next ch3 sp, 1dc in next 20 sts, 1dc in top of ch2, TURN [83 sts].
Rows 11-13. Ch2, 1dc in next 81 sts, 1dc in top of ch2, TURN, [83 sts].
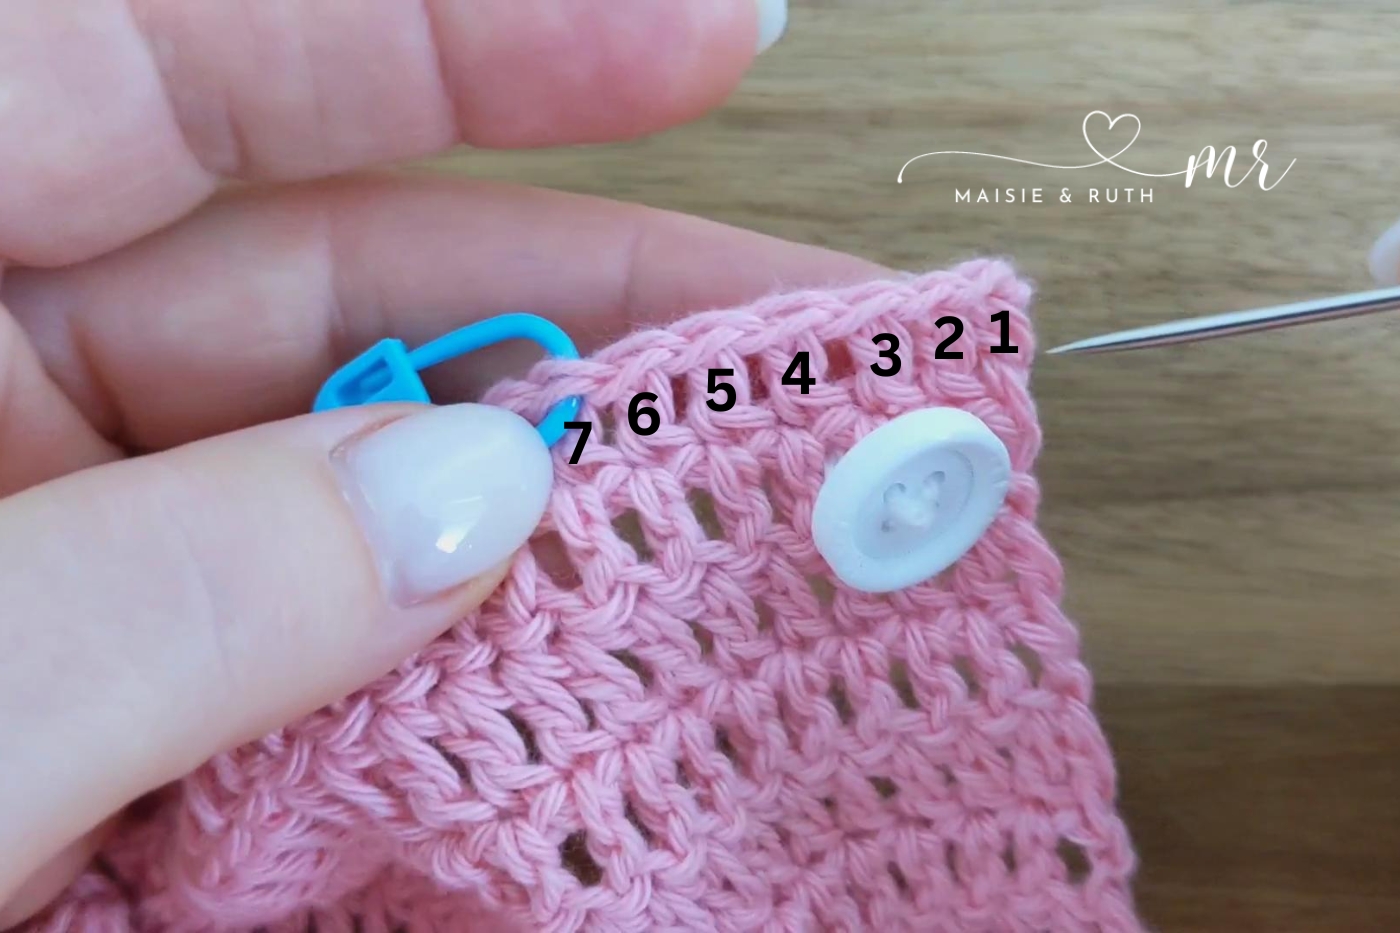
Row 14 (BH). Ch2, 1dc in next 78 sts, ch1, sk next st, 1dc in next 2 sts, 1dc in top of ch2, TURN, [82 sts, 1x ch1 sp].
Row 15. Ch2, 1dc in next 2 sts, 1dc in ch1-sp, 1dc in next 78 sts, 1dc in top of ch2, TURN, [83 sts].
Rows 16-19. Ch2, 1dc in next 81 sts, 1dc in top of ch2, TURN, [83 sts].
Row 20 (BH). Ch2, Repeat row 14, TURN, [82 sts, 1x ch1 sp].
Row 21. Repeat Row 15, TURN, [83 sts].
Row 22. Repeat row 16, [83 sts].
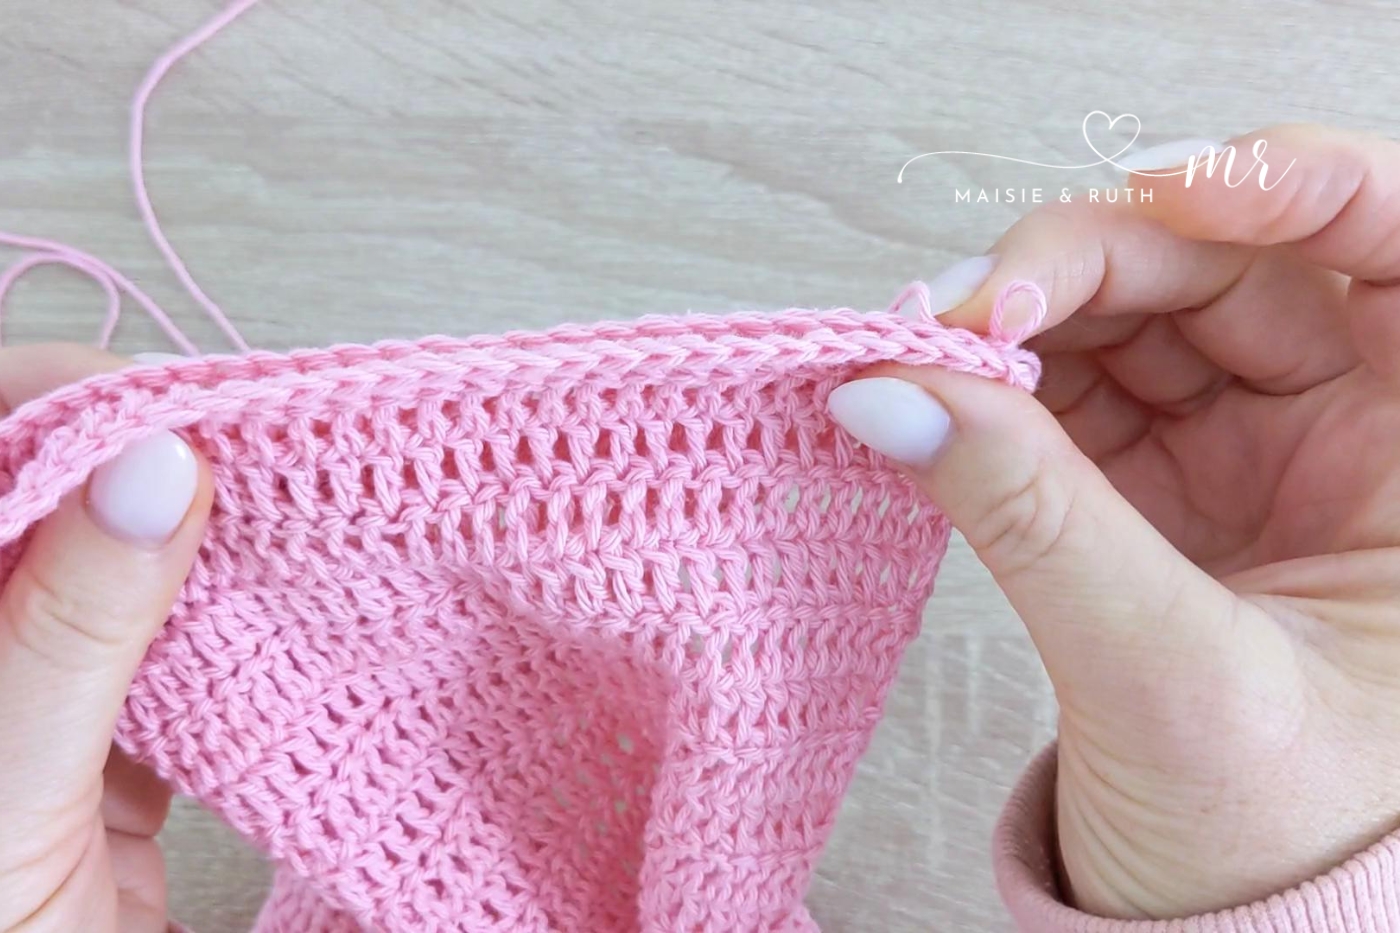
Cut yarn, fasten off and weave in ends. Sew 4 buttons on right front panel.
SLEEVES: RIGHT SLEEVE
It’s time to work on the sleeves now and you’ll begin with the right sleeve first.
You will be working into the 25 stitches that you skipped in row 9 (I placed a marker into both the 1st and 25th stitch).
8 extra stitches will also be created, giving you a total of 33 stitches when working the sleeves:
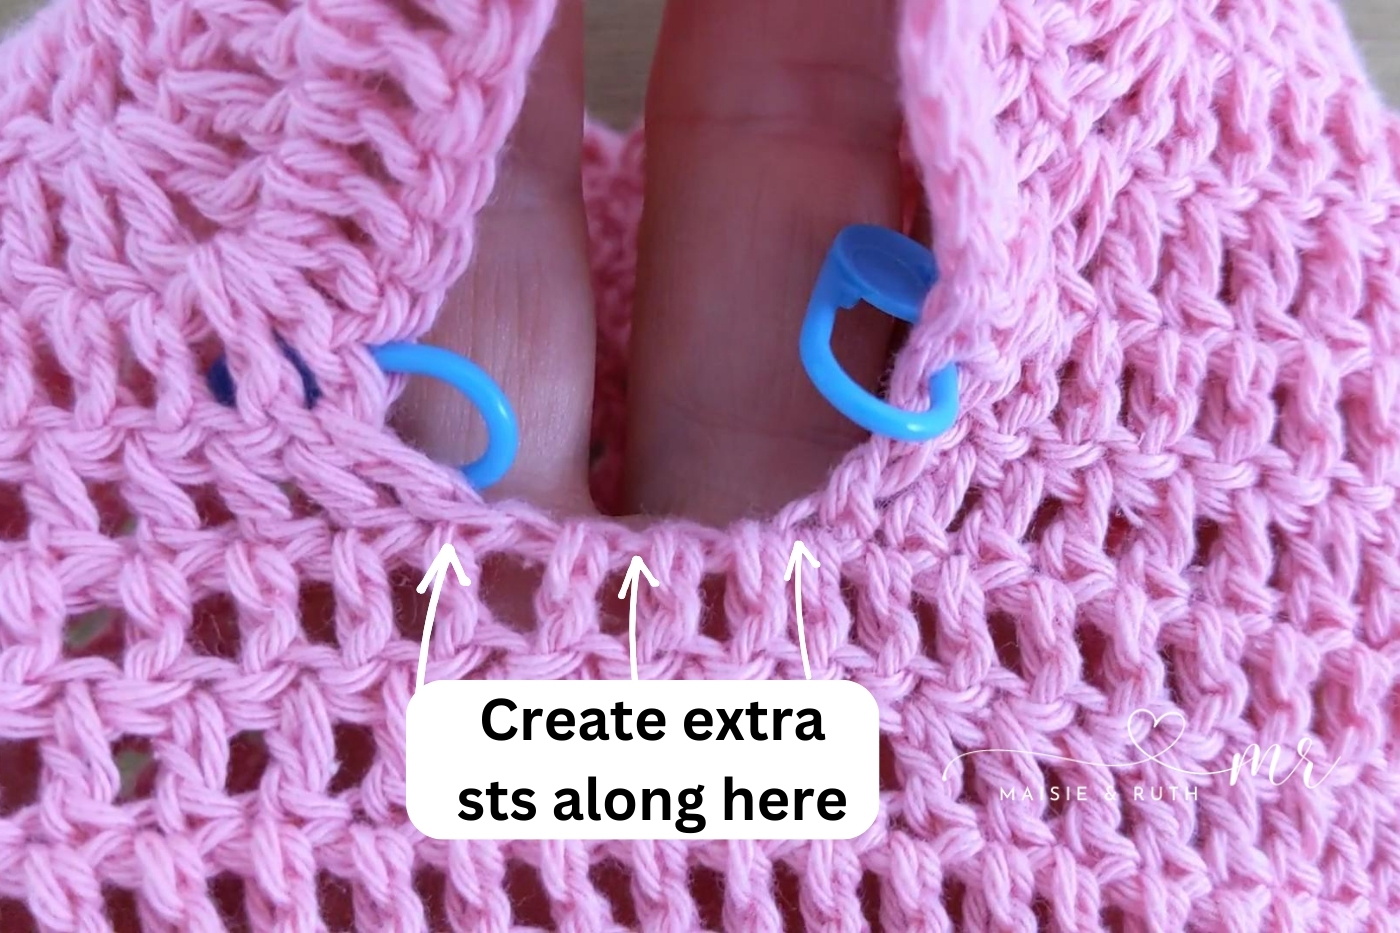
With the back of your work facing you, attach your yarn to the end of row 9 of the yoke, at the right armhole:
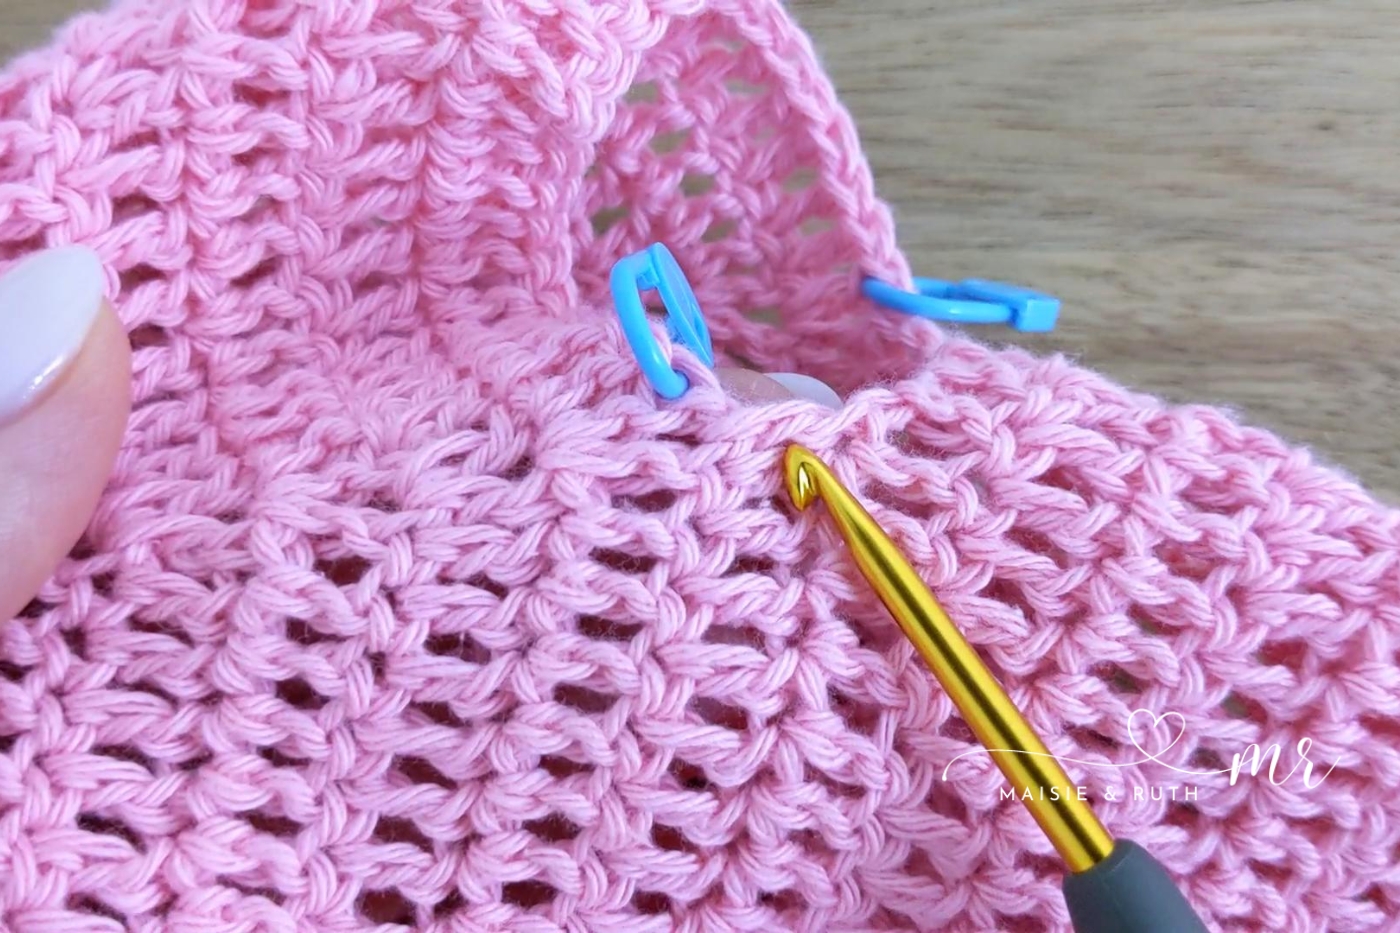
Round 1. Ch2 (does not count as your 1st st), 1dc in same st (at base of ch2), 1dc in next 25 sts around armhole, work an extra 7 dc evenly spaced at underarm area, sl st to 1st dc to join, TURN [33 sts].
Round 2. Ch2 (does not count as your 1st st), 1dc in same st (at base of ch2 – see pattern notes 1dc in 3rd ch from hook), 1dc in next 32 sts, sl st to 1st dc to join, TURN [33 sts].
Rounds 3-16: Repeat round 2.
Cut yarn, fasten off and weave in ends.
With Colour B, attach yarn to last stitch worked.
Round 17. Ch1, *(1sc, ch2, 1sc) in same st, sk next st*, repeat from * to * around sleeve, sl st into base of beg ch1 to join round.
Cut yarn, fasten off and weave in ends.
Turn up the last 2 rows to create a little cuff.
LEFT SLEEVE
With the back of your work facing you, attach your yarn to the end of row 9 of the yoke, at the left armhole:

Round 1. Ch2 (does not count as your 1st st), 1dc in same st (at base of ch2), work 7 dc evenly spaced at underarm area, 1dc in next 25 sts around armhole, sl st to 1st dc to join, TURN [33 sts].
Round 2. Ch2 (does not count as your 1st st), 1dc in same st (at base of ch2), 1dc in next 32 sts, sl st to 1st dc to join, TURN [33 sts].
Rounds 3-16: Repeat round 2.
Cut yarn, fasten off and weave in ends.
With Colour B, attach yarn to last stitch worked.
Round 17. Ch1, *(1sc, ch2, 1sc) in same st, sk next st*, repeat from * to * around sleeve, sl st into base of beg ch1 to join round.
Cut yarn, fasten off and weave in ends.
Turn up the last 2 rows to create a little cuff.
HOOD
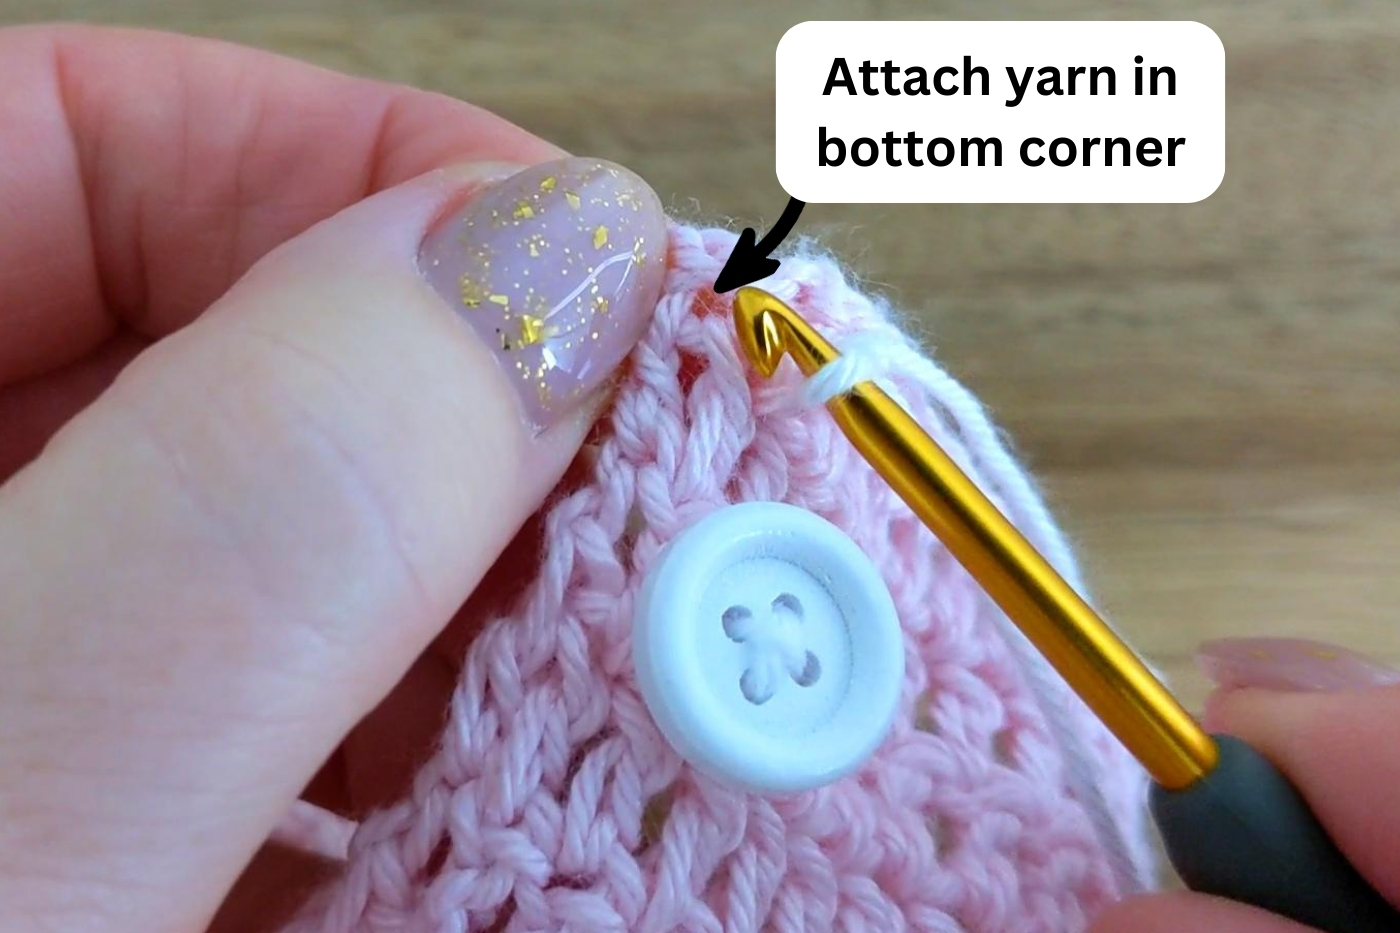
With the front of your work facing you, attach yarn into the 7th stitch from the neck edge on the right front panel.:
Row 1. Ch2 (counts as your 1st st here and throughout), 1dc in same st, 1dc in next 7 sts, 3dc in next st, 1dc in next 9 sts, 3dc in next st, 1dc in next 15 sts, 3dc in next st, 1dc in next 9 sts, 3dc in next st, 1dc in next 7 sts, 2dc in next st (leave remaining sts unworked), TURN [63 sts].
Rows 2-18. Ch2, 1dc in next 61 sts, 1dc in top of ch2, TURN [63 sts].
SEAMING THE HOOD
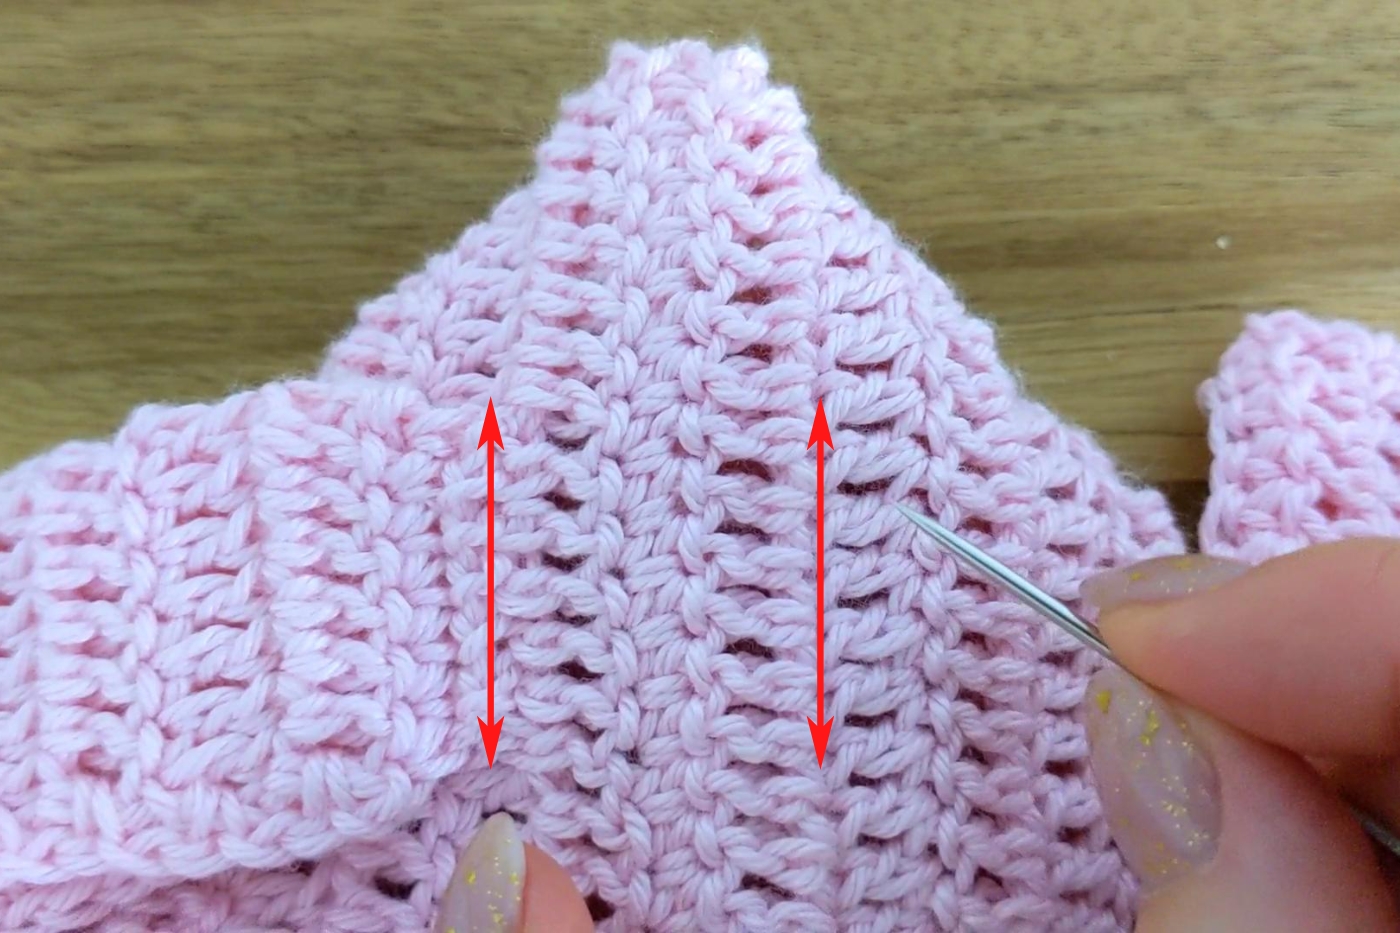
To seam the hood, turn it inside out so that the wrong side is now facing you.
Bring the two sides of the top of the hood together:
Working under both loops on each side, seam the two sides together using the single crochet stitch.
Remember: I show you how to seam the hood together in the video tutorial (linked above).
Once you’ve finished seaming the hood, cut yarn, fasten off and weave in your ends.
Turn the hood out so that the right side is now facing you.
Turn hood back to create a brim.
EDGING
UP RIGHT FRONT PANEL:
With Colour B, attach yarn to bottom corner of right front panel:
(1sc, ch2, 1sc) in each dc row end up right front panel.
ALONG NECK:
*(1sc, ch2, 1sc) in next st, sk next st*, repeat from * to * along neck edge.
AROUND HOOD:
(1sc, ch2, 1sc) in each dc row end around hood.
ALONG NECK:
*(1sc, ch2, 1sc) in next st, sk next st*, repeat from * to * along neck edge.
DOWN LEFT FRONT PANEL:
(1sc, ch2, 1sc) in each dc row end down front panel.
AROUND BOTTOM OF HOODIE:
*(1sc, ch2, 1sc) in next st, sk next st*, repeat from * to * around bottom of hoodie.
Sl st to 1st sc to join the round.
Cut yarn, fasten off and weave in ends.
BUNNY EARS
Row 1. Ch2, 2dc in 2nd ch from hook, TURN [2 sts].
Row 2. Ch2 (does not count as your 1st st here and throughout), 2dc in same st (at base of ch2), 2dc in next st, TURN [4 sts].
Row 3. Ch2, 2dc in same st (at base of ch2), 1dc in next 2 sts, 2dc in last st, TURN [6 sts].
Row 4. Ch2, 2dc in same st (at base of ch2), 1dc in next 4 sts, 2dc in last st, TURN [8 sts].
Row 5. Ch2, 2dc in same st (at base of ch2), 1dc in next 6 sts, 2dc in last st, TURN [10 sts].
Row 6. Ch2, 2dc in same st (at base of ch2), 1dc in next 8 sts, 2dc in last st, TURN [12 sts].
Row 7. Ch2, 2dc in same st (at base of ch2), 1dc in next 10 sts, 2dc in last st, TURN [14 sts].
Rows 8-28. Ch2, 1dc in same st (at base of ch2), 1dc in next 13 sts, TURN [14 sts].
No NOT cut yarn.
EDGING AROUND EAR
Ch1, (1sc, ch1) in each dc row end around both sides of ear.
Do not cut yarn.
SEAMING EAR
Fold ear in half.
Seam top of ear together using the single crochet seam.
Cut yarn (leave a tail 10” long for sewing on to hoodie) & fasten off.
Sew ears onto hoodie. See photo below for position or watch the video:
BUNNY APPLIQUE
HEAD
Using Colour B
Make a magic circle (if you do not like the magic circle method, see the Alternative Round 1 below).
Round 1. Ch2 (does not count as your 1st st here and throughout), 12hdc in the magic circle, sl st to 1st hdc to join round, [12 sts].
Alternative Round 1. Ch4, sl st to 1st ch to make a circle, ch2 (does not count as your 1st st here and throughout), 12hdc in centre of circle (work over yarn tail), sl st to 1st hdc to join round, [12 sts].
Round 2. Ch2, 2hdc in same st (at base of ch2), 2hdc in next 11 sts, sl st to 1st hdc to join round, [24 sts].
Round 3. Ch2, 2BLOhdc in same st (at base of ch2), 1BLOhdc in next st, *2BLOhdc in next st, 1BLOhdc in next st*, repeat from * to * until end, sl st to 1st BLOhdc to join round or make an invisible join, [36 sts].
Cut yarn (leave a long tail about 18” for sewing applique on to hoodie later).
EARS
With Colour A
Ch 10
Row 1. Sl st in 2nd ch from hook, 1hdc in next 5 ch, 1sc in next 3 ch (change to Colour B in last st – see ‘Pattern Notes’ above), TURN.
Cut yarn, fasten off & weave in ends.
Row 2. Ch1, 1sc in same st (at base of ch1), 1sc in next 2 sts, 1hdc in next 5 sts, 2hdc in last st, working up other side of ear: 2hdc in next st, 1hdc in next 5 sts, 1sc in last 3 sts, sc2tog along bottom of ear.
Cut yarn, leaving a 10” tail for sewing ear onto head later, fasten off.
ASSEMBLY OF BUNNY APPLIQUE
You can watch the video tutorial for step-by-step instruction.
1. Sew the ears on to the head through the exposed front loops in round 3 (do not cut the yarn tails, you will use them to sew each ear on to the front of the hoodie):
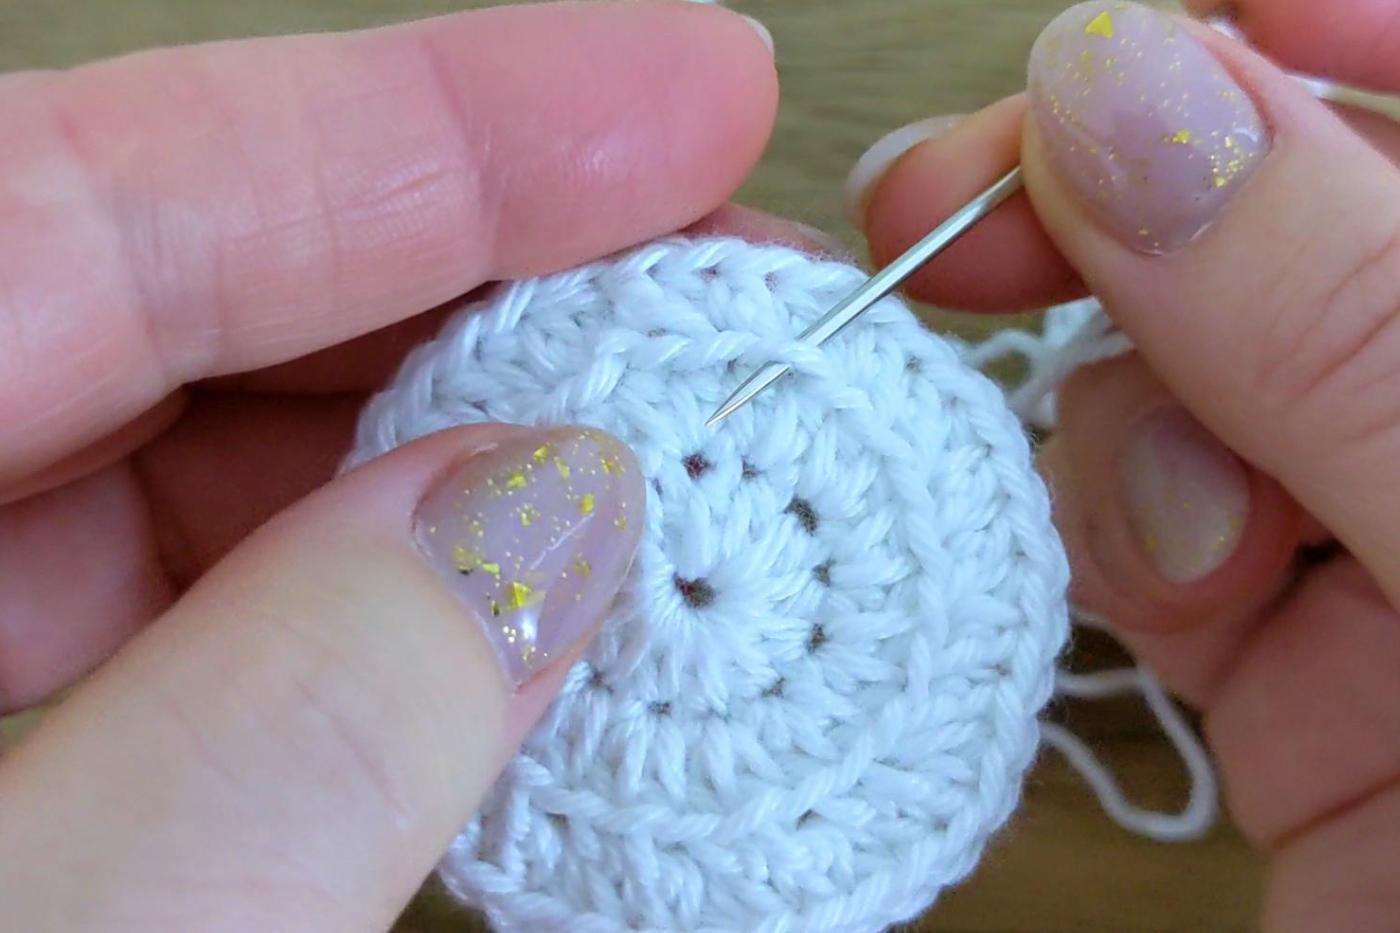
2. With Colour C, embroider eyes (cut about 10” of yarn for each eye).
3. With Colour A, embroider the nose (cut about 10” of yarn).
SEW BUNNY APPLIQUE ON TO HOODIE
Thread your yarn tails, one at a time, and sew each bunny applique onto the front of the hoodie.
REMEMBER: You can watch the video tutorial for these parts.

SHARE YOUR WORK!
I really hope that you enjoyed the free pattern for this crochet bunny baby hoodie!
I would LOVE to see photos of your completed cardigan… please tag me on Instagram using @maisieandruth and / or #maisieandruth


Hallöchen, Du häkelst Zauberhafte Werke. Ich liebe es Dir beim häkeln zuzuschauen. Ich liebe deine Anleitungen. Ich werde das Hasen Set nach häkeln und zeige Dir dann auch gerne Bilder. Lg Silvia
Hallo Silvia! Danke schön! Ich wünsche Ihnen viel Spaß beim Basteln dieser kleinen Outfits 😘🐰💝
Hi Amanda just love your patterns I have made lots of your items especially the bear blanket. Just wondered when the panda will be published. Thanks.
Hi Lorna, thank you so much! The free pattern for the panda baby blanket is here: https://maisieandruth.com/panda-crochet-baby-blanket-free-pattern/
Thank you again and enjoy making it! 🥰💝
Love your patterns. Thank you so much.
That’s so lovely of you to say, Kerryn! 😘 I hope you have fun making your little bunny set 🐰