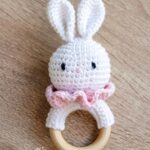
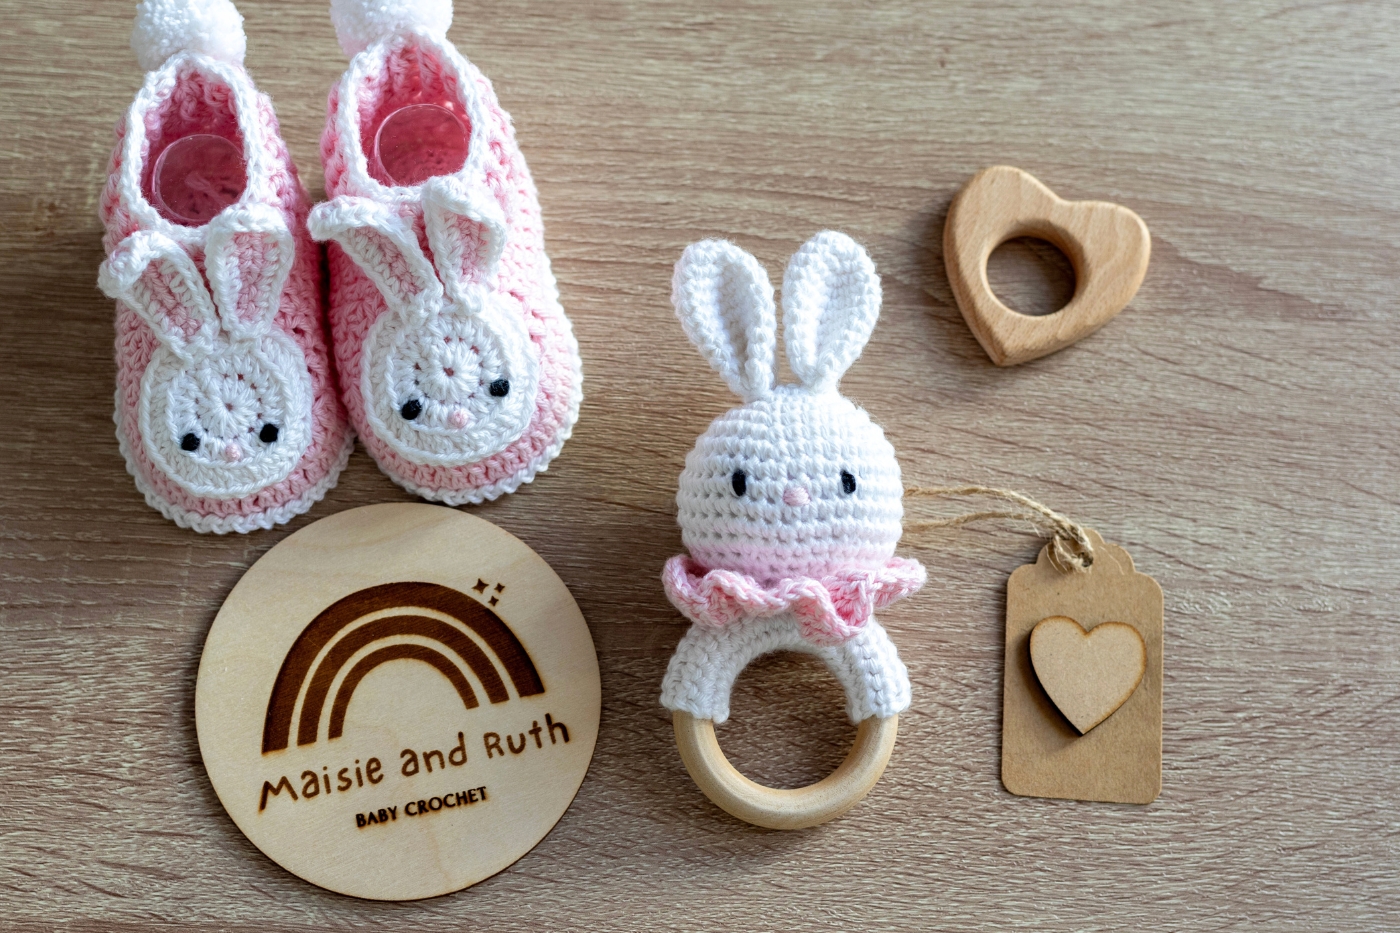
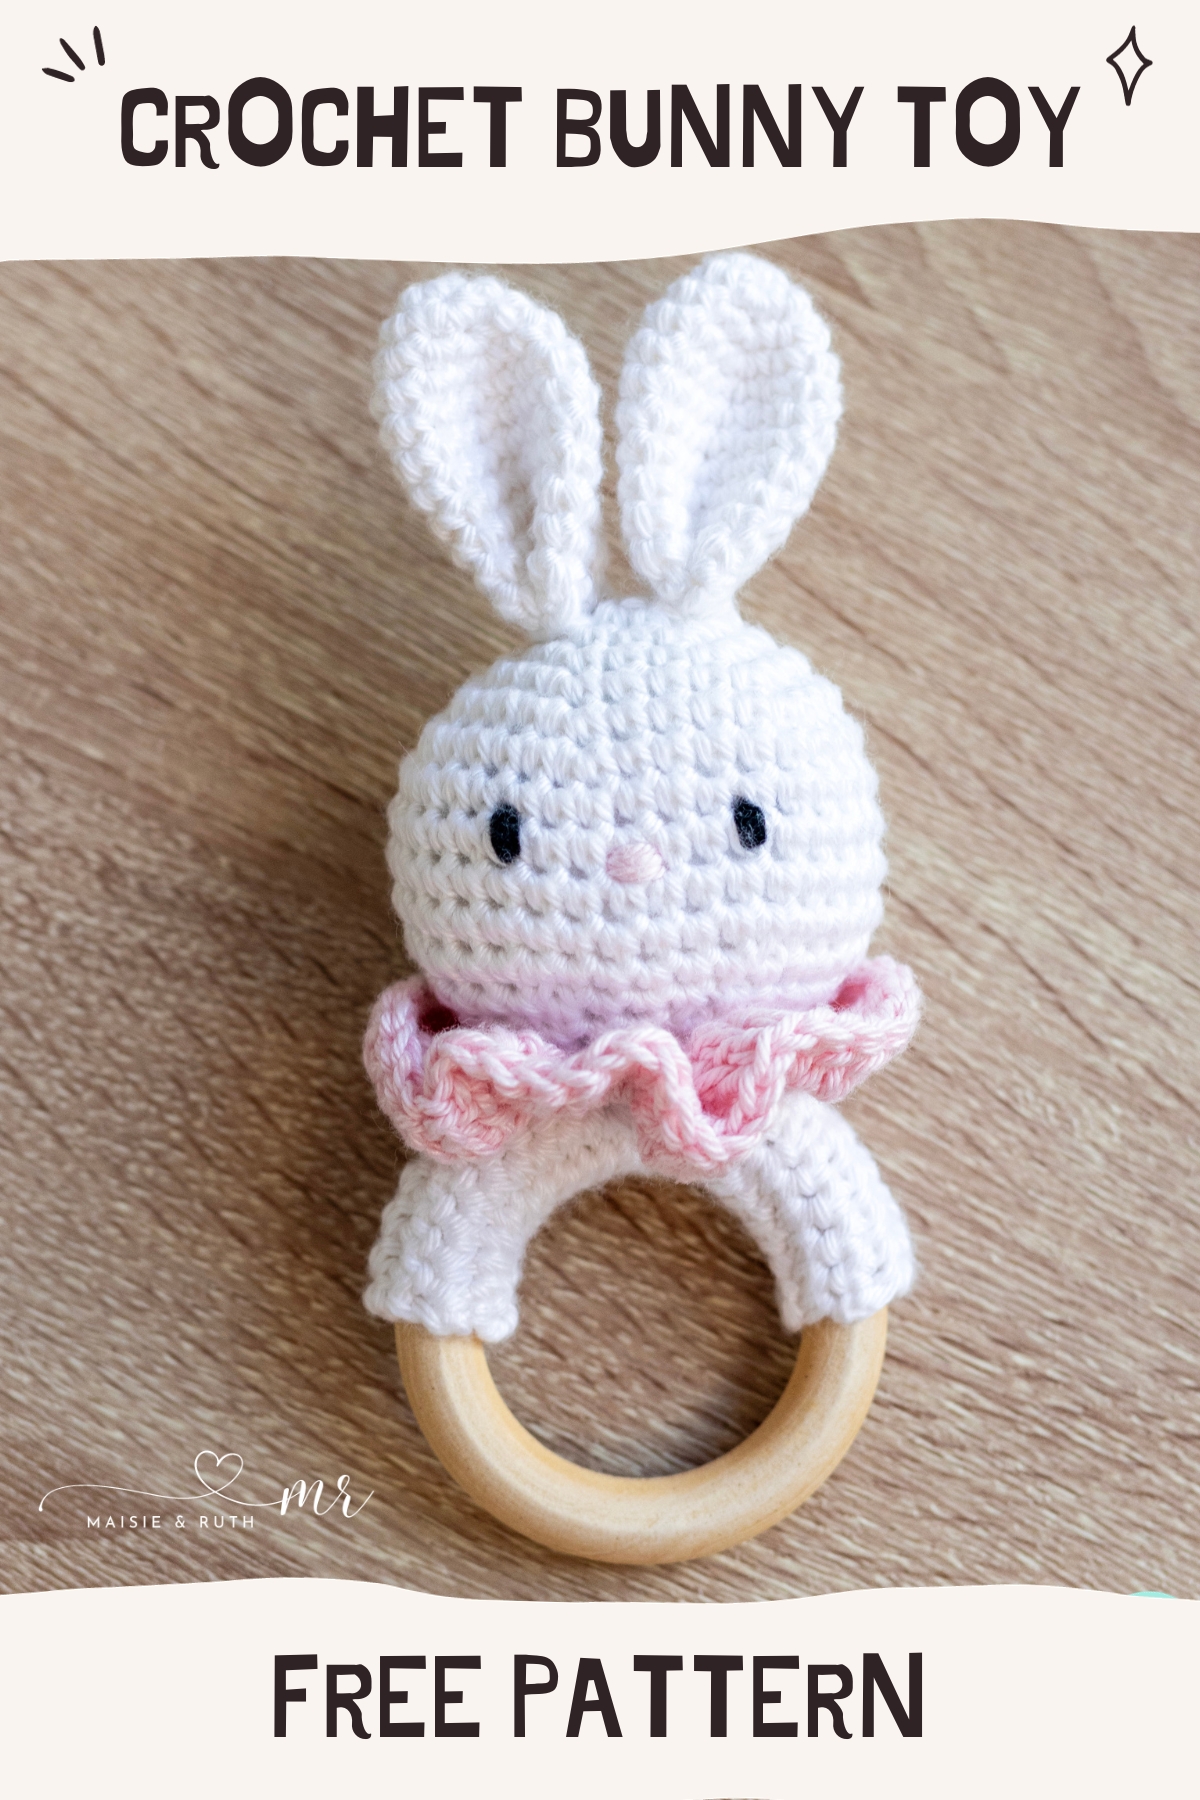
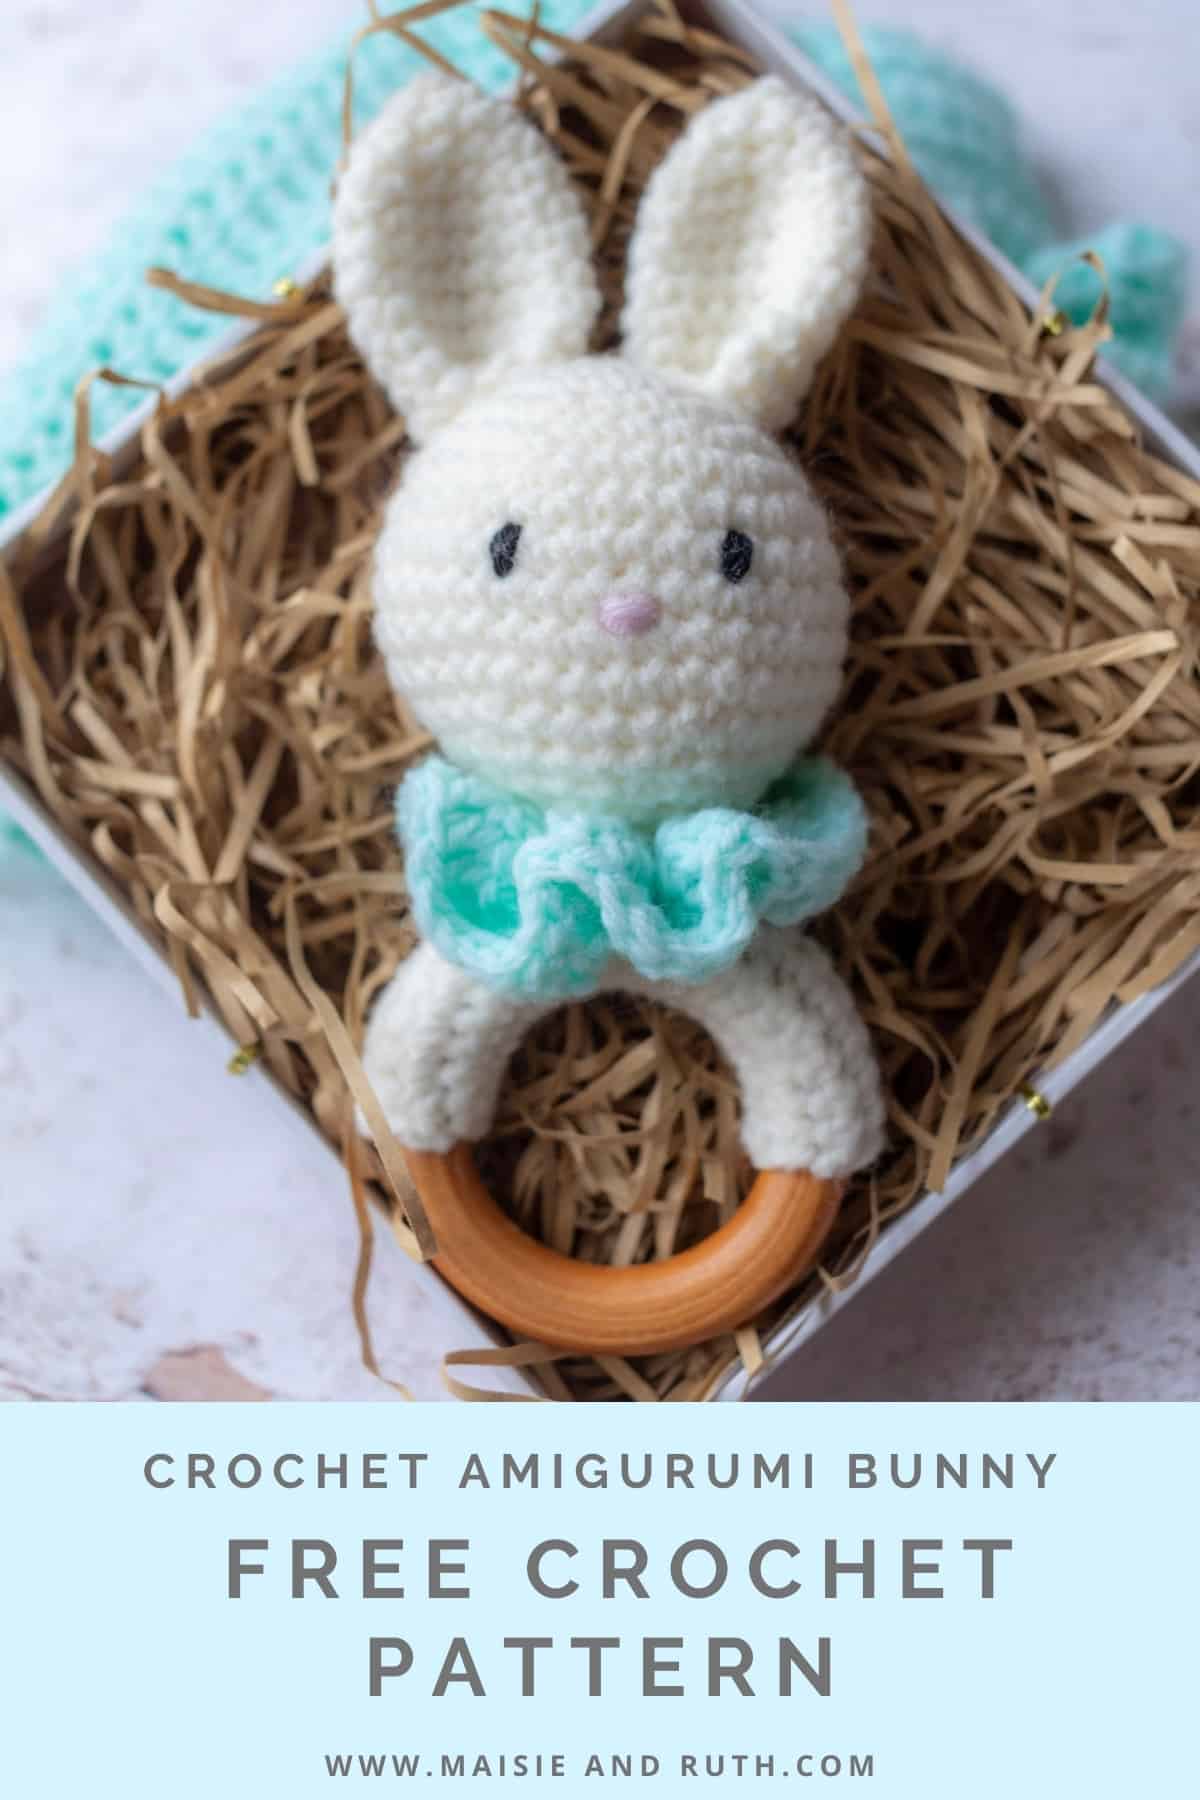
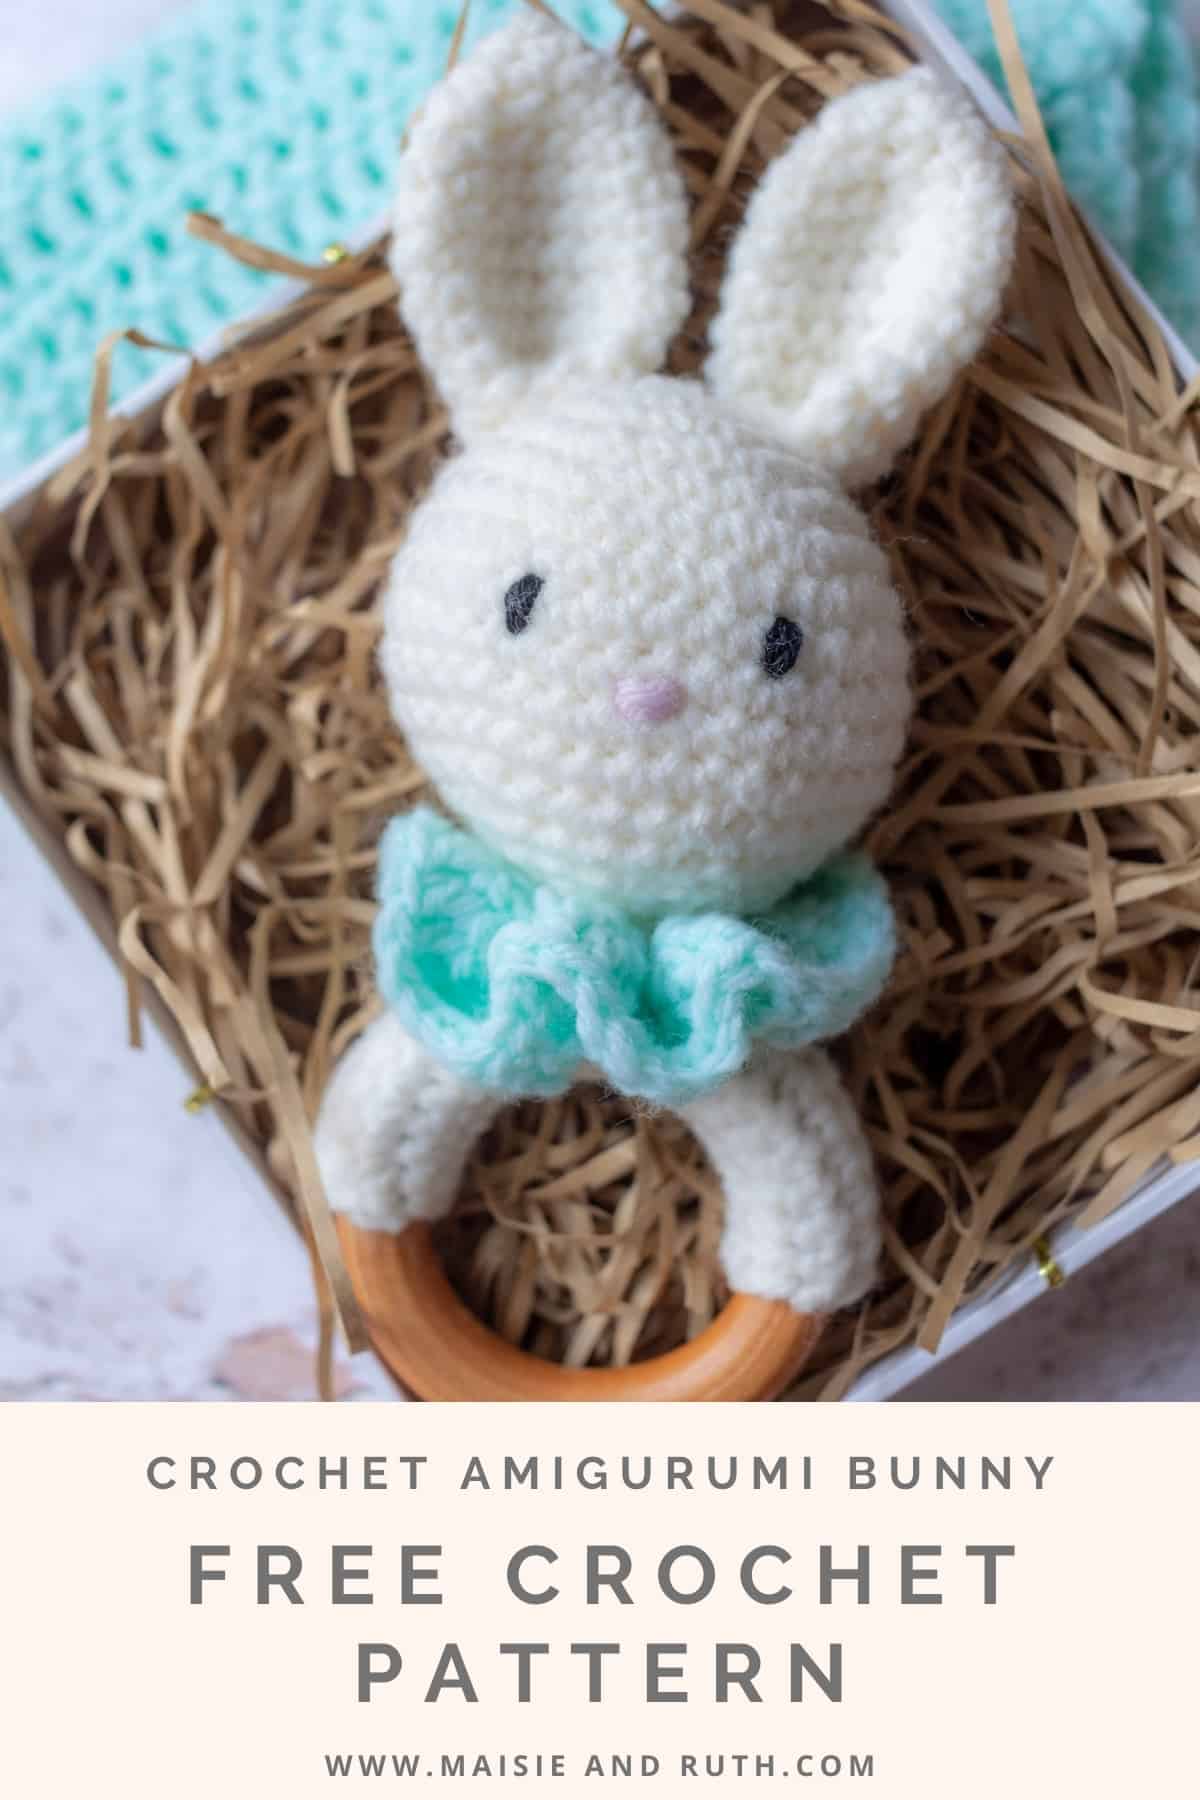
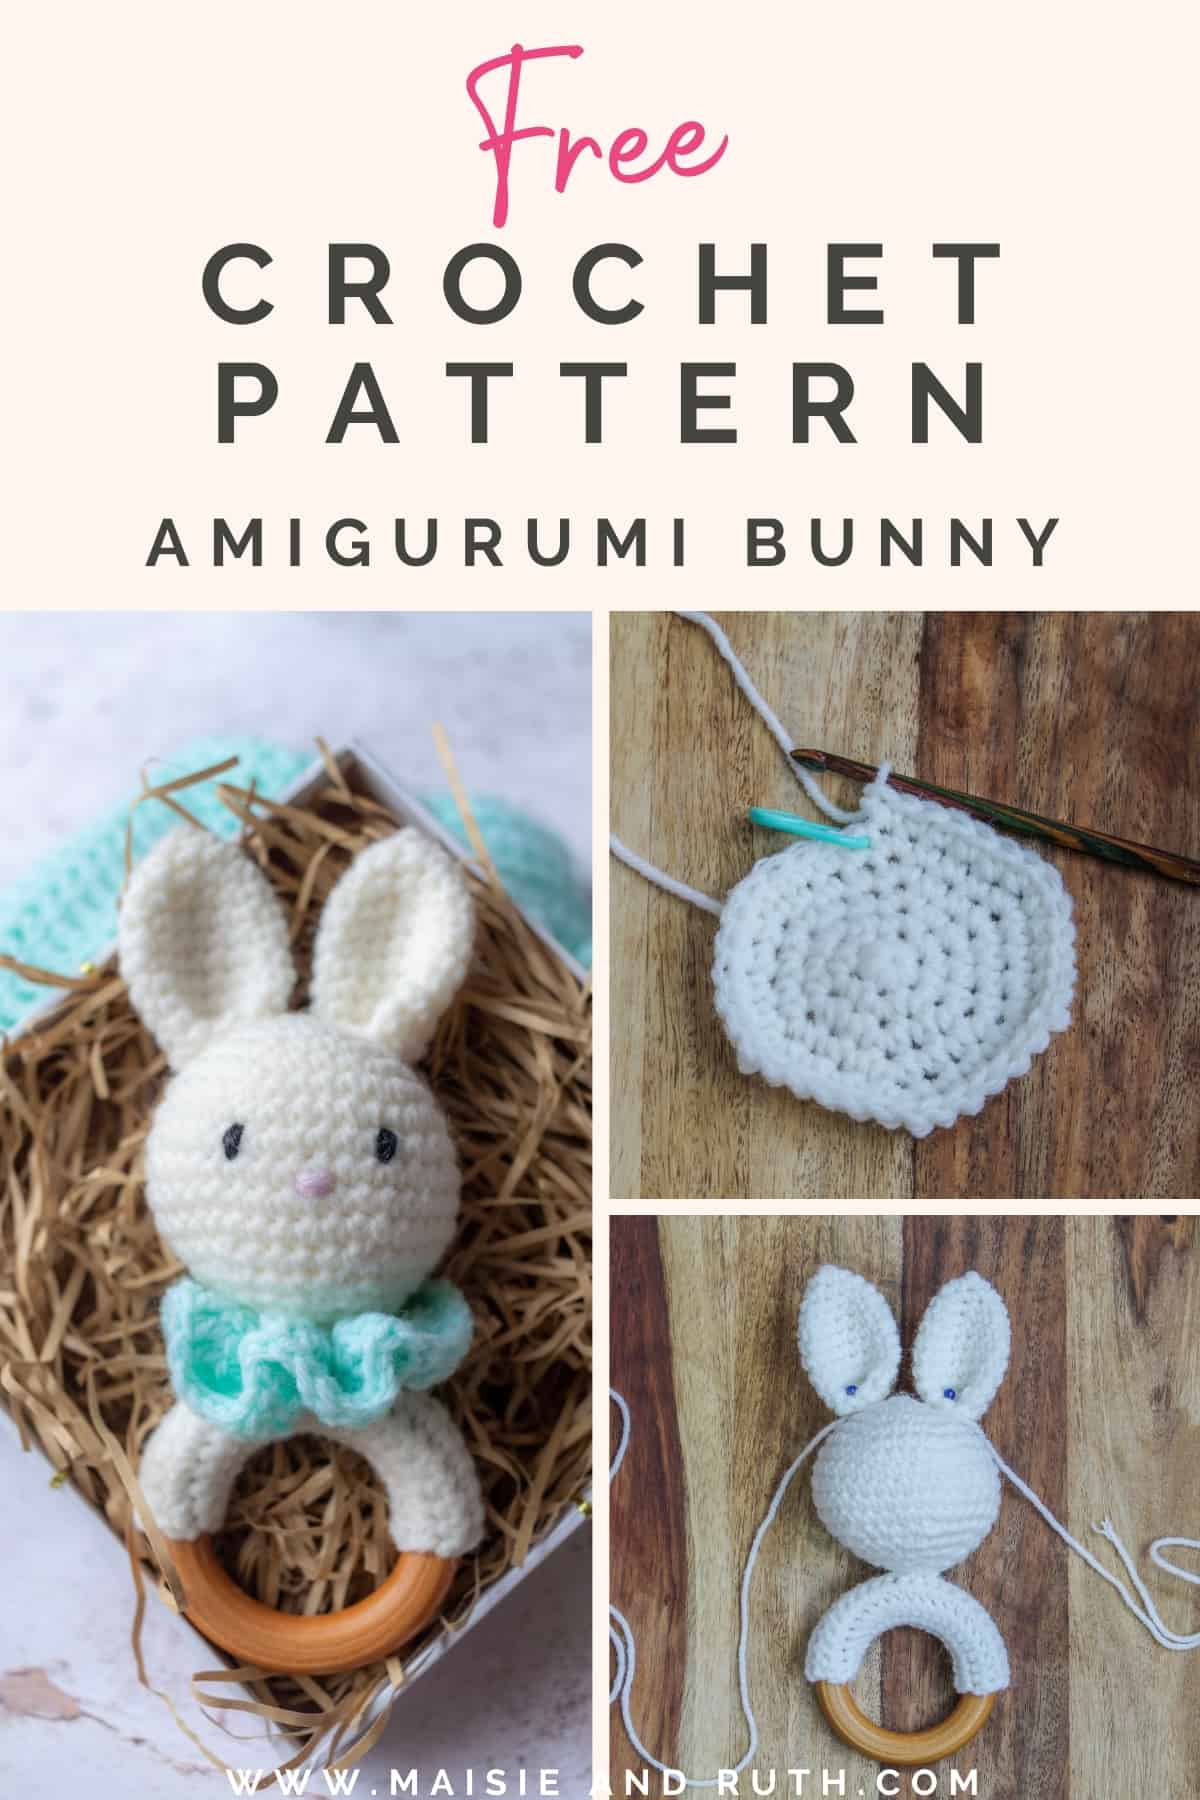
I have a great FREE Crochet Amigurumi Pattern for you right here on the blog! Scroll down to get the instructions and find out how you can work up Bella the Bunny, an adorable baby teething toy!
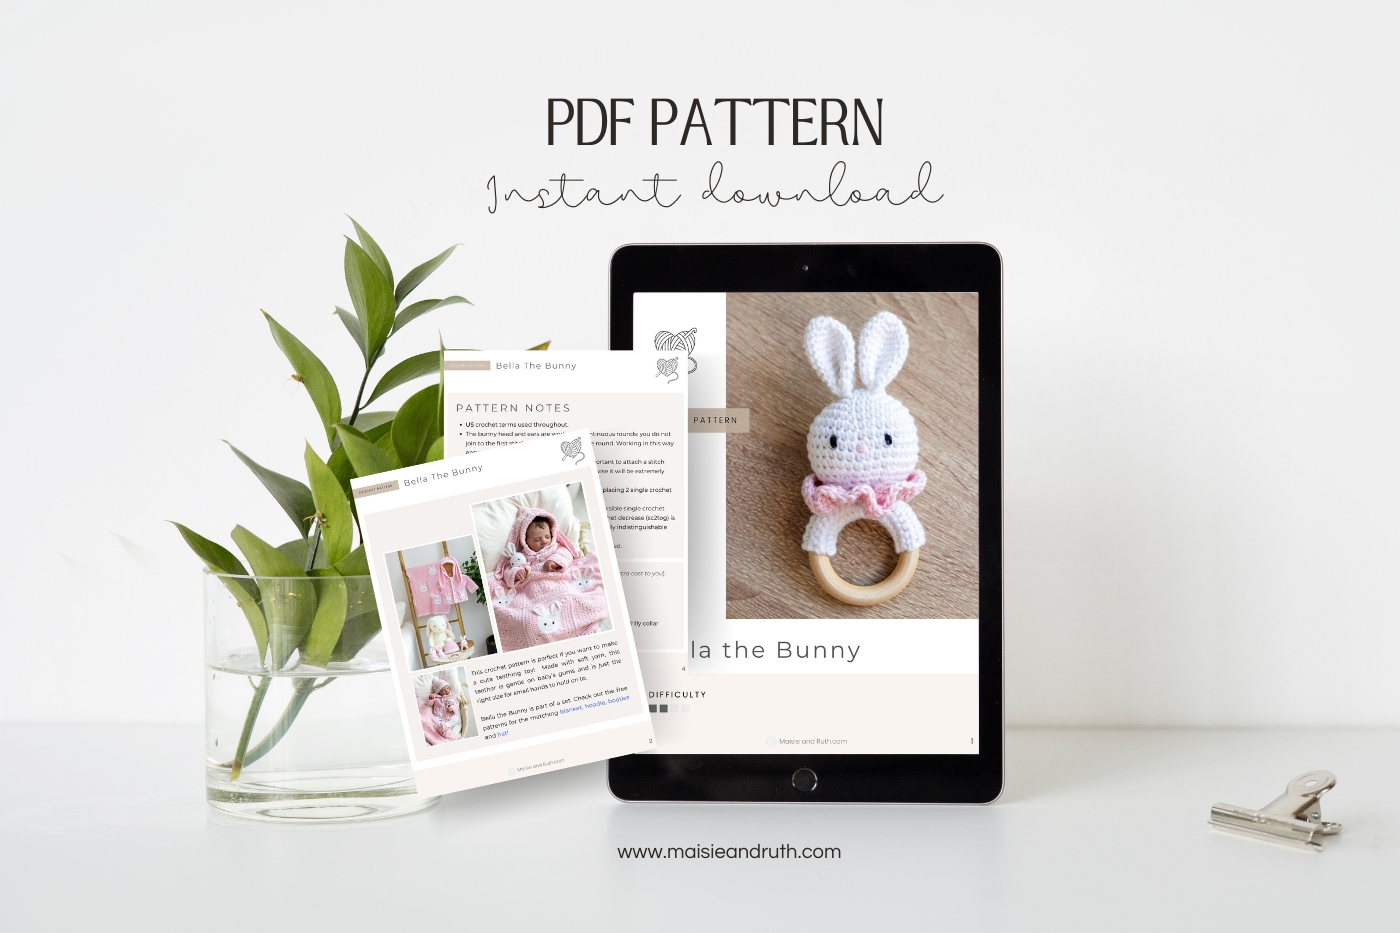
There’s also a detailed VIDEO TUTORIAL. And to purchase an ad-free PDF version, please visit my Etsy store HERE
SMALL & QUICK PROJECT
My free crochet amigurumi pattern for Bella the Bunny is a small crochet project that is suitable for crocheters of all levels.
This baby teether is quick and easy to work up, making it perfect for a last-minute baby shower gift or for your own little one.

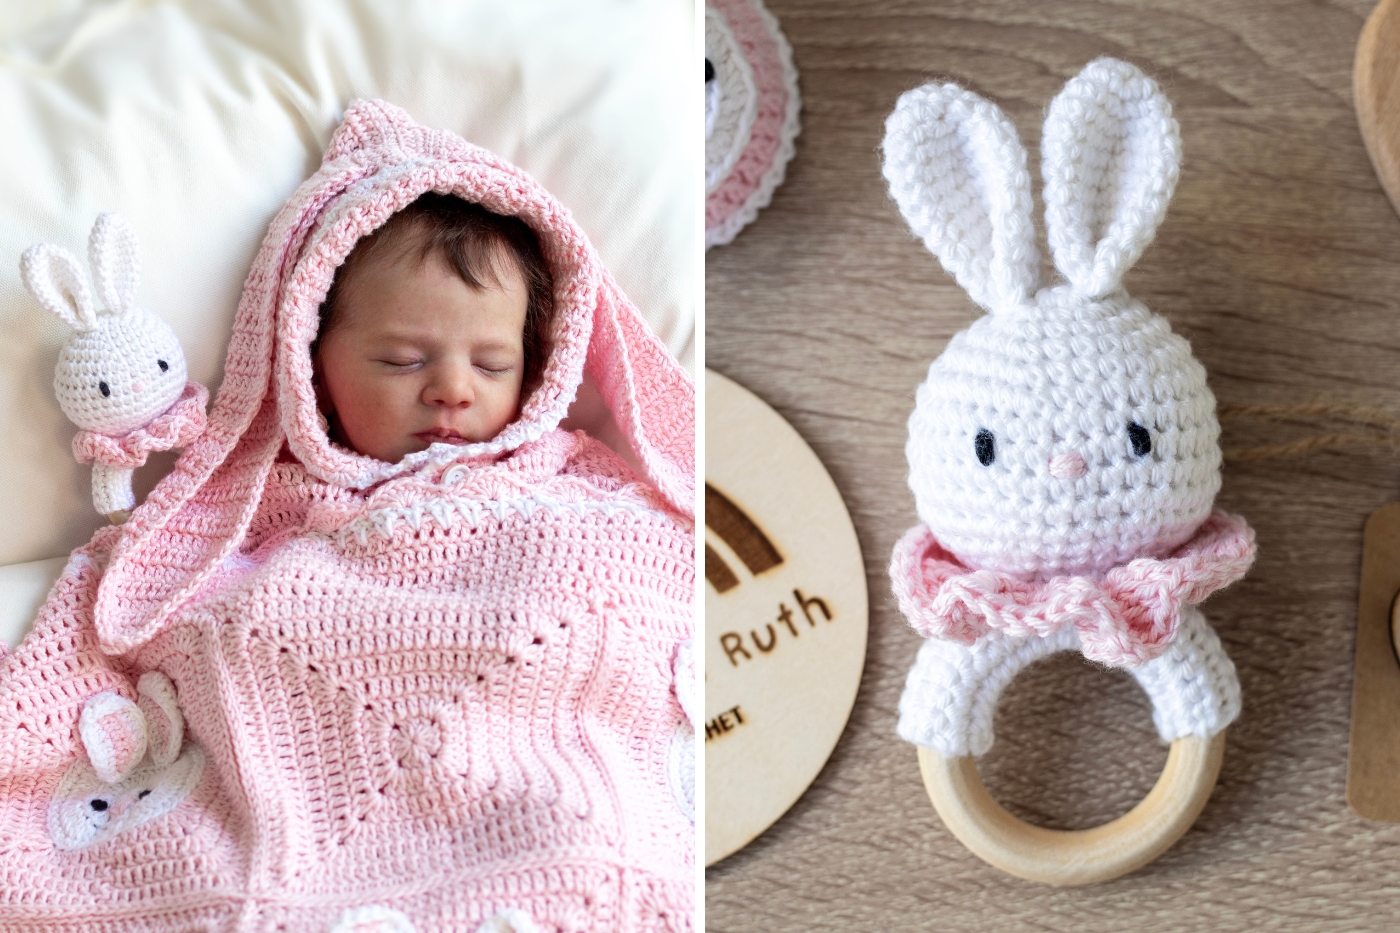
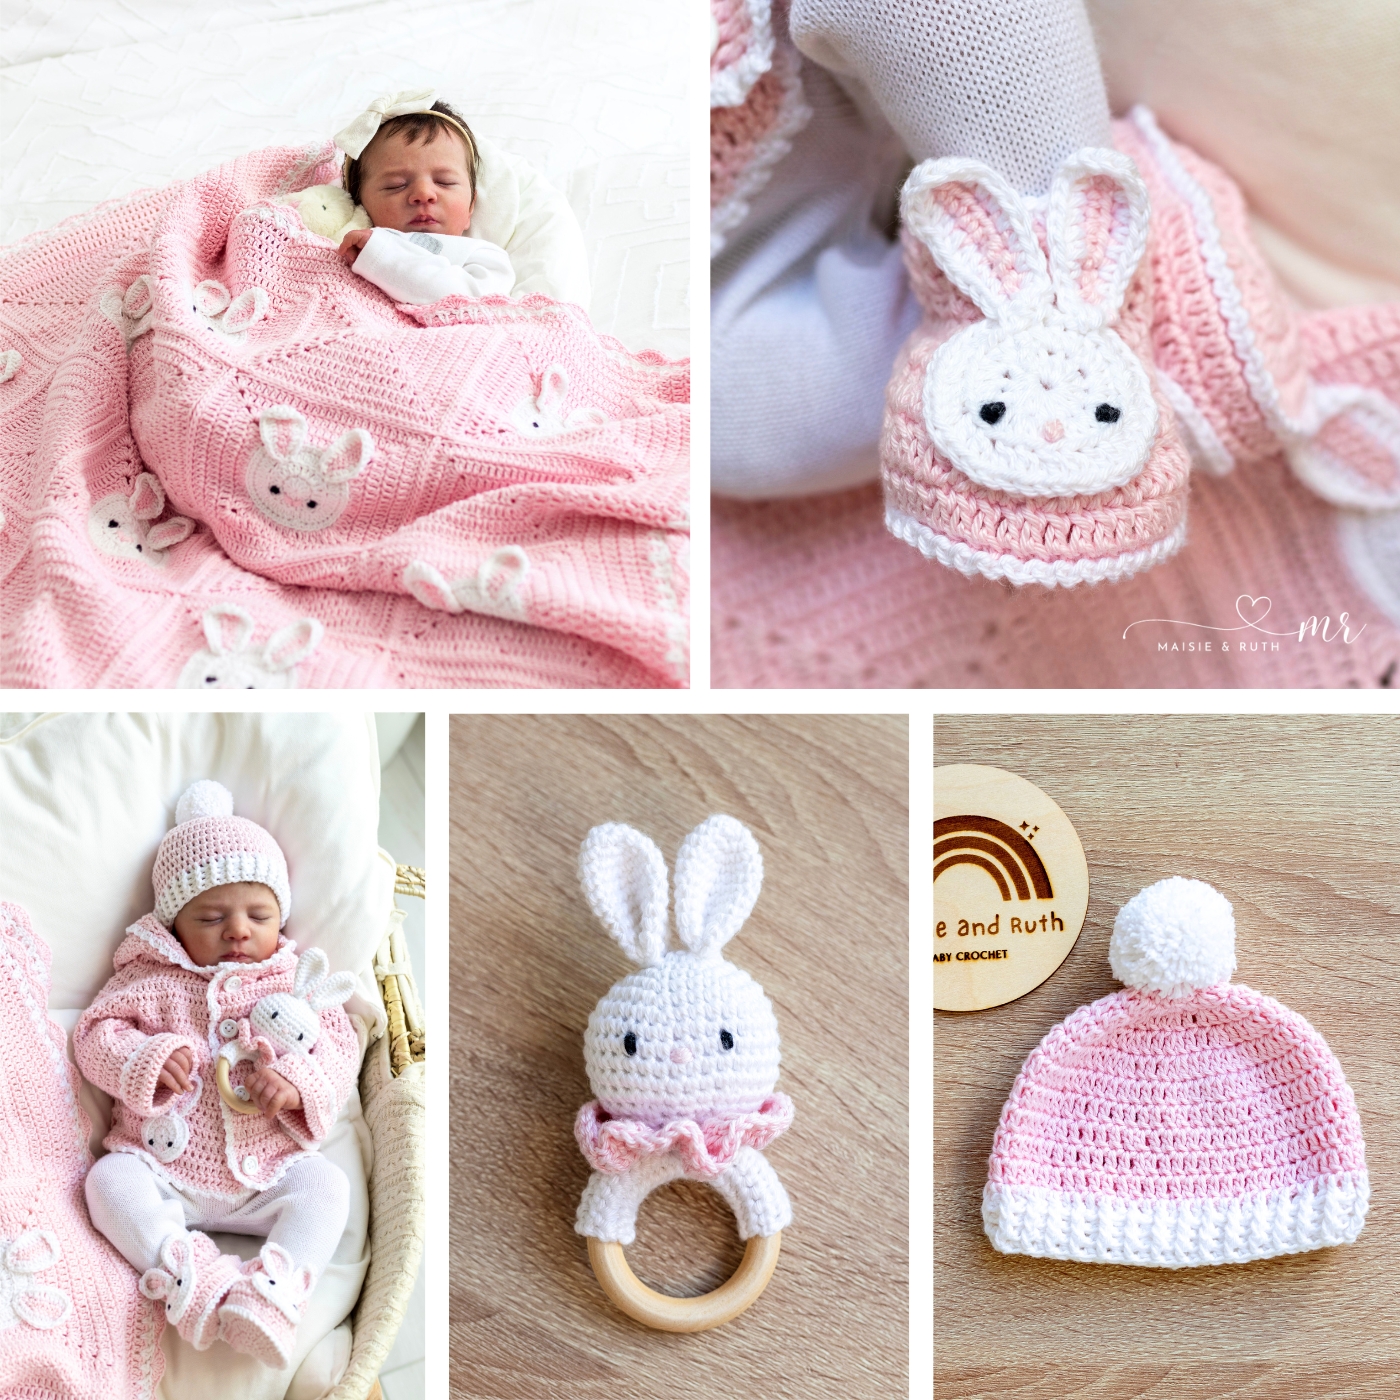
CROCHET BABY SET
Talking of gifts for a newborn baby, Bella the Bunny is part of a crochet set that I designed. There’s a soft and snugly blanket with sweet bunny motifs; cute bunny baby booties; a stylish hoodie with long bunny ears; and a warm and cozy hat with a contrasting coloured brim and fluffy pom pom on top!
All of these patterns use basic crochet stitches and are accompanied by step-by-step video tutorials. You’ll be guided every step of the way!
YARN USED
You can use any weight 3 / light worsted / DK / 8 ply yarn for this project.
I’ve made this teething toy with both Paintbox Yarns Baby DK and Stylecraft Naturals Cotton and Bamboo. Both brands are incredibly soft and I often use them for baby garments. However, it’s also suitable for amigurumi as it doesn’t stretch and therefore maintains its shape very well.
Bella the Bunny will definitely stand the test of time, even when inquisitive little hands start squeezing and chewing on her, as babies inevitably do with their toys!
If you’re ready for this free crochet amigurumi pattern, let’s head to the tutorial now and find out how to make this delightful little bunny…
PDF PRINTABLE PATTERNS!
If you would prefer an ad-free, printable version of this pattern, you can purchase it from my Etsy store
BELLA THE BUNNY: A FREE CROCHET AMIGURUMI PATTERN
Before you begin, please carefully read all the information below… I’ve included useful points in this free crochet amigurumi pattern that will be helpful.
LEVEL
Easy (see details of project levels at the Craft Yarn Council).
PATTERN NOTES
- US crochet terms used throughout.
- The bunny head and ears are worked in continuous rounds: you do not join to the first stitch at the beginning of the round. Working in this way ensures that there is no seam.
- When working in continuous rounds, it’s important to attach a stitch marker to the first stitch of each round otherwise it will be extremely hard to spot the beginning of each round.
- Increases will be made in the head and ears by placing 2 single crochet (2sc) in the same stitch.
- When making the decreases, you will use the invisible single crochet decrease. This variation of the regular single crochet decrease (sc2tog) is easy to do and it makes the decrease stitch virtually indistinguishable from a regular stitch.
- You will stuff the head. The ears will remain unstuffed.
MATERIALS
- Yarn: #3, light worsted / DK / 8 ply
Examples could be: Paintbox Yarns Baby DK (183 yds/ 1.8oz [167m / 50g]) or Stylecraft Naturals Bamboo and Cotton
Colour A. Less than 150m / 164 yds (for the head, ears and cover for ring)
Colour B. Scrap amount of yarn for the ruffled collar
Colour C. Scrap amount of black yarn for the eyes
Colour D. Scrap amount of yarn for the nose
- Crochet Hook: D (3mm)
- Stitch marker
- 10g of Polyester toy filling
- Wood teething ring: 2 ¼ ” (5.5cm) to 2 ½” (6.25cm) in diameter. I recommend that you choose an organic, non-toxic wooden ring, preferably CPSIA compliant.
- Scissors
- Tapestry needle
GAUGE
22 sts and 24 rows = 4” (10cm) in single crochet
STITCHES AND ABBREVIATIONS (US CROCHET TERMS)
ch(s) – chain(s)
dc – double crochet: Yarn over (yo), insert hook into stitch, yo, pull up a loop (3 loops on hook). Yo, pull through 2 loops (2 loops on hook). Yo, pull through remaining 2 loops. 1 double crochet completed.
fasten off – To fasten off securely, work one chain, then cut the yarn leaving a 5 – 6” tail. Pull the tail through the loop that is on your hook. Tighten gently.
Inv sc dec – invisible single crochet decrease: Insert your hook into the front loop only of the next stitch (2 loops on your hook). Insert your hook into the front loop only of the following stitch (3 loops on your hook). Yarn over, pull through the first 2 loops on your hook (2 loops left on your hook). Yarn over, pull through the remaining 2 loops on your hook. 1 invisible single crochet decrease completed.
sc – single crochet: Insert hook into stitch, yarn over (yo), pull up a loop (2 loops on hook). Yo, pull through both loops on hook. 1 single crochet completed.
sl st – slip stitch: Insert hook into stitch, yarn over (yo), pull up a loop, you will have 2 loops on your hook. Pull the first loop through the second loop. 1 slip stitch completed/
st(s) – stitch(es)
* to * – Repeat instructions between asterisks as many times as directed.
( ) – Sets of stitches to be worked within one stitch or space.
[ ] – The total number of stitches at the end of a row.
PATTERN INSTRUCTIONS
HEAD
With Colour A
Make a magic circle (if you do not like the magic circle method, see the Alternative Round 1 below).
Round 1. 6sc in the magic circle, do not join round, instead place a st marker in the first sc of the round [6sts].
Alternative Round 1. Ch2, 6sc in 2nd ch from hook, do not join round, instead place a st marker in the first sc of the round [6sts].
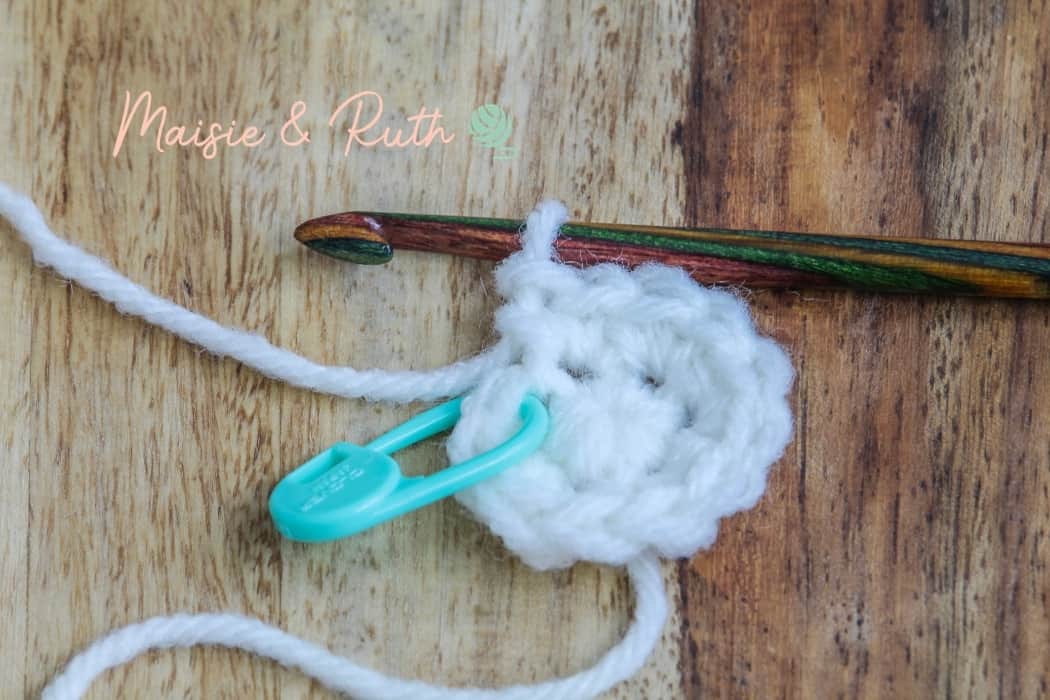
Round 2. 2sc in next 6 sts [12 sts].
The image below was taken at the end of round 2. As you are working in continuous rounds, place a stitch marker into the first stitch of each round. This will ensure that you can easily keep track of the beginning of rounds.
Round 3. (1sc in next st, 2sc in next st) 6 times [18 sts].
Round 4. (1sc in next 2 sts, 2sc in next st) 6 times [24 sts].
Round 5. (1sc in next 3 sts, 2sc in next st) 6 times [30 sts].
Round 6. (1sc in next 4 sts, 2sc in next st) 6 times [36 sts].
At the end of round 6, your work should measure 5 – 5.5 cm.
Rounds 7 – 11. 1sc in next 36 sts [36 sts].
You will now start your decreases.
Round 12. (1sc in next 4 sts, 1 inv sc dec) 6 times [30 sts].
Round 13. (1sc in next 3 sts, 1 inv sc dec) 6 times [24 sts].
Round 14. (1sc in next 2 sts, 1 inv sc dec) 6 times [18 sts].
Round 15. (1sc in next st, 1 inv sc dec) 6 times (12 sts).
At the end of round 15, firmly stuff the head with polyester filling before moving on to the last round:

Round 16. (1sc in next 2sts, 1 inv sc dec) 6 times [9 sts].
Cut yarn and weave tail through the filling to hide.
The circumference of the head should be 15 – 16 cm approx.
EARS (MAKE 2)
With Colour A
Make a magic circle (if you do not like the magic circle method, see the Alternative Round 1 below).
Round 1. 6sc in the magic circle, do not join round, instead place a st marker in the first sc of the round [6sts].
Alternative Round 1. Ch2, 6sc in 2nd ch from hook, do not join round, instead place a st marker in the first sc of the round [6sts].
Round 2. (1sc in next st, 2sc in next st) 3 times [9 sts].
Round 3 . (1sc in next 2 sts, 2sc in next st) 3 times [12 sts].
Round 4. (1sc in next 3 sts, 2sc in next st) 3 times [15 sts].
Rounds 5 – 11. 1sc in each st around [15 sts].
At the end of round 11, your ear should measure:
W – 3 – 3.5 cm approx.
L – 4 – 4.5cm approx.
Now seam the ear shut with a sl st seam.
Cut yarn, leaving a long tail about 10″/ 25cm.
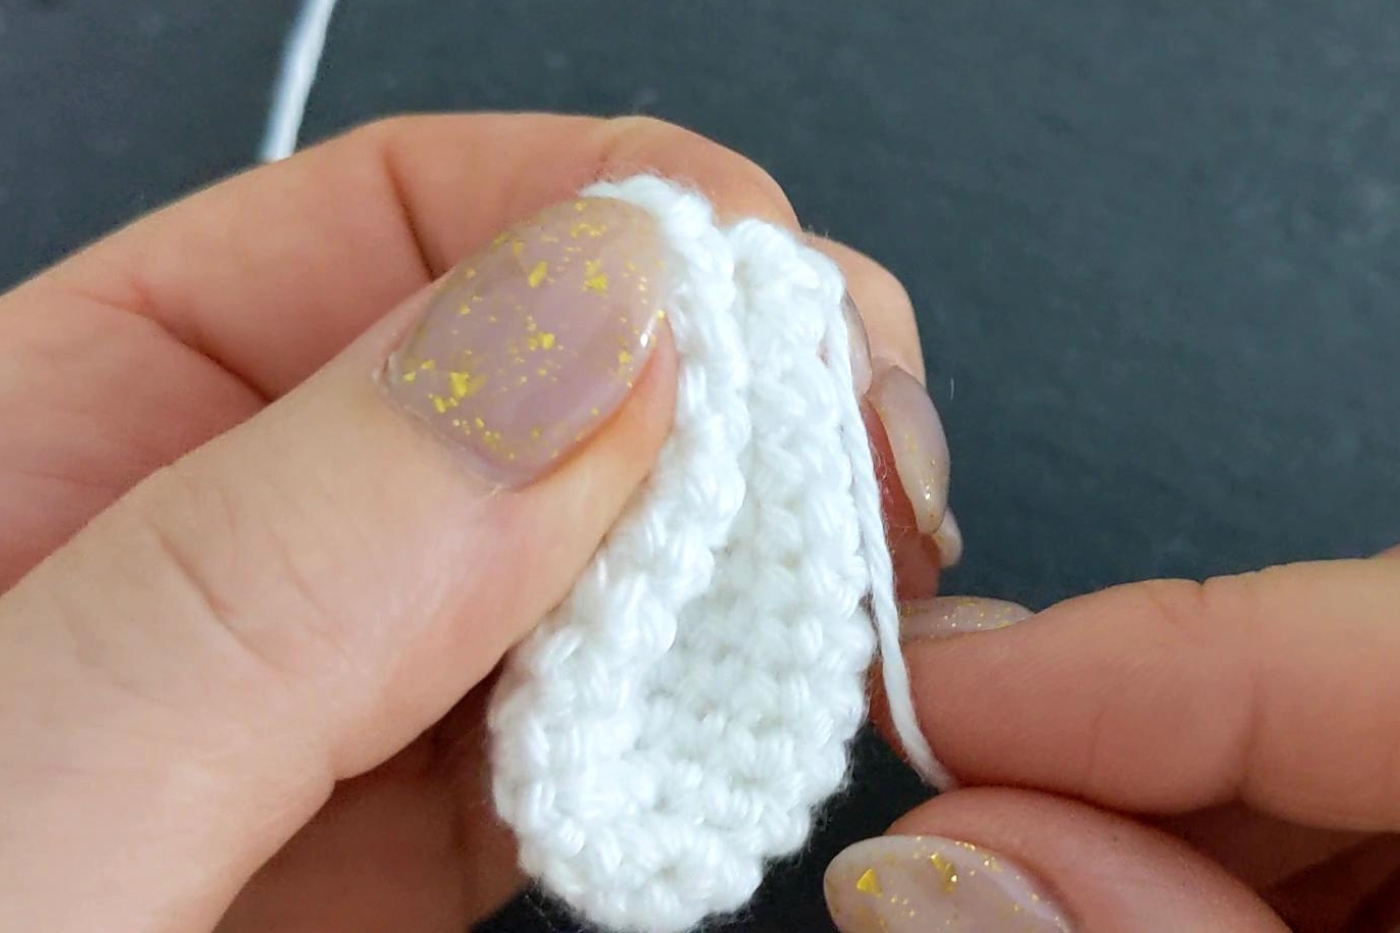
It is time to shape the ear. Fold the ear in half and sew the two sides together:
RUFFLED COLLAR
With Colour B
Ch 11 (loosely)
Row 1. 1dc in 3rd ch from hook (skipped 2 chs do not count as your 1st st), 4dc in same ch, 5dc in next 8 chs, TURN [45sts].
Row 2. Ch2 (counts as your first st), 1dc in next 44 sts [45 sts].
Cut yarn, leaving a tail for sewing a couple of stitches to join the collar later.
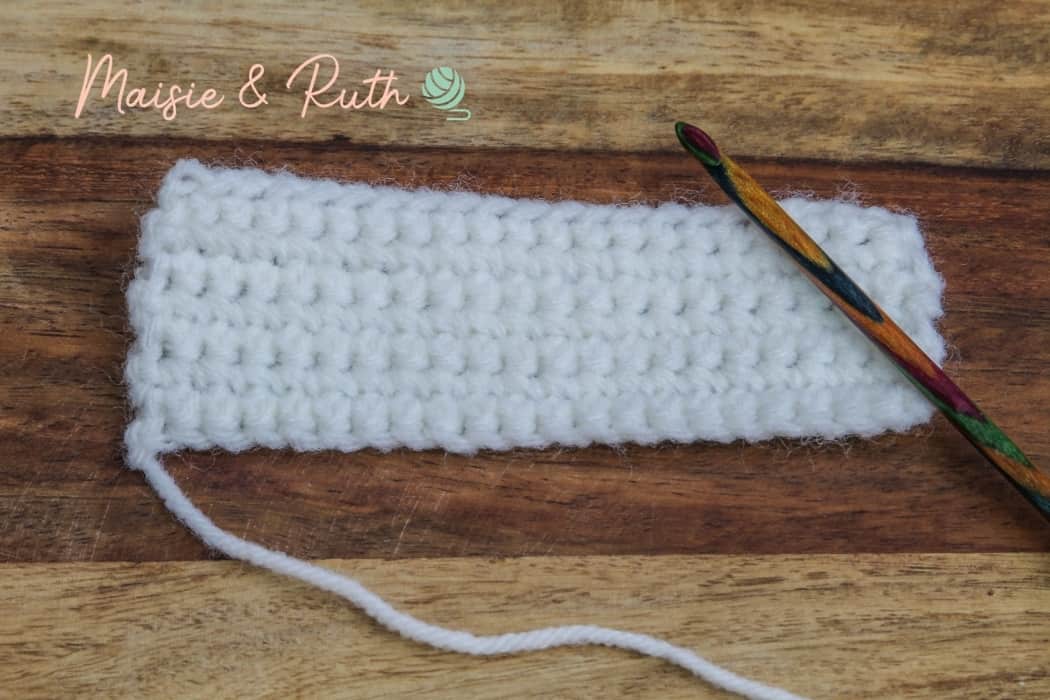
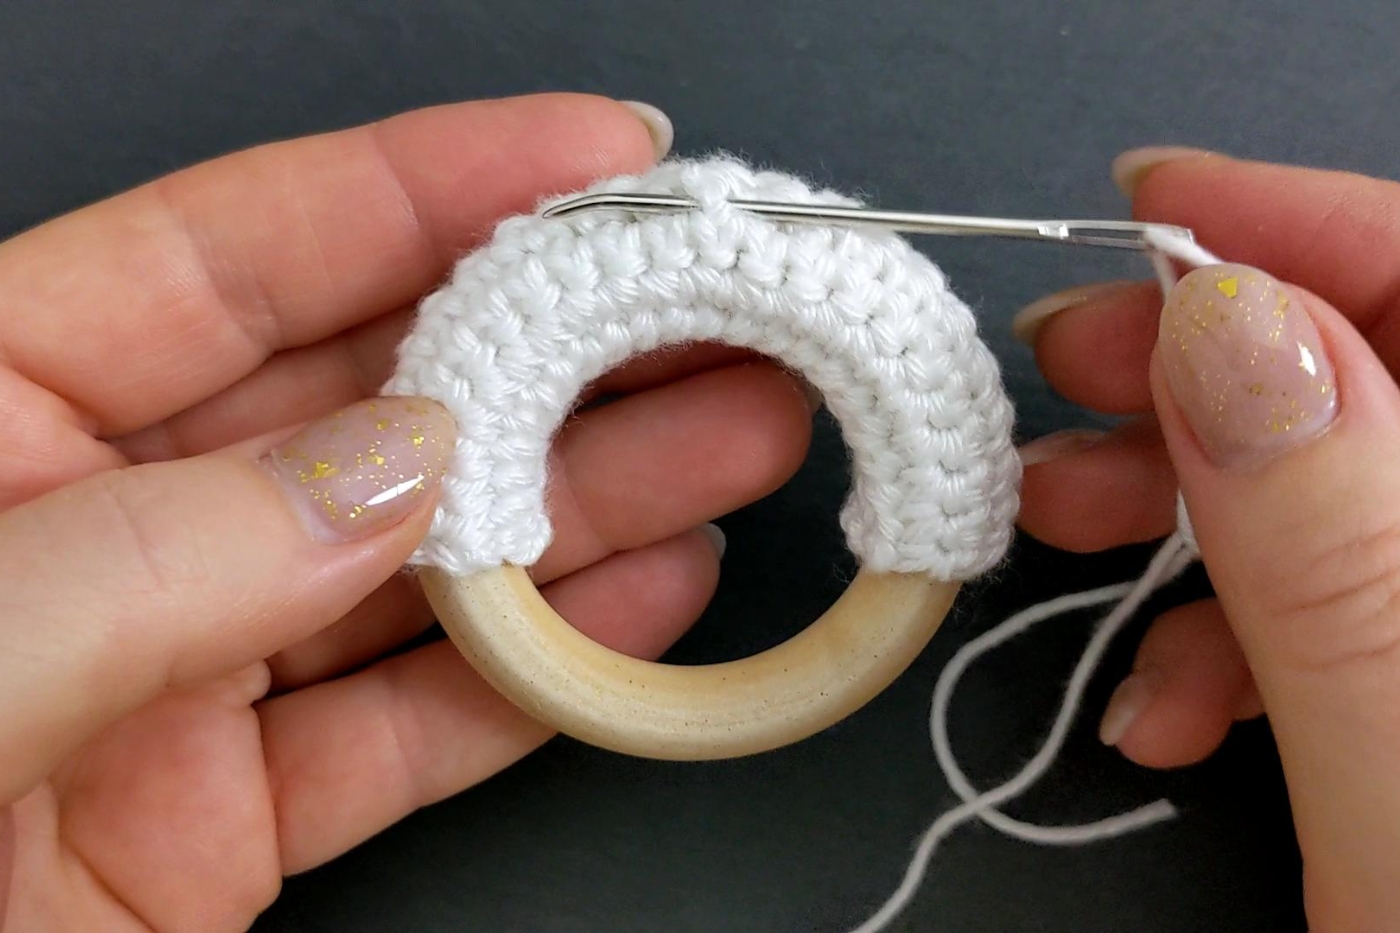
COVER FOR TEETHING RING
With Colour A
Ch 22
Row 1. 1sc in 2nd ch from hook, 1sc in next 20 ch, TURN [21 sts].
Row 2. Ch1 (does not count as your first st), 1sc in same st, 1sc in next 20 sts, TURN [21 sts].
Rows 3 – 7. Repeat row 2.
After row 7, the cover should measure:
W – 1.5″ (3.5cm) approx.
L – 3.75″ (9.5 cm) approx.
Cut yarn and fasten off, making sure that you have left a long tail (about 12″ / 30 cm) for sewing the cover around the teething ring later.
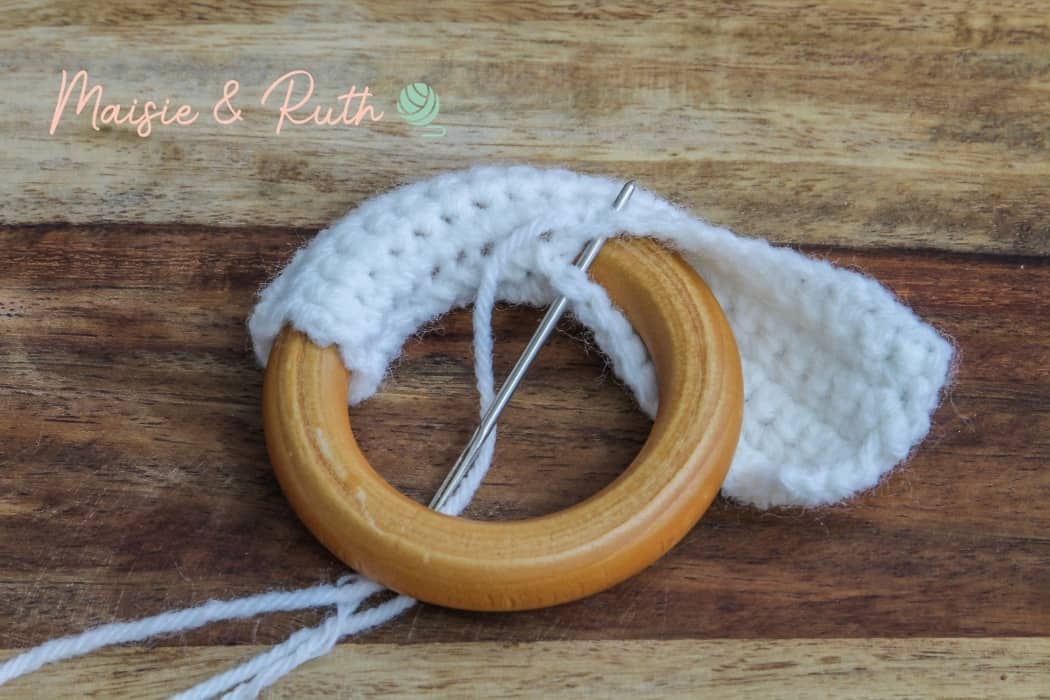
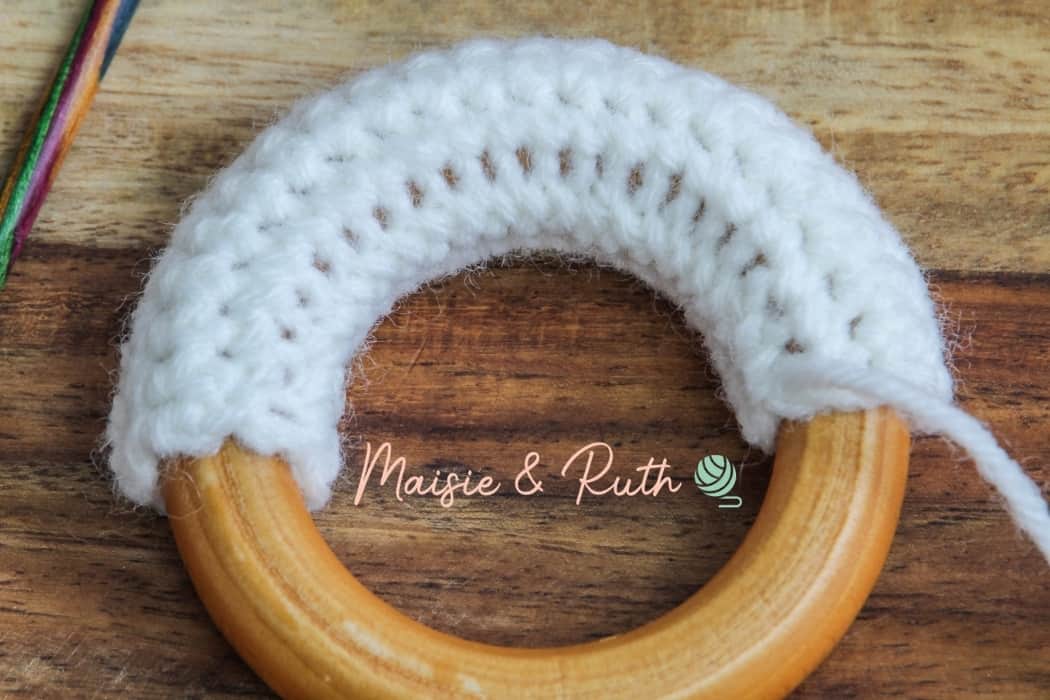
When you have completed the cover, position it over the ring and whip stitch the two sides together.
You will need to stretch the cover over the ring as you seam, but making the cover to this measurement ensures a nice snug fit and will prevent it from sliding around the teething ring:
ATTACH EARS
Attach ears to head. I attached the ears between the 2nd and 3rd rows from the top of the head. When attaching the ears, a tip is to insert a couple of pins through the ears into the head. This secures everything and makes it easier to sew the ears in place:
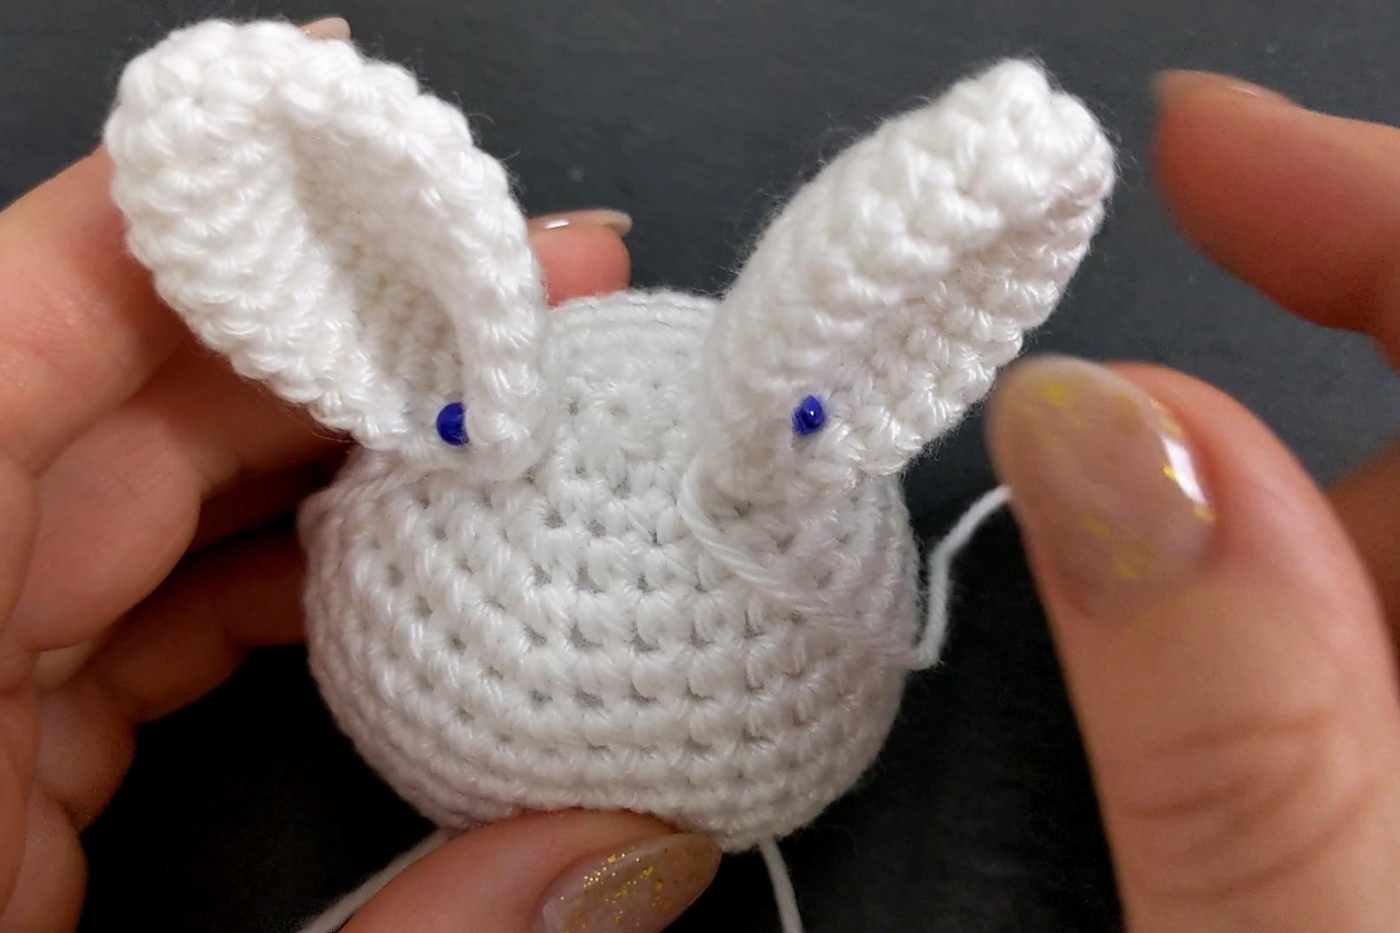
EMBROIDER EYES
With Colour C
I embroidered the eyes around some stitches on the 9th row from the top of the head (5 sts in between each eye).
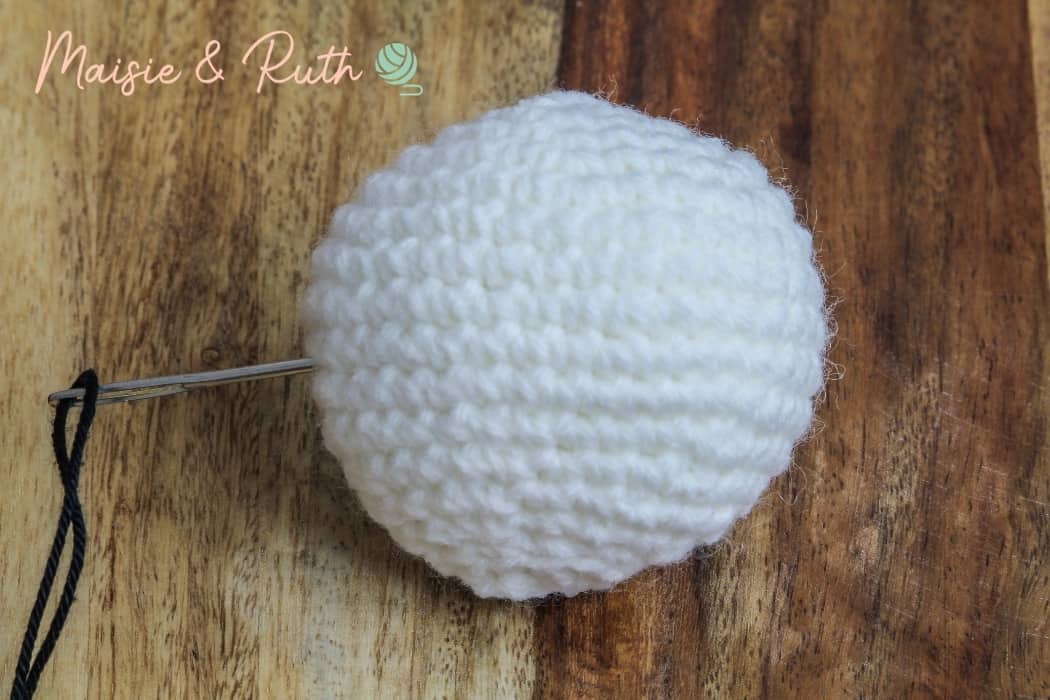
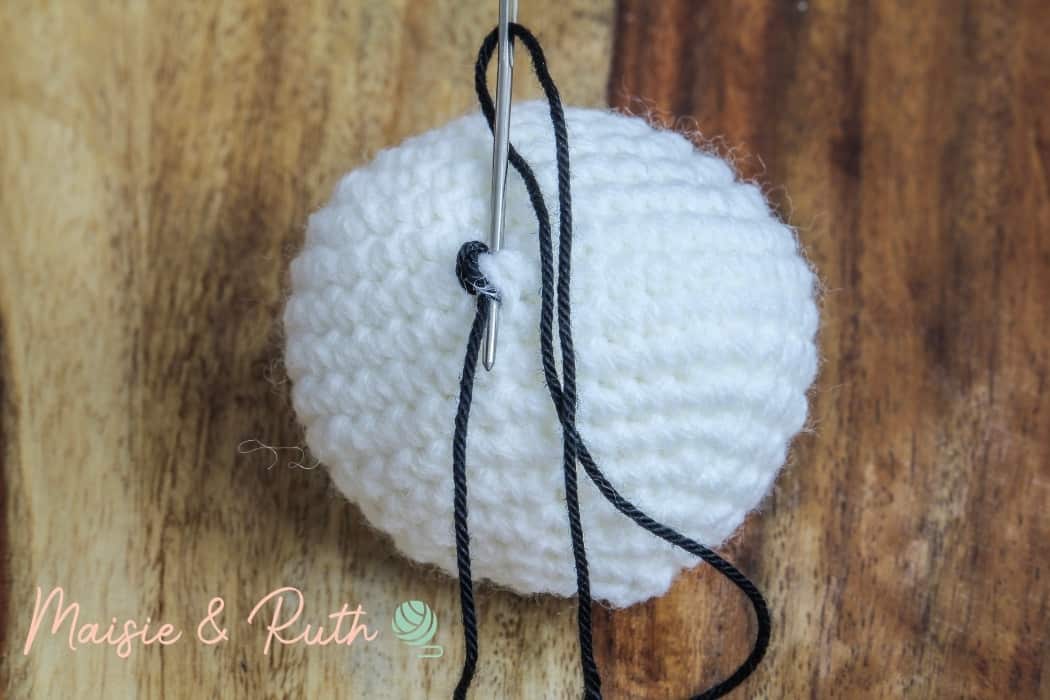
Step 1. Thread your black yarn (about 10″ /25 cm) onto your needle.
Step 2. Starting at the side of the head, insert the needle into your work, as shown in the image below:
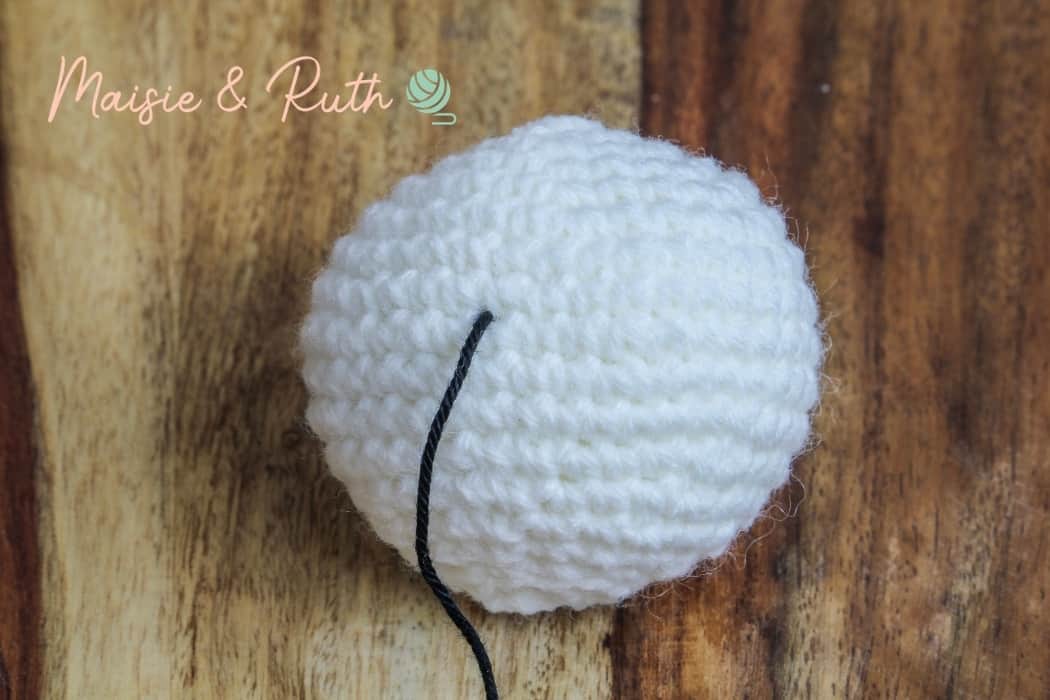
Step 3. Pull the needle so that the yarn comes out at the spot where you want your first eye. The end of your yarn should be left within the head so that it is fully concealed:
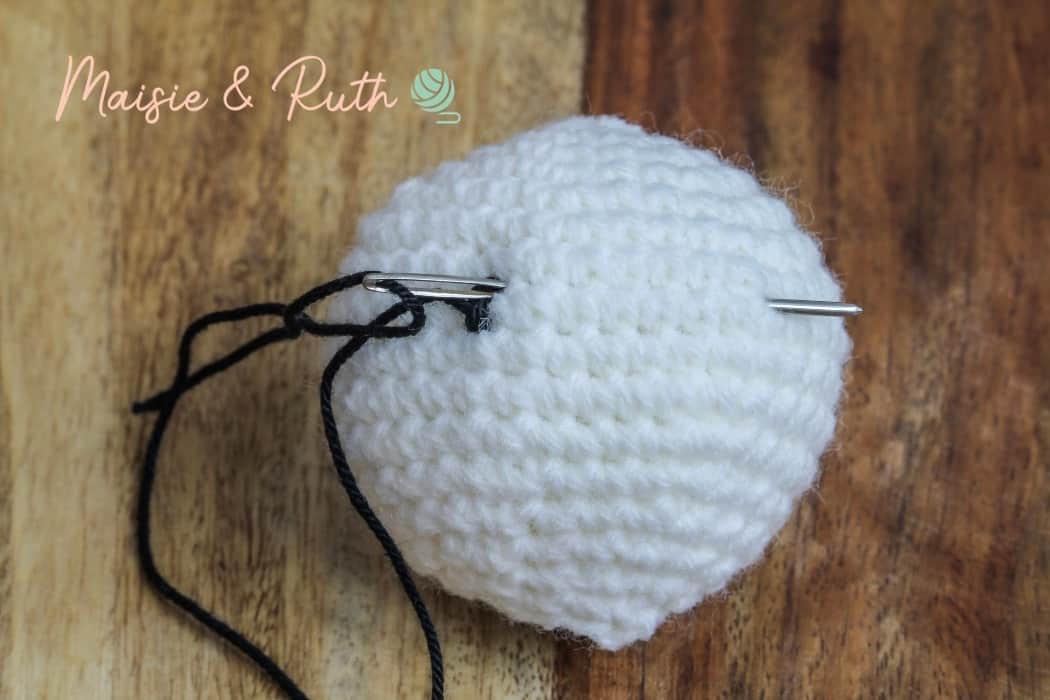
Step 4. Insert the needle just slightly above the hole where your yarn is protruding from, then come back through the same hole where your yarn is sticking out from:
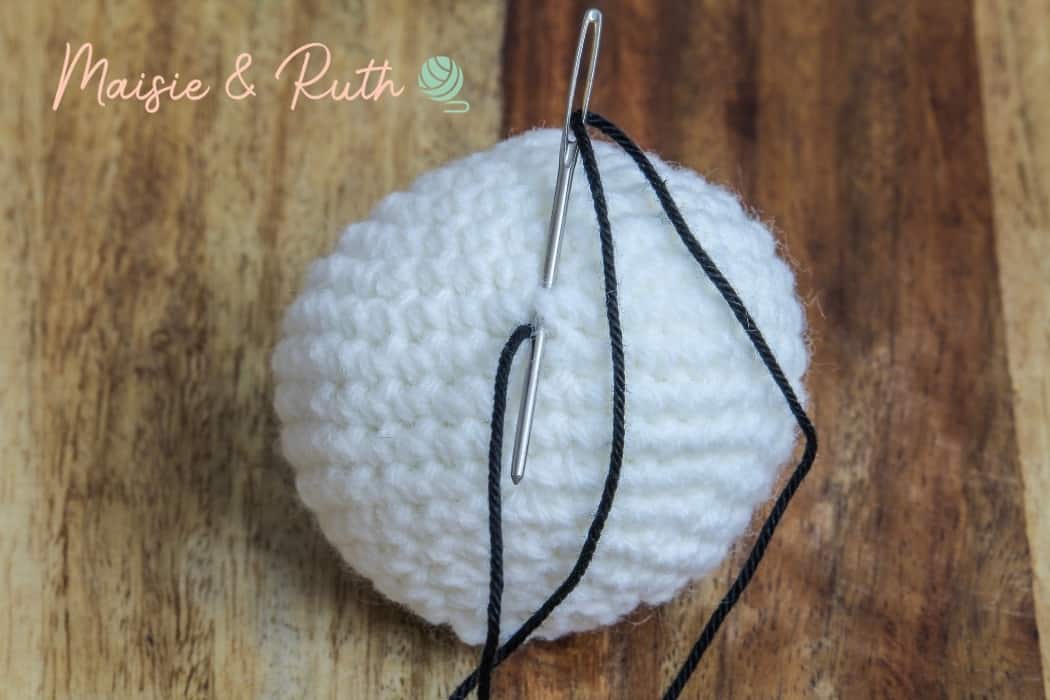
In the image below, you can see that part of the first eye has now been formed:
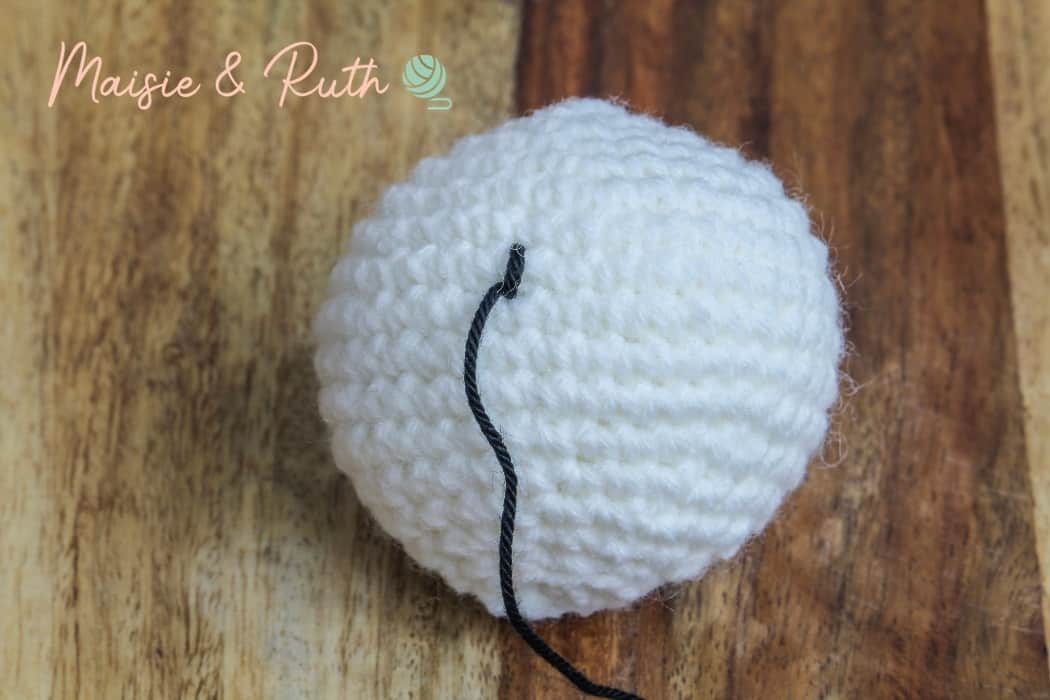
Repeat step 4 twice more (if you would like a bigger eye, repeat this step as many times as you like):
Step 5. Once you are happy with the first eye, insert your needle horizontally into the head and bring it out at the point where you want your second eye to be:
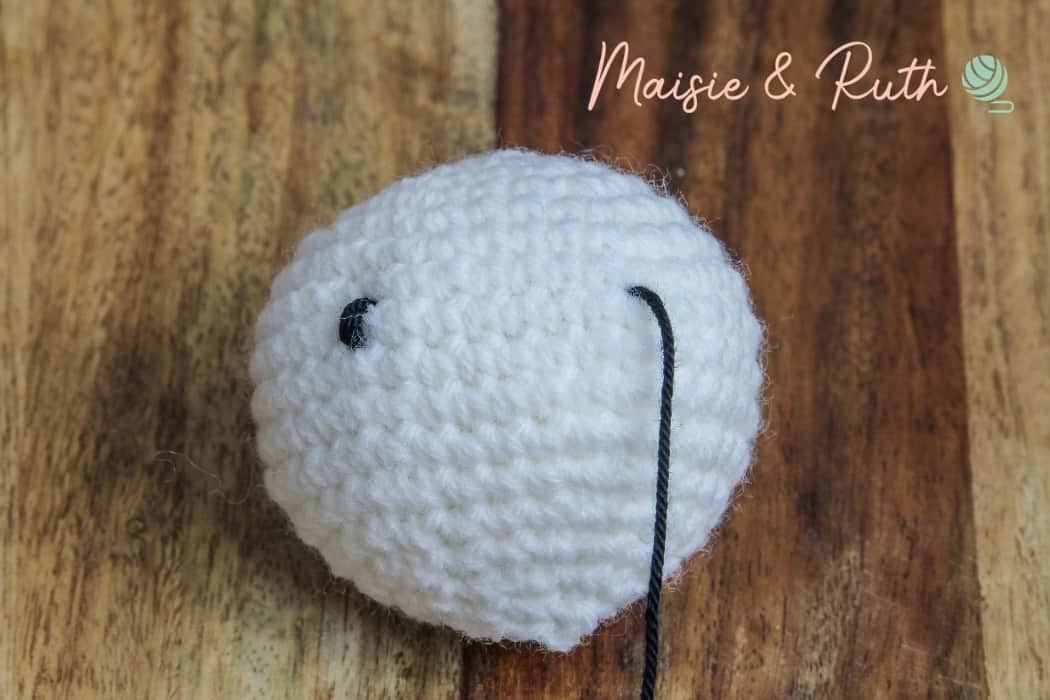
You will make the second eye in exactly the same manner as the first eye that you have just completed.
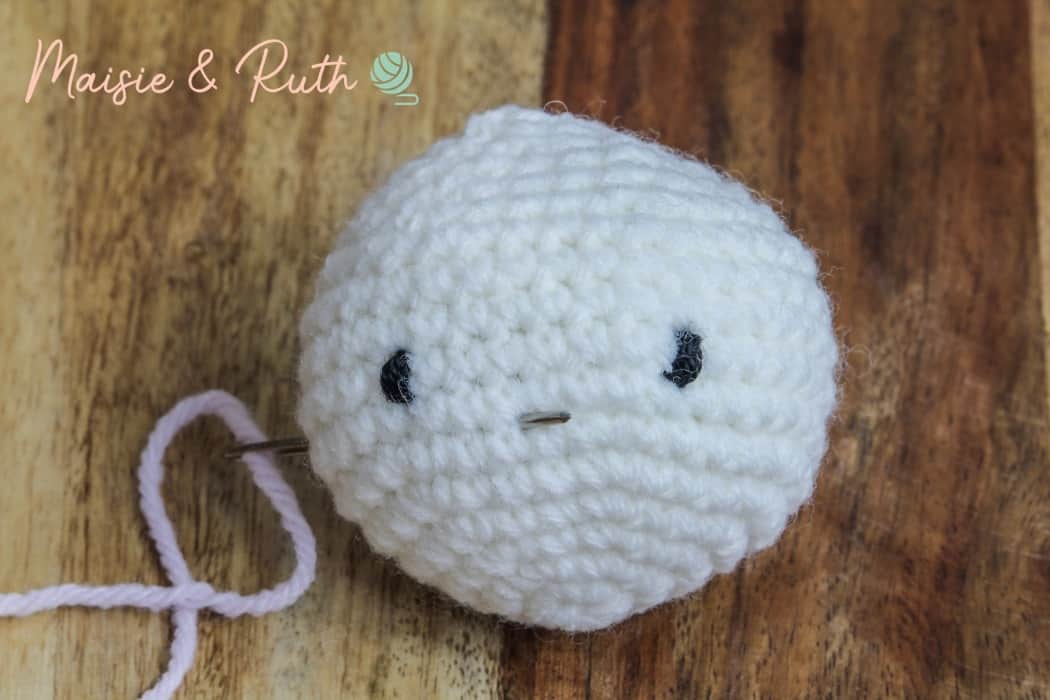
EMBROIDER NOSE
With Colour D
I embroidered the nose over one stitch, situated on the 9th row from the top of the head.
Step 1. Thread your needle with some pink yarn (about 10″ /25 cm) .
Step 2. Starting at the side of the head, insert the needle into your work:
Step 3. Pull the yarn out at the spot where you want your nose to be positioned. The end of your yarn should be left within the head so that it is fully concealed.
Step 4. To make a horizontal stitch for the nose, insert the needle just slightly along from where your yarn is sticking out from. Bring the needle back out through the same hole where your yarn is coming from:
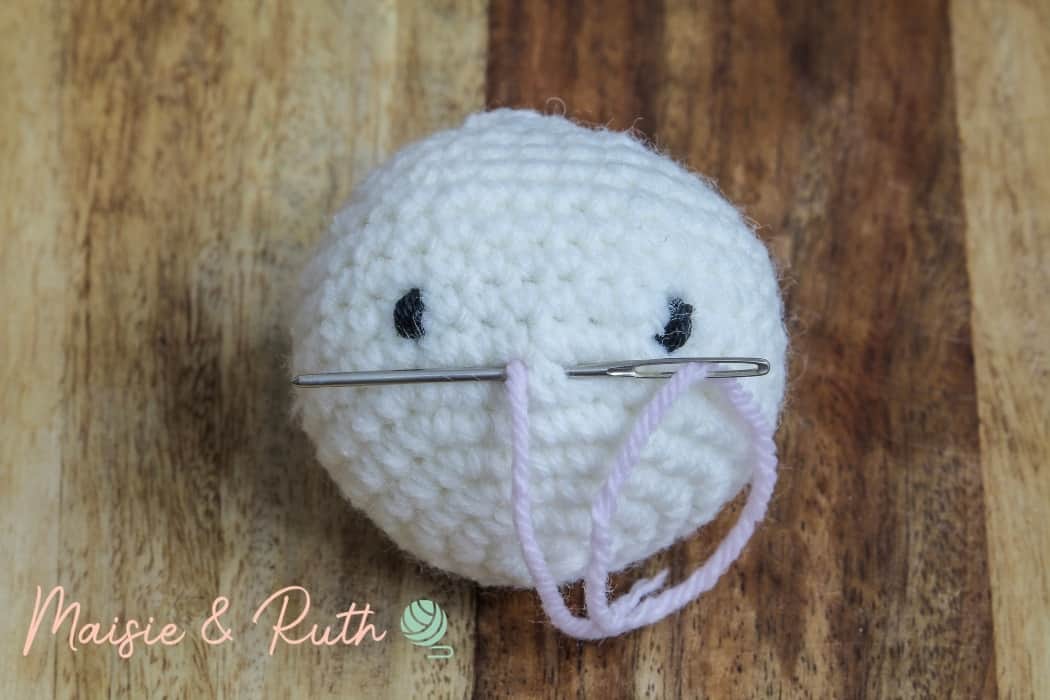
Repeat step 4 once more (or as many times as you like for a bigger bunny nose):

Remember that embroidering these little details on the face can be trial and error… don’t be afraid to pull the yarn out and start again (sometimes several times over) to get the look that you want. Like everything, this step does get easier with more practise.
ATTACH HEAD TO RING
Cut a piece of yarn approx. 30″ / 76cm long.
Thread it through your yarn needle and attach it to the centre of the ring cover:
Tie a few knots to secure.
Re-thread your needle and start sewing the head to the ring cover (this doesn’t need to be especially neat as it will be covered by the ruffled collar).
ATTACH RUFFLED COLLAR
When you have assembled your bunny, wrap the collar around the base of the head and with your needle and yarn, join both sides together with a couple of stitches.

I really hope that you enjoyed this free crochet amigurumi pattern…comment below and let me know if you had fun working on this project!
If you make Bella the Bunny, I would love to see your photos of her! Tag me on Instagram using @maisieandruth 😊
PIN ME FOR LATER!
Happy crocheting!