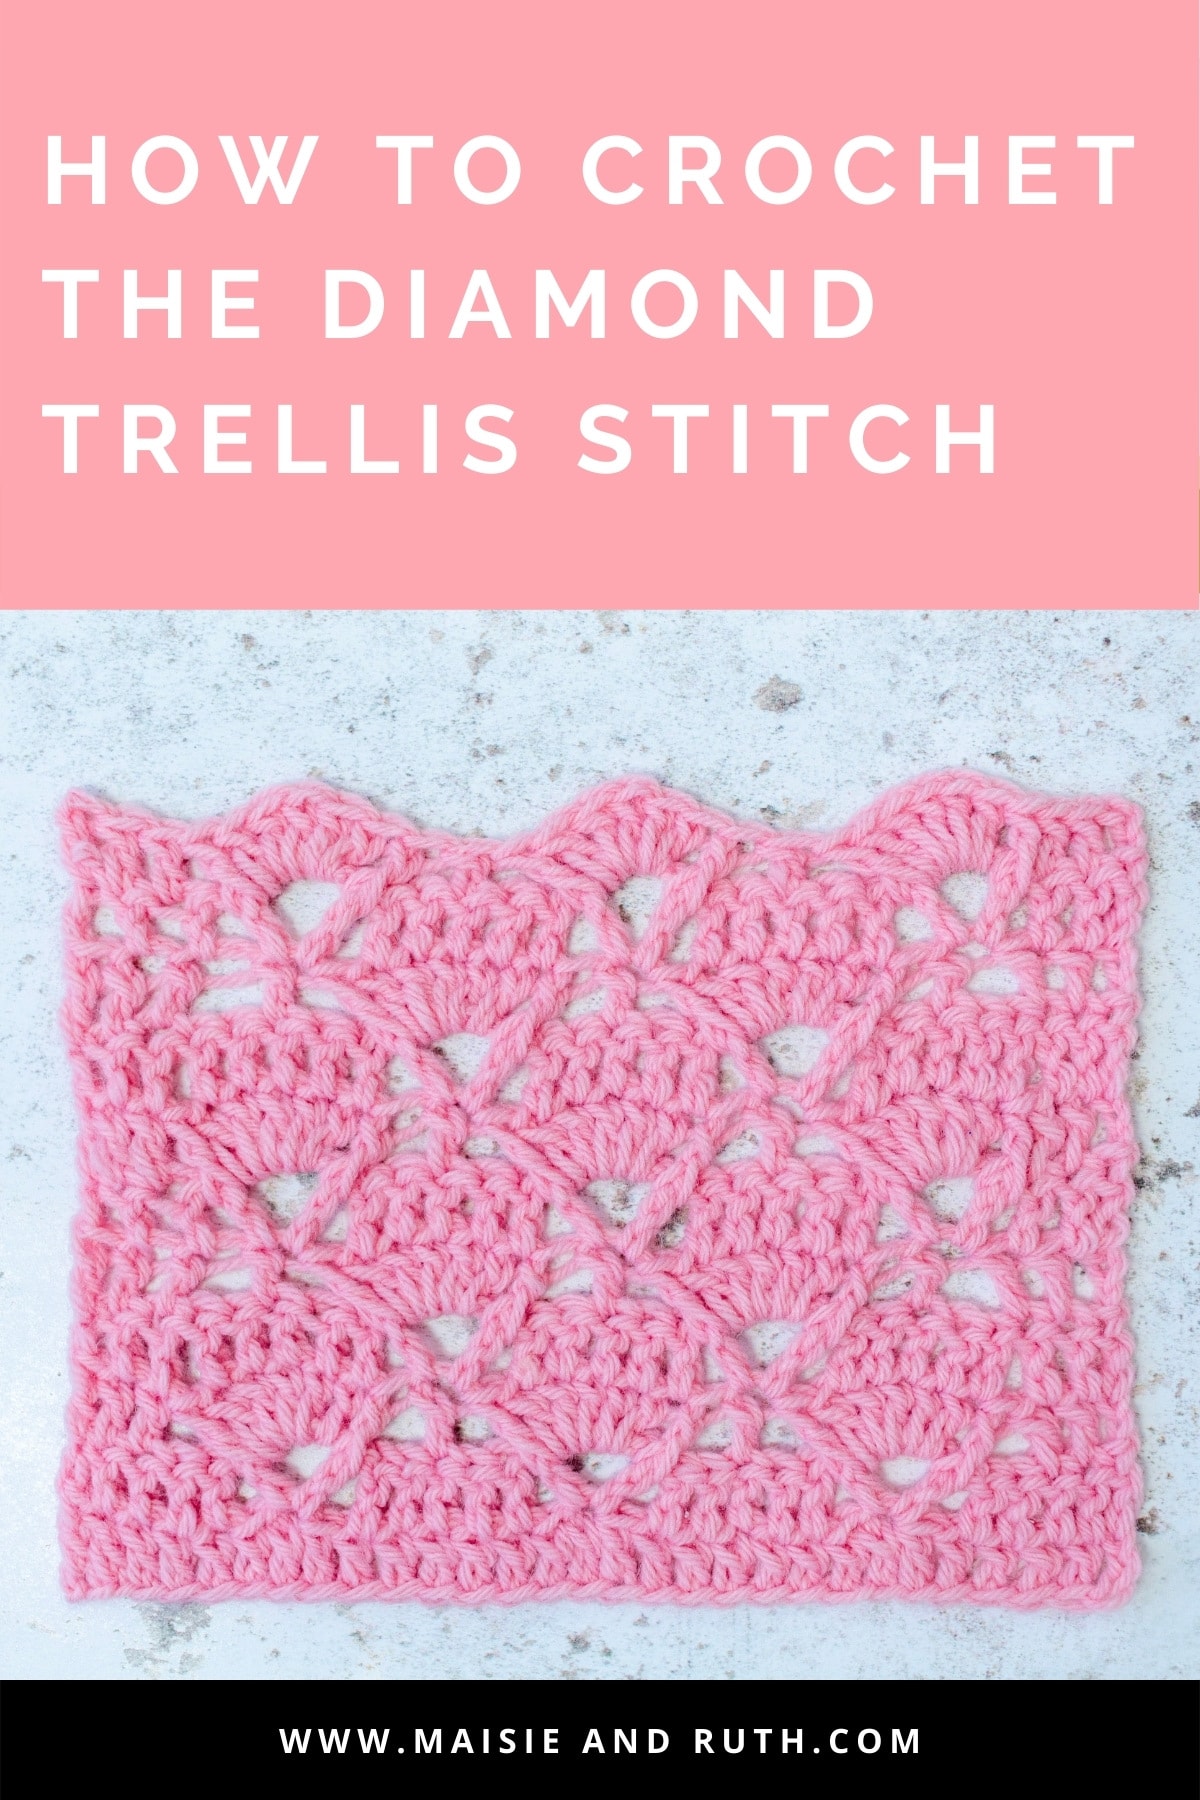
Learn to crochet the pretty Diamond Trellis Stitch by following along with my step-by-step photo tutorial below!
There’s also a VIDEO tutorial for this pattern!
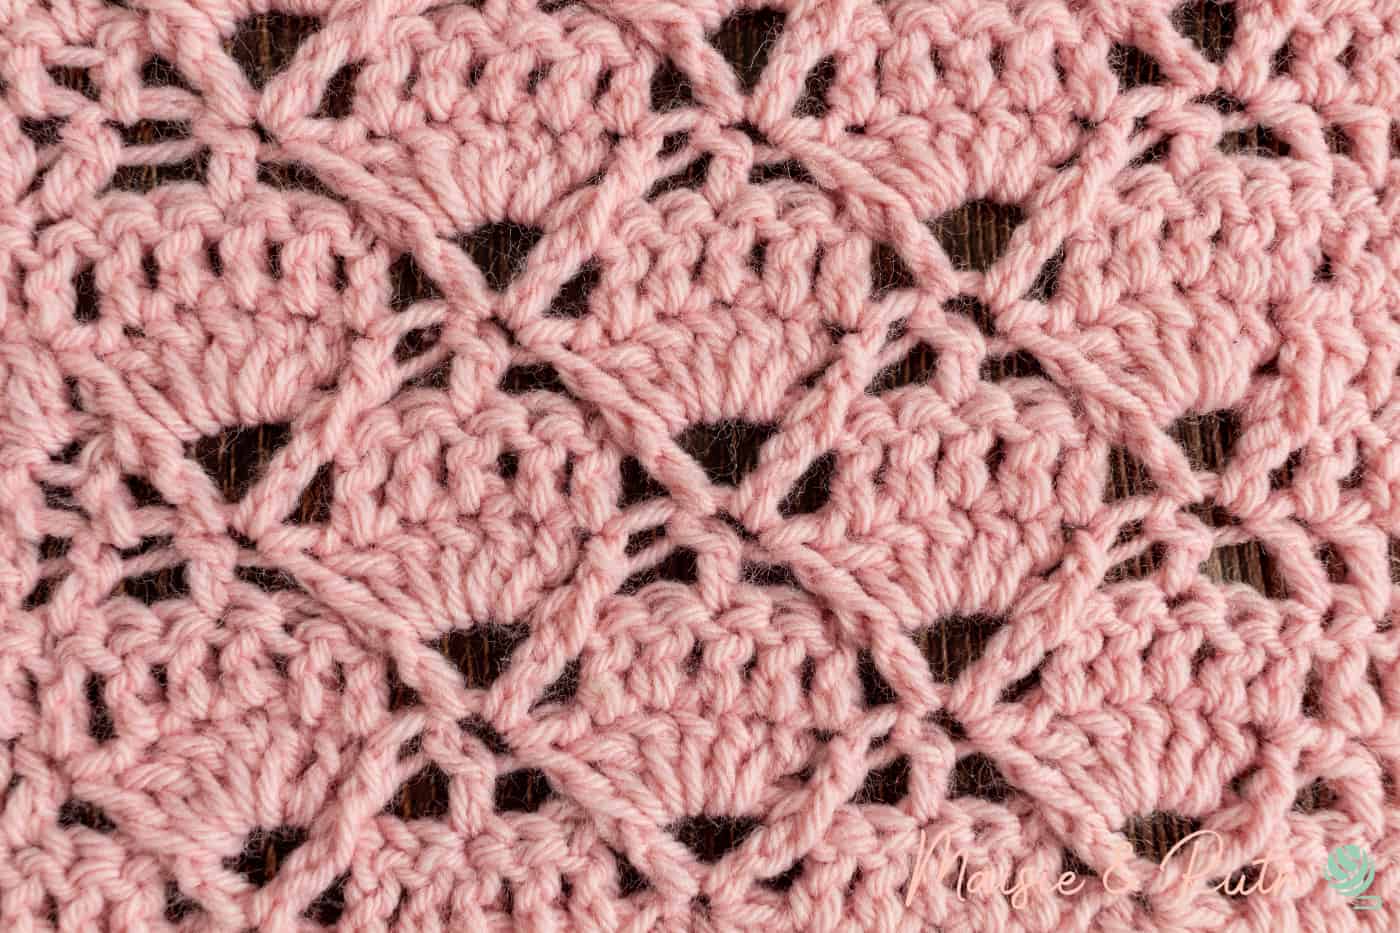
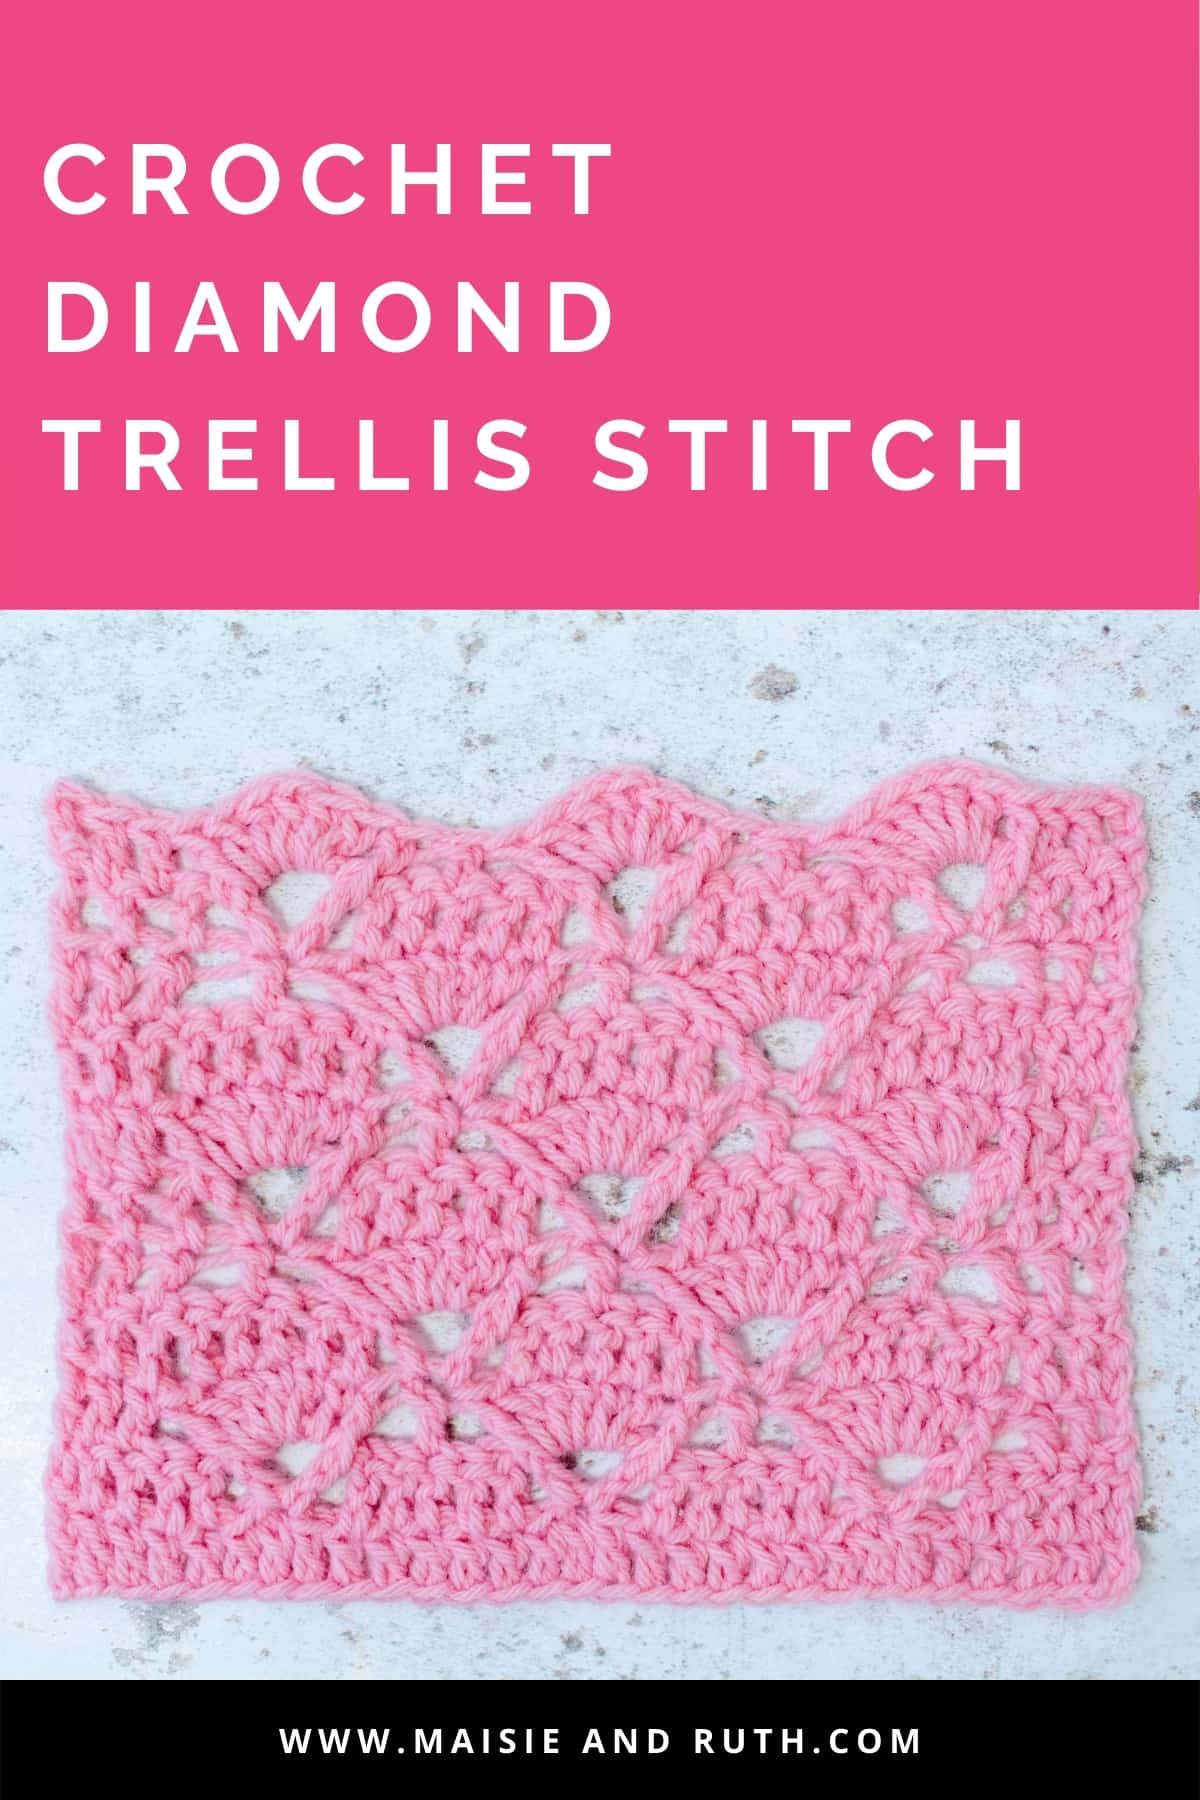
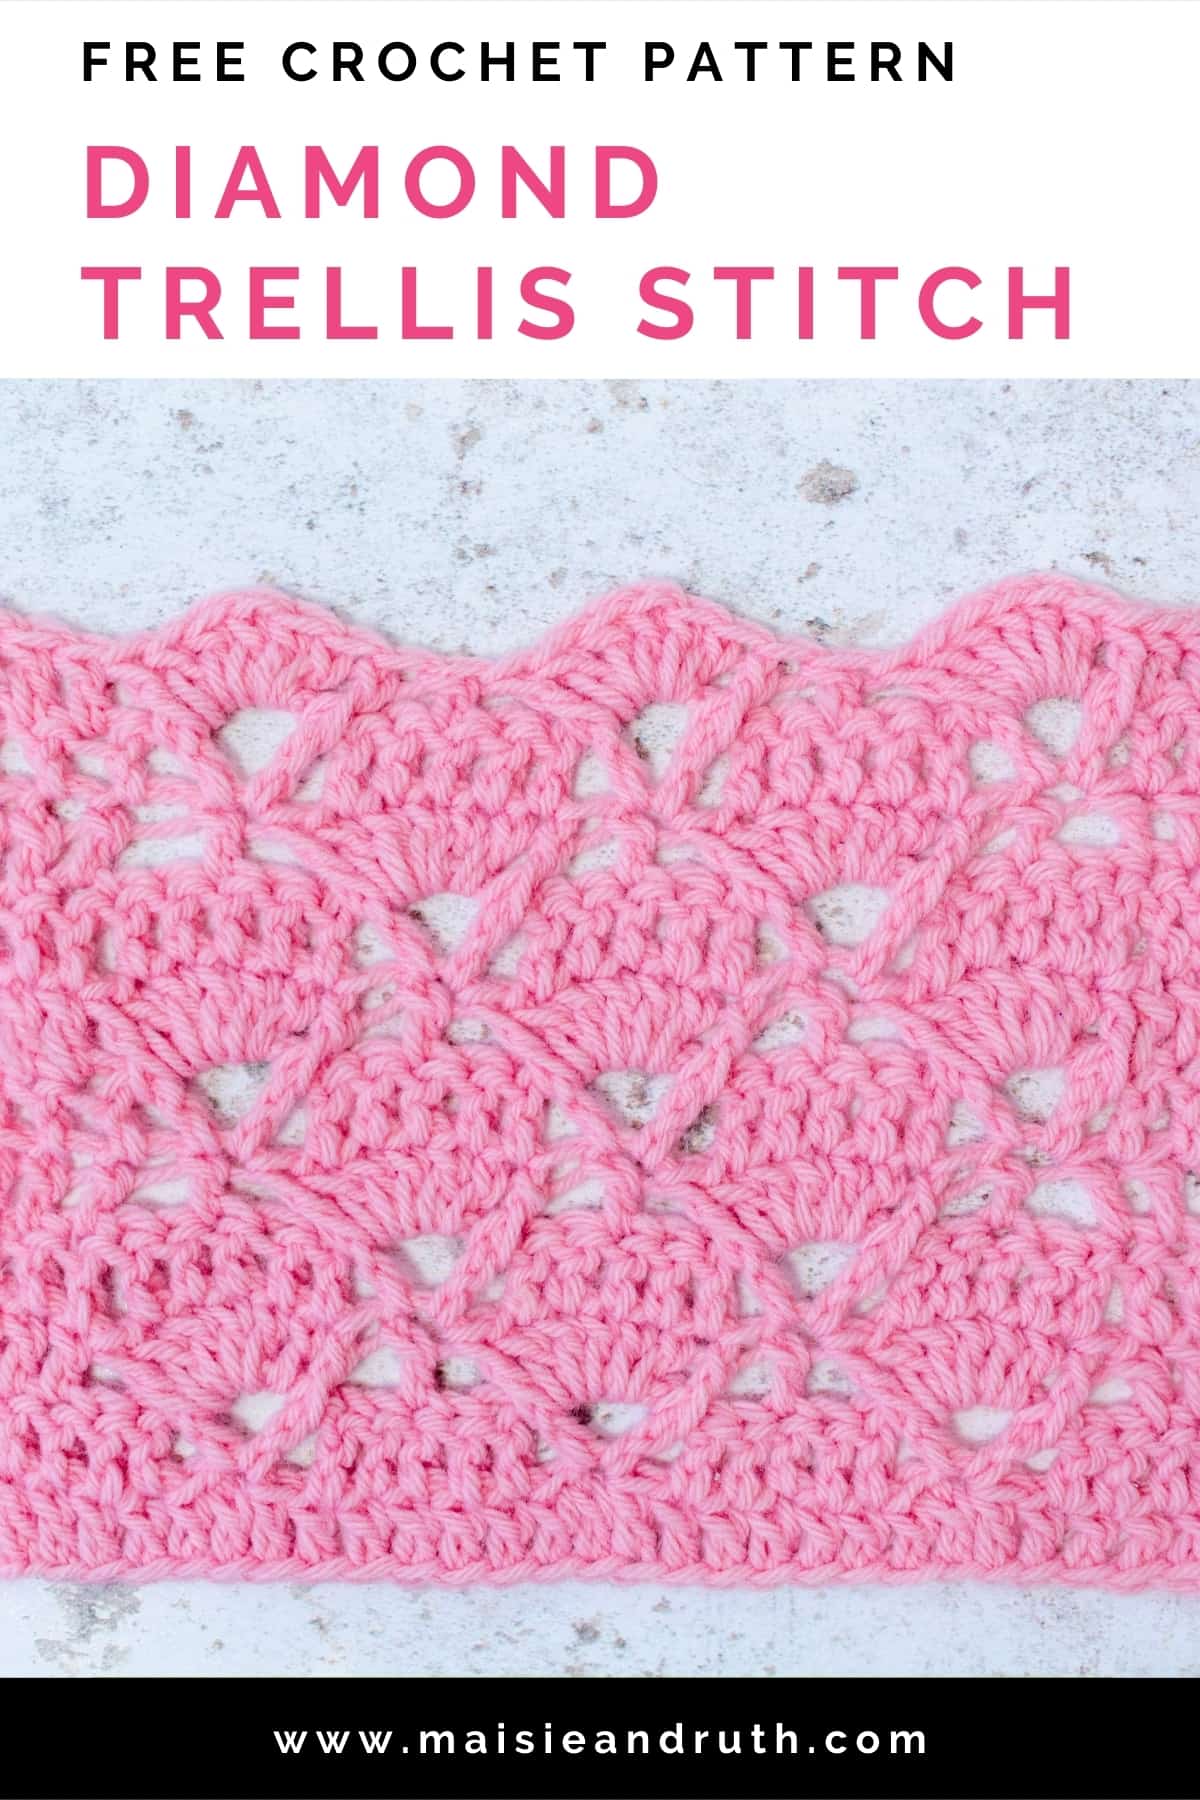
The crochet diamond trellis stitch has a beautiful raised texture, achieved in part by working front post double crochet stitches throughout the pattern.
The lacy look is extremely attractive and it will suit many crochet projects such as blankets, shawls, scarves and cushions, to name a few.
CROCHET A BABY BLANKET
If you would like to make a baby blanket from this stitch, check out my free crochet pattern for the Bonnie Blanket on the blog.
By mastering the stitch tutorial here first, I’m sure that you’ll be able to go on and tackle the Bonnie Blanket with no problem whatsoever.
Let’s get to it now and find out how to create this gorgeous stitch.
LEARN TO CROCHET THE DIAMOND TRELLIS STITCH
LEVEL
Easy – Intermediate (see details of project levels at the Craft Yarn Council).
SUPPLIES
- Yarn: #3, light worsted / DK / 8 ply. I used a small amount of Paintbox Yarns Baby DK from 1 ball
- Hook: Size 7 (4.5mm)
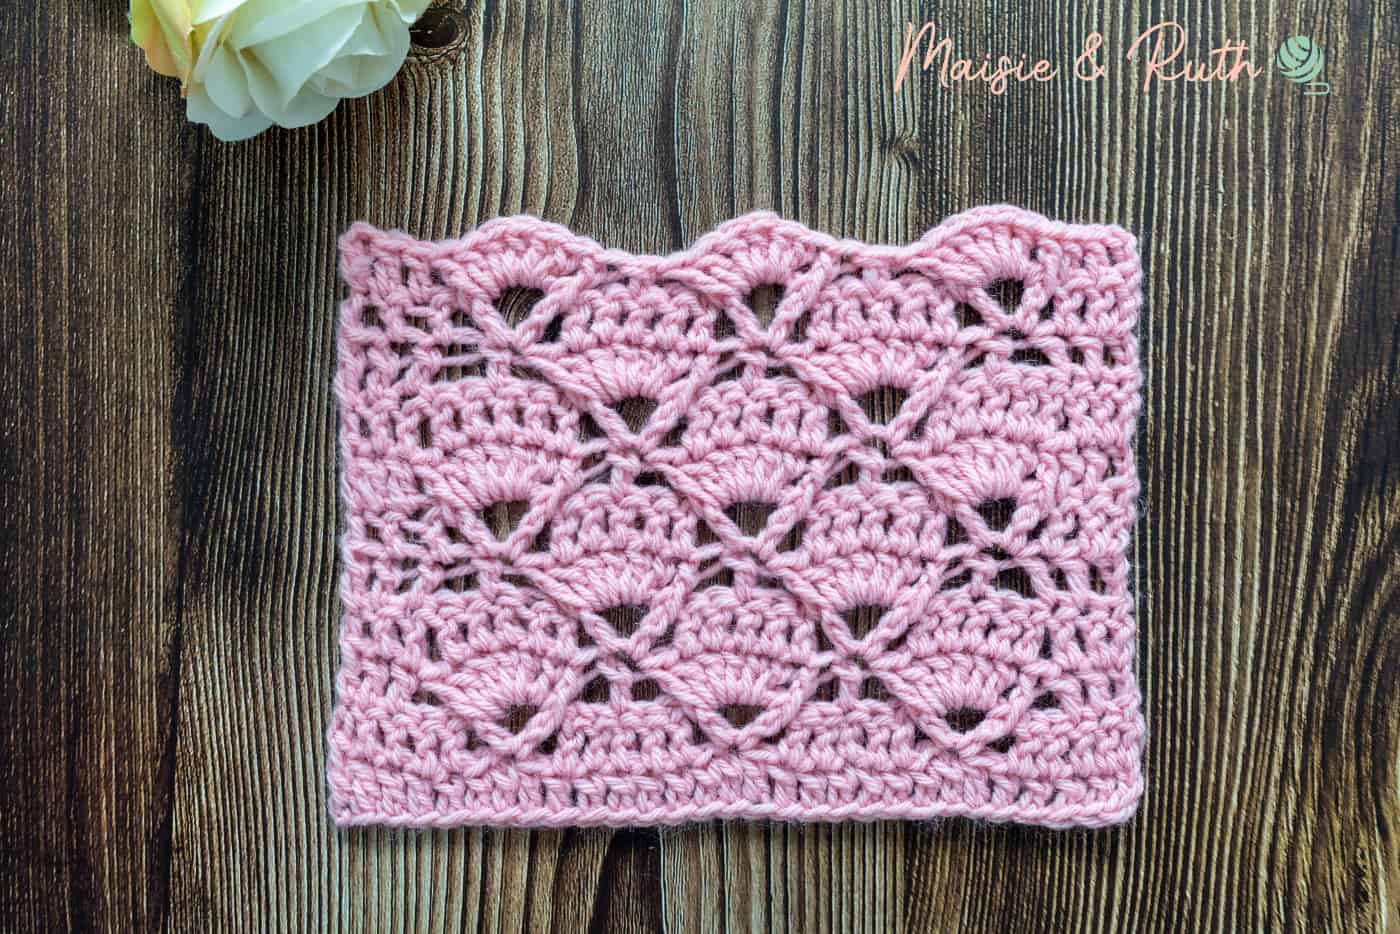
SIZE OF SWATCH
Width – 6.25 inches
Length – 5 inches
STITCHES AND ABBREVIATIONS (US CROCHET TERMS)
beg – beginning
ch(s) – chain(s)
dc – double crochet: Yarn over (yo), insert hook into stitch, yo, pull up a loop, 3 loops remaining on hook. Yo, pull through 2 loops, 2 loops remaining on hook. Yo, pull through remaining 2 loops. 1 double crochet completed.
sk – skip: Do not crochet into these stitches.
sp – space
st(s) – stitch(es)
* to * – Repeat instructions between asterisks as many times as directed.
( ) – Sets of stitches to be worked within one stitch or space.
[ ] – The total number of stitches at the end of a row.
SPECIAL STITCHES
FPdc – front post double crochet: Yarn over (yo), insert hook from front to back to front around the post of the next stitch, yo, pull up a loop, 3 loops remaining on hook. Yo, pull up a loop and pull through 2 loops on hook, 2 loops remaining on hook. Yo, pull up a loop and pull through remaining 2 loops on hook. 1 FPdc completed. See my FPdc Tutorial for helpful step-by-step photos.
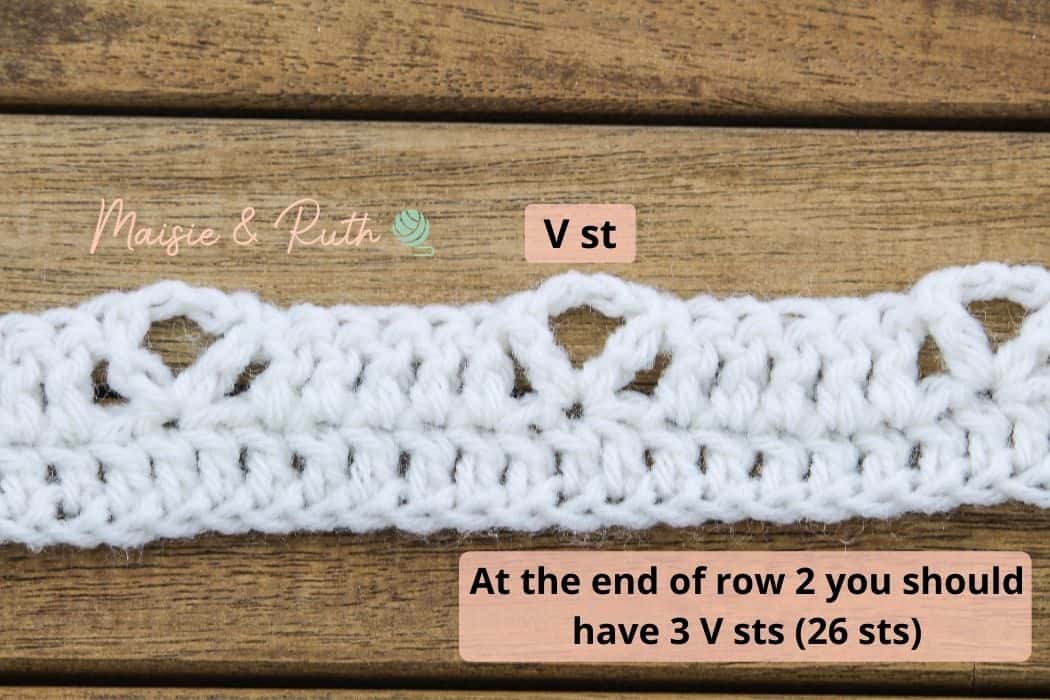
V stitch: (1dc, ch3, 1dc) worked in the same stitch
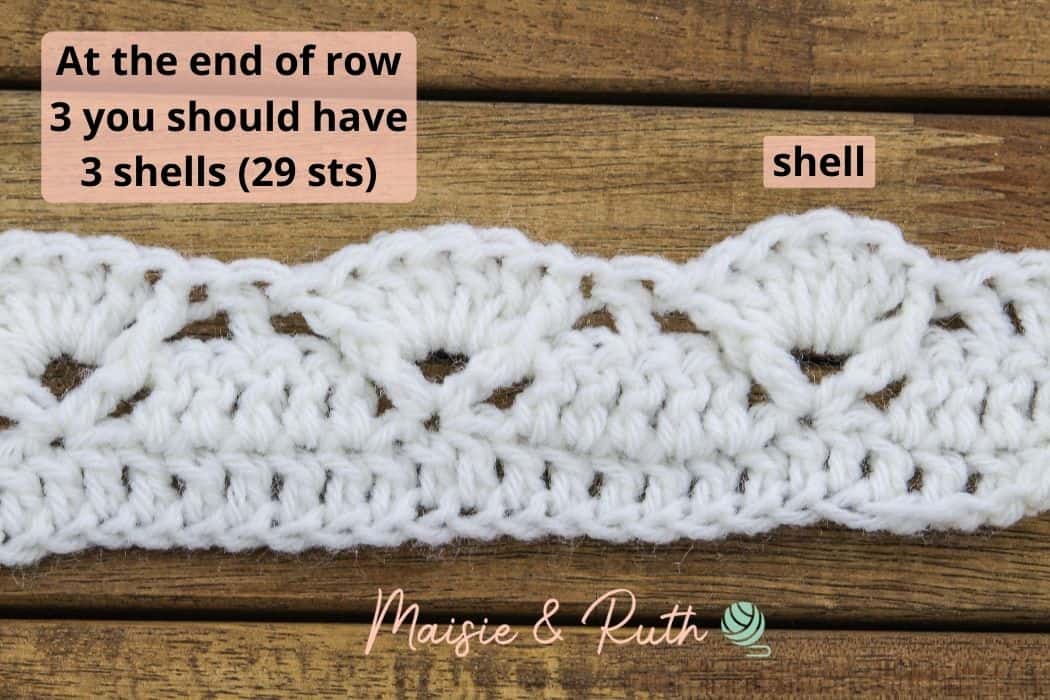
Shell stitch: 5dc in ch3 sp
PATTERN NOTES
- Written in US crochet terms.
- 4-row pattern repeat.
- The pattern uses a multiple of 8 + 5 (add an extra 2 for the foundation chain). For this particular swatch I chained a total of 31 (I chained 24, which is divisible by 8, then I added an extra 5 stitches. I chained a further 2 stitches for the foundation chain).
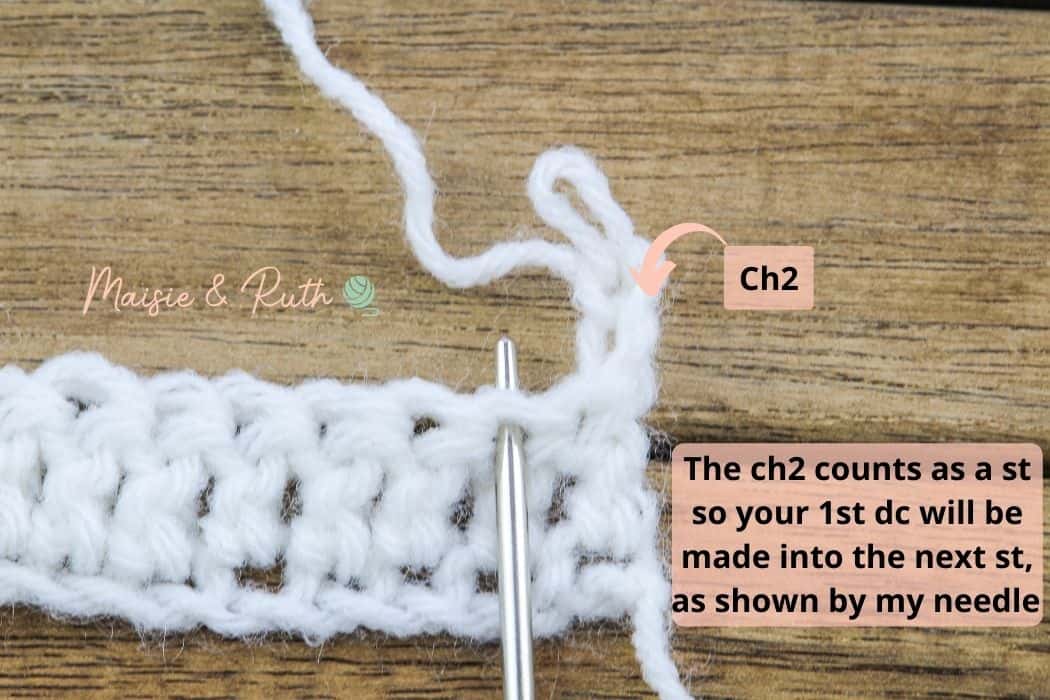
- The ch2 made at the beginning of each row counts as the first dc in the row.
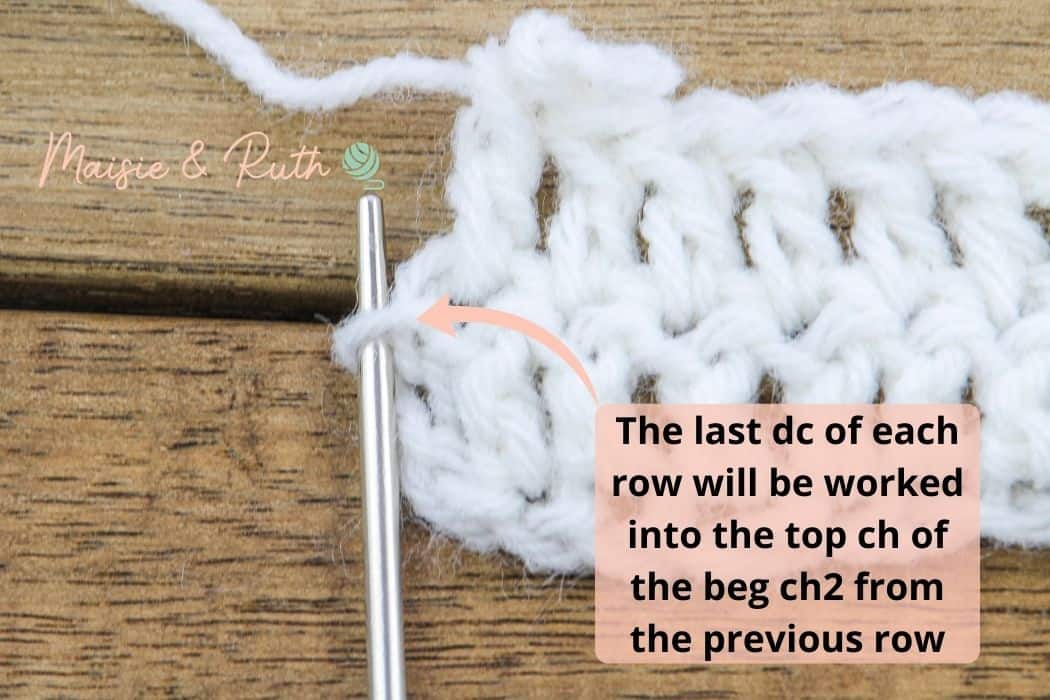
- At the end of rows, your last stitch should be worked into the top of the ch2 from the previous row.
- Odd numbered rows are right side rows; even numbered rows are wrong side rows.
- Turn at the end of rows.
- I have provided full written instructions for each row. These are then followed by photos for greater clarification.
- In most of the photos below, I show you what your work should look like after you have finished crocheting that particular part of the pattern.
VIDEO TUTORIAL
You can view the step by step video tutorial below… Just click on the play button!
PATTERN INSTRUCTIONS
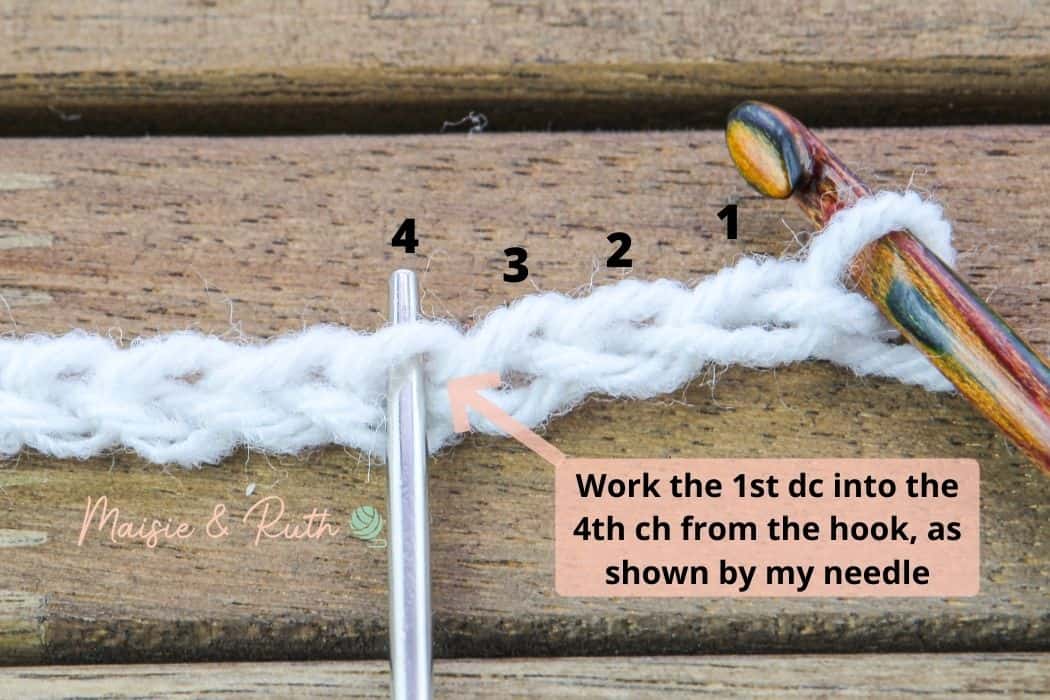
Ch 31 (your foundation chain should be pretty tight)
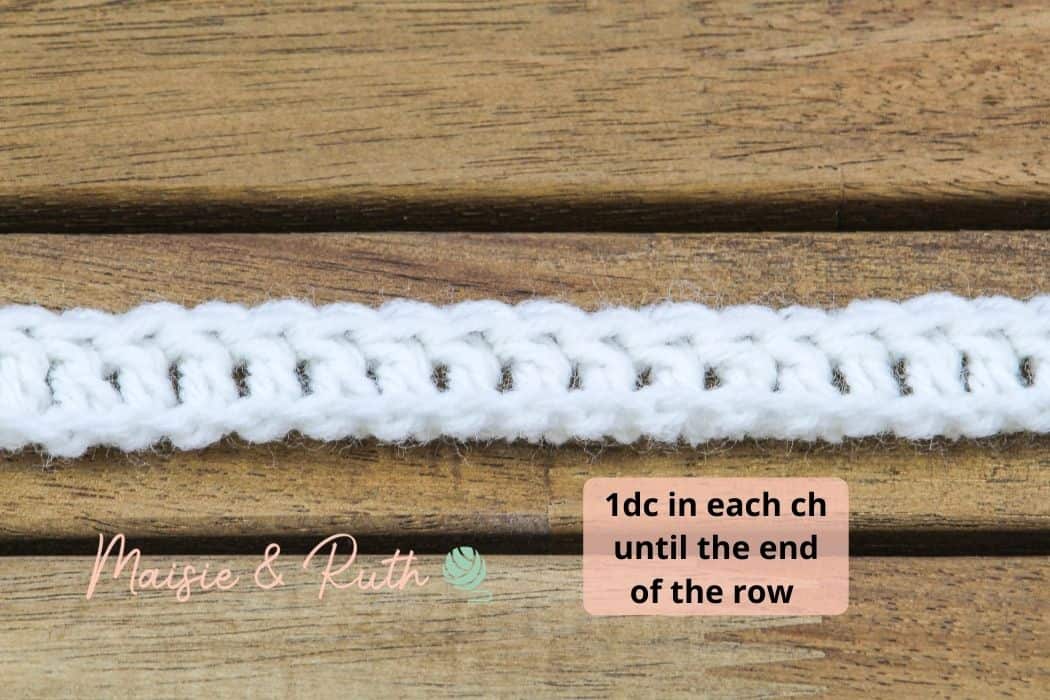
Row 1 (RS). 1dc in 4th ch from hook (skipped 3 chs count as 1st dc), 1dc in each ch until end of row, TURN [29 sts].
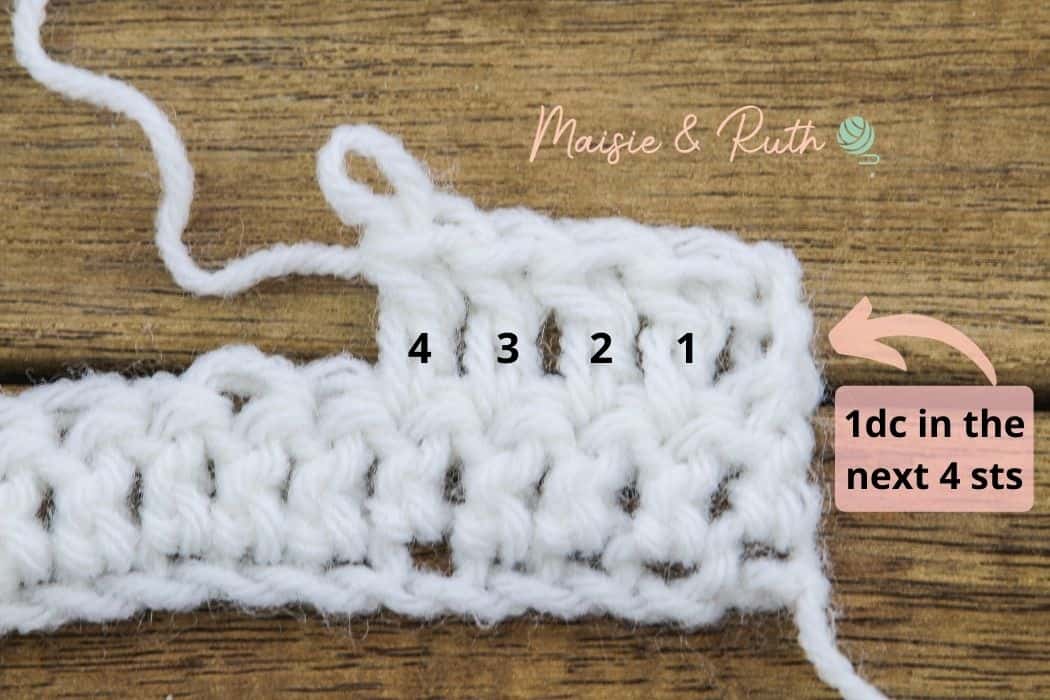
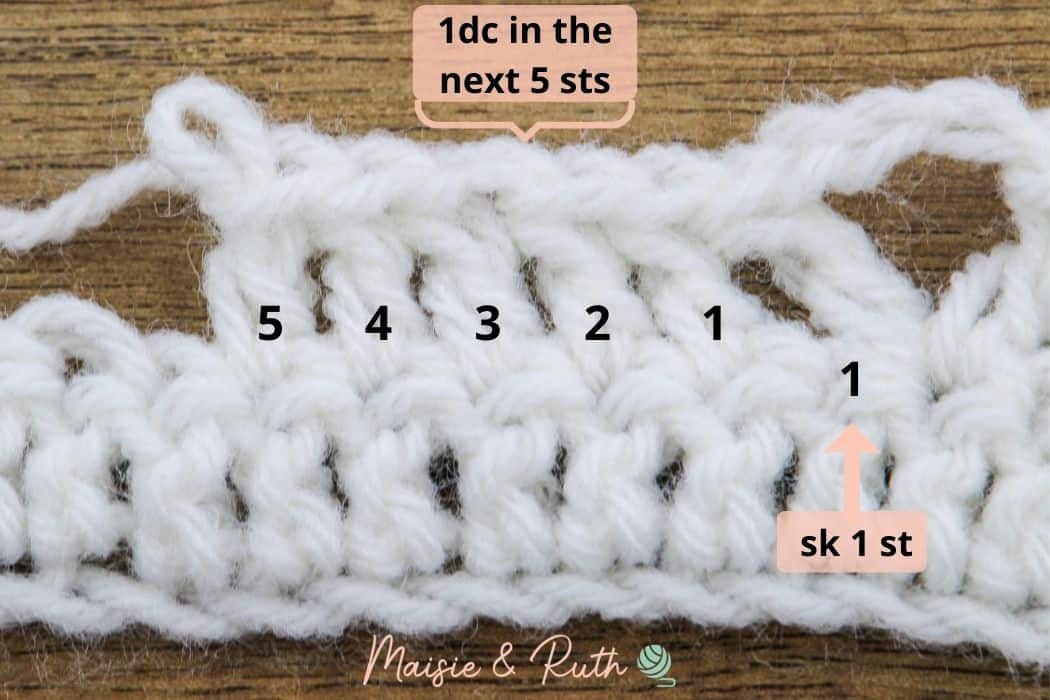
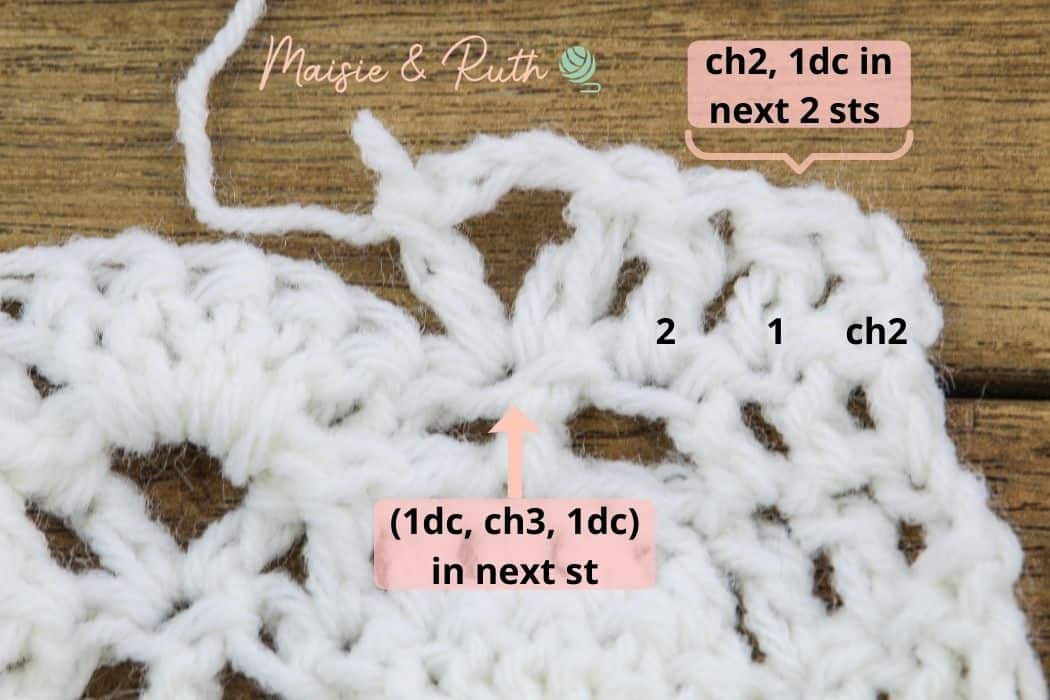
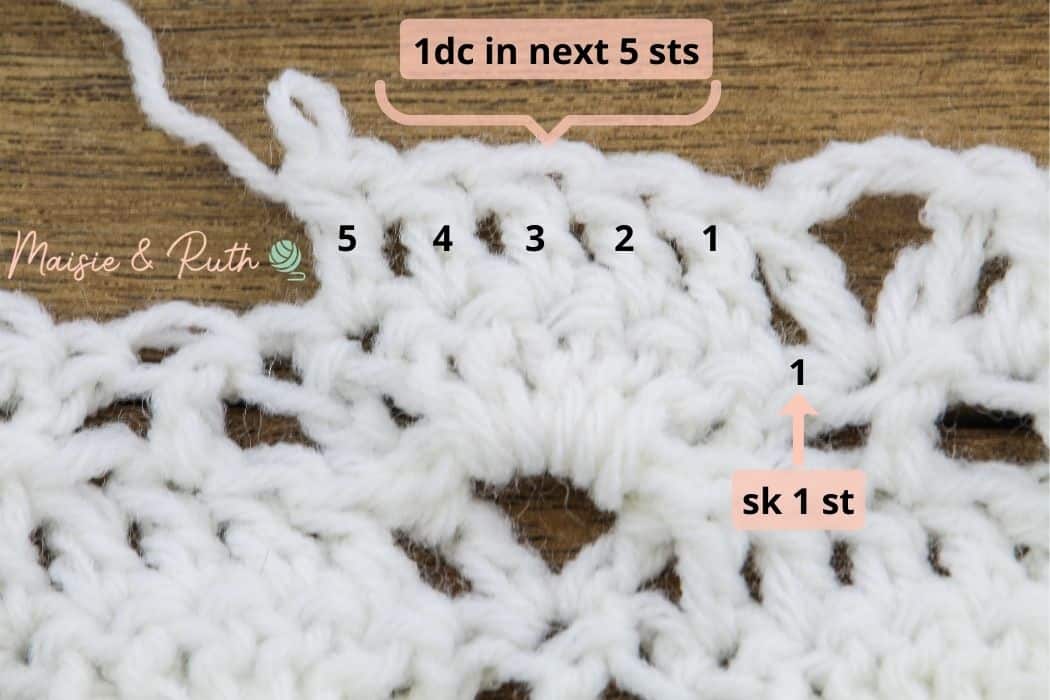
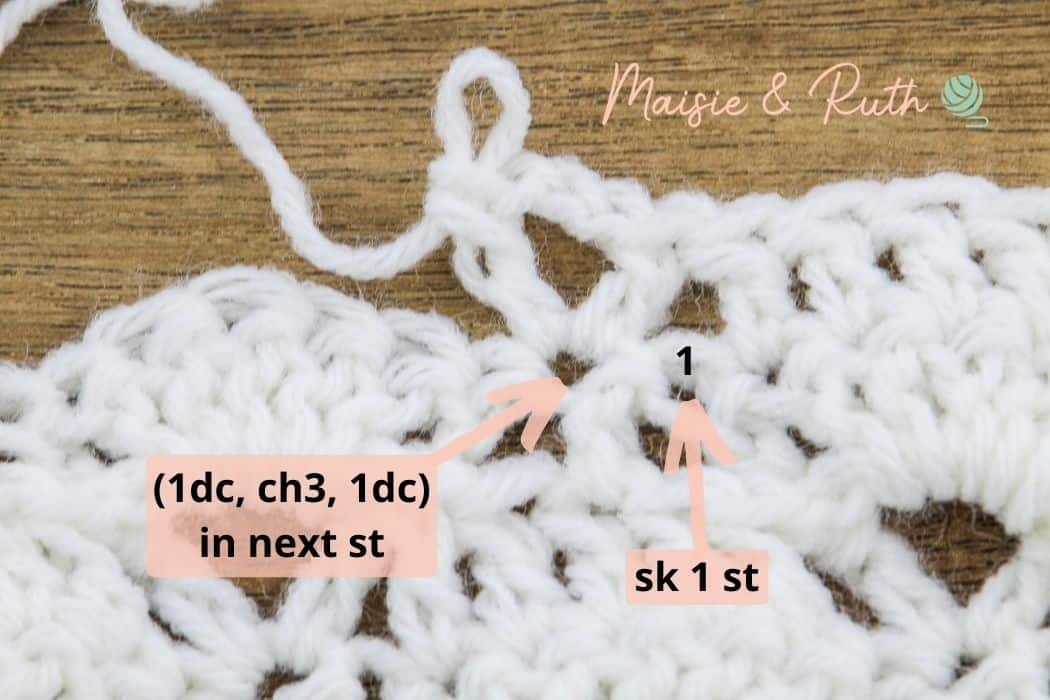
Row 2 (WS). Ch2 (counts as a dc here and throughout), 1dc in next 4 sts, *sk 1 st, (1dc, ch3, 1dc) in the next st, sk 1 st, 1dc in next 5 sts*, repeat from * to * across to the end of the row, TURN, [3 V stitches, 26 sts].
The following stitches that you will now work will form the row repeat (the instructions between * to *):

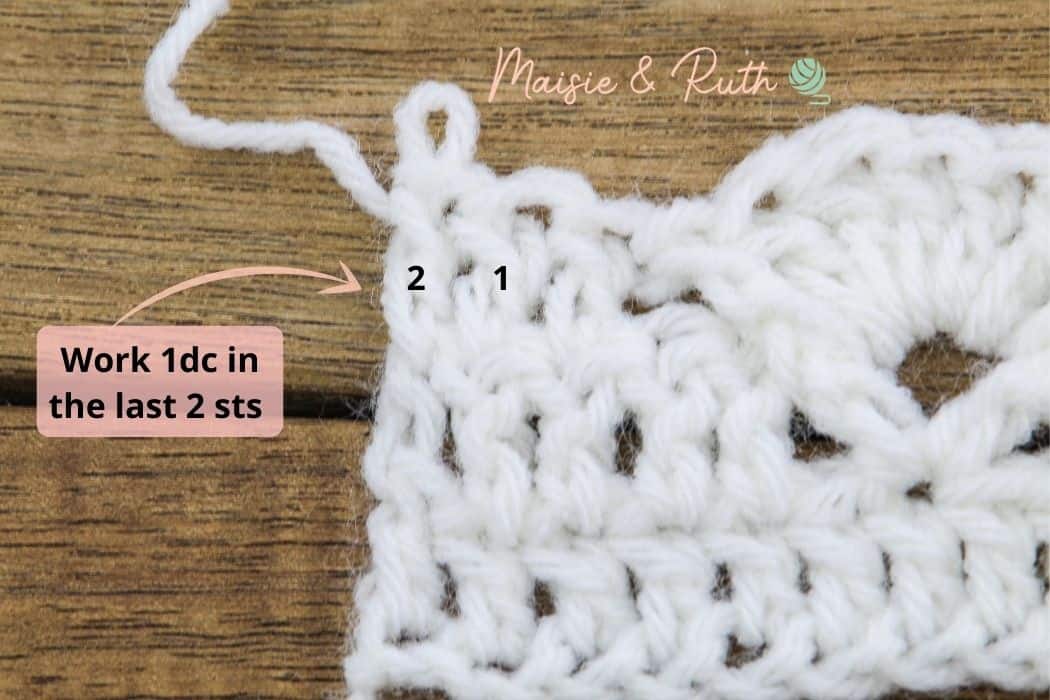
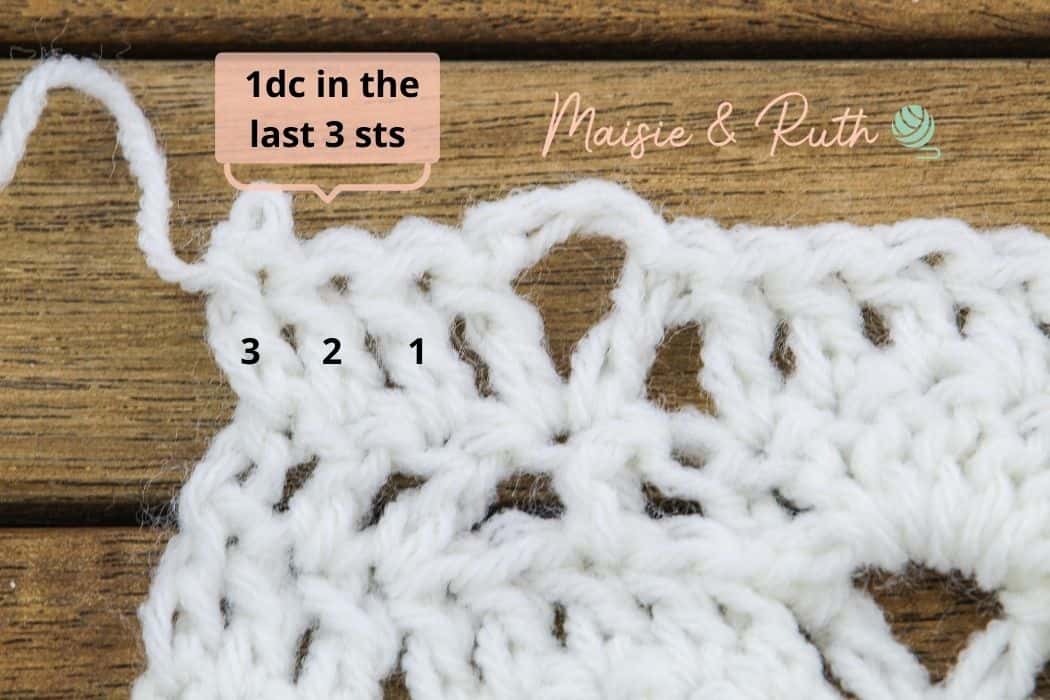
Once you get to the end of each row, it’s important not to forget to work into the top of the beginning ch2 from the previous row… it’s very easy to miss this last stitch! (see image below).
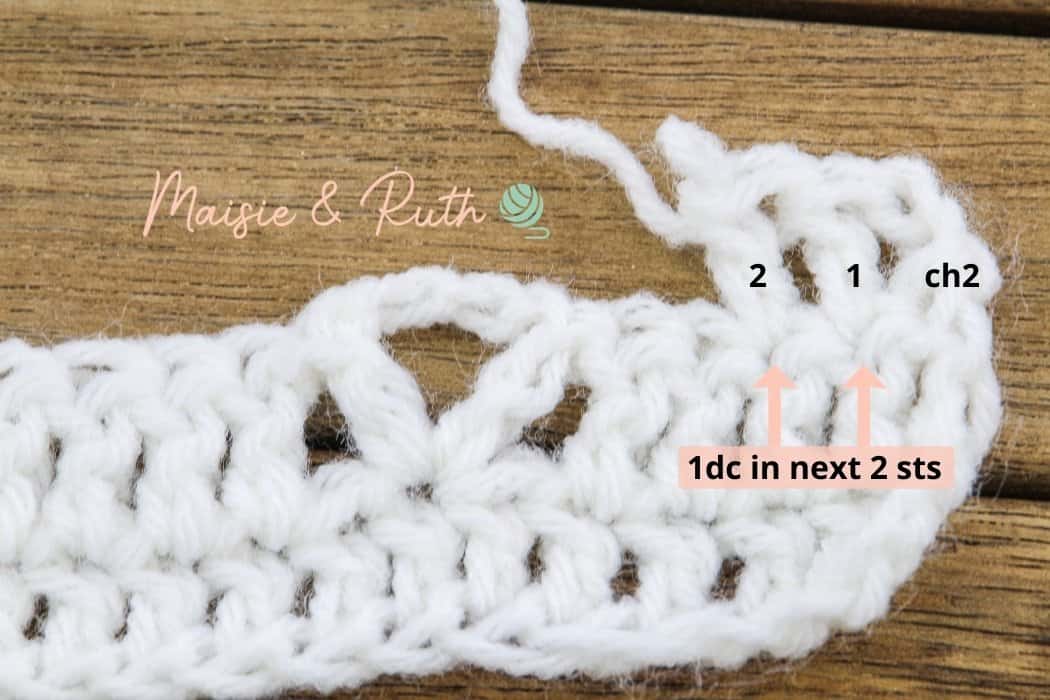
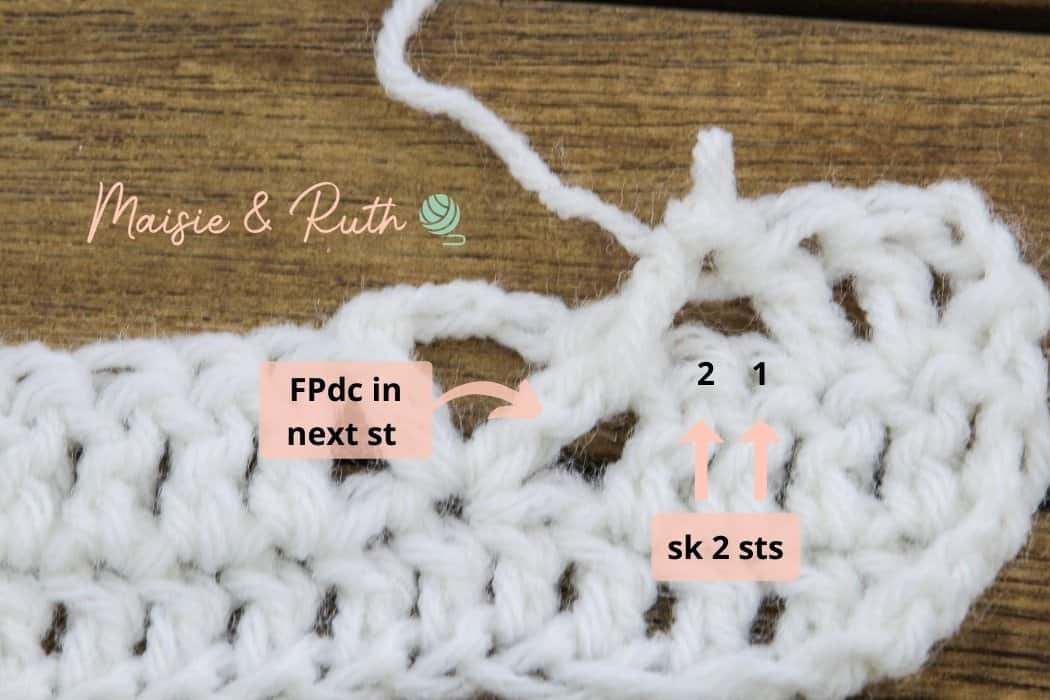
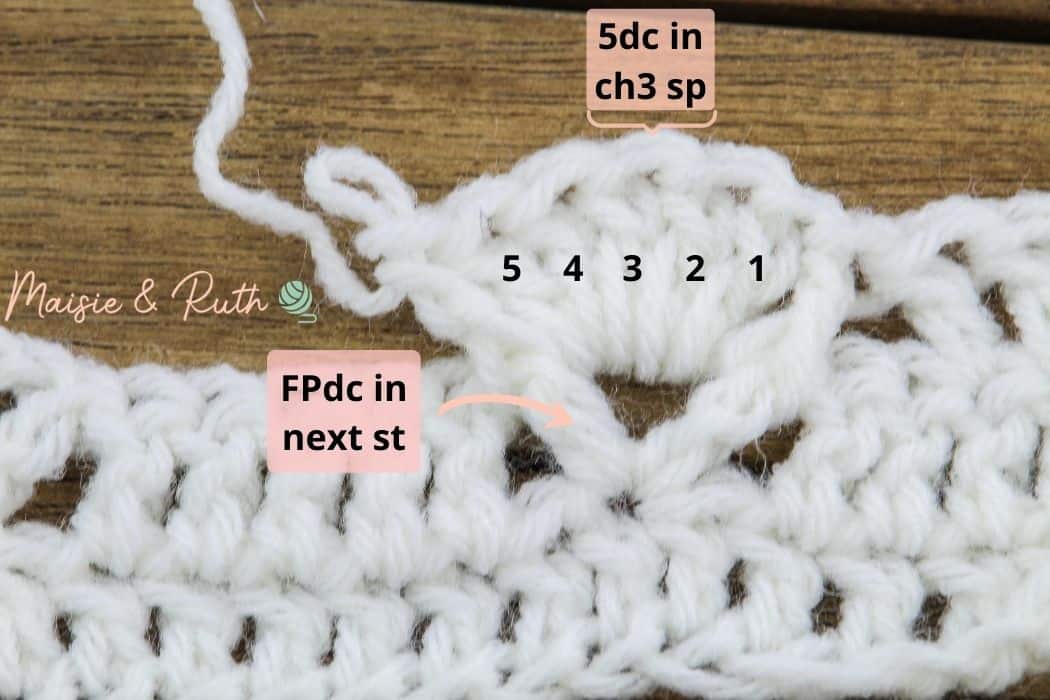
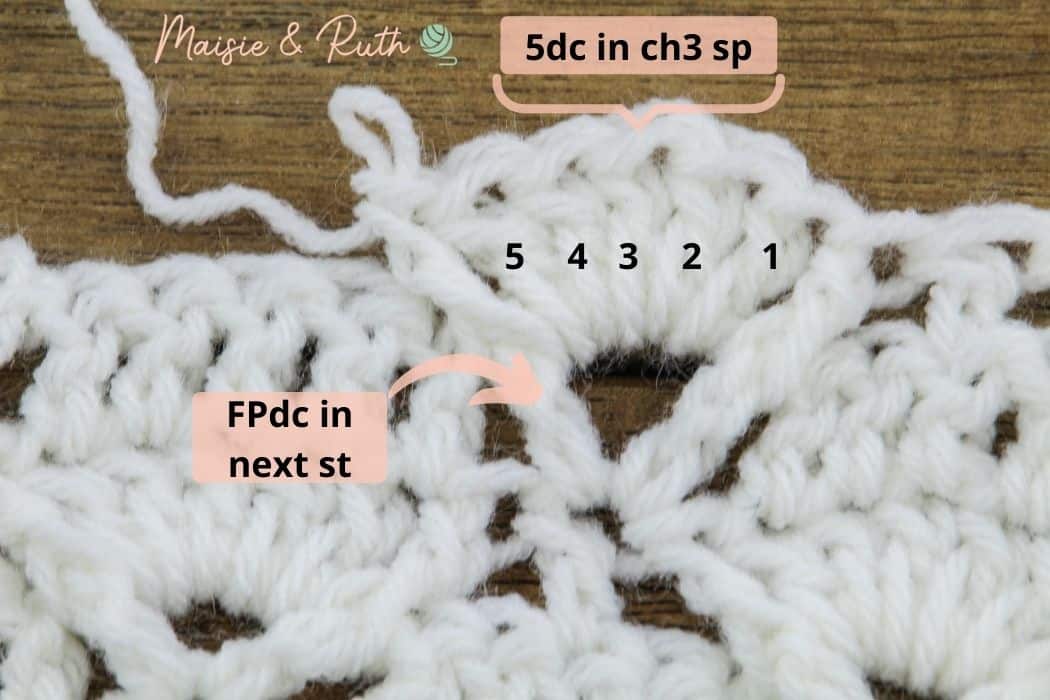
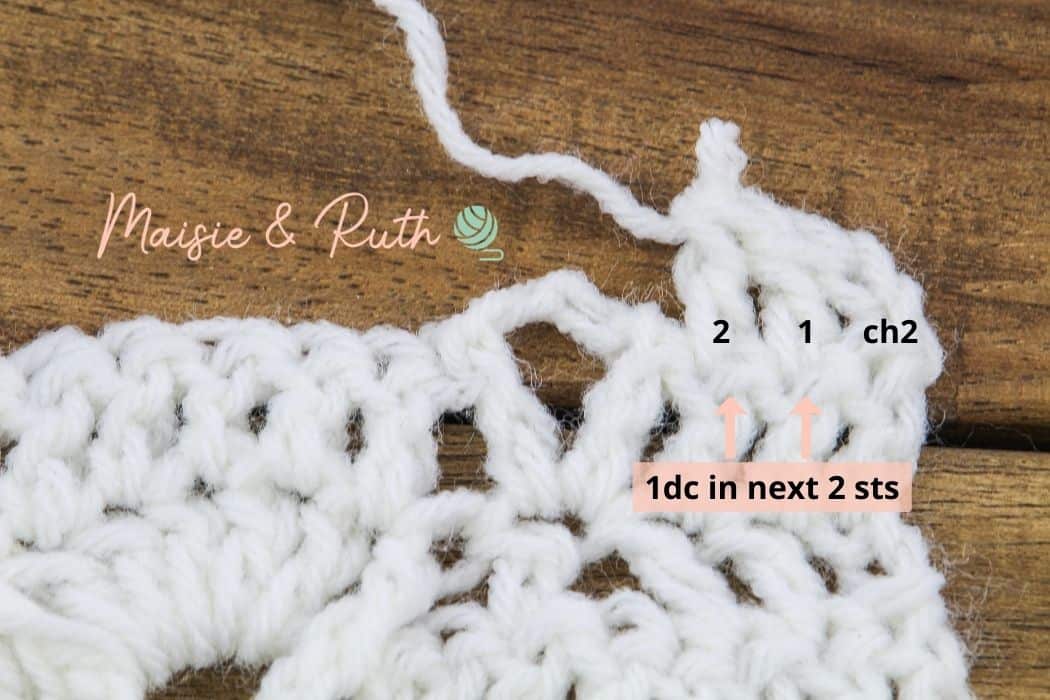
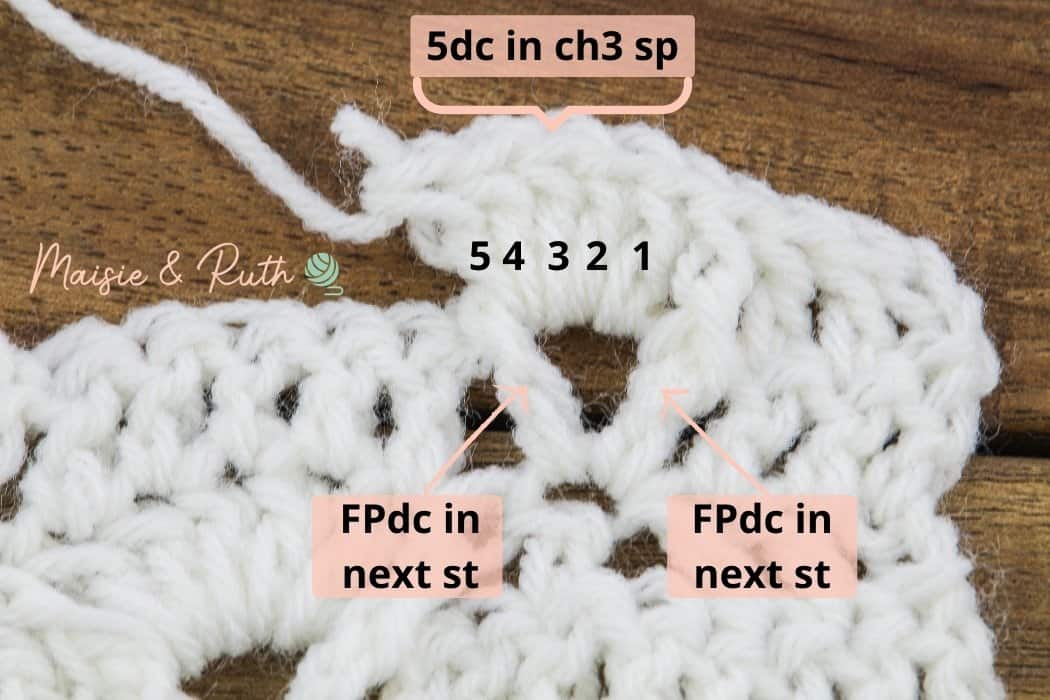
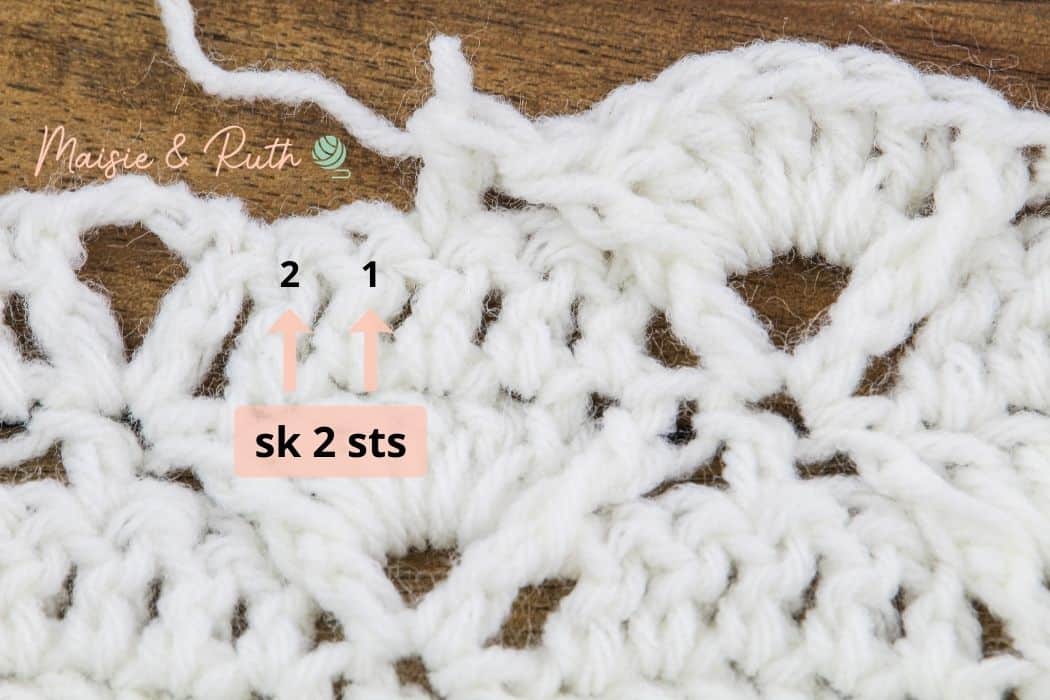
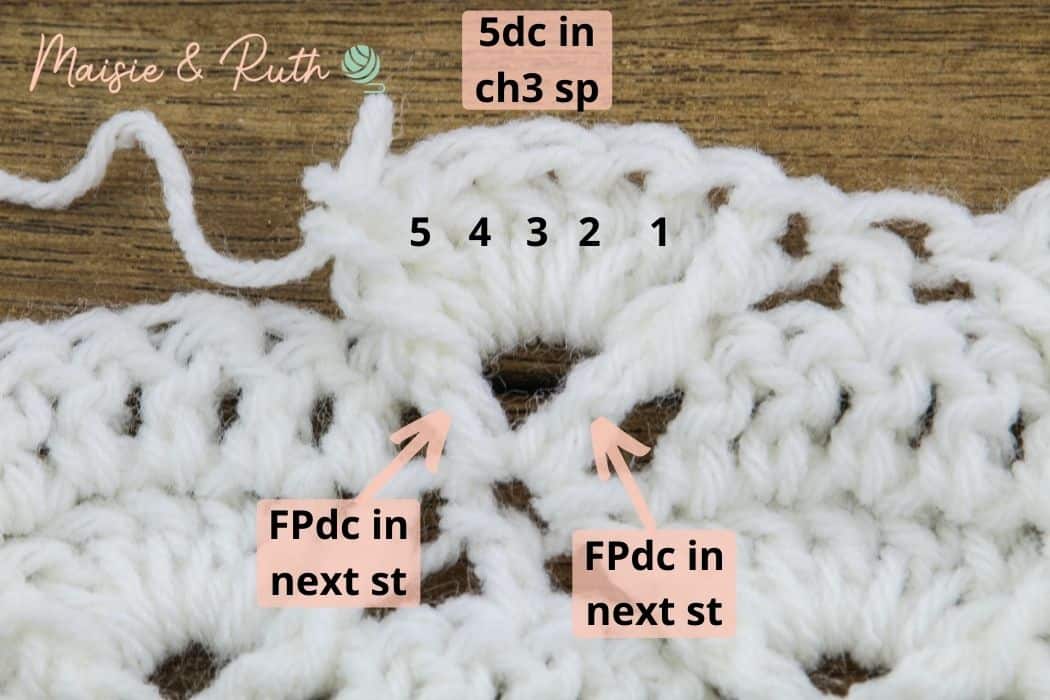
Row 3. Ch2, 1dc in next 2 sts, *sk 2 sts, FPdc in next st, 5dc in ch3 sp, FPdc in next st, sk 2 sts, 1dc in next st*, repeat from * to * across the row to last 2 sts, 1dc in last 2 sts, TURN, [3 shells, 29 sts].
The following stitches that you will now work will form the row repeat:
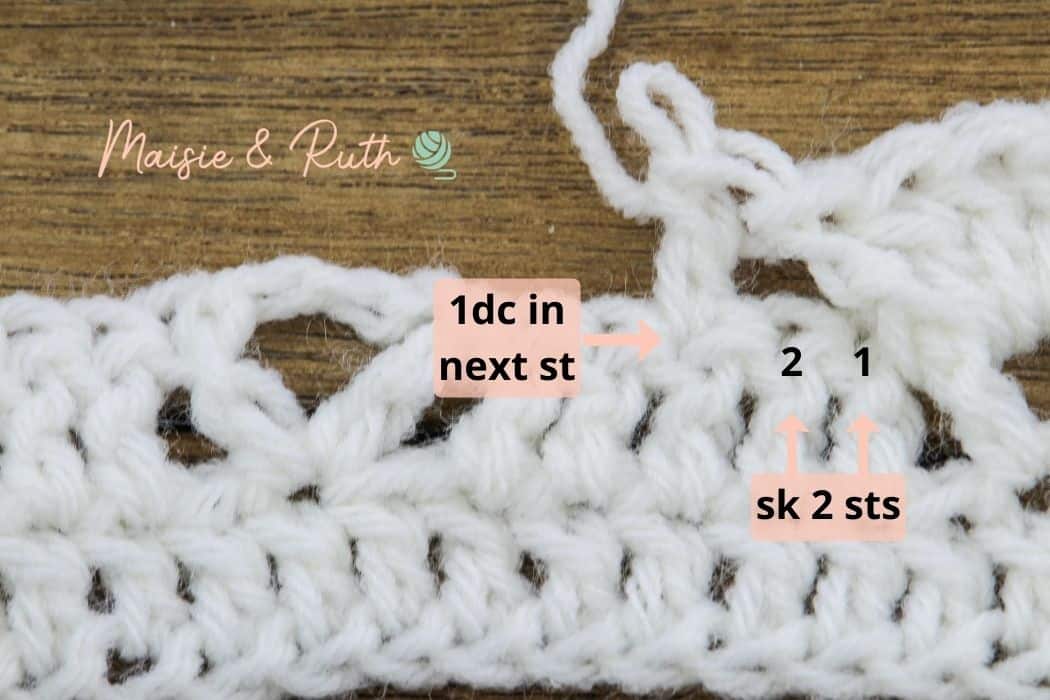
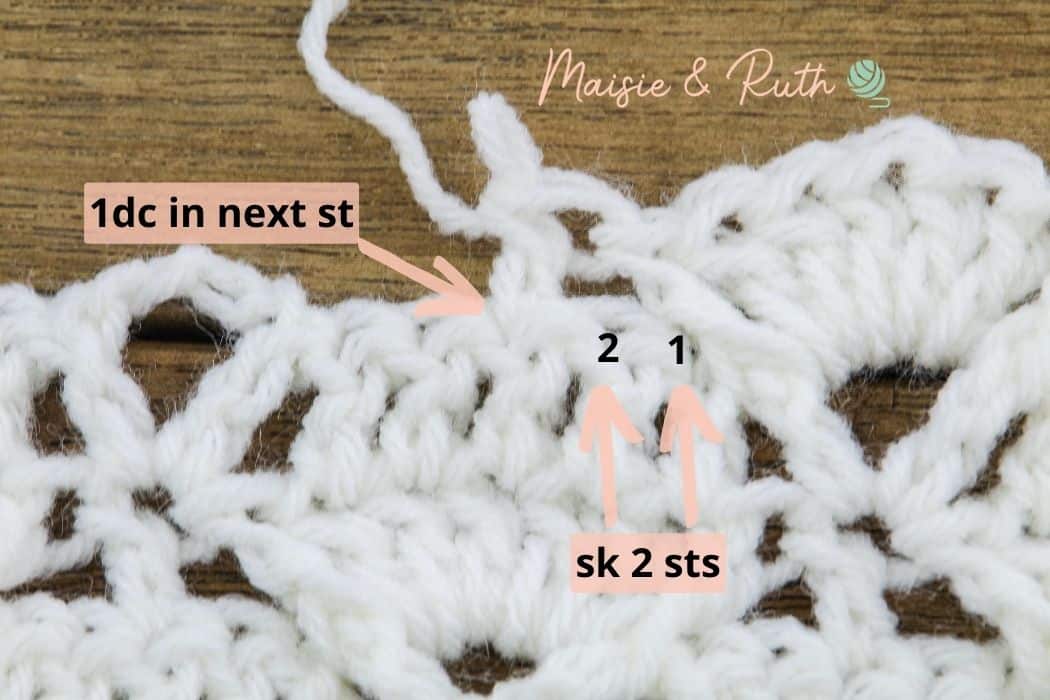
Work the row repeat across the row to the last 2 stitches.
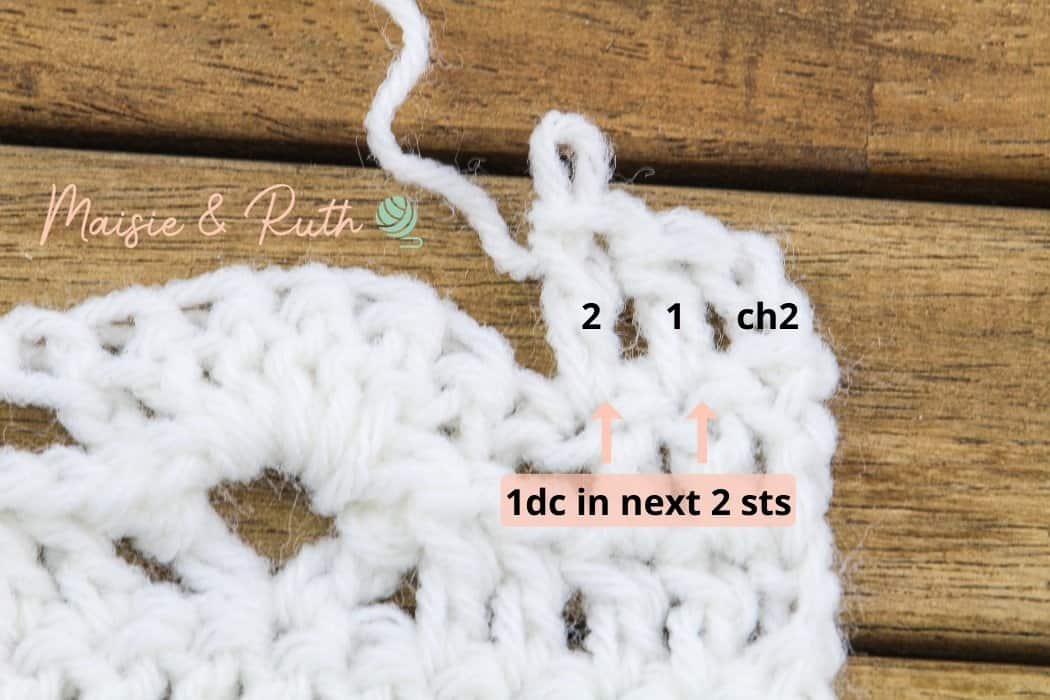
Work the last 2 stitches as follows:
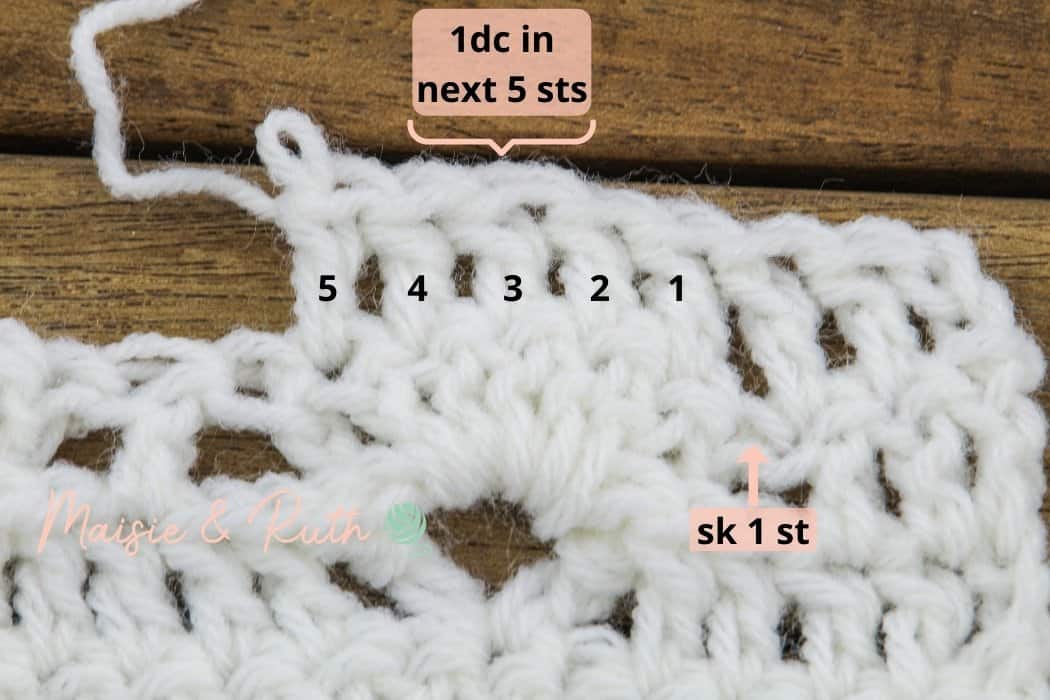
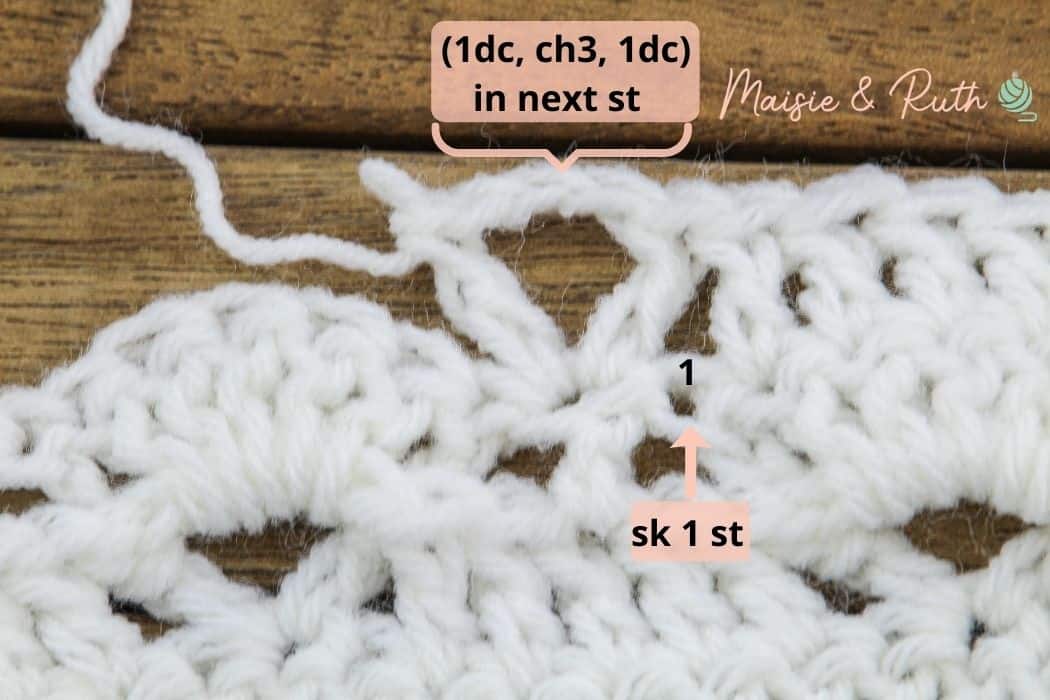
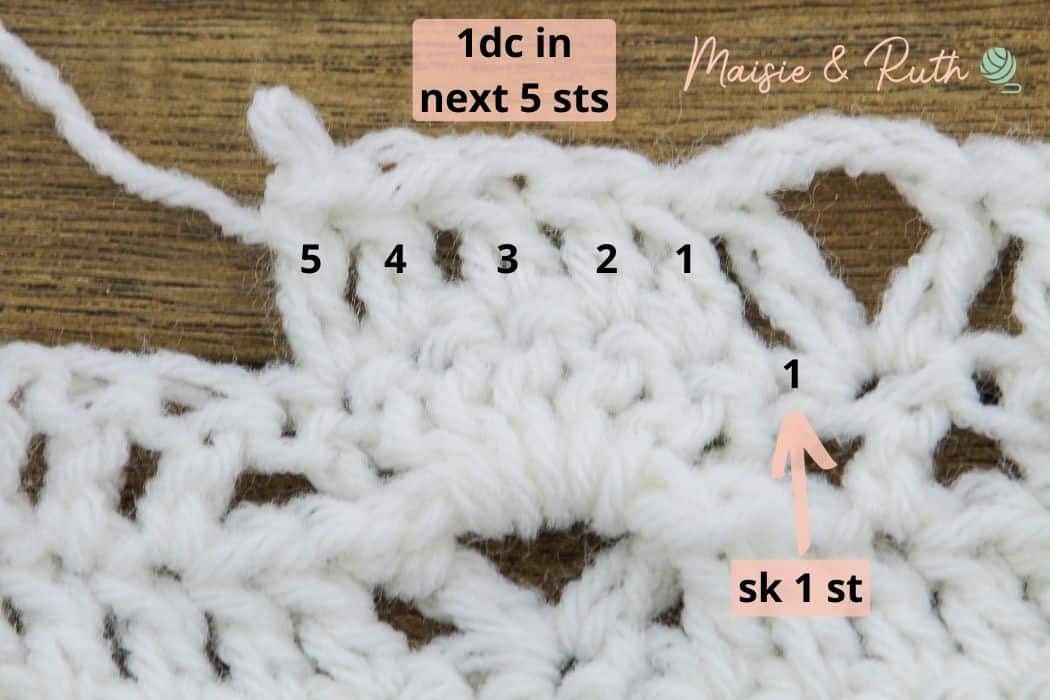
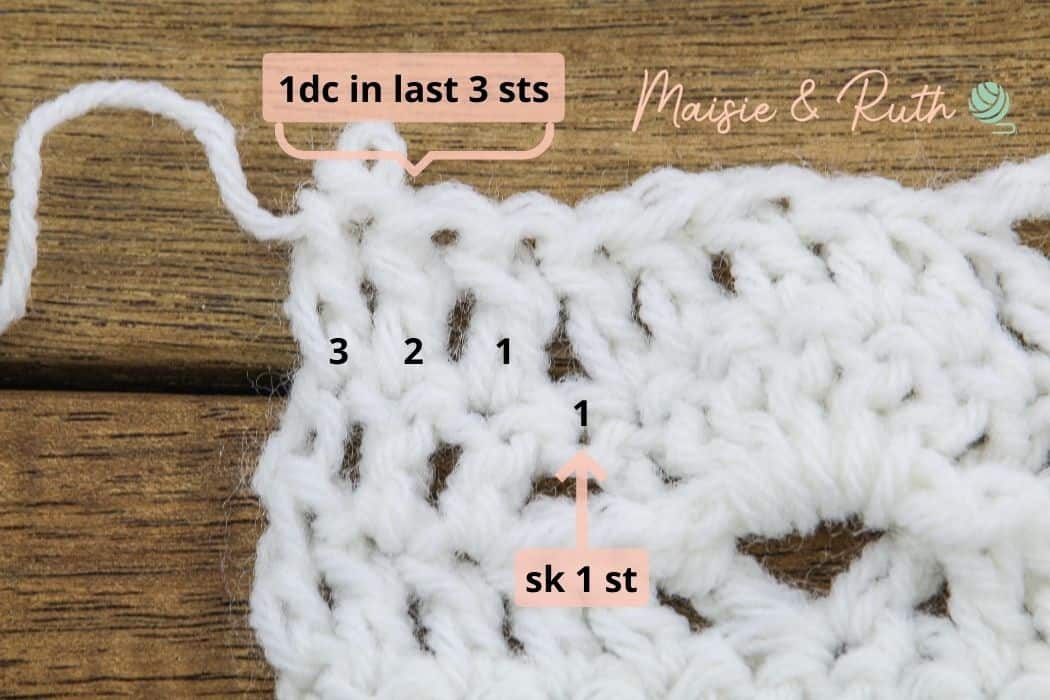
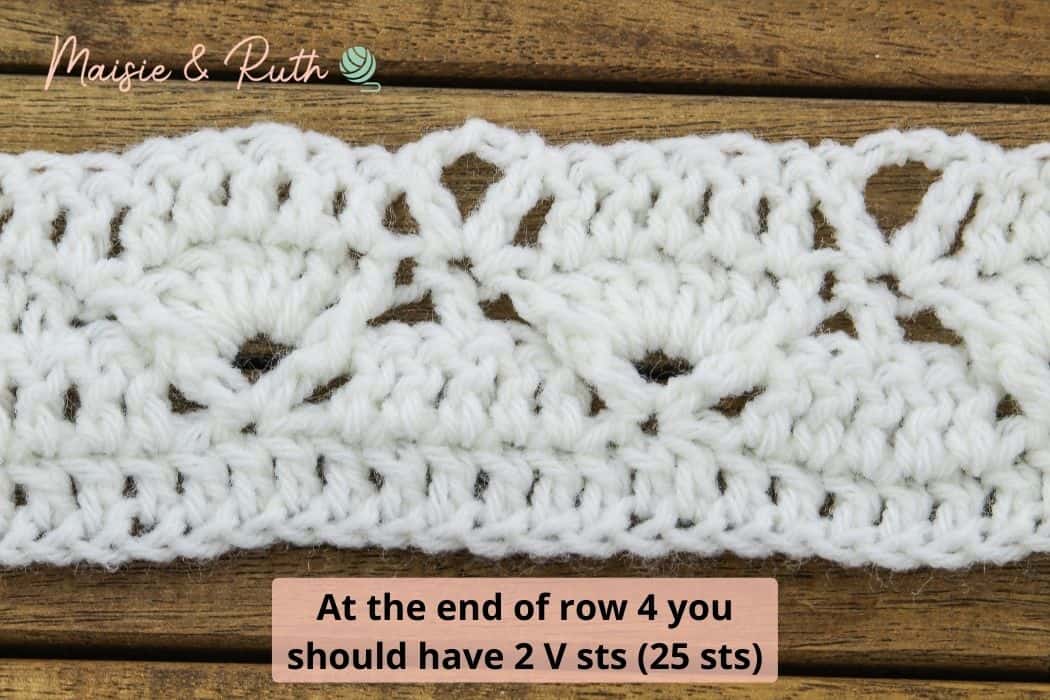
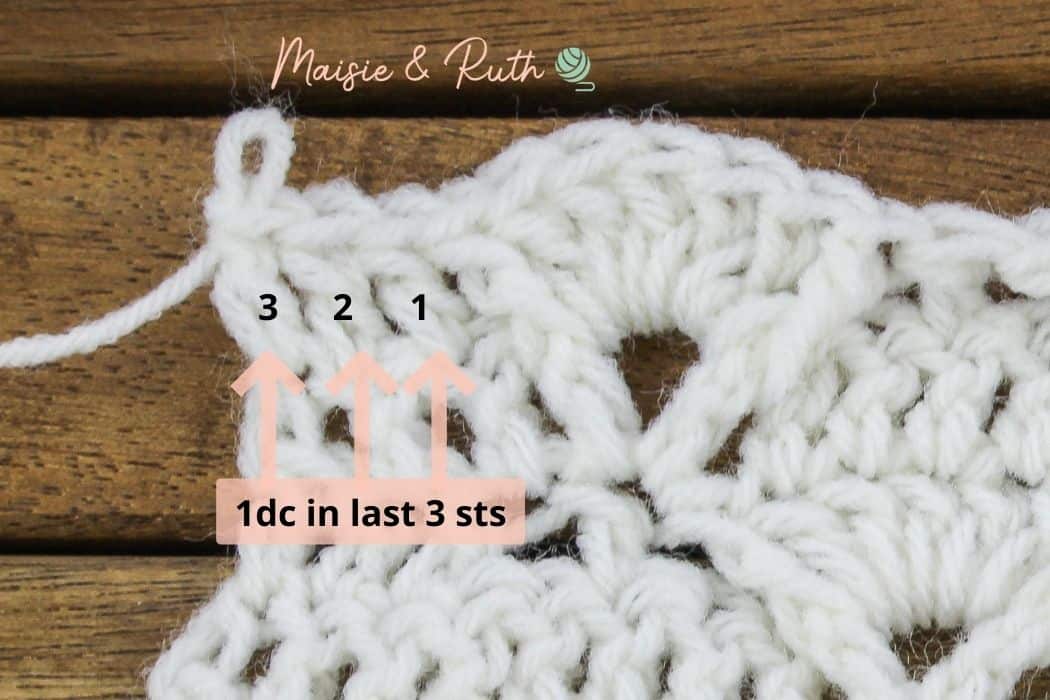
Row 4. Ch2, 1dc in next 2 sts, sk 1 st, 1dc in next 5 sts, *sk 1 st, (1dc, ch3, 1dc) in next st, sk 1 st, 1dc in next 5 sts*, repeat from * to * across the row to last 4 sts, sk 1 st, 1 dc in last 3 sts, TURN, [2 V sts, 25 sts].
The following stitches that you will now work will form the row repeat:
Work the row repeat across the row to the last 4 stitches.
Work the last 4 stitches as follows:
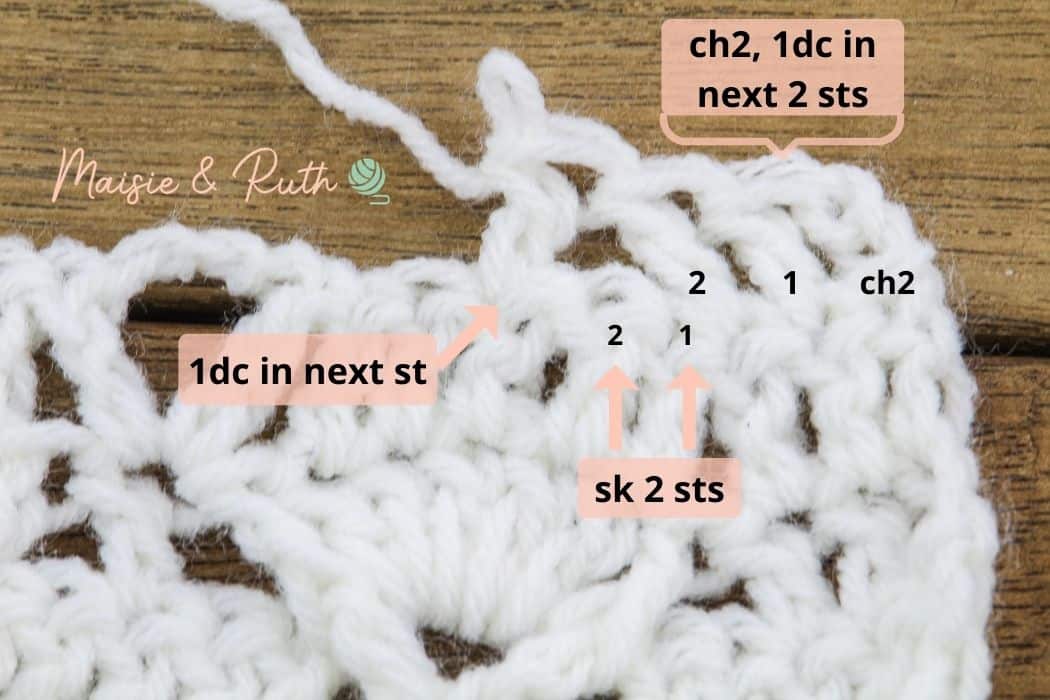
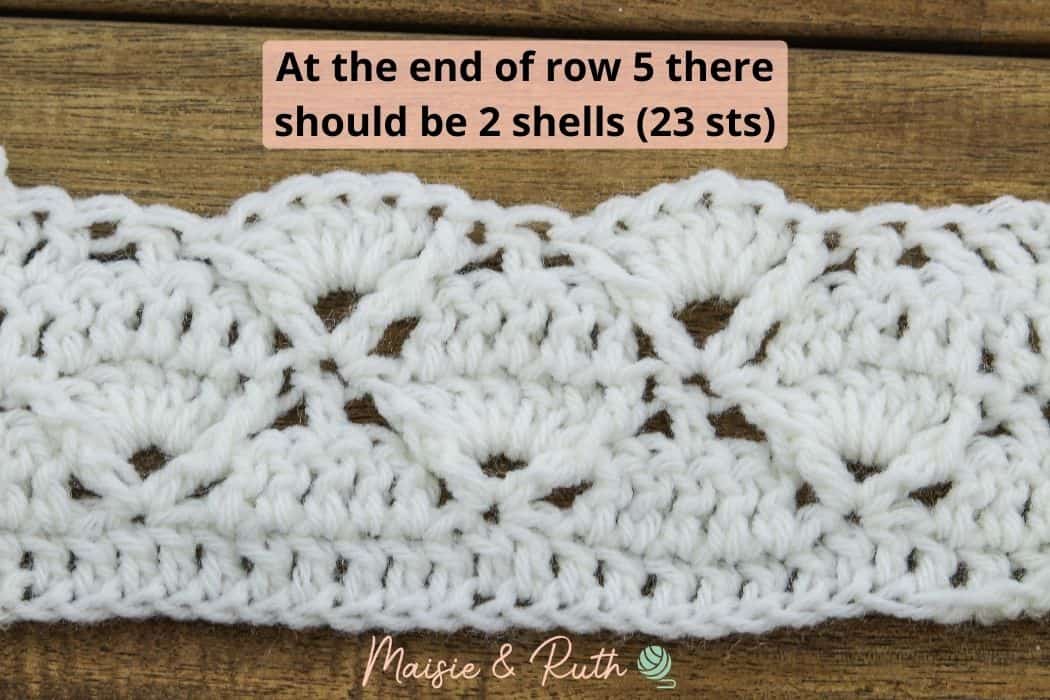
Row 5. Ch2, 1dc in next 2sts, sk 2 sts, 1dc in next st, *sk 2 sts, FPdc in next st, 5dc in ch3 sp, FPdc in next st, sk 2 sts, 1dc in next st*, repeat from * to * across the row to last 5 sts, sk 2sts, 1dc in last 3 sts, TURN, [2 shells, 23 sts].
The following stitches that you will work will form the row repeat:
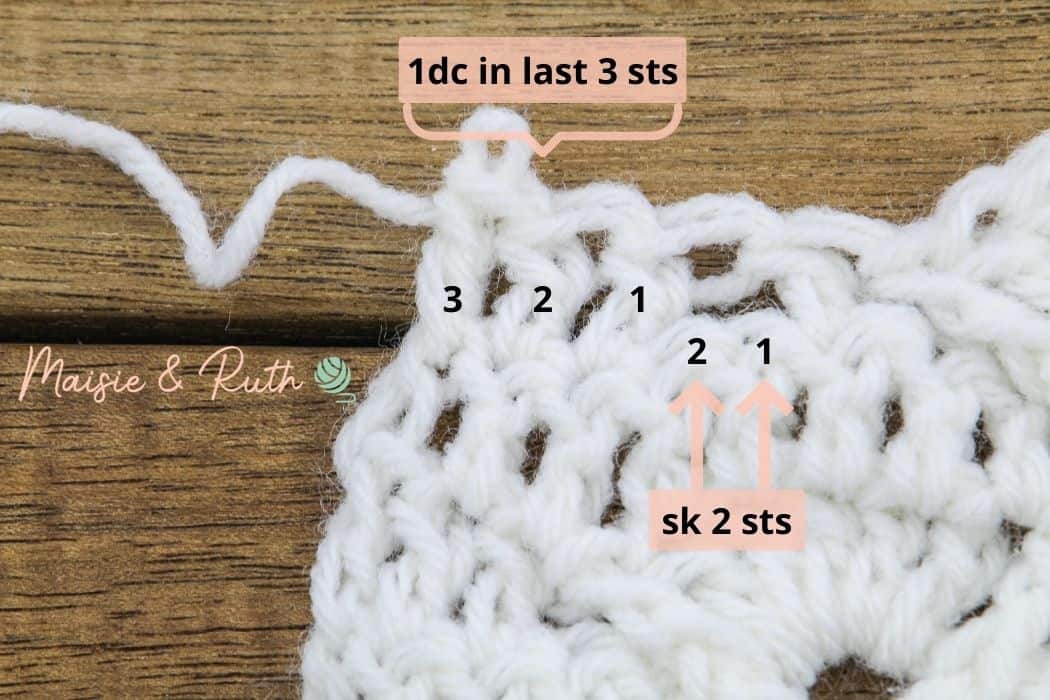
Work the row repeat across the row to the last 5 stitches.
Work the last 5 stitches as follows:
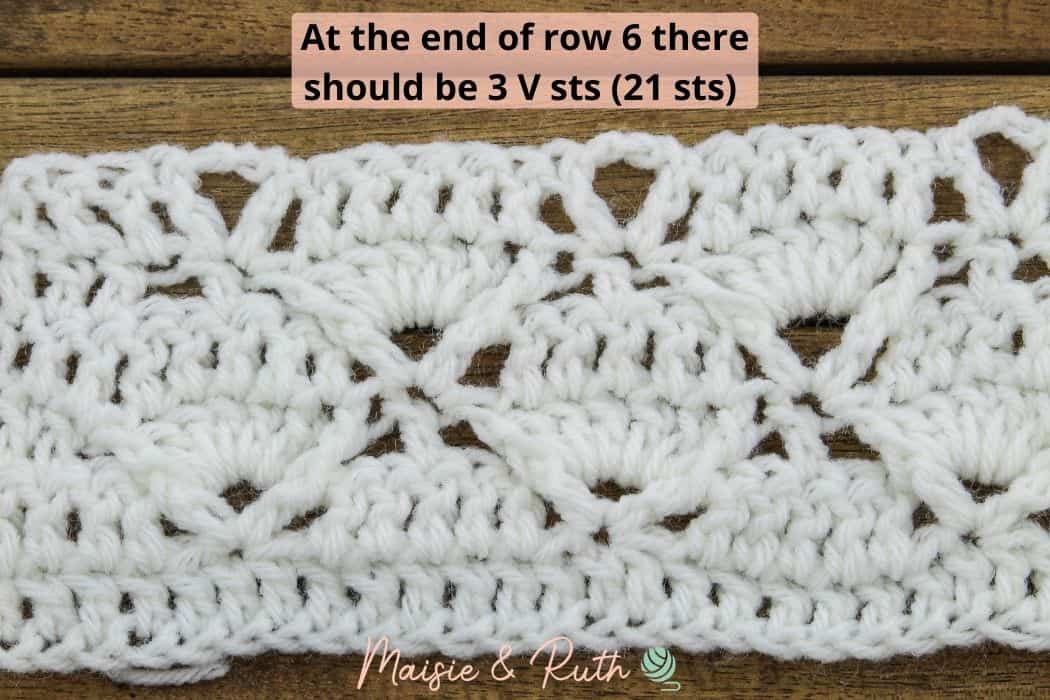
Row 6. Ch2, 1dc in next 2 sts, (1dc, ch3, 1dc) in next st, *sk 1 st, 1dc in next 5 sts, sk 1 st, (1dc, ch3, 1dc) in next st*, repeat from * to * across the row to last 3 sts, 1dc in last 3 sts, TURN, [3 V sts, 21 Sts].
The following stitches that you will now work will form the row repeat:
Work the row repeat across the row to the last 3 stitches.
Work the last 3 stitches as follows:
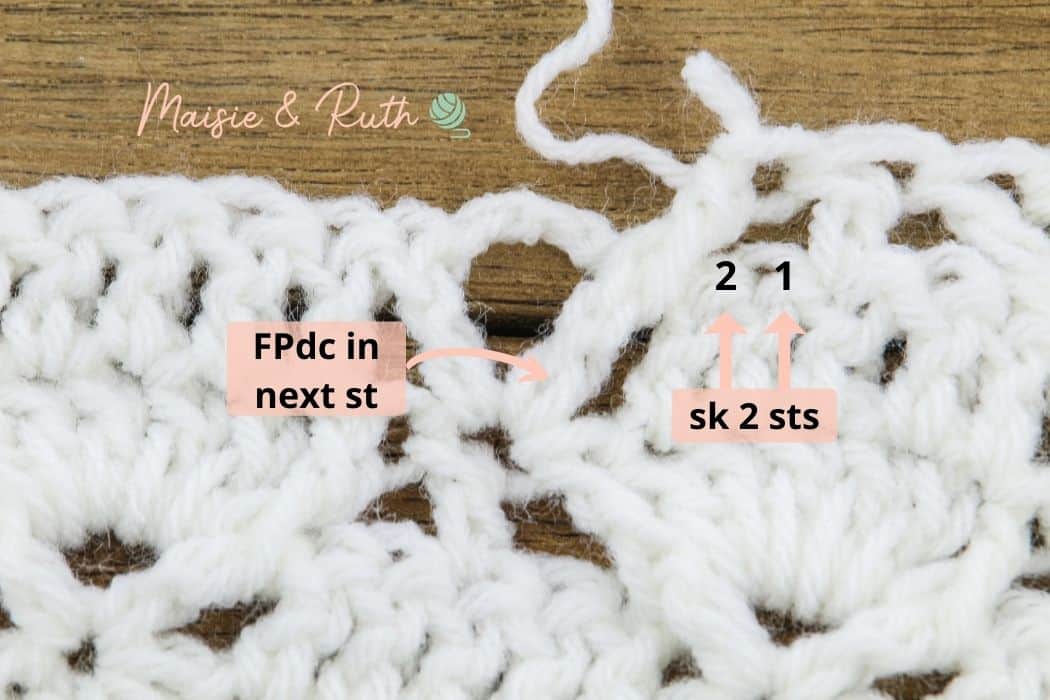
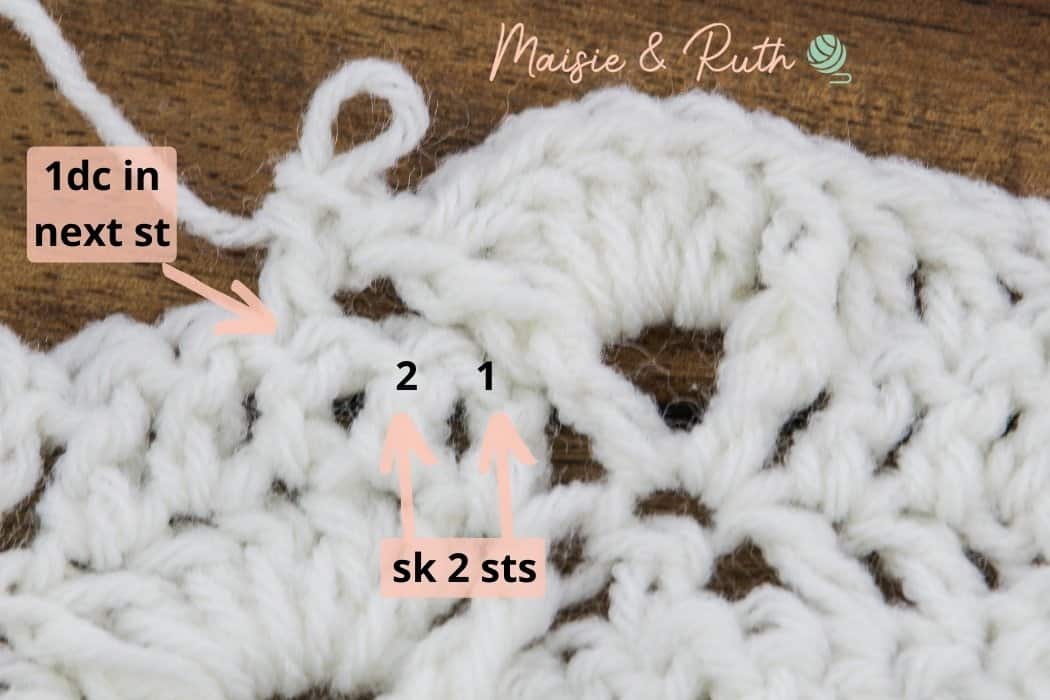
Row 7. Ch2, 1dc in next 2 sts, FPdc in next st, 5dc in ch3 sp, FPdc in next st, *sk 2 sts, 1dc in next st, sk 2 sts, FPdc in next st, 5dc in ch3 sp, FPdc in next st*, repeat from * to * across the row to last 3 sts, 1dc in last 3 sts ,TURN, [3 shells, 29 sts].
The following stitches that you will now work will form the row repeat:
Work the row repeat across the row to the last 3 stitches.
Work the last 3 stitches as follows:

Repeat rows 4-7 once more.
PIN IT FOR LATER!
If you would like to learn to crochet the diamond trellis stitch but don’t have time right now, make sure that you save the pin to your board for later!

SHARE YOUR WORK!
I hope that you find the tutorial easy to follow… please leave me a comment below to let me know how you get on 😊
If you get around to making something from this stitch, or you have a go at The Bonnie Blanket, I would love to see your finished item!
Post a photo on Instagram and tag me using @maisieandruth.
Happy crocheting!