

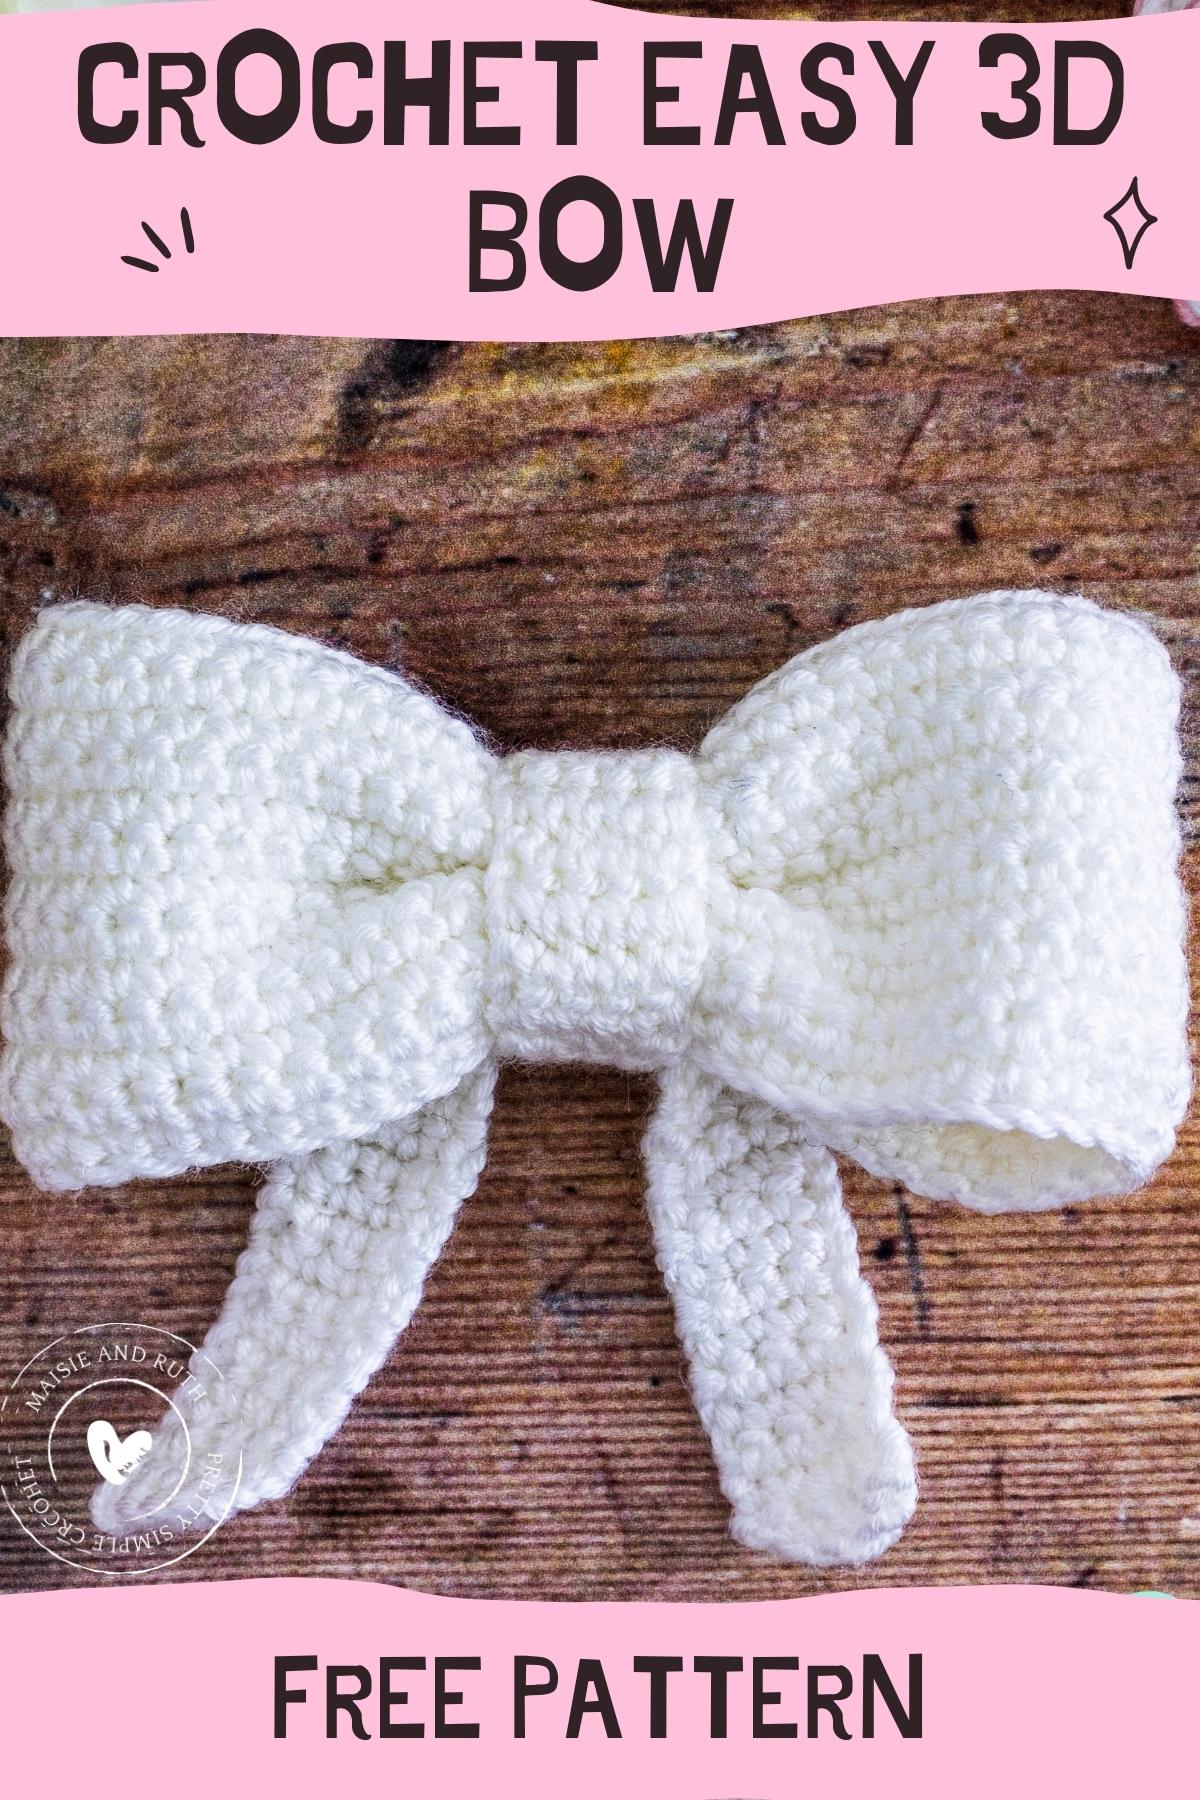
This Crochet Simple 3D Bow is such a fun little project for you!
Read on for the FREE written pattern and / or watch the video tutorial!

QUICK & EASY PROJECT
Using just basic stitches, this sweet little crochet bow works up really quickly!
Beginners – you can definitely give this a try as it’s an easy project, with the added benefit of a video tutorial for further guidance.
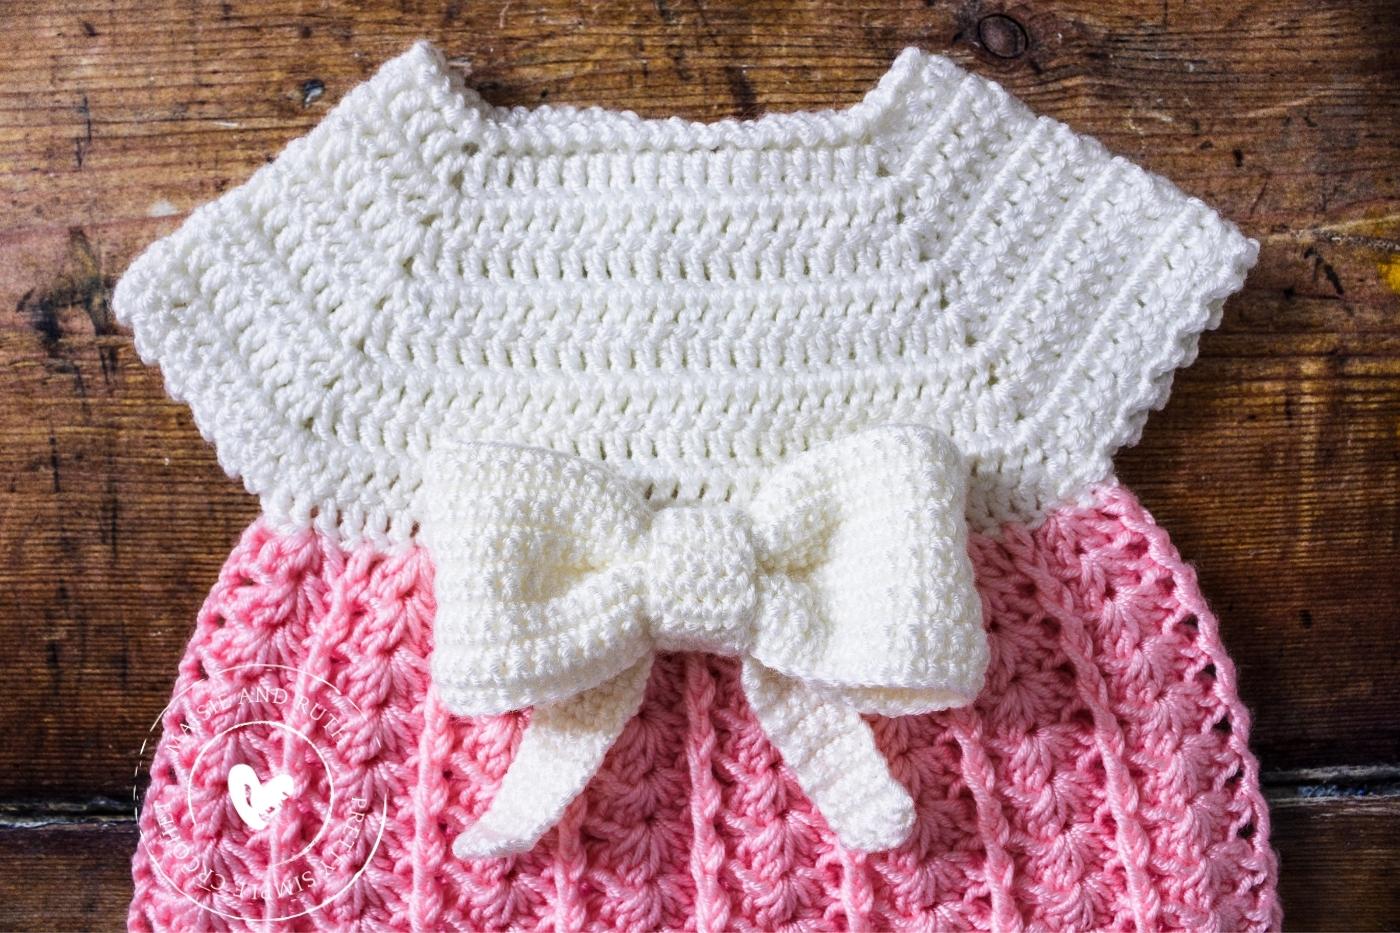
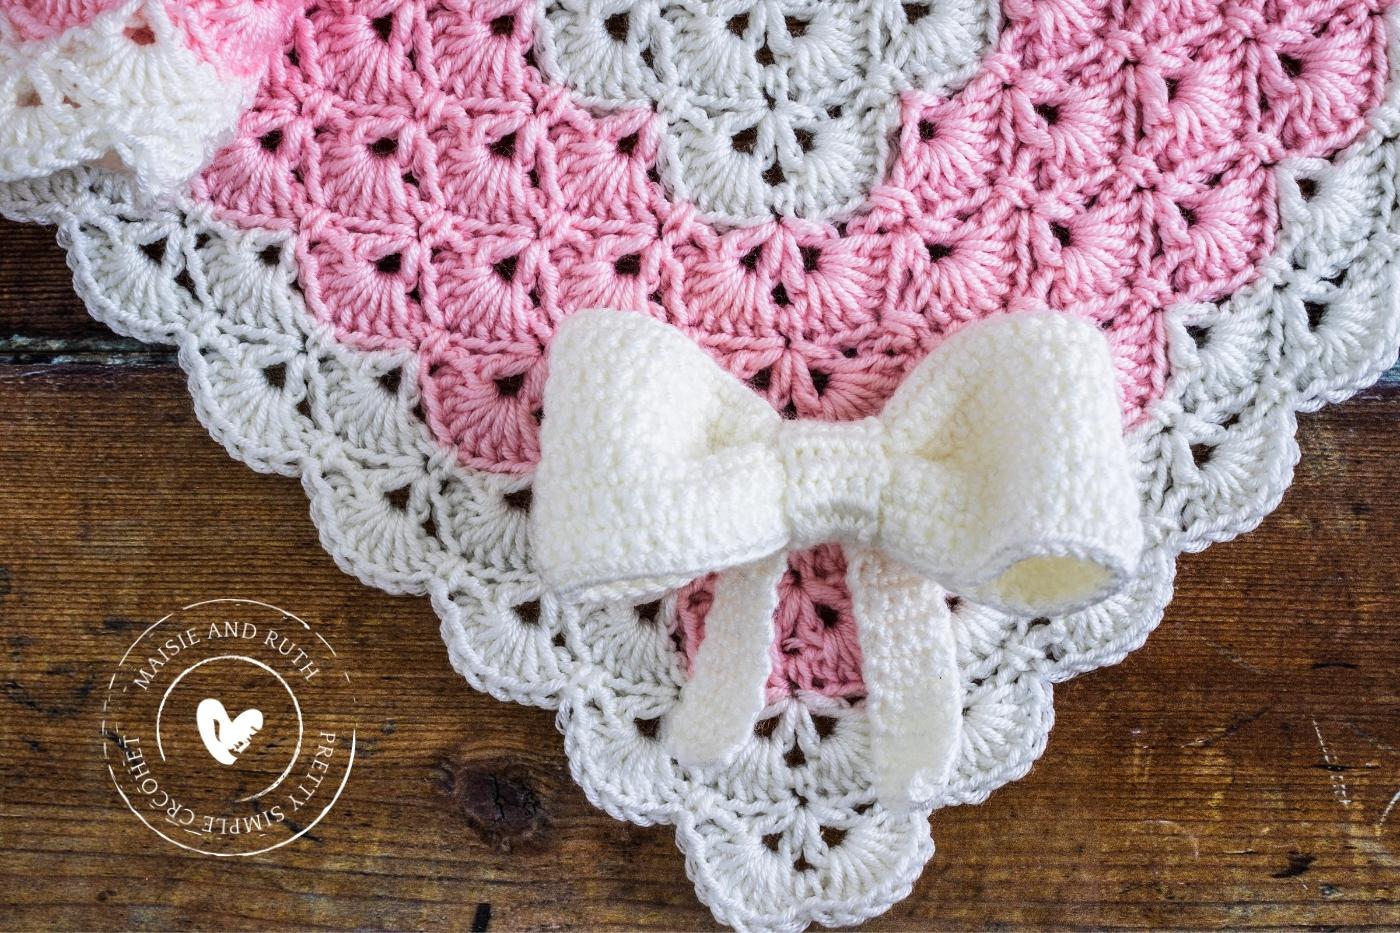
Crochet simple 3D bow on baby dress.
PERFECT ACCESSORY
There are lots of ways to embellish your crochet work.
Flowers are always a popular addition however bows are equally as adorable!
You can add them to a variety of projects such as hats, bags and headbands. You can even make hair clips from them.
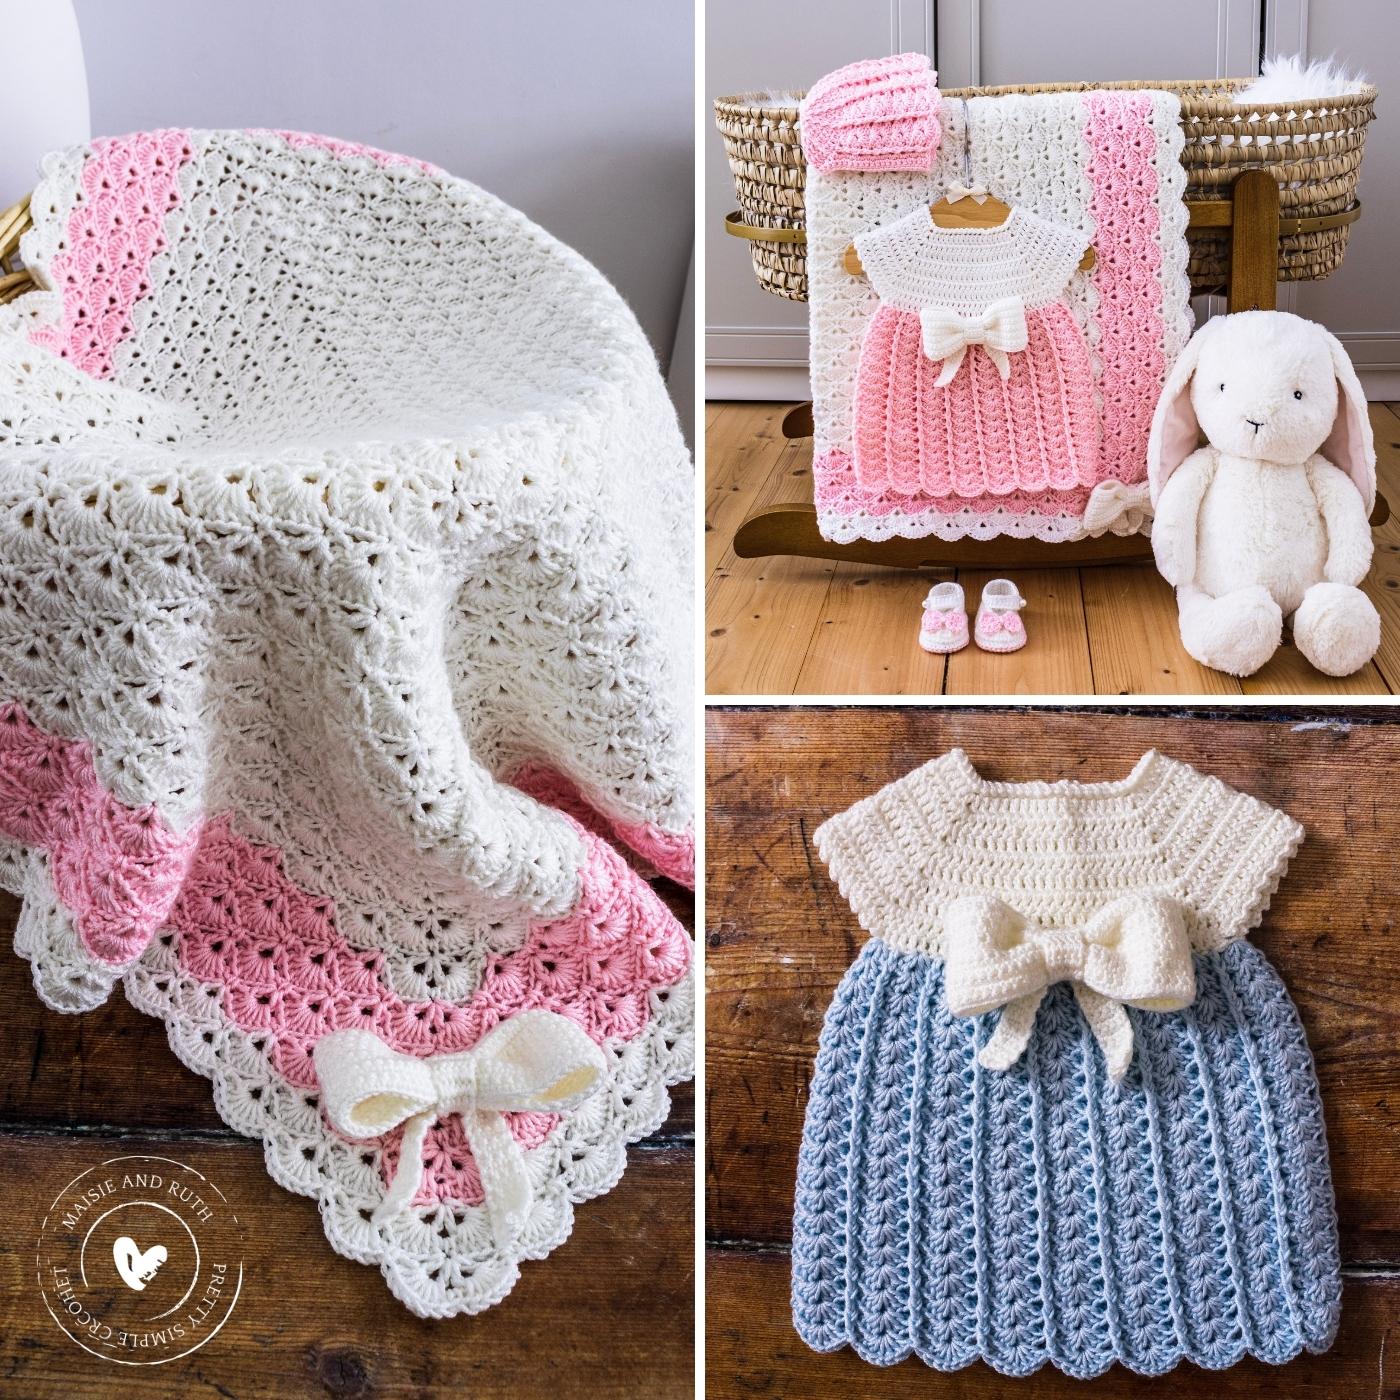
From the image below, you can see that I decided to add my bow to both a baby dress and matching baby blanket. I hope you’ll agree with me that it’s upped the cuteness level of these items even further!
VIDEO TUTORIAL
Crochet along with me to make this baby 3D bow! Just click on the play button below:
PIN IT FOR LATER!
If you can’t make this easy crochet baby dress right now, then you can always pin it for later!
You can also follow me on Pinterest here
If you would like to make this crochet bow, then read on for the written instructions now!
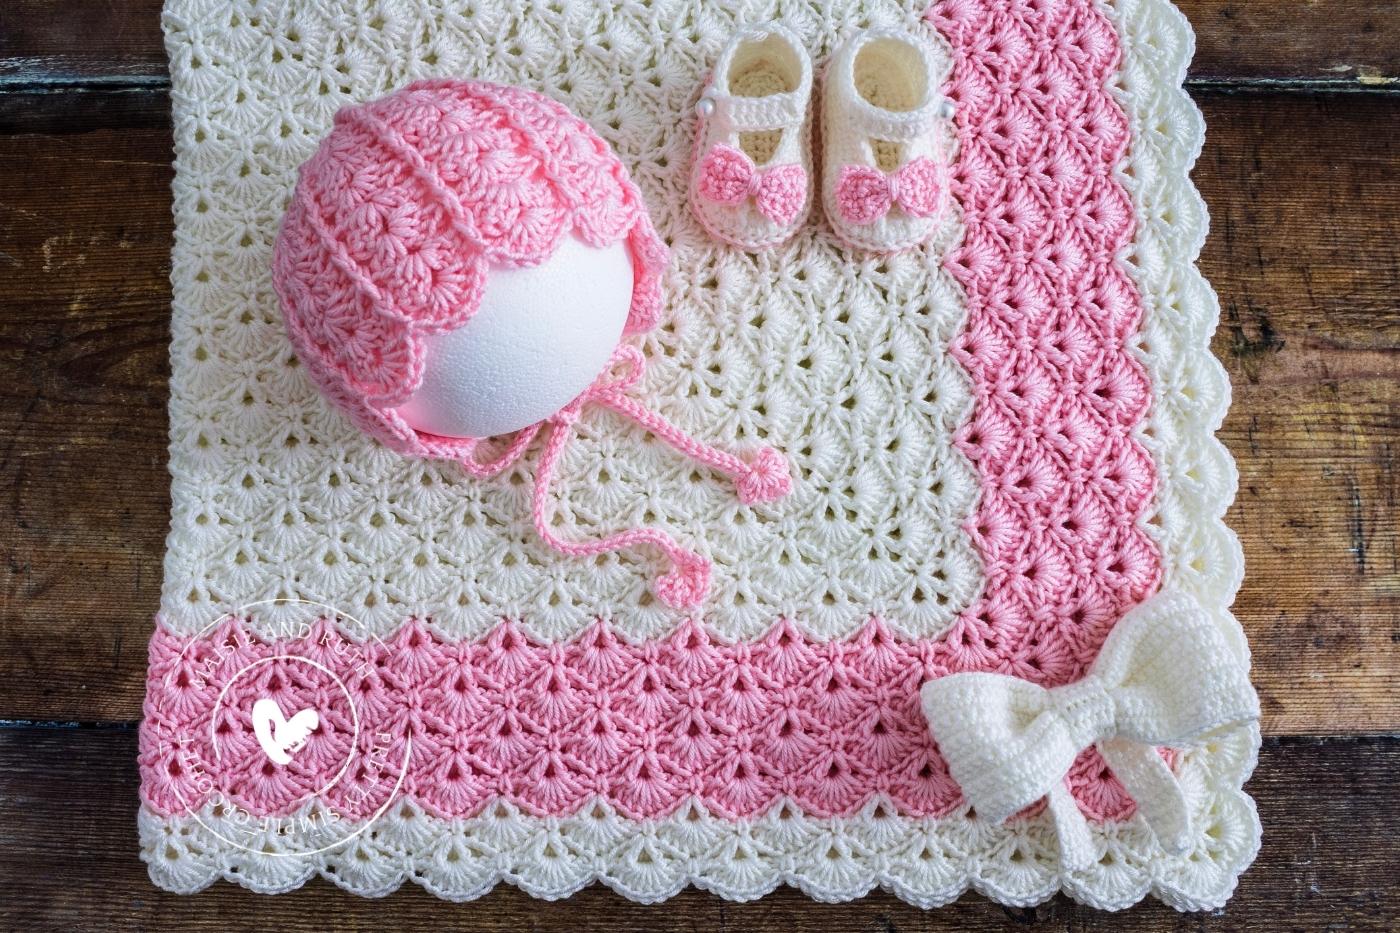
The crochet simple 3D bow makes a lovely addition to this pretty shell stitch blanket.
CROCHET SIMPLE 3D BOW: A FREE PATTERN
Please carefully read all the information below.
LEVEL

“Projects using basic stitches. May include basic increases and decreases”.
Source: Craft Yarn Council of America’s www.YarnStandards.com
MATERIALS
- Yarn: Category #3 / light worsted / DK / 8 ply yarn. I used less than 50g of Sirdar Snuggly Soothing, 241yds / 3.5 oz (220m / 100g) in the colour White (102)
- Crochet Hook: 3mm hook
- Yarn needle (the bent tip makes sewing much easier)
- Scissors (super sharp… and pretty)
- 2 x stitch markers (these interlocking ones will not fall out!)
FINISHED SIZE
Width – 5” (12.5cm)
Height – 2.5” (6.25cm)
STITCHES & ABBREVIATIONS (US CROCHET TERMS)
ch(s) – chain(s)
fasten off – To fasten off securely, work one chain, then cut the yarn leaving a 5 – 6” tail. Pull the tail through the loop that is on your hook. Tighten gently.
sc – single crochet: Insert hook into stitch, yarn over (yo), pull up a loop (2 loops on hook). Yo, pull through both loops on hook. 1 single crochet completed.
st(s) – stitch(es)
Turn: Turn your work clockwise or anti-clockwise. It doesn’t matter as long as you are consistent for a neater edge.
[ ] – The total number of stitches at the end of a row.
PATTERN INSTRUCTIONS
BODY
Ch 54
Row 1. 1sc in 2nd ch from hook, 1sc in next 52 ch, TURN [53 sts].
Row 2. Ch1, 1sc in same st (at base of ch1), 1sc in next 52 sts, TURN [53 sts].
Rows 3 – 13. Repeat row 2.
Cut yarn, leaving a long tail.
CENTRE SECTION
(The centre section will need to be sufficiently small so you can really stretch it around the middle of your bow).
Ch 6
Row 1. 1sc in 2nd ch from hook, 1sc in next 4 ch, TURN [5 sts].
Rows 2. ch1, 1sc in same st (at base of ch1), 1sc in next 4 sts, TURN [5 sts].
Rows 3 – 13. Repeat row 2.
Cut yarn, fasten off and weave in ends.
LEGS
Ch 5
Row 1. 1sc in 2nd ch from hook, 1sc in next 3 ch, TURN [4 sts].
Row 2. 1sc in same st, 1sc in next 3 sts, TURN [4 sts].
Row 3 – 36. Repeat row 1.
Cut yarn, fasten off and weave in ends.
ASSEMBLY
For further help, please see the video tutorial above.
- Take the body of your bow and sew the two ends together (I used the whip stitch).
- Cut a fairly long piece of yarn. Ensuring that the seam is positioned in the centre, concertina (scrunch) your bow in the middle and wrap the piece of yarn you just cut around the centre and tie a few knots to secure.
- Fold the legs in half. Please them at the centre back of your bow.
- Take the centre section and wrap it around the middle of the bow, making sure that you place it through the legs. Sew the two ends of the centre section together (you will have to stretch it slightly when seaming together).
And that’s it – you’ve finished making and assembling your lovely little bow!
SHARE YOUR WORK!
I really hope that you enjoyed the free pattern for this crochet simple 3D bow!
Did you make the bow just for fun or did you use it to decorate another crochet project?
Whatever the reason, I always love to see photos of your work; please tag me on Instagram using @maisieandruth or use #maisieandruth
And remember to pin this pattern for later if you can’t make it right now!
Happy crocheting,


