


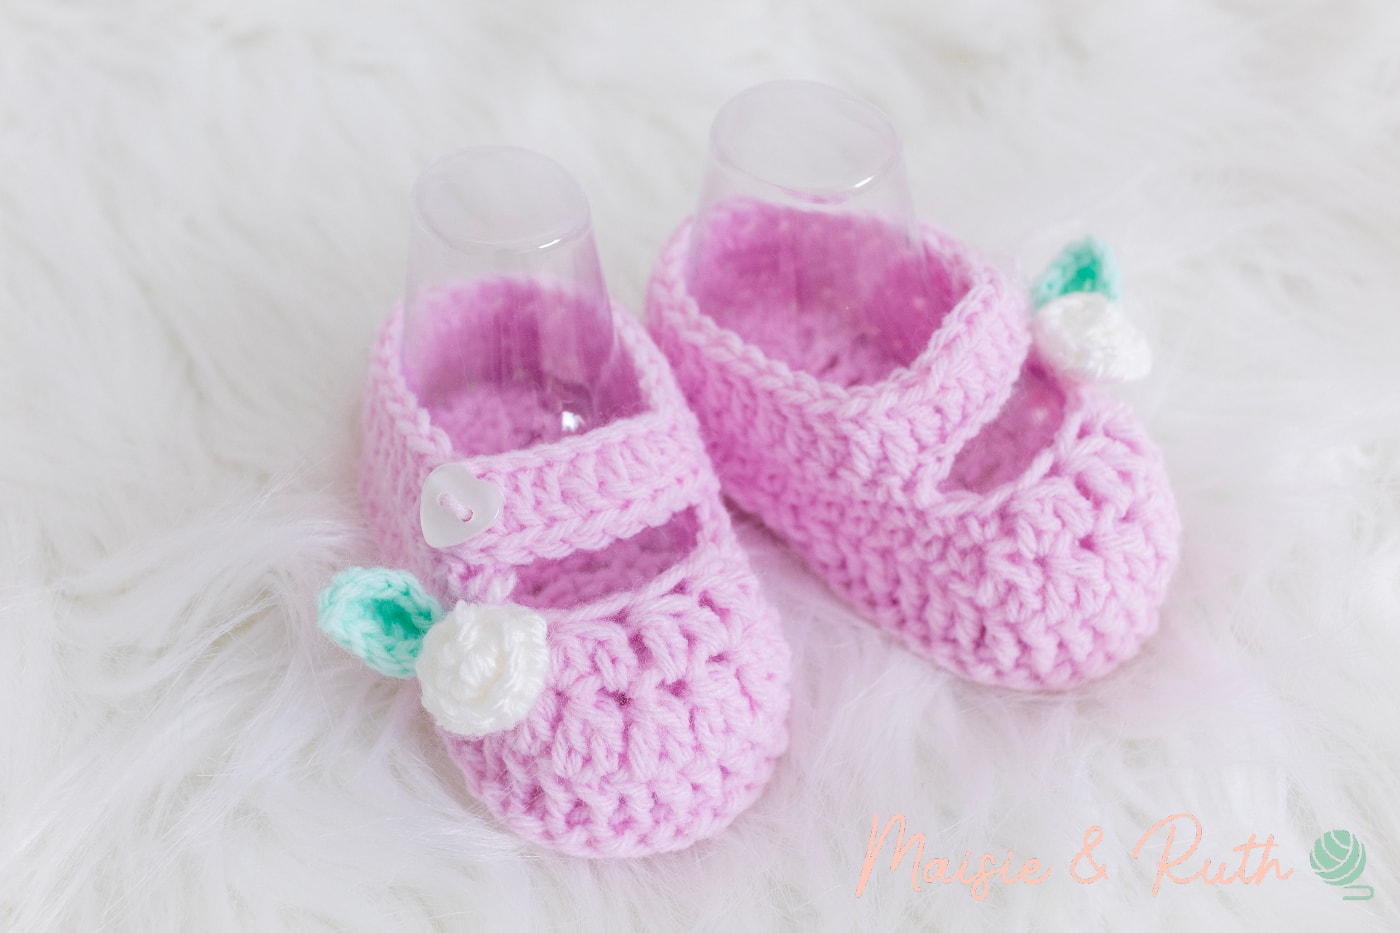
Are you looking for a quick and easy Crochet Baby Booties Pattern? Well, you’re going to love my design that is available right here for FREE on the blog!
There’s also a VIDEO TUTORIAL to accompany the pattern. And to purchase an ad-free printable version, please visit my Etsy store HERE

These baby booties are super quick to work up and I’ve made them even easier to make by including many photos of the process.
The Gracie Baby Bootie is part of a set – the Freya Frilly Romper, the Bluebell Bonnet and Bella the Bunny. They would make wonderful gifts for a baby shower…click on the links to get access to the free patterns.

YARN
For this crochet baby booties pattern, I used Paintbox Yarns Baby DK. It’s an ideal yarn for this project as it’s soft and lightweight, making it super comfy for delicate little baby feet!
The colour range for this yarn is extensive with many pastel and bold colours to choose from, so feel free to work up these booties in whatever shade takes your fancy.
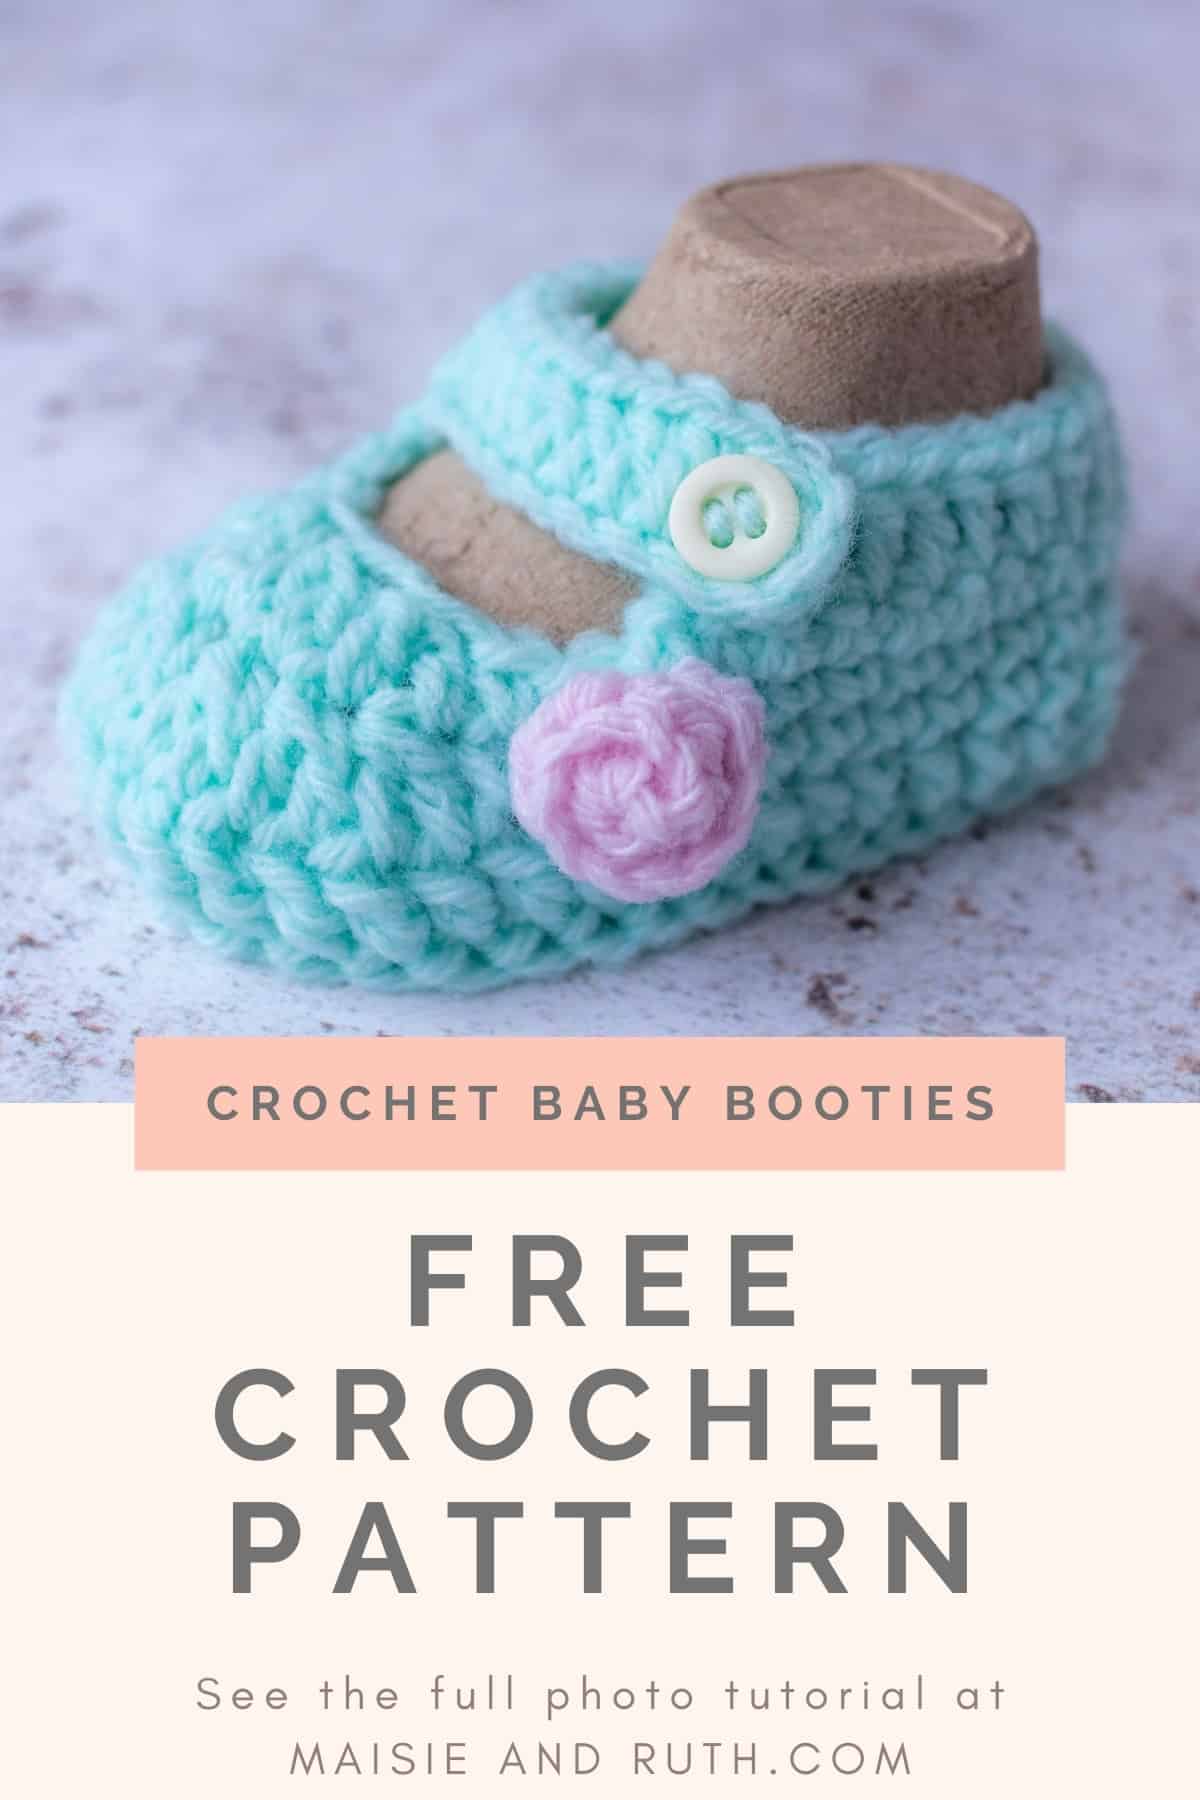
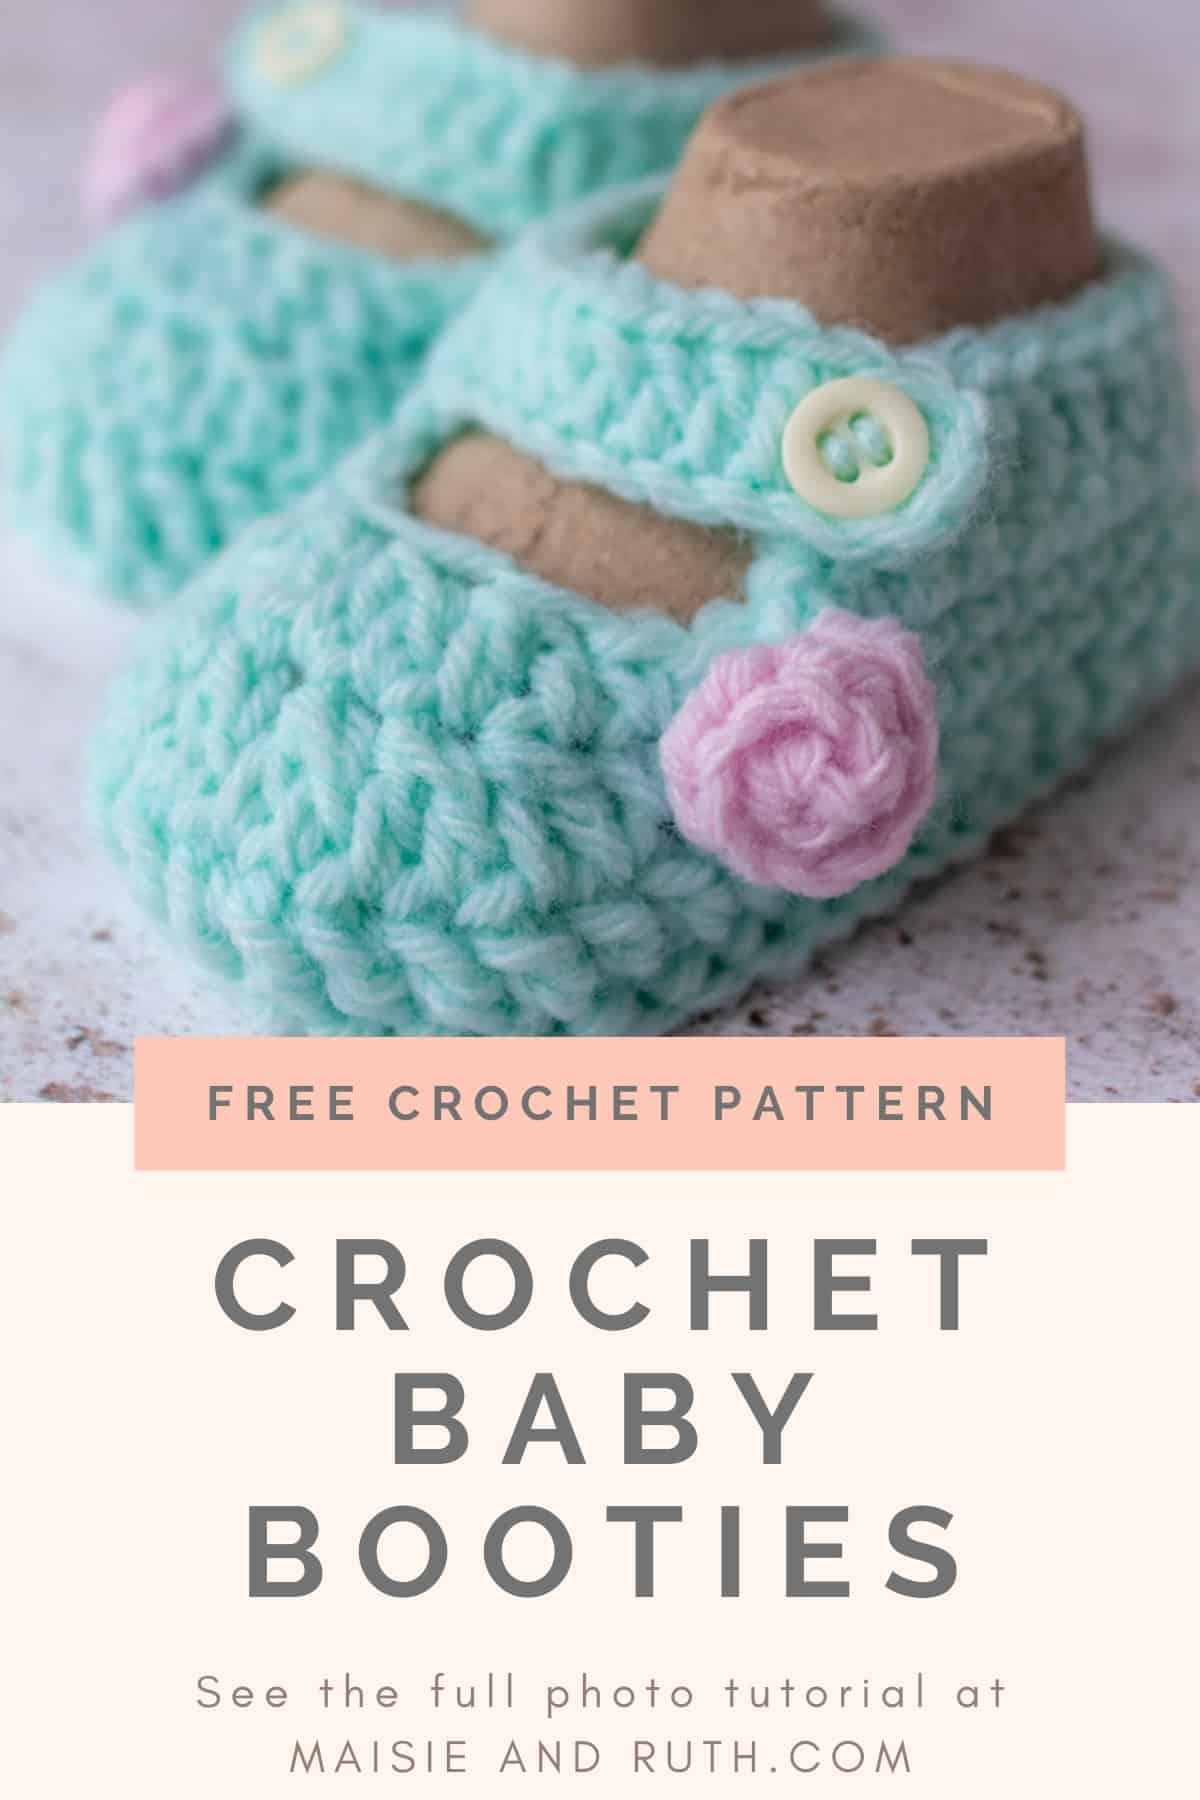
For a cute finishing touch, I decided to embellish the bootie with a little rose and mini leaf.
SUBSTITUTE YARN
You may use any category 3 light / DK yarn for this crochet project. As long as you meet the gauge detailed below, you’ll be fine.
You can also substitute the Paintbox Yarns Baby DK with the regular Paintbox Yarns Simply DK. I frequently work with this yarn as it’s a great choice for crochet baby items. The specified gauge for both the DK and the Baby DK is identical.
YarnSub is a great resource to find out if your favourite yarn would make a suitable alternative to the recommended yarn.
I’ve made these booties in Sirdar Snuggly DK and King Cole Comfort Baby DK. Both these yarns are also recommended by YarnSub as being good matches for Paintbox Yarns Baby DK.
PDF PRINTABLE PATTERNS!
If you would prefer an ad-free, printable version of this pattern, you can purchase it from my Etsy store
The Gracie Shoes are also part of a Pattern Bundle! Check it out here
Thank you for supporting my shop!
Ready? Let’s have a look at the tutorial for this crochet baby booties pattern right now…
THE GRACIE BOOTIE: A FREE CROCHET BABY BOOTIES PATTERN
Before you begin, please carefully read all the information that is detailed before the main pattern instructions… I’ve included useful points that will make the process easier for you.
LEVEL
Easy – (see details of project levels at the Craft Yarn Council).
PATTERN NOTES
- US crochet terms used throughout.
- The bootie is made in rounds.
- The ch1 and ch3 at the beginning of each round do not count as a stitch. Therefore, you should make the first stitch of the round in the same stitch (at the base of the ch1 or ch3).
- As the ch1 or ch3 at the beginning of rounds does not count as a stitch, you should join the round by making a slip stitch into the very first dc or sc stitch of the round.
- When counting the total number of stitches at the end of each round, please be careful not to include the ch1 or ch3 in the final stitch count.
- For beginners, it will be helpful to place a stitch marker in the first dc or sc made at the beginning of each round to ensure that you slip stitch into this particular stitch when joining at the end of the round.
MATERIALS
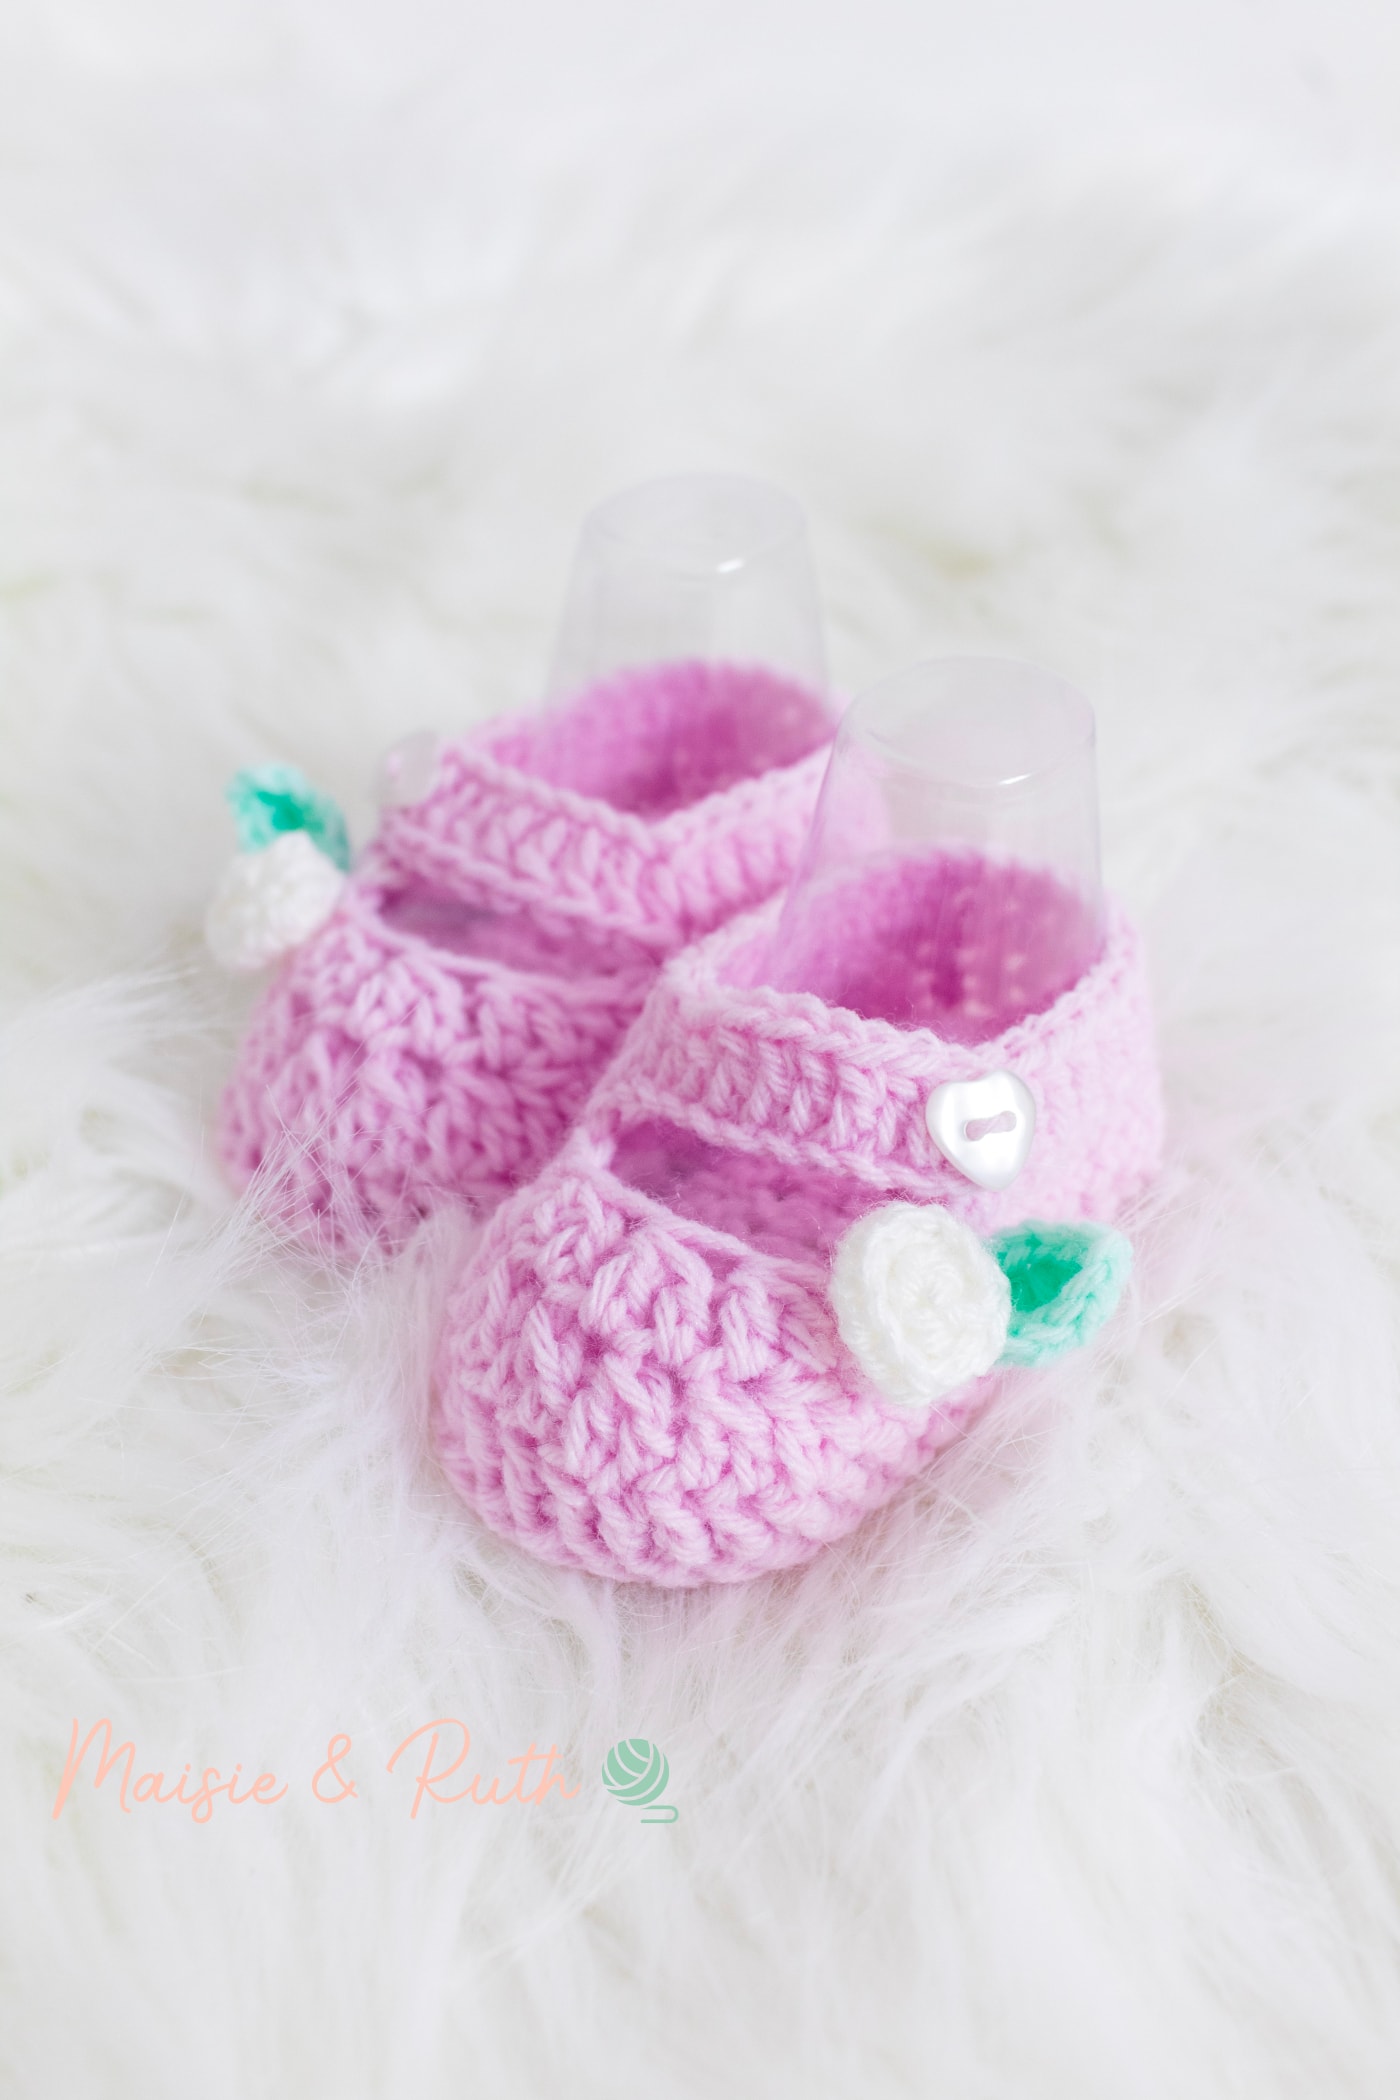
- Yarn: #3, light worsted / DK / 8 ply. I used 1 ball of Paintbox Yarns Baby DK
- The green booties were worked in the colour Mint Green (760), 183 yds/ 1.8oz (167m / 50g)
- The pink booties were made in the colour Candyfloss Pink (749), 183 yds/ 1.8oz (167m / 50g)
- Crochet Hook for booties: Newborn C (3mm); 0 – 3 months E (3.5mm)
- Crochet hook for rose & leaf: C (3mm)
- Scissors
- Yarn needle
- Stitch marker x 1
- 2 buttons: 11/32″ (9mm)
GAUGE
To check your gauge / tension, work the first two rounds of the pattern below.
To check that you’re okay for size, the length of your sole (which is also the finished length of your bootie) should measure as follows:
Newborn (3mm hook): 3” (8cm) approx.
0 – 3 months (E / 3.5mm hook): 3.5″ (9cm) approx.
STITCHES AND ABBREVIATIONS – US CROCHET TERMS
beg – beginning
ch(s) – chain(s)
dc – double crochet: Yarn over (yo), insert hook into stitch, yo, pull up a loop, 3 loops remaining on hook. Yo, pull through 2 loops, 2 loops remaining on hook. Yo, pull through remaining 2 loops. 1 double crochet completed.
dc2tog – double crochet two together (also known as a dc decrease): Yarn over (yo), insert hook into stitch, yo, pull up a loop, 3 loops remaining on hook. Yo, pull through 2 loops, 2 loops remaining on hook. Yo, insert hook into next st, yo, pull up a loop, 4 loops remaining on hook. Yo, pull through 2 loops, 3 loops remaining on hook. Yo, pull through remaining 3 loops. DC2tog completed.
fasten off – To fasten off securely, work one chain, then cut the yarn leaving a 5 – 6” tail. Pull the tail through the loop that is on your hook. Tighten gently.
hdc – half double crochet: Yarn over (yo), insert hook into stitch, yo, pull up a loop (3 loops on hook). Yo, pull through all 3 loops. 1 half double crochet completed.
sc – single crochet: Insert hook into stitch, yarn over (yo), pull up a loop, 2 loops remaining on hook. Yo, pull through both loops on hook. 1 single crochet completed.
sl st – slip stitch: Insert hook into stitch, yarn over (yo), pull up a loop, 2 loops on hook. Pull the first loop through the second loop. 1 slip stitch completed
st(s) – stitch(es)
( ) – Sets of stitches to be worked within one stitch or space.
[ ] – The total number of stitches you should have at the end of a row / round.
SPECIAL STITCHES
BPdc – back post double crochet: Yarn over (yo), insert hook from back to front to back around the post of the next stitch, yo, pull up a loop, 3 loops remaining on hook. Yo, pull up a loop and pull through 2 loops on hook, 2 loops remaining on hook. Yo, pull up a loop and pull through remaining 2 loops on hook. 1 BPdc completed.
PATTERN INSTRUCTIONS
SOLE
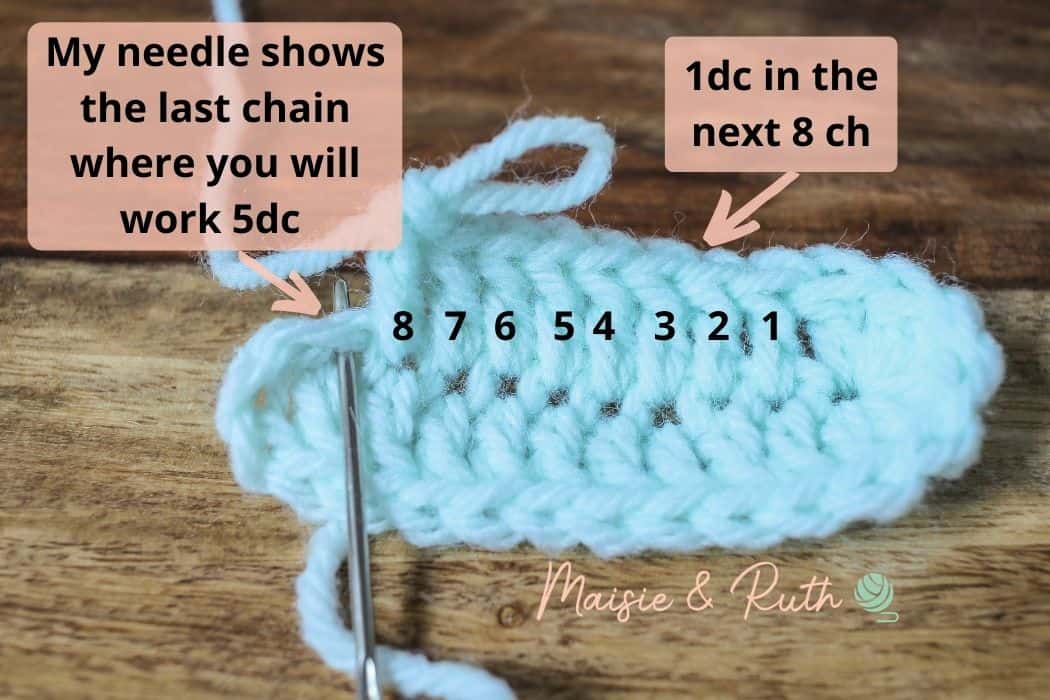
Ch13
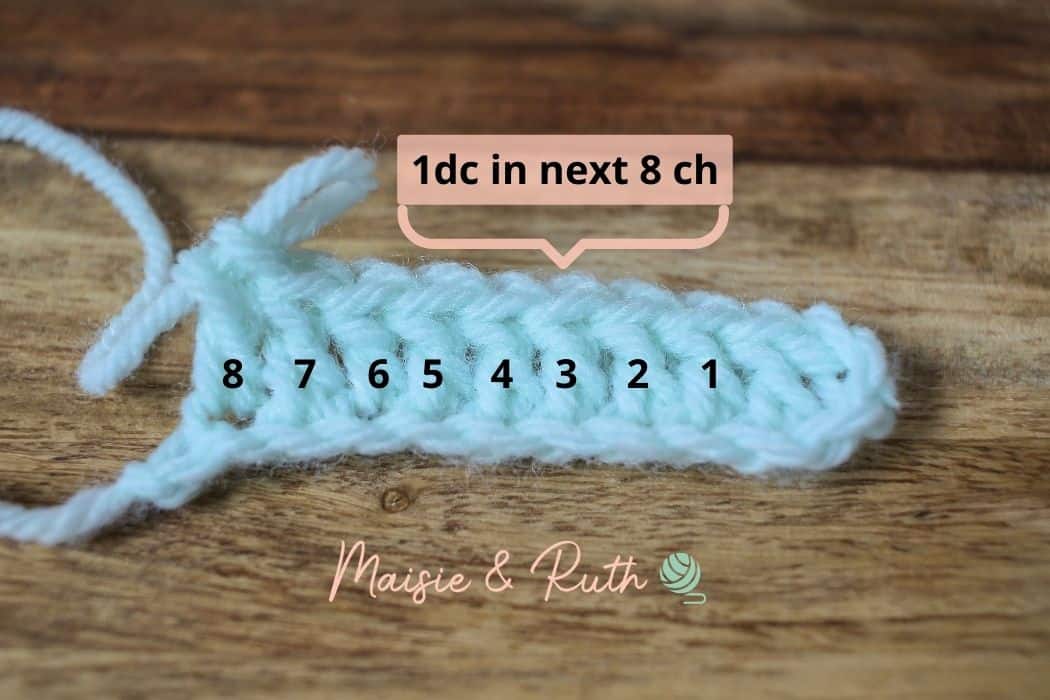
Round 1. 1dc in 4th ch from the hook (skipped 3 chs do not count as a st), 1dc in next 8 chs, 6dc in last ch, working up the other side of the ch, 1dc in next 8 ch, 5dc in last ch, sl st to 1st dc to join [28 sts].
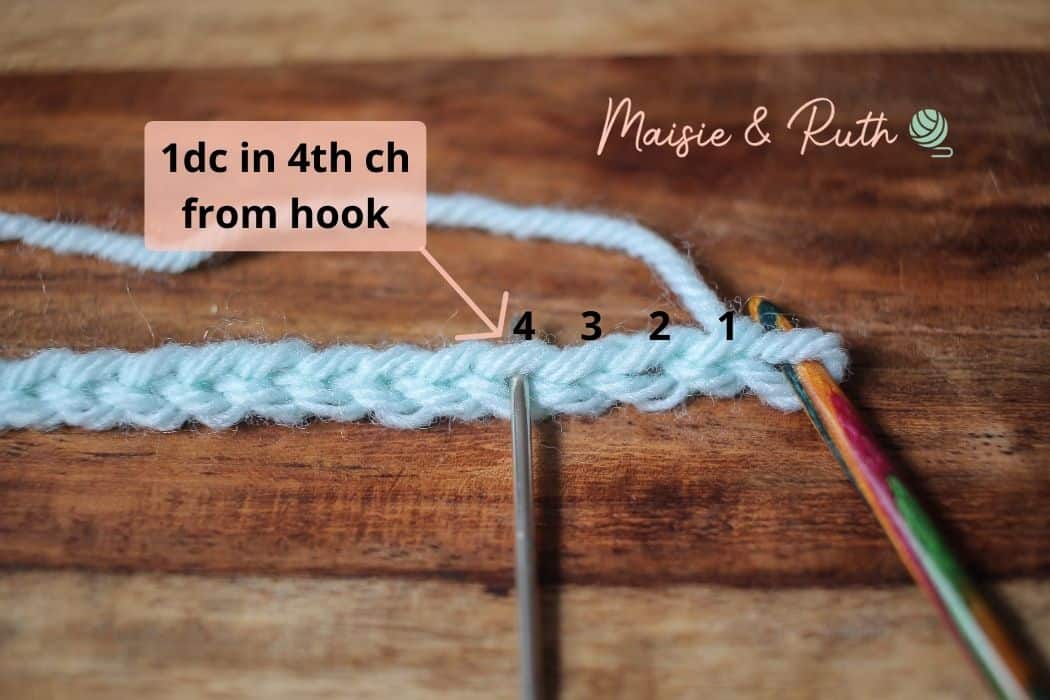

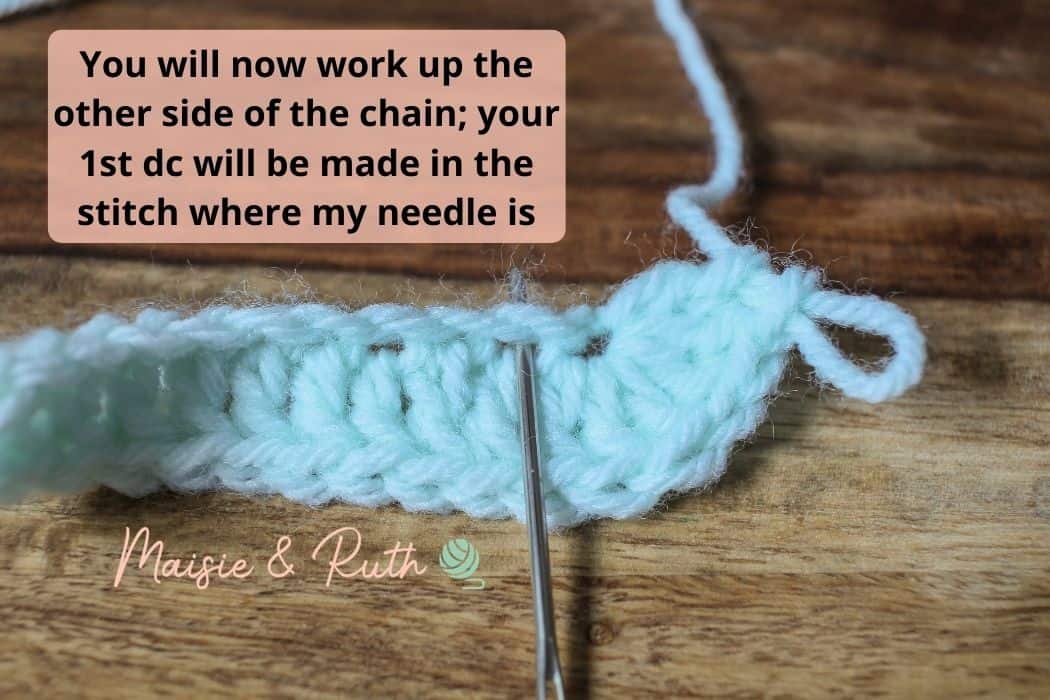
At the end of the round, you will skip the ch3 made at the beginning of the round and slip stitch to the 1st dc to join:
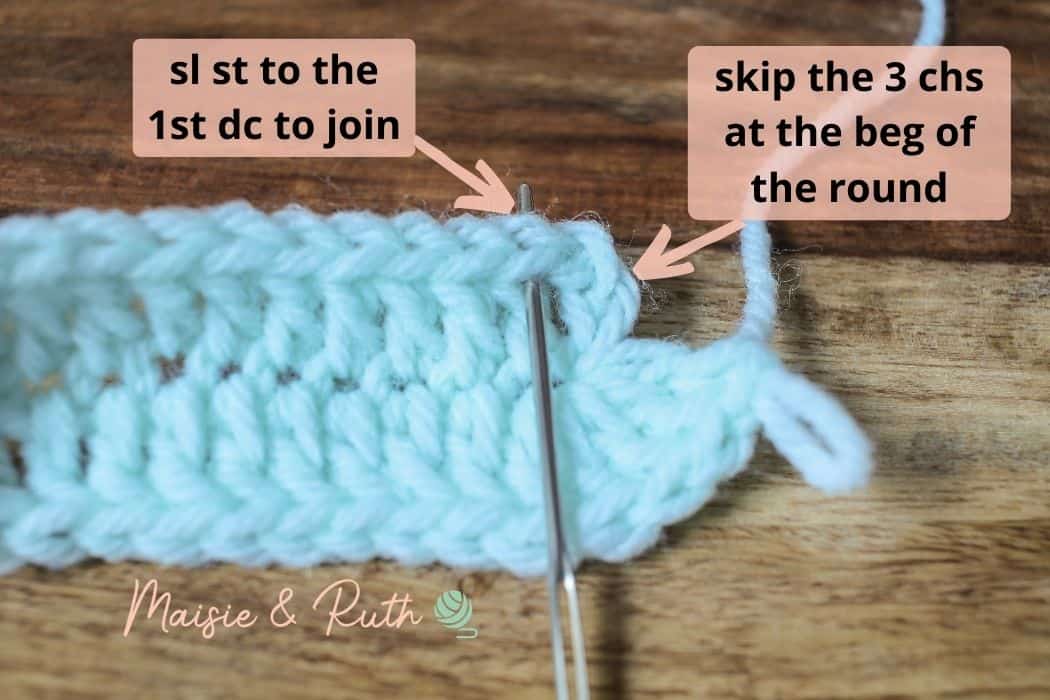
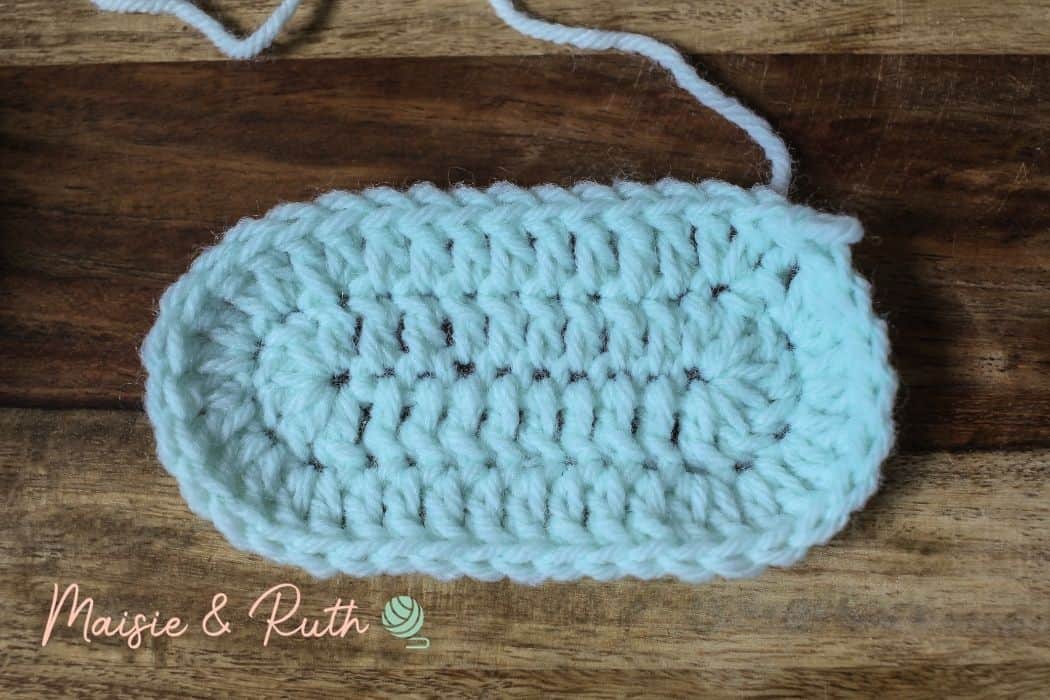
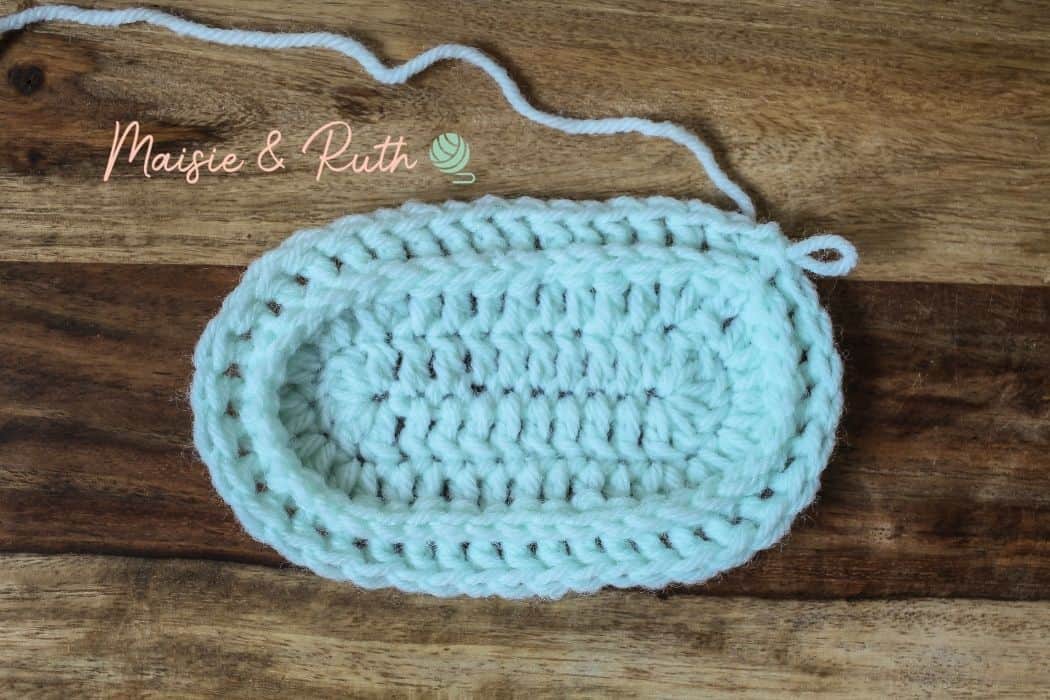
Round 2. Ch3 (does not count as a st here and throughout), 2dc in same st, 1dc in next 8 sts, 2dc in next 6 sts, 1dc in next 8 sts, 2dc in next 5 sts, sl st to 1st dc to join [40 sts].

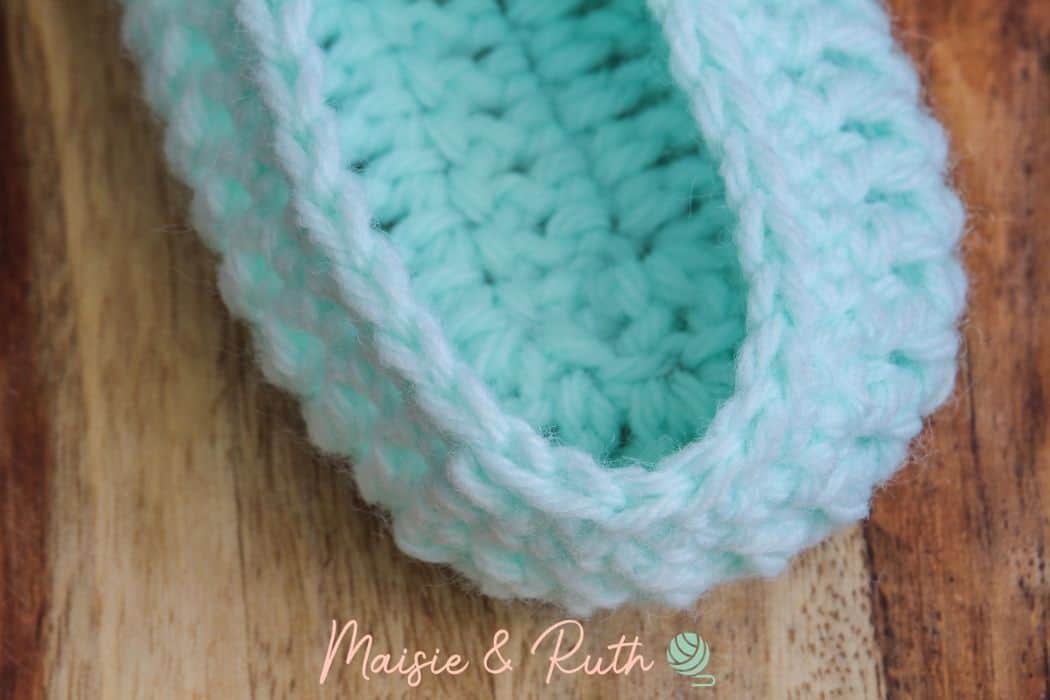
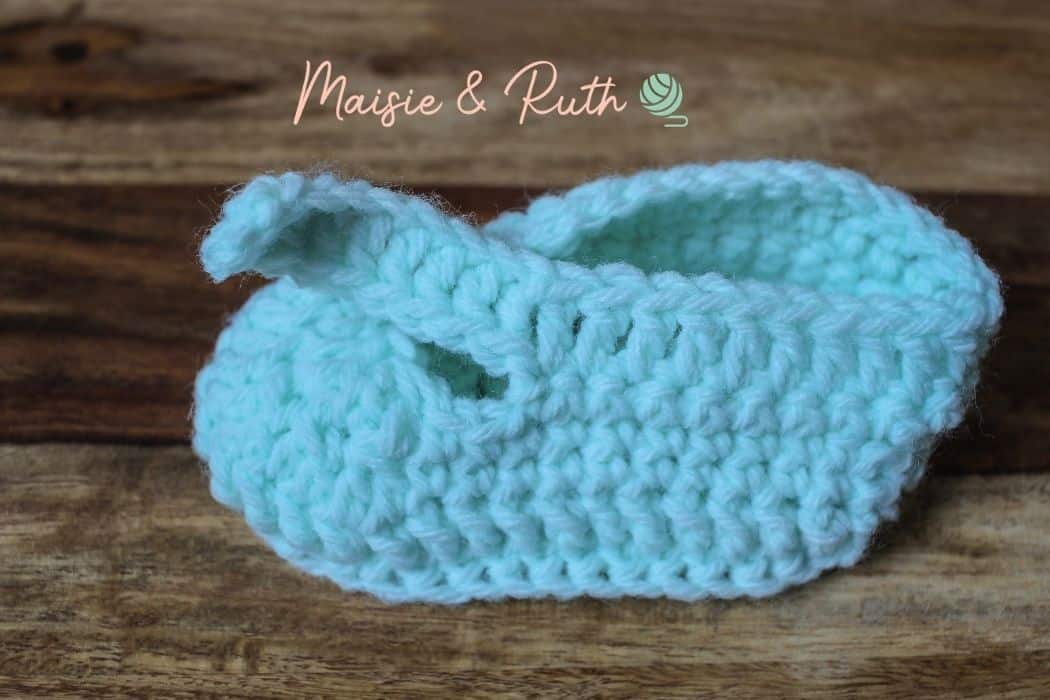
At the end of round 2, your bootie should be looking similar to this:
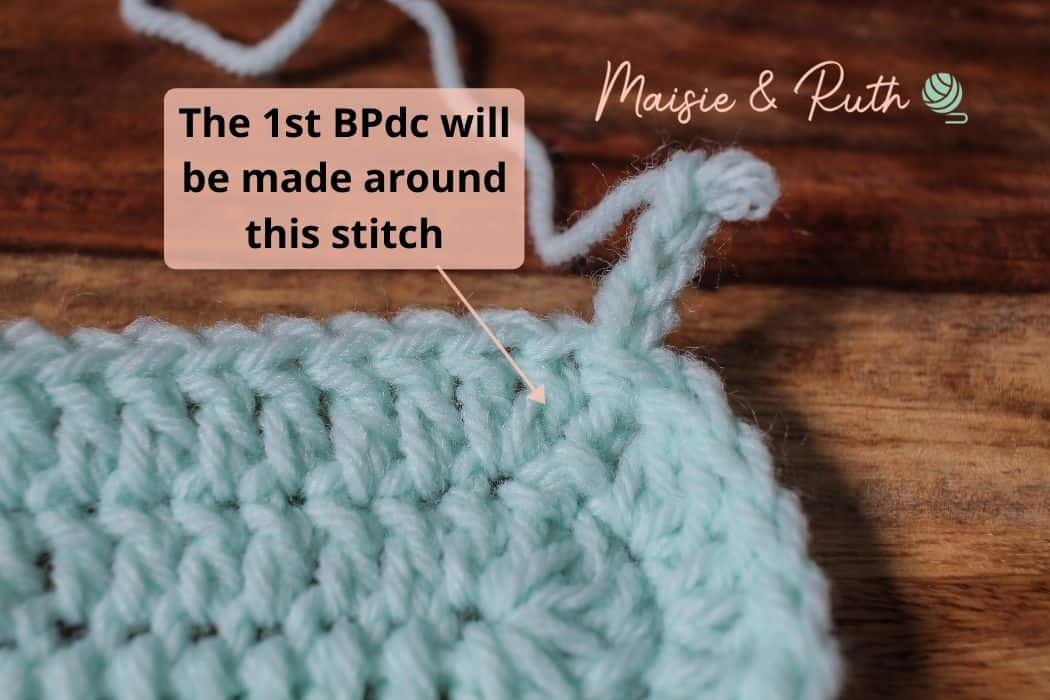
UPPER HALF OF BOOTIE
Round 3. Ch3, BPdc in next 40 sts, sl st to 1st BPdc to join, [40 sts].
The image below shows you what your work should look like after round 3:
SHAPE THE TOE
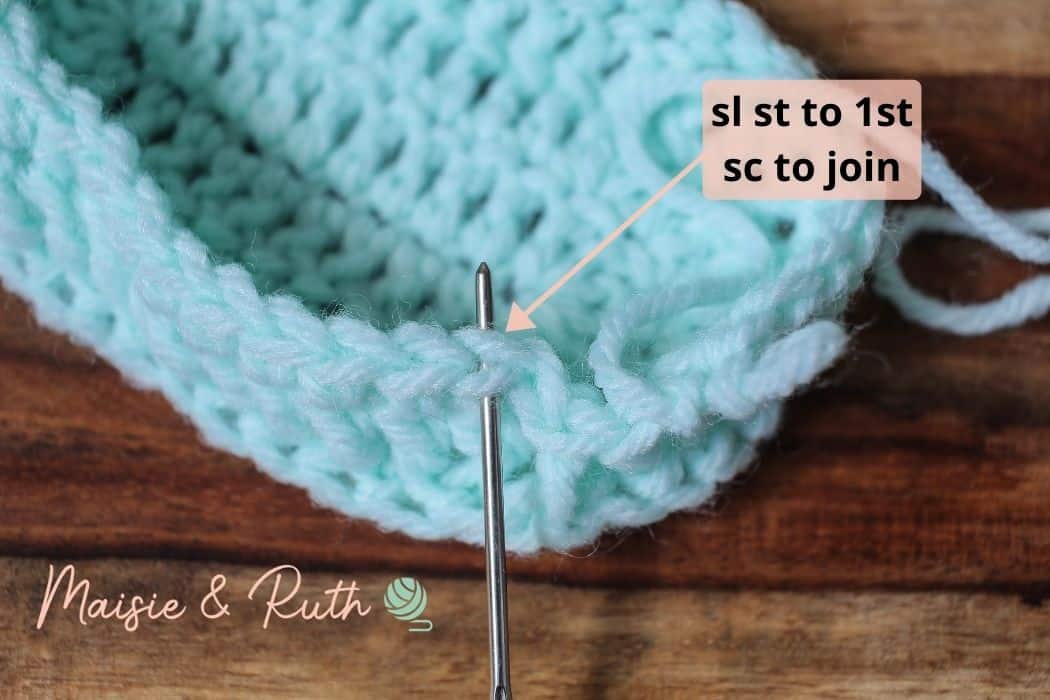
Round 4. Ch1 (does not count as a st here and throughout), 1sc in same st, 1sc in next 9 sts, (dc2tog) 6 times, 1sc in next 18 sts, sl st to 1st sc to join [34 sts].
When ending the round, make sure that you sl st to the 1st sc and not the ch1 at the beginning of the round:
Your bootie should be looking like this after round 4:
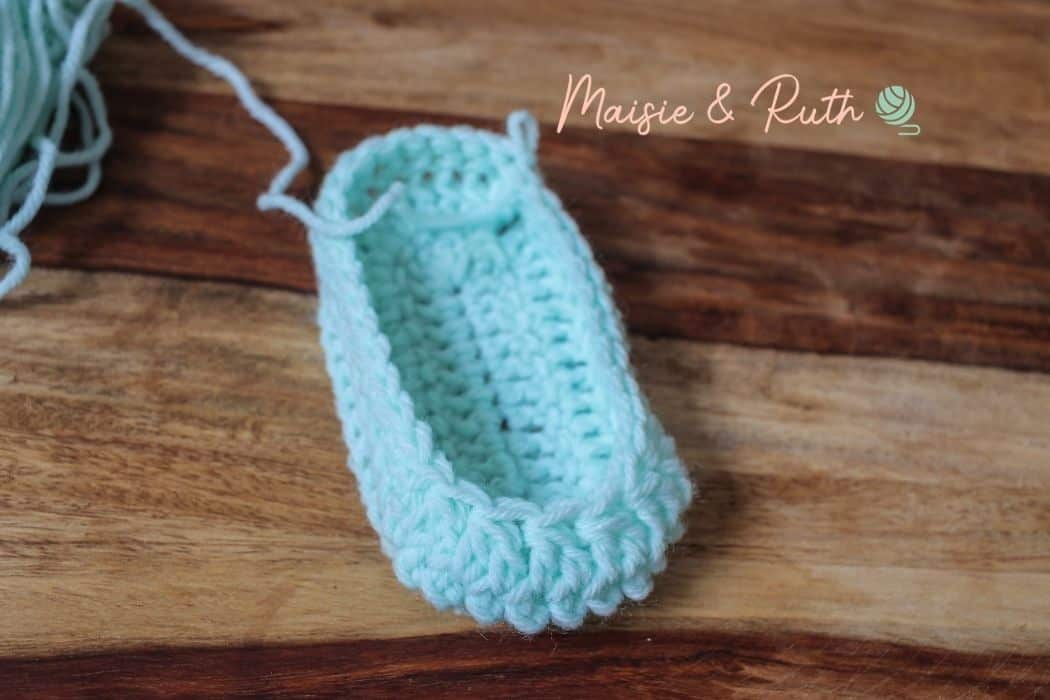
Round 5. Ch1, 1sc in same st, 1sc in next 9 sts, (dc2tog) 3 times, 1sc in next 18 sts, to join sl st to 1st sc or make an invisible join [31 sts].
If you made a sl st at the end of this round, cut your yarn, fasten off and weave in your ends.
At this point, your baby bootie should be looking like this:
At the end of round 5, instead of making a slip stitch to the 1st sc to join, I made an invisible join.
Joining your work in this way will ensure a neat and tidy look to your finished piece. This method also ensures that you don’t inadvertently create any extra stitches.
Have a look at the photo below to see how the invisible join looks exactly like the top of a stitch to give a really nice seamless look:
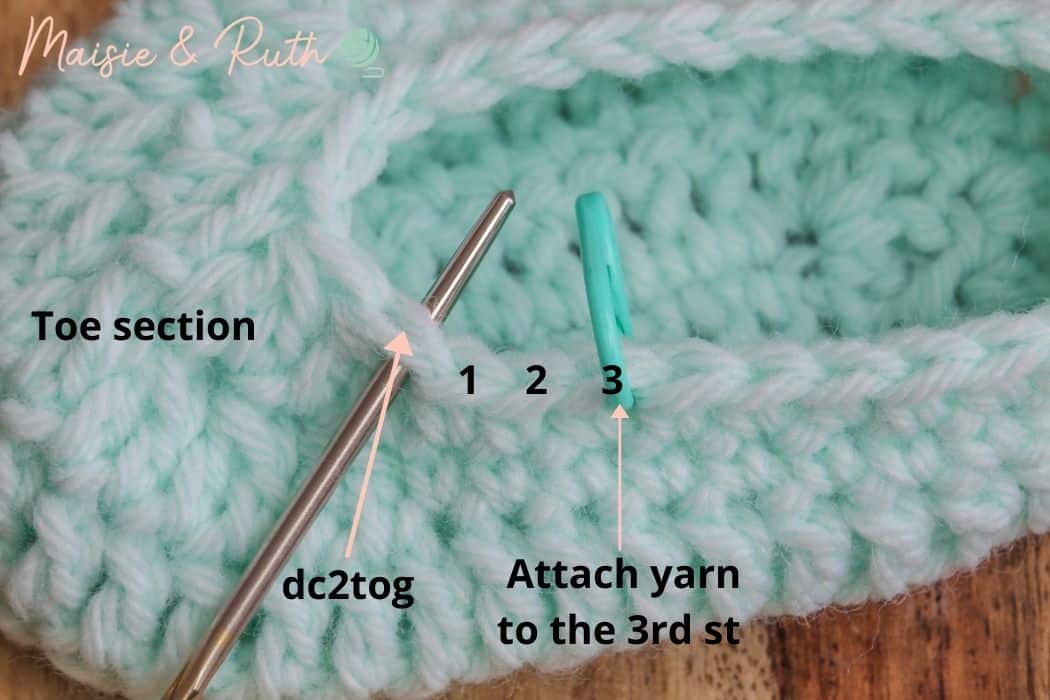
SIDE OF LEFT SHOE
You will now re-attach your yarn in order to work up the left side and strap of the bootie.
First, you will need to identify the correct stitch to which you will attach the yarn.
On the left side of the shoe, find the last dc2tog stitch at the toe section and attach your yarn to the 3rd sc along (where my stitch marker is). You can see this more clearly in the image below:
When attaching your yarn to start row 6, ensure that your bootie is positioned as seen in the photo below:

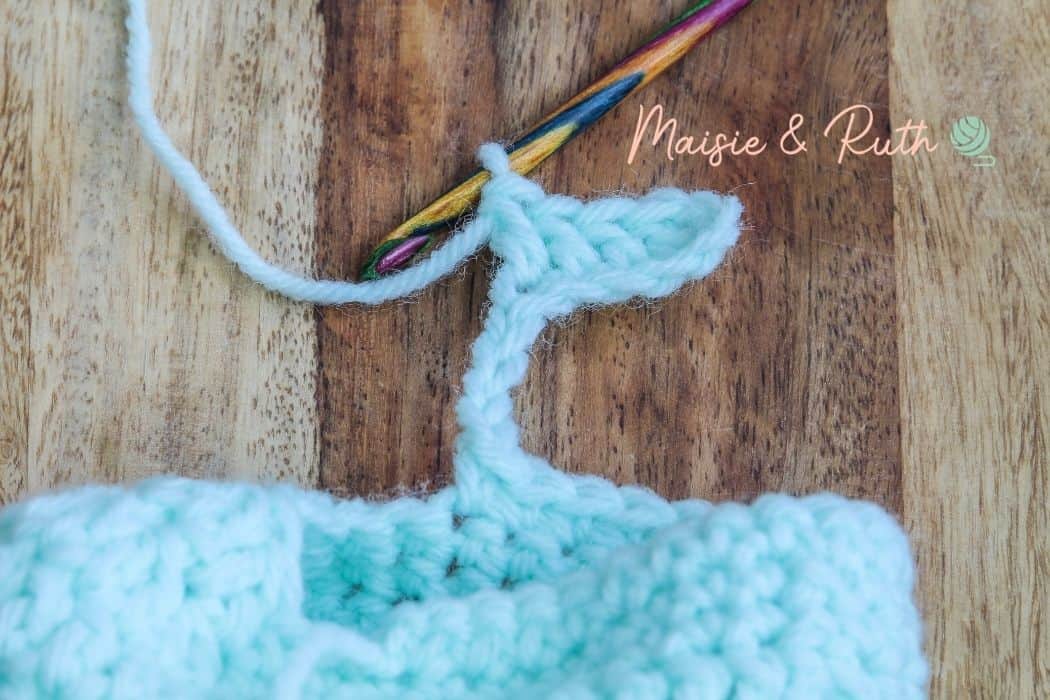
Row 6. Ch1 (does not count as a st), 1sc in same st, 1sc in next 23 sts, ch11, 1dc in 4th ch from hook (buttonhole made) 1dc in next 7 ch, 1dc in next 24 sts.
In the photo below, the strap is formed by chaining 11 and working dc stitches into the chains:
Below you can see that the strap has now been made and dc stitches will continue to be worked until the end of the row:

Cut yarn, fasten off and weave in ends.
Sew button on opposite side of strap, making sure that it is aligned with the buttonhole.
SIDE OF RIGHT BOOTIE
You will re-attach the yarn and start working on the side of the right bootie in the same way as the left one.
However, the sequence of stitches will be different as the strap will be worked on the opposite side of the shoe.
Attach your yarn to the right bootie in the same way as you did with the left one (refer to the images above if you need a reminder).
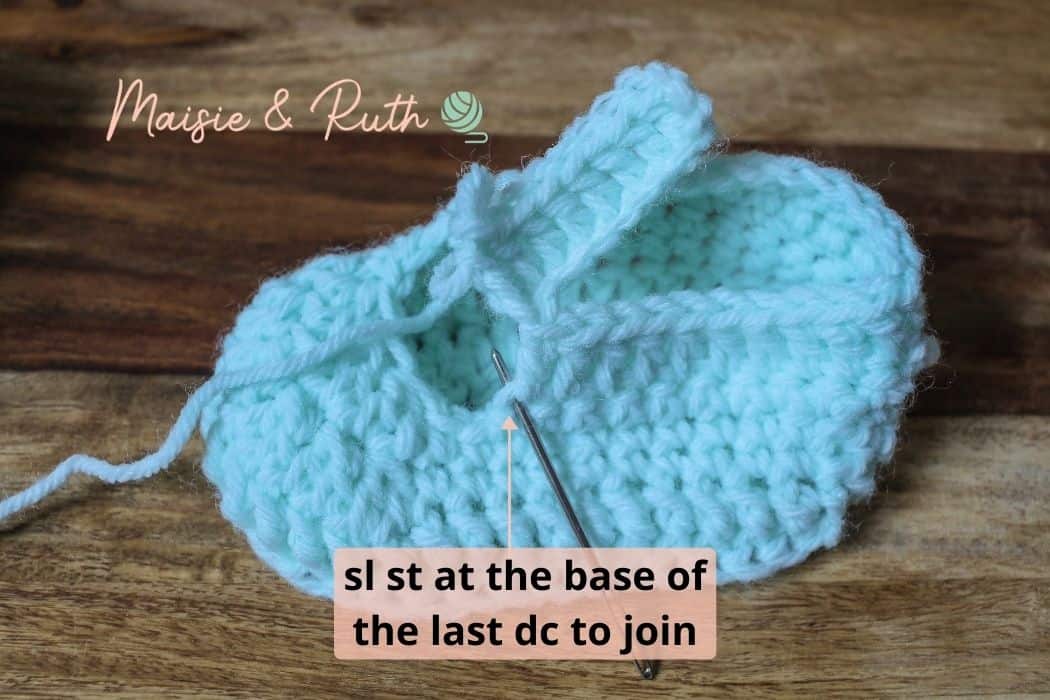
Row 6. Ch1, 1sc in same st, 1sc in next 23 sts, ch1, TURN, 1dc in same st, 1dc in next 23 sts, ch11, 1dc in 4th CH from hook (buttonhole made) 1dc in next 7 ch, sl st at base of the last dc to join.
The image below shows where to place your slip stitch (seen by my needle) in order to attach the strap to the side of the bootie:
Cut yarn and fasten off. Weave in end. Sew on button.
The final row of the right bootie has just been completed:
MINI ROSE PATTERN INSTRUCTIONS
Ch6
Row 1. 1hdc in 2nd ch from hook, 2hdc in same ch, *3hdc in next ch*, repeat from * to * until end of row, [15 hdc sts].
Cut yarn, leaving a fairly long tail for sewing the rose onto another item.
This mini rose should naturally curl itself. If not, roll it up into a little rose shape.
Sew it onto your baby bootie.
MINI LEAF
Ch6
Row 1. 1sc in 2nd ch from hook, 1hdc in next ch, 1dc in next ch, 1hdc in next ch, 1sc in last ch, ch2, working up the other side of the ch, 1sc in 1st ch, 1hdc in next ch, 1dc in next ch, 1hdc in next ch, 1sc in last ch, sl st in tip of leaf to join.
Cut yarn, fasten off and weave in ends.
Sew leaf on to your bootie, just behind the mini rose.
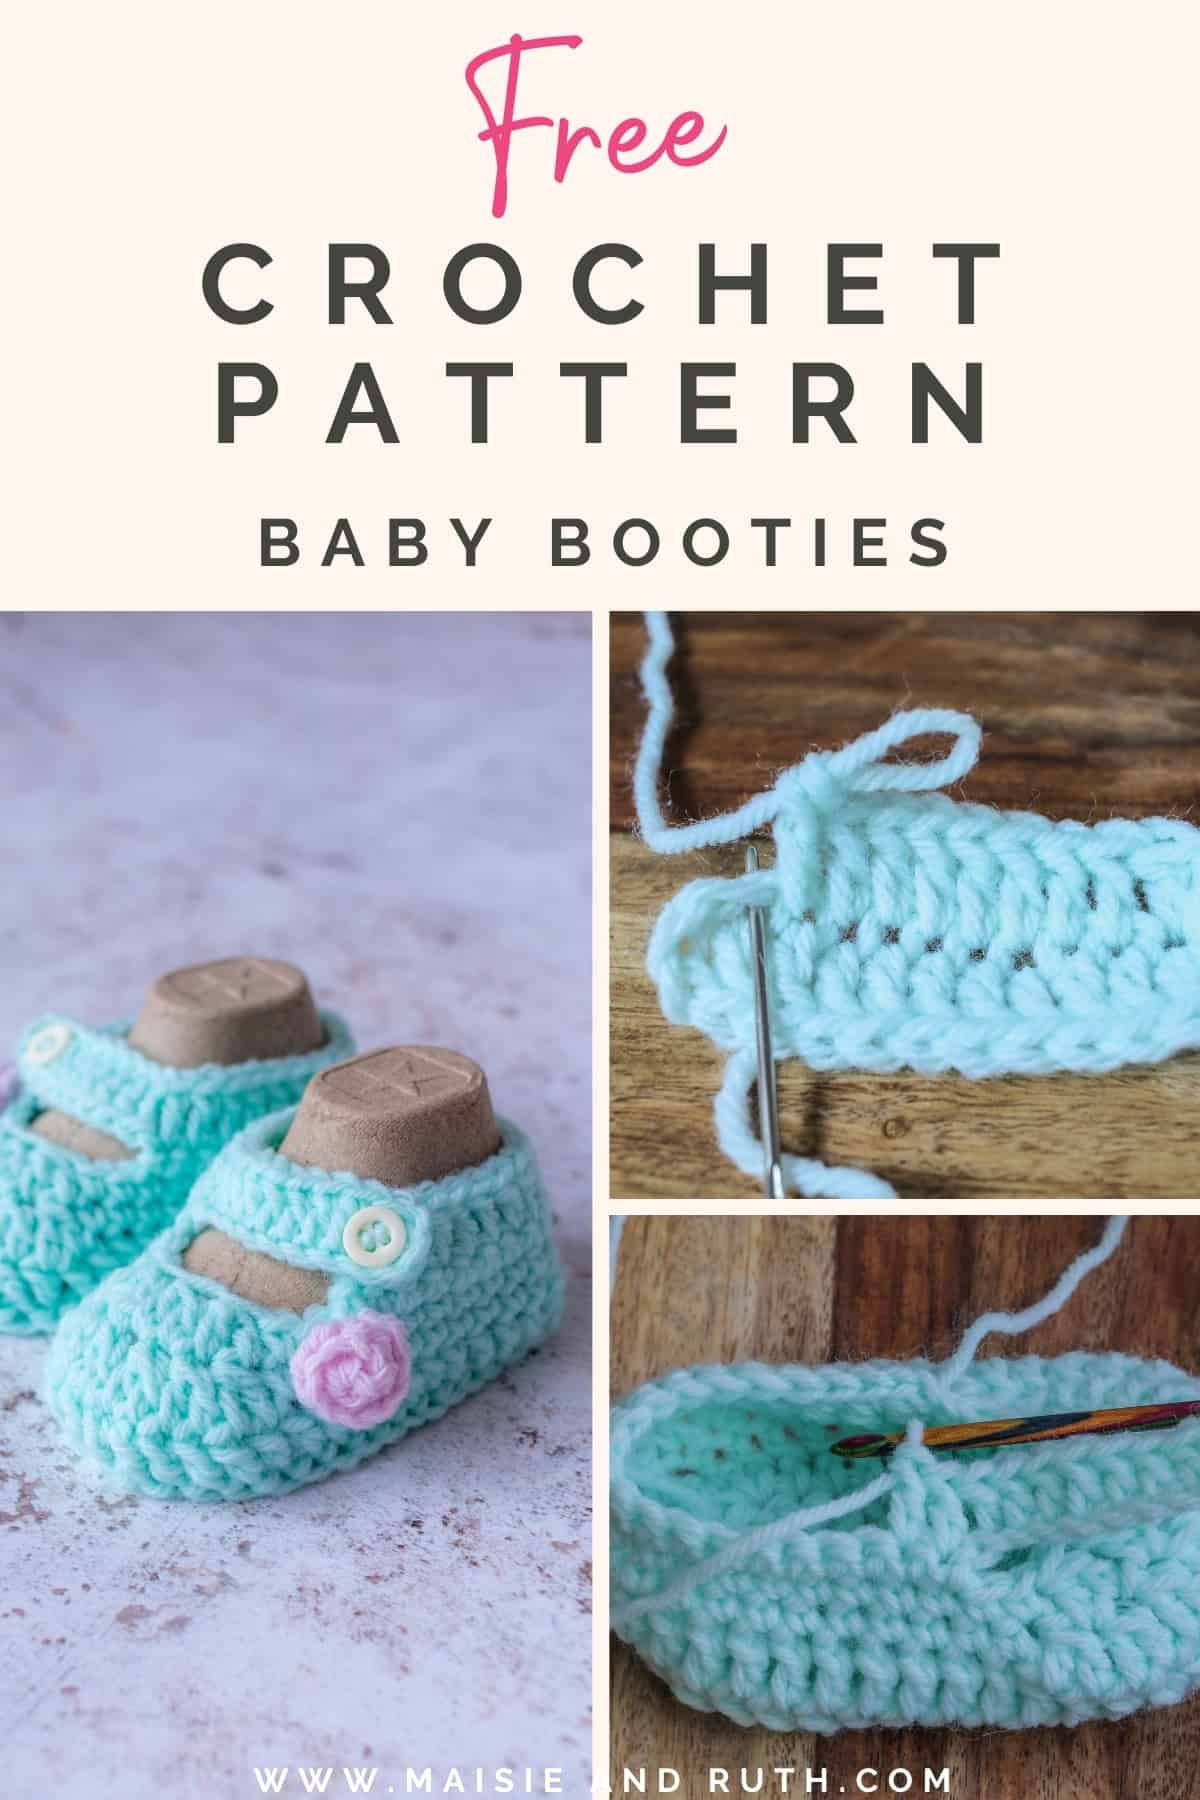
PIN ME FOR LATER!
I hope that you enjoyed my free crochet baby booties pattern; let me know in the comments below if you get around to making them!
If you don’t have the time to make them right now, pin the pattern to your board for later 😉
I love to see photos of your work (work in progress or finished) so if you post your photos on Instagram please tag me using @maisieandruth
Happy crocheting,


