

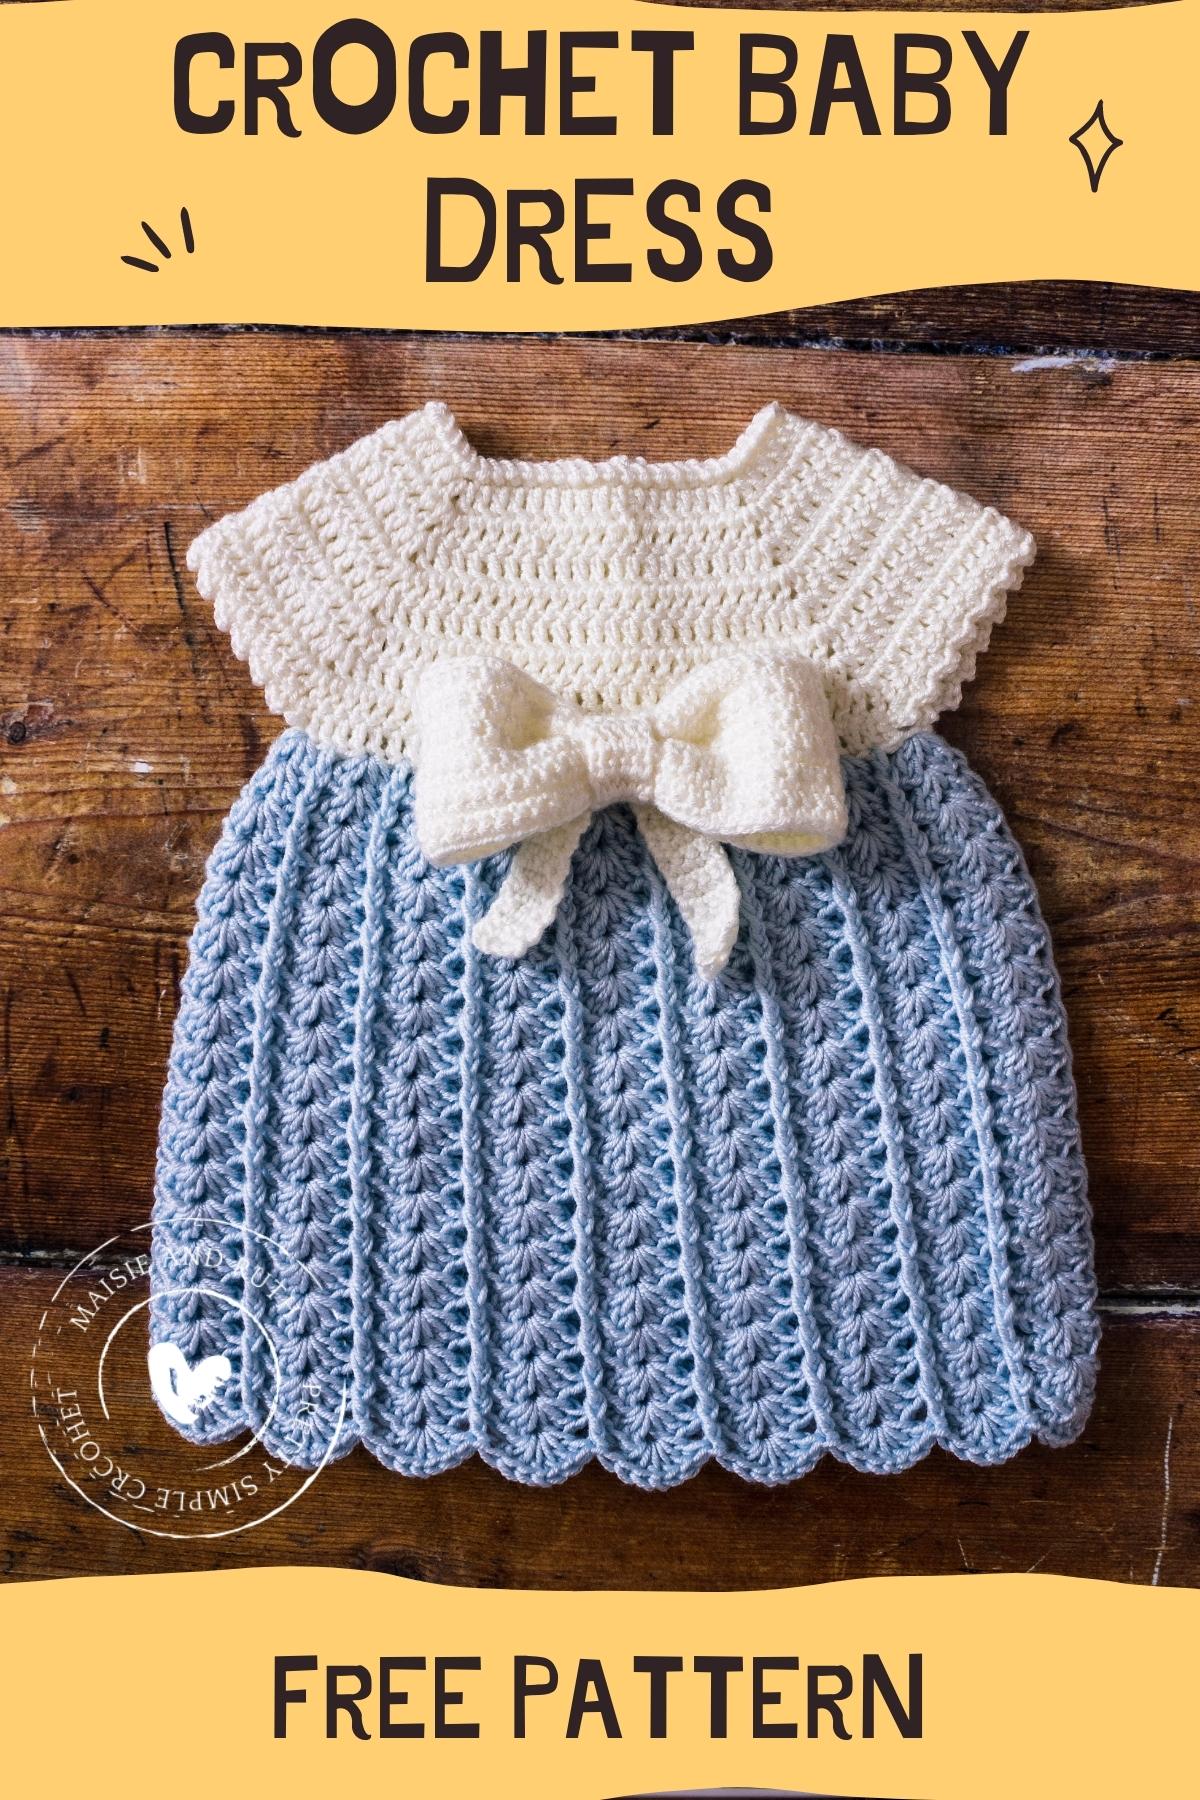
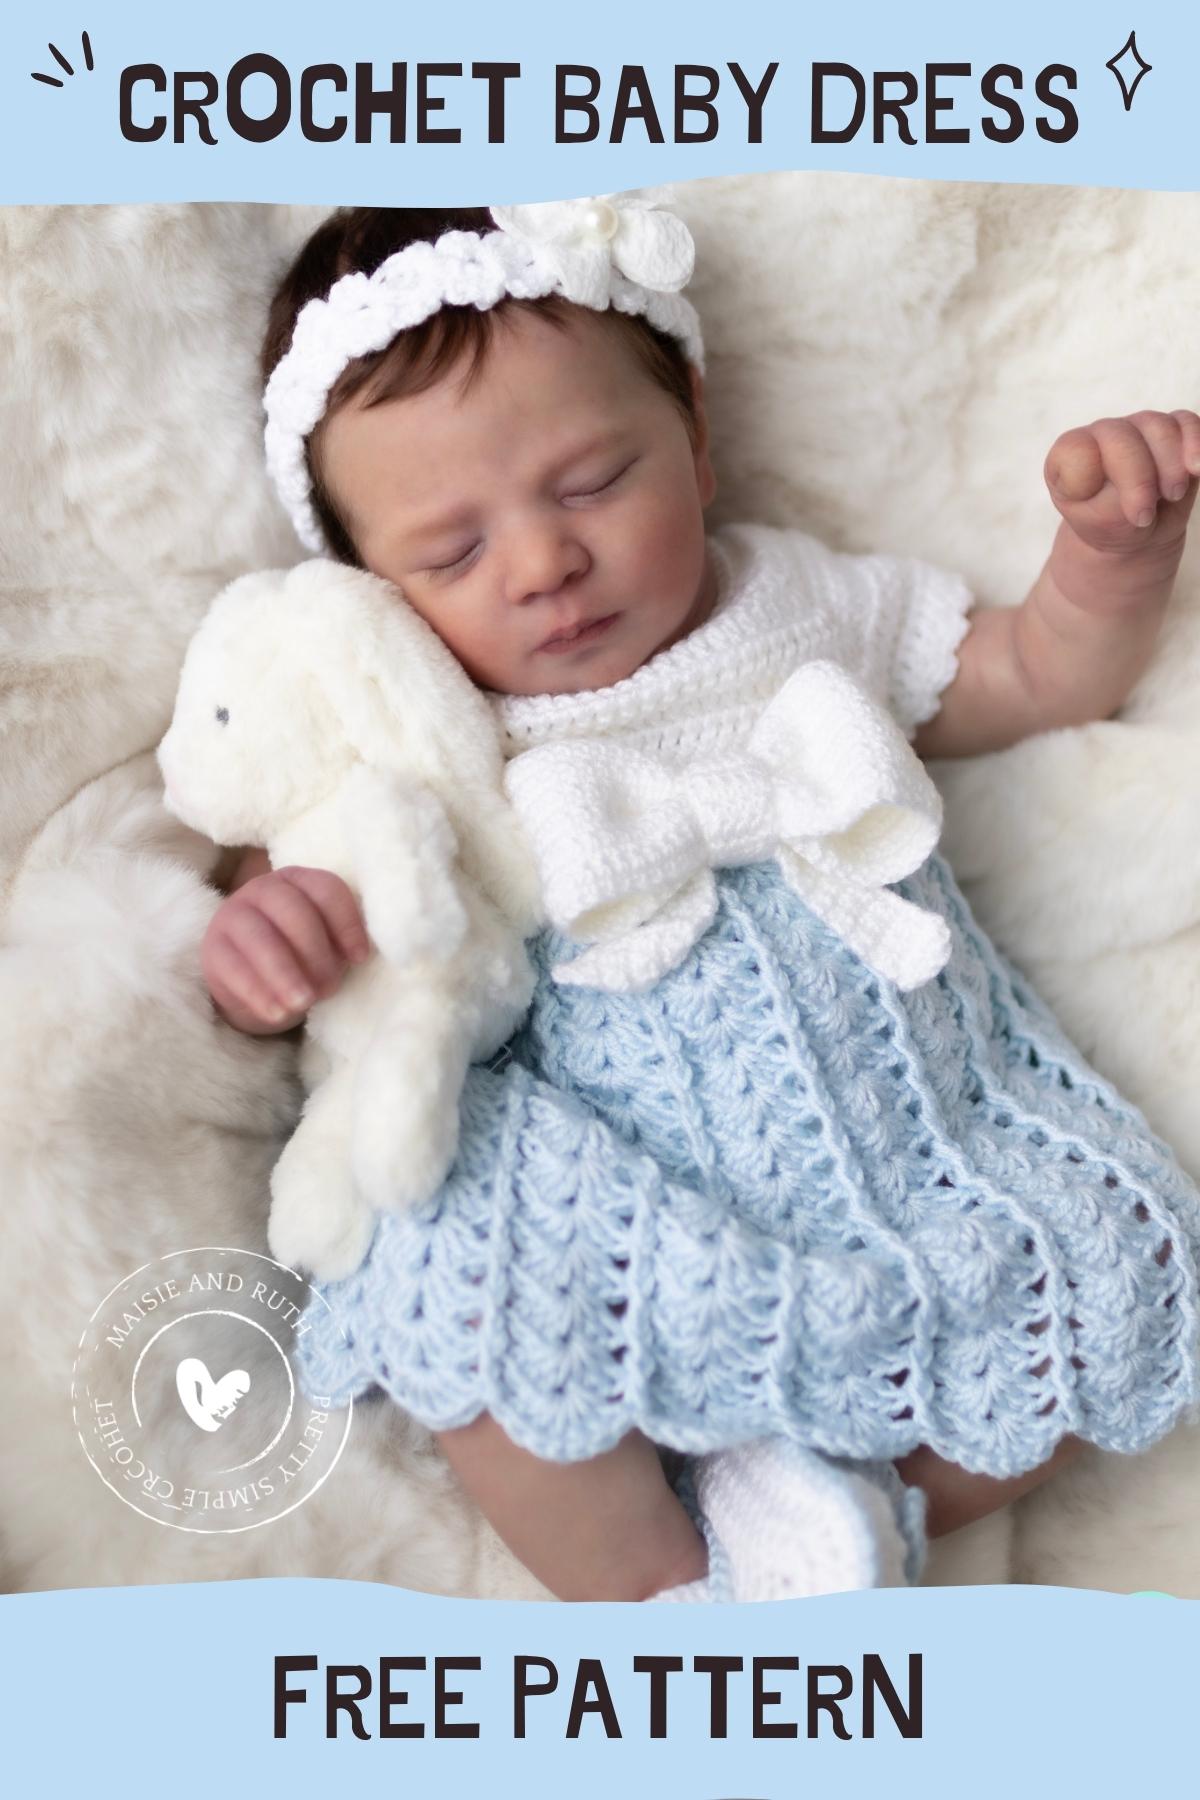
Learn how to make this adorable Easy Crochet Baby Dress by following along with my FREE pattern!
A VIDEO TUTORIAL is also included to assist you even further. And to purchase an ad-free printable version, please visit the Etsy store HERE

BEAUTIFUL & ELEGANT DESIGN
This easy crochet baby dress pattern comes in four sizes and is worked from the top-down, meaning that you’ll work from the neck edge downwards.
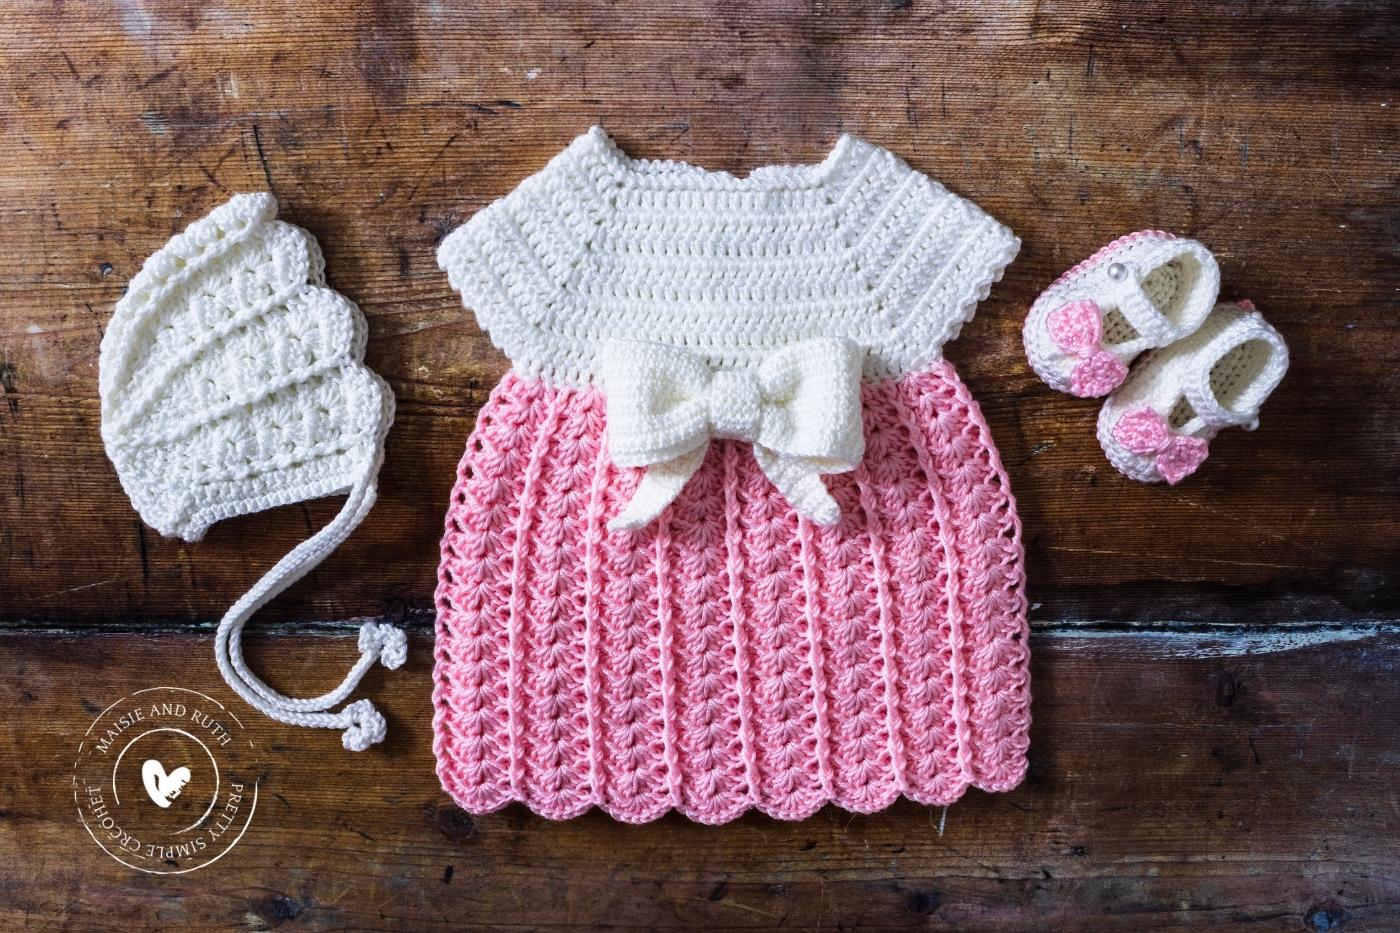
In this free pattern, the yoke (top) of the dress is structured with simple stitches, whilst the skirt has been created using shell and post stitches… just look at the texture that these stitches create!
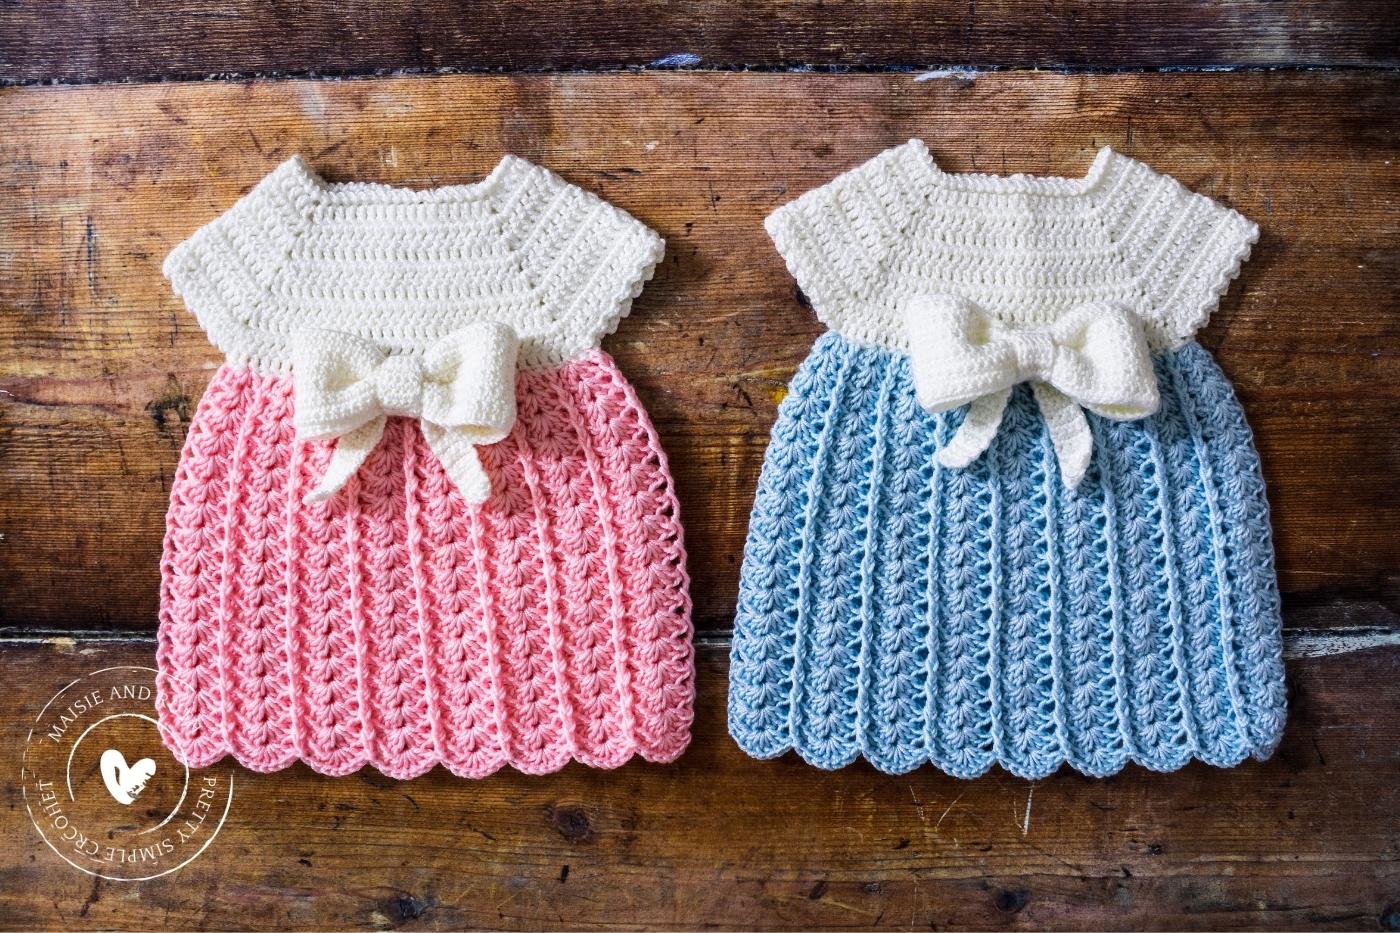
The dress is very cute just on its own, however you can enhance it even further by adding a handmade 3d crochet bow.
And when it comes to colours, you can have fun and play around with different colour combinations in order to make several versions of this dress.
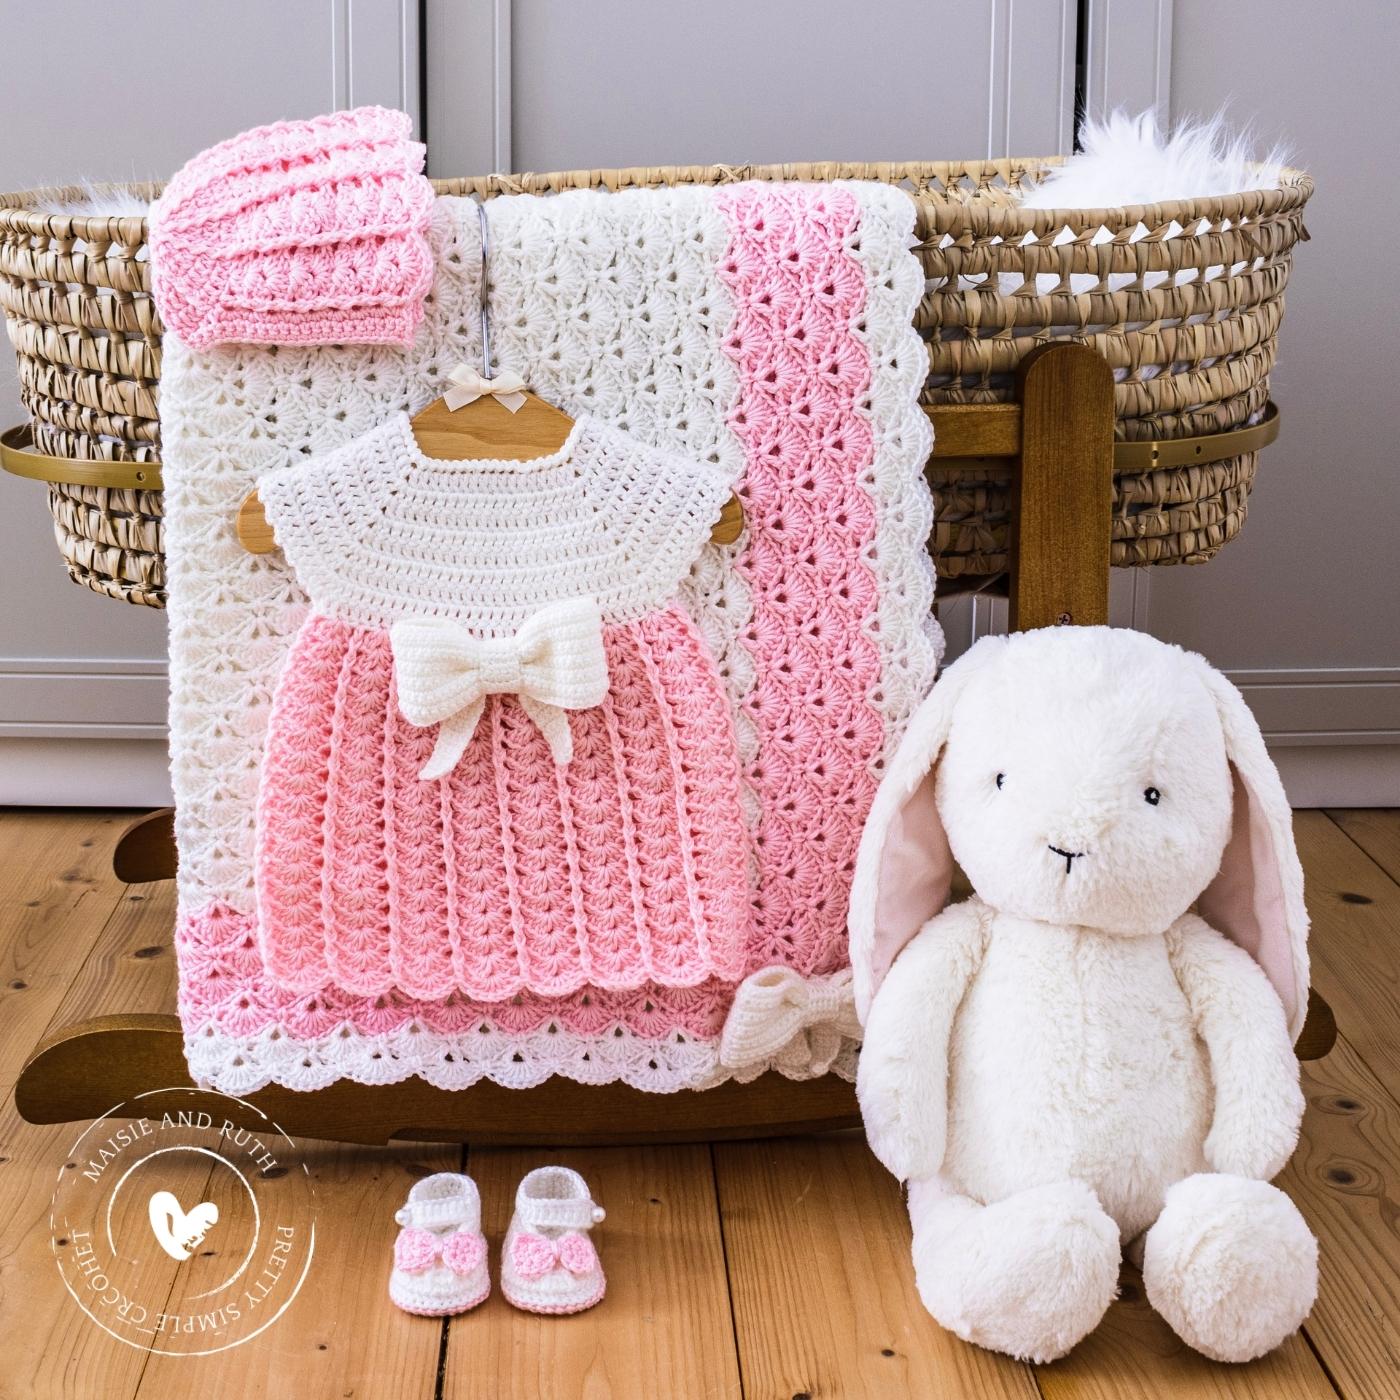
PRECIOUS BABY SET
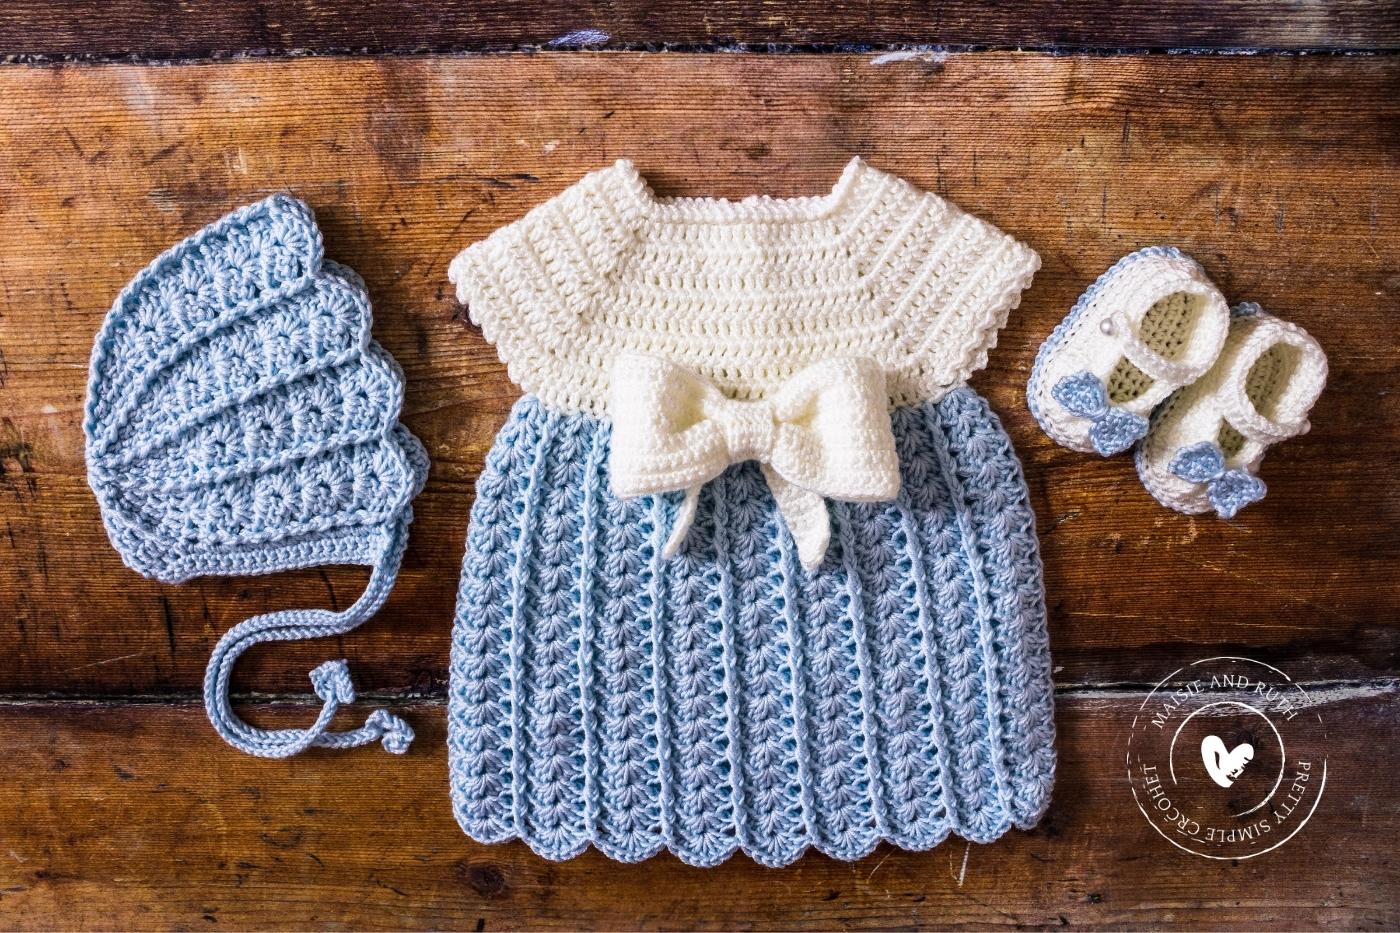
Whether you’re looking to gift something to a parent-to-be or you’re expecting a baby yourself, you may like to make this dress alongside some of the other items from the set (see photo below).
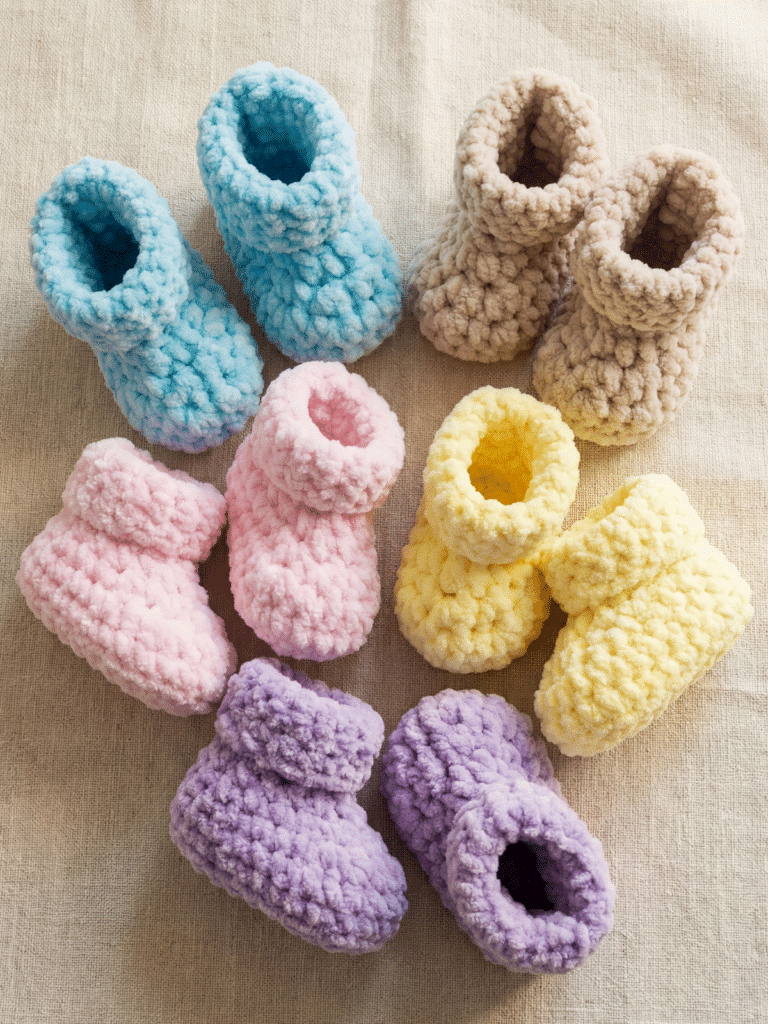
Take your pick from the matching bonnet, booties, headband and giant granny square blanket
This little set really is so precious and is bound to draw a lot of compliments and make everyone around baby smile!
PIN IT FOR LATER!
If you can’t make this easy crochet baby dress right now, then you can always pin it for later!
You can also follow me on Pinterest here
Ready? Let’s take a look at the instructions for this easy crochet baby dress now…
PDF PRINTABLE PATTERNS!
If you would prefer an ad-free, printable version of this pattern, you can purchase it from my Etsy store
This dress is also part of a Pattern Bundle! Check it out here
Thank you for supporting my shop!
EASY CROCHET BABY DRESS: A FREE PATTERN
Please carefully read all the information below.
LEVEL

“Projects may include simple stitch patterns, color work, and/or shaping”.
Source: Craft Yarn Council of America’s www.YarnStandards.com
PATTERN NOTES
- US crochet terminology used throughout.
- You can use any #3 / light worsted / DK / 8 ply yarn for this project, providing you meet the gauge as detailed below.
- You will need two crochet hooks: E (3.5mm) and G (4mm).
- There are four sets of instructions: 1. Newborn 2. 0-3 months 3. 3-6 months 4. 6-12 months
- The dress is worked in one piece from neck edge down.
- When working the yoke: the ch2 turning chain does not count as the first stitch of the next row. Therefore, you should make the first stitch of the row in the same stitch (at the base of the ch2). At the end of rows, do not crochet into the top of the ch2.
- When counting the total number of stitches at the end of each row, please be careful not to include the ch2 in the final stitch count.
- For beginners, it will be helpful to place a stitch marker in the first stitch made at the beginning of each row.
MATERIALS
- Yarn: Category #3 / light worsted / DK / 8 ply yarn. I used Sirdar Snuggly Soothing, 241 yds / 3.5 oz (220m / 100g):
Colour A – for the yoke and all edging.
Colour B – for the skirt section.
Newborn – 1 x ball in colour A; 1 x ball in colour B
0-3 months – 1 x ball in colour A; 1 x ball in colour B
3-6 months – 1 x ball in colour A; 1 x ball in colour B
6-12 months – 1 x ball in colour A; 2 x balls in colour B
- Crochet Hooks: E (3.5mm) and G (4mm)
- Buttons: 3 x 8mm buttons.
- Yarn needle (the bent tip makes sewing much easier)
- Scissors (super sharp… and pretty)
- 2 x stitch markers (these interlocking ones will not fall out!)
GAUGE / TENSION
In order to achieve the correct size and fit, it is important to test your gauge (tension) with a sample square before you begin.
If your tension is tight (too many stitches to ″), try using a larger hook.
If your tension is loose (fewer stitches to ″), use a smaller hook.
With an E (3.5mm) crochet hook:
20 stitches & 11 rows = 4″ (10cm) in double crochet
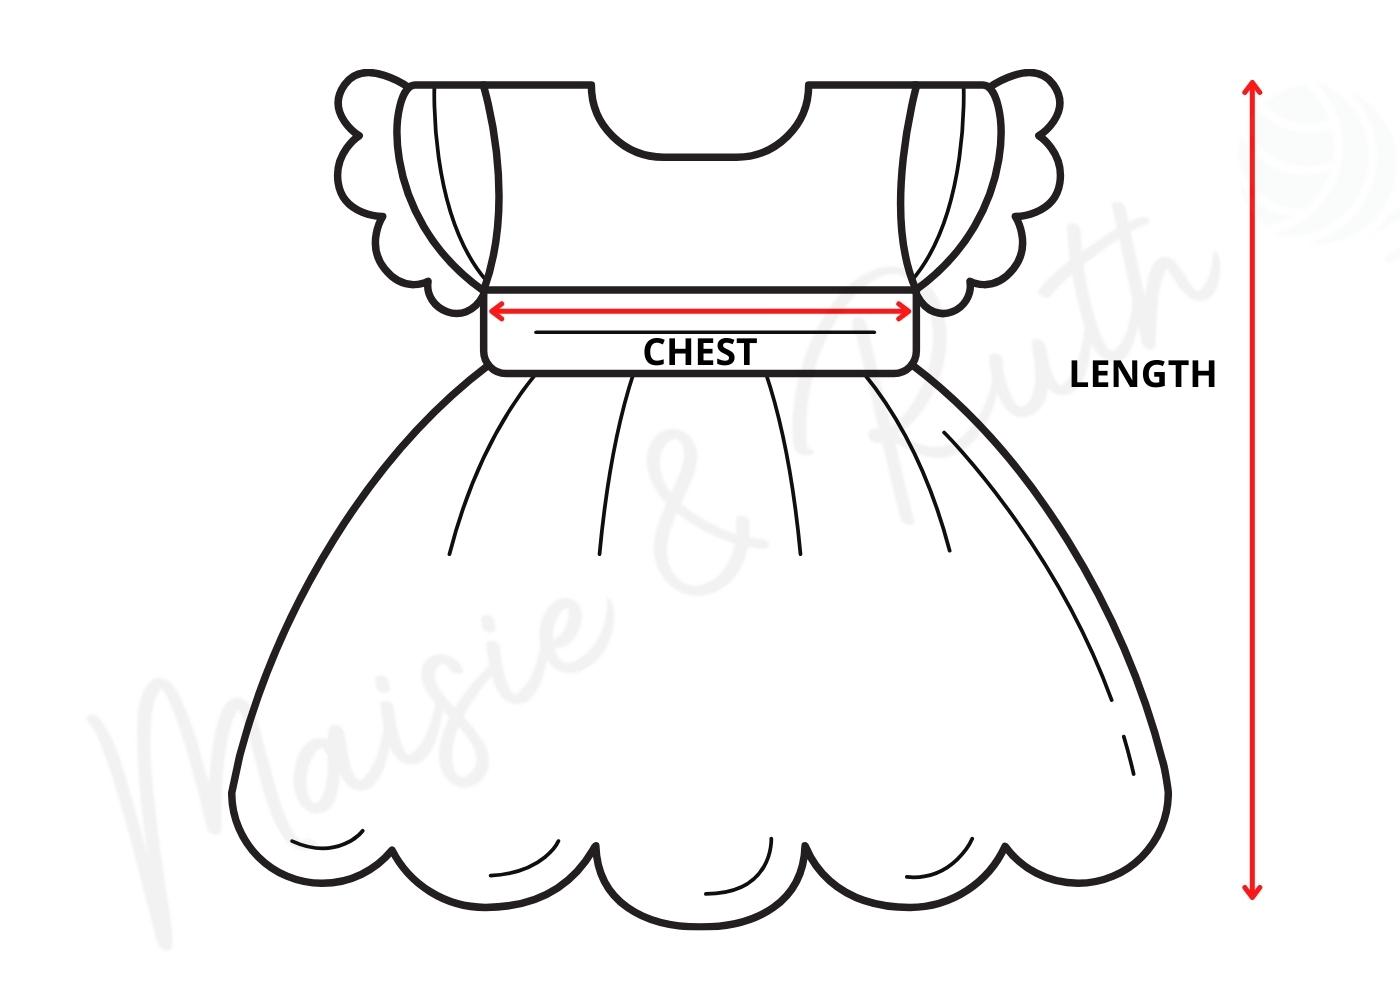
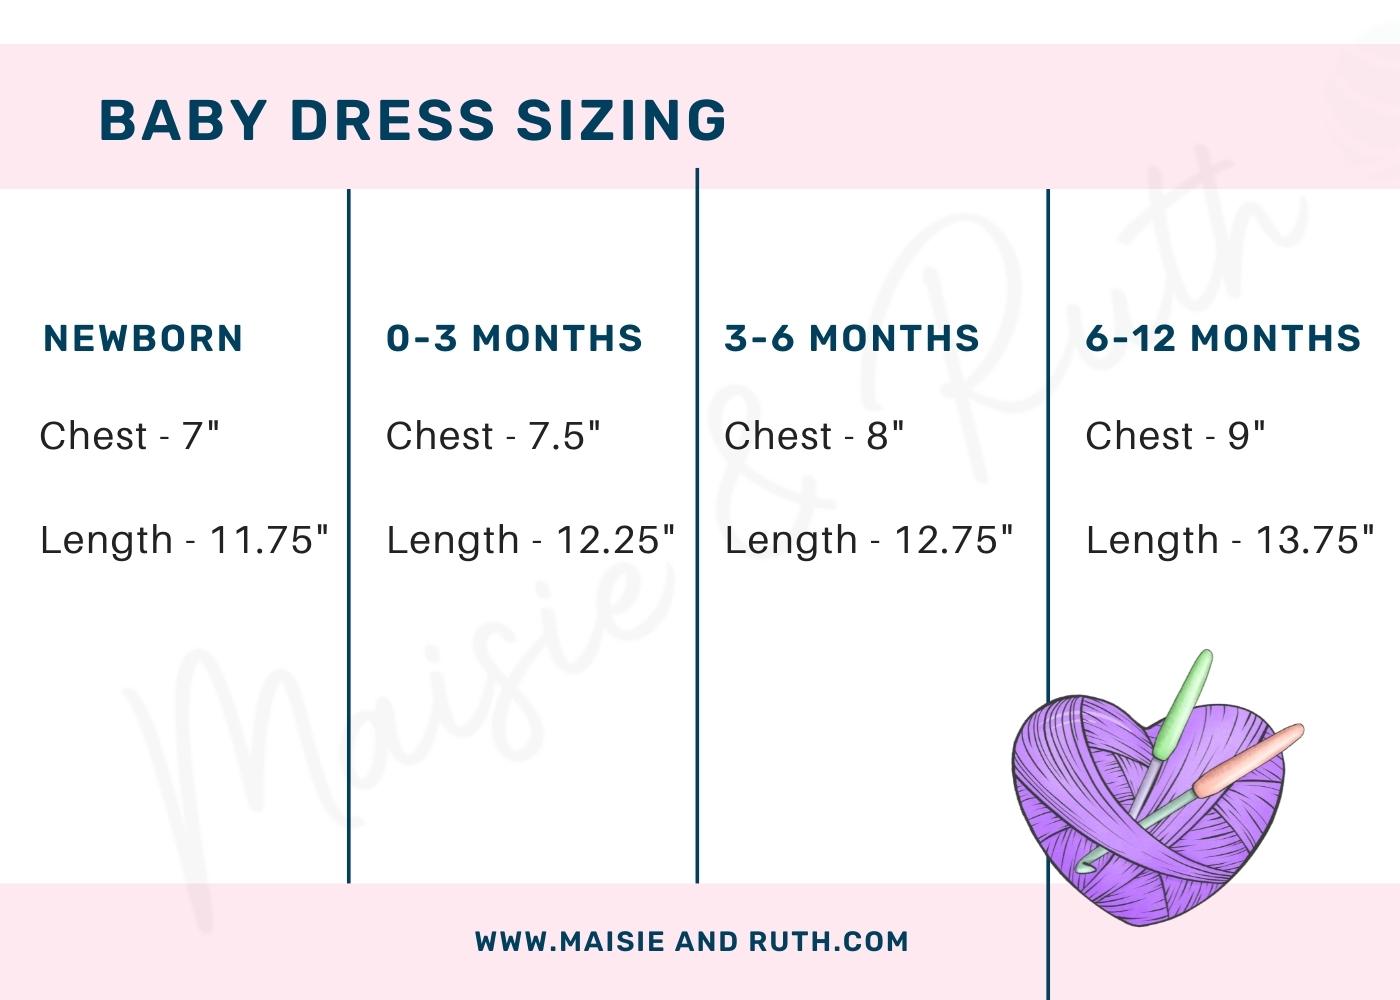
FINISHED SIZE
The sizes given are based on the standard measurements from the Craft Yarn Council.
STITCHES & ABBREVIATIONS (US CROCHET TERMS)
beg – beginning
ch(s) – chain(s)
dc – double crochet: Yarn over (yo), insert hook into stitch, yo, pull up a loop (3 loops on hook). Yo, pull through 2 loops (2 loops on hook). Yo, pull through remaining 2 loops. 1 double crochet completed.
sc – single crochet: Insert hook into stitch, yarn over (yo), pull up a loop (2 loops on hook). Yo, pull through both loops on hook. 1 single crochet completed.
sk – skip: Do not crochet into this stitch / space.
sl st – slip stitch: Insert hook into stitch, yarn over (yo), pull up a loop, you will have 2 loops on your hook. Pull the first loop through the second loop. 1 slip stitch completed.
sp(s) – space(es)
st(s) – stitch(es)
Turn: Turn your work clockwise or anti-clockwise. It doesn’t matter as long as you are consistent for a neater edge.
* to * – Repeat instructions between asterisks as many times as directed.
( ) – Sets of stitches to be worked within one stitch or space.
[ ] – The total number of stitches at the end of a row.
SPECIAL STITCHES
Fan – (3dc, ch1, 3dc) in same space
Shell – (2dc, ch1, 2dc) in same space
V-st – (1dc, ch1, 1dc) in same stitch
PATTERN INSTRUCTIONS (NEWBORN)
YOKE
With Colour A and an E (3.5mm) crochet hook:
Chain 49
Row 1. 1dc in 3rd ch from hook (skp’d 2 ch do not count as your 1st dc), 1dc in next 5 ch, V-st in next ch, 1dc in next 8 ch, V-st in next ch, 1dc in next 15 ch, V-st in next ch, 1dc in next 8 ch, V-st in next ch, 1dc in next 6 ch, TURN [51 dc, 4x ch1 sps].
Row 2. Ch2 (does not count as your 1st st here and throughout), 1dc in same st (at base of ch2), 1dc in next 6 sts, V-st in next ch1 sp, 1dc in next 10 sts, V-st in next ch1 sp, 1dc in next 17 sts, V-st in next ch1 sp, 1dc in next 10 sts, V-st in next ch1 sp, 1dc in next 7 sts, TURN [59 dc, 4x ch1 sps].
Row 3. Ch2, 1dc in same st (at base of ch2), 1dc in next 7 sts, V-st in next ch1 sp, 1dc in next 12 sts, V-st in next ch1 sp, 1dc in next 19 sts, V-st in next ch1 sp, 1dc in next 12 sts, V-st in next ch1 sp, 1dc in next 8 sts, TURN [67 dc, 4x ch1 sps].
Row 4. Ch2, 1dc in same st (at base of ch2), 1dc in next 8 sts, V-st in next ch1 sp, 1dc in next 14 sts, V-st in next ch1 sp, 1dc in next 21 sts, V-st in next ch1 sp, 1dc in next 14 sts, V-st in next ch1 sp, 1dc in next 9 sts, TURN [75 dc, 4x ch1 sps].
Row 5. Ch2, 1dc in same st (at base of ch2), 1dc in next 9 sts, V-st in next ch1 sp, 1dc in next 16 sts, V-st in next ch1 sp, 1dc in next 23 sts, V-st in next ch1 sp, 1dc in next 16 sts, V-st in next ch1 sp, 1dc in next 10 sts, TURN [83 dc, 4x ch1 sps].
Row 6. Ch2, 1dc in same st (at base of ch2), 1dc in next 10 sts, V-st in next ch1 sp, 1dc in next 18 sts, V-st in next ch1 sp, 1dc in next 25 sts, V-st in next ch1 sp, 1dc in next 18 sts, V-st in next ch1 sp, 1dc in next 11 sts, TURN [91 dc, 4x ch1 sps].
Row 7. Ch2, 1dc in same st (at base of ch2), 1dc in next 11 sts, V-st in next ch1 sp, 1dc in next 20 sts, V-st in next ch1 sp, 1dc in next 27 sts, V-st in next ch1 sp, 1dc in next 20 sts, V-st in next ch1 sp, 1dc in next 12 sts, TURN [99 dc, 4x ch1 sps].
Row 8. Ch2, 1dc in same st (at base of ch2), 1dc in next 12 sts, V-st in next ch1 sp, 1dc in next 22 sts, V-st in next ch1 sp, 1dc in next 29 sts, V-st in next ch1 sp, 1dc in next 22 sts, V-st in next ch1 sp, 1dc in next 13 sts, TURN [107 dc, 4x ch1 sps].
The length of your yoke (measured from the neck edge to the end of row 8) should measure 3″ (8cm) approximately.
DIVIDE FOR ARMHOLES
Row 9. Ch2, 1dc in same st (at base of ch2), 1dc in next 13 sts, 1dc in next ch1 sp, sk next 24 sts, 1dc in next ch1 sp, 1dc in next 31 sts, 1dc in next ch1 sp, sk next 24 sts, 1dc in next ch1 sp, 1dc in next 13 sts, 2dc in last st, sl st to 1st dc to join work and begin working in the round, [64 dc].
Cut yarn, fasten off and weave in ends.
SKIRT SECTION
Change to Colour B and a G (4mm) hook.
Attach yarn to 1st stitch of the round.
Round 1. Ch3, (counts as your 1st st here and throughout), sk next st, *shell in next st, sk next st, 1dc in next st, sk next st*, repeat from * to * until end of round, sl st to top of beg ch3 to join, DO NOT TURN, [16 shells & 16 dc].
Round 2. Ch3, sk next 2 dc of shell, shell in next ch1 sp, sk next 2 dc of shell, *FPdc in next st, sk next 2 dc of shell, shell in next ch1 sp, sk next 2 dc of shell*, repeat from * to * until end of round, sl st to top of beg ch3 to join, DO NOT TURN, [16 shells & 16 dc].
Round 3. Ch3, sk next 2 dc of shell, fan in next ch1 sp, sk next 2 dc of shell, *FPdc in next st, sk next 2 dc of shell, fan in next ch1 sp, sk next 2 dc of shell*, repeat from * to * until end of round, sl st to top of beg ch3 to join, DO NOT TURN, [16 fans & 16 dc].
Round 4. Ch3, sk next 3 dc of fan, fan in next ch1 sp, sk next 3 dc of fan, *FPdc in next st, sk next 3 dc of fan, fan in next ch1 sp, sk next 3 dc of fan*, repeat from * to * until end of round, sl st to top of beg ch3 to join, DO NOT TURN, [16 fans & 16 dc].
Rounds 5 – 17. Repeat round 4.
Cut yarn, fasten off and weave in ends.
EDGING FOR BACK AND NECK OPENING
(Please refer to the video tutorial if you need further guidance when working this section).
Change back to Colour A and an E (3.5mm) hook.
You will now place some simple edging around the back and neck opening of your dress.
Three buttonholes will also be made at the back opening.
You will begin in the lower left corner of the back opening, work up to the neckline, crochet along the neckline and work down the other side of the back opening to the lower right hand corner.
With the back of your work facing you, go over to the lower left corner of the back opening and attach your yarn to the end of row 9.
BUTTONHOLE BAND
Row 1. Ch3, 1dc in same row end, ch2, 1dc in next row end (1st buttonhole made), work 6dc evenly up left side, ch2, 1dc in next row end (2nd buttonhole made), work 7dc evenly up left side, ch2, 1dc in next row end (3rd buttonhole made), 1dc in corner at neck edge.
NECK EDGING
Row 1. (sl st, ch1) in each st around neck edge.
BUTTONBAND
Row 1. Dc evenly down right side of back opening (I made 17 dc).
Cut yarn, fasten off and weave in ends.
EDGING FOR SLEEVES
(Please refer to the video tutorial if you need further guidance when working this section).
Use Colour A and an E (3.5mm) hook.
RIGHT SLEEVE
With the back of your work facing you, attach your yarn to the end of row 9 of the yoke, at the right armhole.
Row 1. Ch1 (counts as your 1st st), *(1sc, ch2, 1sc) in next st, sk next st*, repeat from * to * 12 times, ending with a sl st into the end of row 9 of the yoke (at bottom of armhole).
Cut yarn, fasten off and weave in ends.
LEFT SLEEVE
With the front of your work facing you, attach your yarn to the end of row 9 of the yoke, at the left armhole.
Row 1. Ch1 (counts as your 1st st), *(1sc, ch2, 1sc) in next st, sk next st*, repeat from * to * 12 times, ending with a sl st into the end of row 9 of the yoke (at bottom of armhole).
Cut yarn, fasten off and weave in ends.
BOW
Crochet and sew the 3D bow to the centre front of dress (where the yoke ends and the skirt begins).
PATTERN INSTRUCTIONS (0-3 MONTHS)
YOKE
With Colour A and an E (3.5mm) crochet hook:
Chain 53
Row 1. 1dc in 3rd ch from hook (skp’d 2 ch do not count as your 1st dc), 1dc in next 6 ch, V-st in next ch, 1dc in next 9 ch, V-st in next ch, 1dc in next 15 ch, V-st in next ch, 1dc in next 9 ch, V-st in next ch, 1dc in next 7 ch, TURN [55 dc, 4x ch1 sps].
Row 2. Ch2 (does not count as your 1st st here and throughout), 1dc in same st (at base of ch2), 1dc in next 7 sts, V-st in next ch1 sp, 1dc in next 11 sts, V-st in next ch1 sp, 1dc in next 17 sts, V-st in next ch1 sp, 1dc in next 11 sts, V-st in next ch1 sp, 1dc in next 8 sts, TURN [63 dc, 4x ch1 sps].
Row 3. Ch2, 1dc in same st (at base of ch2), 1dc in next 8 sts, V-st in next ch1 sp, 1dc in next 13 sts, V-st in next ch1 sp, 1dc in next 19 sts, V-st in next ch1 sp, 1dc in next 13 sts, V-st in next ch1 sp, 1dc in next 9 sts, TURN [71 dc, 4x ch1 sps].
Row 4. Ch2, 1dc in same st (at base of ch2), 1dc in next 9 sts, V-st in next ch1 sp, 1dc in next 15 sts, V-st in next ch1 sp, 1dc in next 21 sts, V-st in next ch1 sp, 1dc in next 15 sts, V-st in next ch1 sp, 1dc in next 10 sts, TURN [79 dc, 4x ch1 sps].
Row 5. Ch2, 1dc in same st (at base of ch2), 1dc in next 10 sts, V-st in next ch1 sp, 1dc in next 17 sts, V-st in next ch1 sp, 1dc in next 23 sts, V-st in next ch1 sp, 1dc in next 17 sts, V-st in next ch1 sp, 1dc in next 11 sts, TURN [87 dc, 4x ch1 sps].
Row 6. Ch2, 1dc in same st (at base of ch2), 1dc in next 11 sts, V-st in next ch1 sp, 1dc in next 19 sts, V-st in next ch1 sp, 1dc in next 25 sts, V-st in next ch1 sp, 1dc in next 19 sts, V-st in next ch1 sp, 1dc in next 12 sts, TURN [95 dc, 4x ch1 sps].
Row 7. Ch2, 1dc in same st (at base of ch2), 1dc in next 12 sts, V-st in next ch1 sp, 1dc in next 21 sts, V-st in next ch1 sp, 1dc in next 27 sts, V-st in next ch1 sp, 1dc in next 21 sts, V-st in next ch1 sp, 1dc in next 13 sts, TURN [103 dc, 4x ch1 sps].
Row 8. Ch2, 1dc in same st (at base of ch2), 1dc in next 13 sts, V-st in next ch1 sp, 1dc in next 23 sts, V-st in next ch1 sp, 1dc in next 29 sts, V-st in next ch1 sp, 1dc in next 23 sts, V-st in next ch1 sp, 1dc in next 14 sts, TURN [111 dc, 4x ch1 sps].
The length of your yoke (measured from the neck edge to the end of row 8) should measure 3″ (8cm) approximately.
DIVIDE FOR ARMHOLES
Row 9. Ch2, 1dc in same st (at base of ch2), 1dc in next 14 sts, (1dc, ch1) in next ch1 sp, sk next 25 sts, 1dc in next ch1 sp, 1dc in next 31 sts, (1dc, ch1) in next ch1 sp, sk next 25 sts, 1dc in next ch1 sp, 1dc in next 14 sts, 2dc in last st, sl st to 1st dc to join work and begin working in the round [66 dc, 2x ch2 sps].
Cut yarn, fasten off and weave in ends.
SKIRT SECTION
Change to Colour B and a G (4mm) hook
NOTE: When working the next round, the ch1 found at each underarm area counts as 1 stitch.
Attach yarn to 1st stitch of the round.
Round 1. Ch3, (counts as your 1st st here and throughout), sk next st, shell in next st, sk next st, *1dc in next st, sk next st, shell in next st, sk next st*, repeat from * to * until end of round, sl st to top of beg ch3 to join, DO NOT TURN, [17 shells & 17 dc].
Round 2. Ch3, sk next 2 dc of shell, shell in next ch1 sp, sk next 2 dc of shell, *FPdc in next st, sk next 2 dc of shell, shell in next ch1 sp, sk next 2 dc of shell*, repeat from * to * until end of round, sl st to top of beg ch3 to join, DO NOT TURN, [17 shells & 17 dc].
Round 3. Ch3, sk next 2 dc of shell, fan in next ch1 sp, sk next 2 dc of shell, *FPdc in next st, sk next 2 dc of shell, fan in next ch1 sp, sk next 2 dc of shell*, repeat from * to * until end of round, sl st to top of beg ch3 to join, DO NOT TURN, [17 fans & 17 dc].
Round 4. Ch3, sk next 3 dc of fan, fan in next ch1 sp, sk next 3 dc of fan, *FPdc in next st, sk next 3 dc of fan, fan in next ch1 sp, sk next 3 dc of fan*, repeat from * to * until end of round, sl st to top of beg ch3 to join, DO NOT TURN, [17 fans & 17 dc].
Rounds 5 – 18. Repeat round 4.
Cut yarn, fasten off and weave in ends.
EDGING FOR BACK AND NECK OPENING
(Please refer to the video tutorial if you need further guidance when working this section).
Change back to Colour A and an E (3.5mm) hook.
You will now place some simple edging around the back and neck opening of your dress.
Three buttonholes will also be made at the back opening.
You will begin in the lower left corner of the back opening, work up to the neckline, crochet along the neckline and work down the other side of the back opening to the lower right hand corner.
With the back of your work facing you, go over to the lower left corner of the back opening and attach your yarn to the end of row 9.
BUTTONHOLE BAND
Row 1. Ch2, 1dc in same row end, ch2, 1dc in next row end (1st buttonhole made), work 6dc evenly up left side, ch2, 1dc in next row end (2nd buttonhole made), work 7dc evenly up left side, ch2, 1dc in next row end (3rd buttonhole made), (1dc, ch1) in corner at neck edge.
NECK EDGING
Row 1. (sl st, ch1) in each st around neck edge.
BUTTONBAND
Row 1. Dc evenly down right side of back opening (I made 17 dc).
Cut yarn, fasten off and weave in ends.
EDGING FOR SLEEVES
(Please refer to the video tutorial if you need further guidance when working this section).
Use Colour A and an E (3.5mm) hook.
RIGHT SLEEVE
With the back of your work facing you, attach your yarn to the end of row 9 of the yoke, at the right armhole.
Row 1. Ch1 (counts as your 1st st), *(1sc, ch2, 1sc) in next st, sk next st*, repeat from * to * 12 times, ending (1sc, ch2, 1sc) in next st, sl st into the end of row 9 of the yoke (at bottom of armhole).
Cut yarn, fasten off and weave in ends.
LEFT SLEEVE
With the front of your work facing you, attach your yarn to the end of row 9 of the yoke, at the left armhole.
Row 1. Ch1 (counts as your 1st st), *(1sc, ch2, 1sc) in next st, sk next st*, repeat from * to * 12 times, ending (1sc, ch2, 1sc) in next st, sl st into the end of row 9 of the yoke (at bottom of armhole).
Cut yarn, fasten off and weave in ends.
BOW
Crochet and sew the 3D bow to the centre front of dress (where the yoke ends and the skirt begins).
PATTERN INSTRUCTIONS (3-6 MONTHS)
YOKE
With Colour A and an E (3.5mm) crochet hook:
Chain 56
Row 1. 1dc in 3rd ch from hook (skp’d 2 ch do not count as your 1st dc), 1dc in next 6 ch, V-st in next ch, 1dc in next 10 ch, V-st in next ch, 1dc in next 16 ch, V-st in next ch, 1dc in next 10 ch, V-st in next ch, 1dc in next 7 ch, TURN [58 dc, 4x ch1 sps].
Row 2. Ch2 (does not count as your 1st st here and throughout), 1dc in same st (at base of ch2), 1dc in next 7 sts, V-st in next ch1 sp, 1dc in next 12 sts, V-st in next ch1 sp, 1dc in next 18 sts, V-st in next ch1 sp, 1dc in next 12 sts, V-st in next ch1 sp, 1dc in next 8 sts, TURN [66 dc, 4x ch1 sps].
Row 3. Ch2, 1dc in same st (at base of ch2), 1dc in next 8 sts, V-st in next ch1 sp, 1dc in next 14 sts, V-st in next ch1 sp, 1dc in next 20 sts, V-st in next ch1 sp, 1dc in next 14 sts, V-st in next ch1 sp, 1dc in next 9 sts, TURN [74 dc, 4x ch1 sps].
Row 4. Ch2, 1dc in same st (at base of ch2), 1dc in next 9 sts, V-st in next ch1 sp, 1dc in next 16 sts, V-st in next ch1 sp, 1dc in next 22 sts, V-st in next ch1 sp, 1dc in next 16 sts, V-st in next ch1 sp, 1dc in next 10 sts, TURN [82 dc, 4x ch1 sps].
Row 5. Ch2, 1dc in same st (at base of ch2), 1dc in next 10 sts, V-st in next ch1 sp, 1dc in next 18 sts, V-st in next ch1 sp, 1dc in next 24 sts, V-st in next ch1 sp, 1dc in next 18 sts, V-st in next ch1 sp, 1dc in next 11 sts, TURN [90 dc, 4x ch1 sps].
Row 6. Ch2, 1dc in same st (at base of ch2), 1dc in next 11 sts, V-st in next ch1 sp, 1dc in next 20 sts, V-st in next ch1 sp, 1dc in next 26 sts, V-st in next ch1 sp, 1dc in next 20 sts, V-st in next ch1 sp, 1dc in next 12 sts, TURN [98 dc, 4x ch1 sps].
Row 7. Ch2, 1dc in same st (at base of ch2), 1dc in next 12 sts, V-st in next ch1 sp, 1dc in next 22 sts, V-st in next ch1 sp, 1dc in next 28 sts, V-st in next ch1 sp, 1dc in next 22 sts, V-st in next ch1 sp, 1dc in next 13 sts, TURN [106 dc, 4x ch1 sps].
Row 8. Ch2, 1dc in same st (at base of ch2), 1dc in next 13 sts, V-st in next ch1 sp, 1dc in next 24 sts, V-st in next ch1 sp, 1dc in next 30 sts, V-st in next ch1 sp, 1dc in next 24 sts, V-st in next ch1 sp, 1dc in next 14 sts, TURN [114 dc, 4x ch1 sps].
Row 9. Ch2, 1dc in same st (at base of ch2), 1dc in next 14 sts, V-st in next ch1 sp, 1dc in next 26 sts, V-st in next ch1 sp, 1dc in next 32 sts, V-st in next ch1 sp, 1dc in next 26 sts, V-st in next ch1 sp, 1dc in next 15 sts, TURN [122 dc, 4x ch1 sps].
The length of your yoke (measured from the neck edge to the end of row 9) should measure 3.5″ (9cm) approximately.
DIVIDE FOR ARMHOLES
Row 10. Ch2, 1dc in same st (at base of ch1), 1dc in next 15 sts, (1dc, ch1) in next ch1 sp, sk next 28 sts, 1dc in next ch1 sp, 1dc in next 34 sts, (1dc, ch1) in next ch1 sp, sk next 28 sts, 1dc in next ch1 sp, 1dc in next 16 sts, sl st to 1st dc to join work and begin working in the round [70 dc, 2x ch1 sps].
Cut yarn, fasten off and weave in ends.
SKIRT SECTION
Change to Colour B and a G (4mm) hook
NOTE: When working the next round, the ch1 found at each underarm counts as 1 stitch.
Attach yarn to 1st stitch of the round.
Round 1. Ch3, (counts as your 1st st here and throughout), sk next st, *shell in next st, sk next st, 1dc in next st, sk next st*, repeat from * to * until 1 st remains, sk last st, sl st to top of beg ch3 to join, DO NOT TURN, [18 shells & 18 dc].
Round 2. Ch3, sk next 2 dc of shell, shell in next ch1 sp, sk next 2 dc of shell, *FPdc in next st, sk next 2 dc of shell, shell in next ch1 sp, sk next 2 dc of shell*, repeat from * to * until end of round, sl st to top of beg ch3 to join, DO NOT TURN, [18 shells & 18 dc].
Round 3. Ch3, sk next 2 dc of shell, fan in next ch1 sp, sk next 2 dc of shell, *FPdc in next st, sk next 2 dc of shell, fan in next ch1 sp, sk next 2 dc of shell*, repeat from * to * until end of round, sl st to top of beg ch3 to join, DO NOT TURN, [18 fans & 18 dc].
Round 4. Ch3, sk next 3 dc of fan, fan in next ch1 sp, sk next 3 dc of fan, *FPdc in next st, sk next 3 dc of fan, fan in next ch1 sp, sk next 3 dc of fan*, repeat from * to * until end of round, sl st to top of beg ch3 to join, DO NOT TURN, [18 fans & 18 dc].
Rounds 5 – 19 Repeat round 4.
Cut yarn, fasten off and weave in ends.
EDGING FOR BACK AND NECK OPENING
(Size 0-3 months is covered in the video tutorial, however you can still refer to it if you need further guidance when working this section).
Change back to Colour A and an E (3.5mm) hook.
You will now place some simple edging around the back and neck opening of your dress.
Three buttonholes will also be made at the back opening.
You will begin in the lower left corner of the back opening, work up to the neckline, crochet along the neckline and work down the other side of the back opening to the lower right hand corner.
With the back of your work facing you, go over to the lower left corner of the back opening and attach your yarn to the end of row 10.
BUTTONHOLE BAND
Row 1. Ch2, 1dc in same row end, ch2, 1dc in next row end (1st buttonhole made), work 7dc evenly up left side, ch2, 1dc in next row end (2nd buttonhole made), work 7dc evenly up left side, ch2, 1dc in next row end (3rd buttonhole made), (1dc, ch1) in corner at neck edge.
NECK EDGING
Row 1. (sl st, ch1) in each st around neck edge.
BUTTONBAND
Row 1. Dc evenly down right side of back opening (I made 20 dc).
Cut yarn, fasten off and weave in ends.
EDGING FOR SLEEVES
(Size 0-3 months is covered in the video tutorial, however you can still refer to it if you need further guidance when working this section).
Use Colour A and an E (3.5mm) hook.
RIGHT SLEEVE
With the back of your work facing you, attach your yarn to the end of row 10 of the yoke, at the right armhole.
Row 1. Ch1 (counts as your 1st st), *(1sc, ch2, 1sc) in next st, sk next st*, repeat from * to * 14 times, sl st into the end of row 10 of the yoke (at bottom of armhole).
Cut yarn, fasten off and weave in ends.
LEFT SLEEVE
With the front of your work facing you, attach your yarn to the end of row 10 of the yoke, at the left armhole.
Row 1. Ch1 (counts as your 1st st), *(1sc, ch2, 1sc) in next st, sk next st*, repeat from * to * 14 times, sl st into the end of row 10 of the yoke (at bottom of armhole).
Cut yarn, fasten off and weave in ends.
BOW
Crochet and sew the 3D bow to the centre front of dress (where the yoke ends and the skirt begins).
PATTERN INSTRUCTIONS (6-12 MONTHS)
YOKE
With Colour A and an E (3.5mm) crochet hook:
Chain 64
Row 1. 1dc in 3rd ch from hook (skp’d 2 ch do not count as your 1st dc), 1dc in next 7 ch, V-st in next ch, 1dc in next 12 ch, V-st in next ch, 1dc in next 18 ch, V-st in next ch, 1dc in next 12 ch, V-st in next ch, 1dc in next 8 ch, TURN [66 dc, 4x ch1 sps].
Row 2. Ch2 (does not count as your 1st st here and throughout), 1dc in same st (at base of ch2), 1dc in next 8 sts, V-st in next ch1 sp, 1dc in next 14 sts, V-st in next ch1 sp, 1dc in next 20 sts, V-st in next ch1 sp, 1dc in next 14 sts, V-st in next ch1 sp, 1dc in next 9 sts, TURN [74 dc, 4x ch1 sps].
Row 3. Ch2, 1dc in same st (at base of ch2), 1dc in next 9 sts, V-st in next ch1 sp, 1dc in next 16 sts, V-st in next ch1 sp, 1dc in next 22 sts, V-st in next ch1 sp, 1dc in next 16 sts, V-st in next ch1 sp, 1dc in next 10 sts, TURN [82 dc, 4x ch1 sps].
Row 4. Ch2, 1dc in same st (at base of ch2), 1dc in next 10 sts, V-st in next ch1 sp, 1dc in next 18 sts, V-st in next ch1 sp, 1dc in next 24 sts, V-st in next ch1 sp, 1dc in next 18 sts, V-st in next ch1 sp, 1dc in next 11 sts, TURN [90 dc, 4x ch1 sps].
Row 5. Ch2, 1dc in same st (at base of ch2), 1dc in next 11 sts, V-st in next ch1 sp, 1dc in next 20 sts, V-st in next ch1 sp, 1dc in next 26 sts, V-st in next ch1 sp, 1dc in next 120 sts, V-st in next ch1 sp, 1dc in next 12 sts, TURN [98 dc, 4x ch1 sps].
Row 6. Ch2, 1dc in same st (at base of ch2), 1dc in next 12 sts, V-st in next ch1 sp, 1dc in next 22 sts, V-st in next ch1 sp, 1dc in next 28 sts, V-st in next ch1 sp, 1dc in next 22 sts, V-st in next ch1 sp, 1dc in next 13 sts, TURN [106 dc, 4x ch1 sps].
Row 7. Ch2, 1dc in same st (at base of ch2), 1dc in next 13 sts, V-st in next ch1 sp, 1dc in next 24 sts, V-st in next ch1 sp, 1dc in next 30 sts, V-st in next ch1 sp, 1dc in next 24 sts, V-st in next ch1 sp, 1dc in next 14 sts, TURN [114 dc, 4x ch1 sps].
Row 8. Ch2, 1dc in same st (at base of ch2), 1dc in next 14 sts, V-st in next ch1 sp, 1dc in next 26 sts, V-st in next ch1 sp, 1dc in next 32 sts, V-st in next ch1 sp, 1dc in next 26 sts, V-st in next ch1 sp, 1dc in next 15 sts, TURN [122 dc, 4x ch1 sps].
Row 9. Ch2, 1dc in same st (at base of ch2), 1dc in next 15 sts, V-st in next ch1 sp, 1dc in next 28 sts, V-st in next ch1 sp, 1dc in next 34 sts, V-st in next ch1 sp, 1dc in next 28 sts, V-st in next ch1 sp, 1dc in next 16 sts, TURN [130 dc, 4x ch1 sps].
Row 10. Ch2, 1dc in same st (at base of ch2), 1dc in next 16 sts, V-st in next ch1 sp, 1dc in next 30 sts, V-st in next ch1 sp, 1dc in next 36 sts, V-st in next ch1 sp, 1dc in next 30 sts, V-st in next ch1 sp, 1dc in next 17 sts, TURN [138 dc, 4x ch1 sps].
The length of your yoke (measured from the neck edge to the end of row 10) should measure 3.75″ (9.5cm) approximately.
DIVIDE FOR ARMHOLES
Row 11. Ch2, 1dc in same st (at base of ch1), 1dc in next 17 sts, (1dc, ch1) in next ch1 sp, sk next 32 sts, 1dc in next ch1 sp, 1dc in next 38 sts, (1dc, ch1) in next ch1 sp, sk next 32 sts, 1dc in next ch1 sp, 1dc in next 18 sts, sl st to 1st dc to join work and begin working in the round [78 dc, 2x ch1 sps].
Cut yarn, fasten off and weave in ends.
SKIRT SECTION
Change to Colour B and a G (4mm) hook
NOTE: When working the next round, the ch1 found at each underarm counts as 1 stitch.
Attach yarn (colour B) to 1st stitch of the round.
Round 1. Ch3, (counts as your 1st st here and throughout), sk next st, *shell in next st, sk next st, 1dc in next st, sk next st*, repeat from * to * until end of round, sl st to top of beg ch3 to join, DO NOT TURN, [20 shells & 20 dc].
Round 2. Ch3, sk next 2 dc of shell, shell in next ch1 sp, sk next 2 dc of shell, *FPdc in next st, sk next 2 dc of shell, shell in next ch1 sp, sk next 2 dc of shell*, repeat from * to * until end of round, sl st to top of beg ch3 to join, DO NOT TURN, [20 shells & 20 dc].
Round 3. Ch3, sk next 2 dc of shell, fan in next ch1 sp, sk next 2 dc of shell, *FPdc in next st, sk next 2 dc of shell, fan in next ch1 sp, sk next 2 dc of shell*, repeat from * to * until end of round, sl st to top of beg ch3 to join, DO NOT TURN, [20 fans & 20 dc].
Round 4. Ch3, sk next 3 dc of fan, fan in next ch1 sp, sk next 3 dc of fan, *FPdc in next st, sk next 3 dc of fan, fan in next ch1 sp, sk next 3 dc of fan*, repeat from * to * until end of round, sl st to top of beg ch3 to join, DO NOT TURN, [20 fans & 20 dc].
Rounds 5 – 21. Repeat round 4.
Cut yarn, fasten off and weave in ends.
EDGING FOR BACK AND NECK OPENING
(Size 0-3 months is covered in the video tutorial, however you can still refer to it if you need further guidance when working this section).
Change back to Colour A and an E (3.5mm) hook.
You will now place some simple edging around the back and neck opening of your dress.
Three buttonholes will also be made at the back opening.
You will begin in the lower left corner of the back opening, work up to the neckline, crochet along the neckline and work down the other side of the back opening to the lower right hand corner.
With the back of your work facing you, go over to the lower left corner of the back opening and attach your yarn to the end of row 11.
BUTTONHOLE BAND
Row 1. Ch2, 1dc in same row end, ch2, 1dc in next row end (1st buttonhole made), work 8dc evenly up left side, ch2, 1dc in next row end (2nd buttonhole made), work 8dc evenly up left side, ch2, 1dc in next row end (3rd buttonhole made), (1dc, ch1) in corner at neck edge.
NECK EDGING
Row 1. (sl st, ch1) in each st around neck edge.
BUTTONBAND
Row 1. Dc evenly down right side of back opening (I made 21 dc).
Cut yarn, fasten off and weave in ends.
EDGING FOR SLEEVES
(Size 0-3 months is covered in the video tutorial, however you can still refer to it if you need further guidance when working this section).
Use Colour A and an E (3.5mm) hook.
RIGHT SLEEVE
With the back of your work facing you, attach your yarn to the end of row 11 of the yoke, at the right armhole.
Row 1. Ch1 (counts as your 1st st), *(1sc, ch2, 1sc) in next st, sk next st*, repeat from * to * 16 times, sl st into the end of row 11 of the yoke (at bottom of armhole).
Cut yarn, fasten off and weave in ends.
LEFT SLEEVE
With the front of your work facing you, attach your yarn to the end of row 11 of the yoke, at the left armhole.
Row 1. Ch1 (counts as your 1st st), *(1sc, ch2, 1sc) in next st, sk next st*, repeat from * to * 16 times, sl st into the end of row 11 of the yoke (at bottom of armhole).
Cut yarn, fasten off and weave in ends.
BOW
Crochet and sew the 3D bow to the centre front of dress (where the yoke ends and the skirt begins).
Helpful Links
- 🧶 Watch the full video tutorial – Follow along step by step on YouTube.
- 💛 Join the Maisie and Ruth Community – Share your finished projects, chat with fellow crocheters, and be inspired.
- 🛍️ Shop printable PDF patterns – Browse the complete collection of ad-free PDF patterns on Etsy.
- 📺 Join YouTube Membership – Get early access to new patterns and exclusive perks.
SHARE YOUR WORK!
I really hope that you enjoyed this free crochet pattern! I would LOVE to see photos of your completed project… please tag me on Instagram using @maisieandruth and / or #maisieandruth
And remember to pin this pattern for later if you can’t make it right now!


I love your patterns! I used to knit, but crocheting your baby patterns is fun, fast and with wonderful results. You patient videos have really improved my projects! Marie from NYC.
Thank you so much for your lovely feedback, Marie – I really appreciate it! 🥰 Happy crocheting 💝
Your patterns and work are so adorable, I love them so much. If and when I make one of your pattern I don’t know how I will share it with you as I do not do social media. Thanks so much for sharing your admirable work.
Awe thank you so much, you’re very kind! 🥰 You can always email your photos to me (amanda@maisieandruth.com) – I would love to see them! Have a great weekend and happy crocheting 💝