


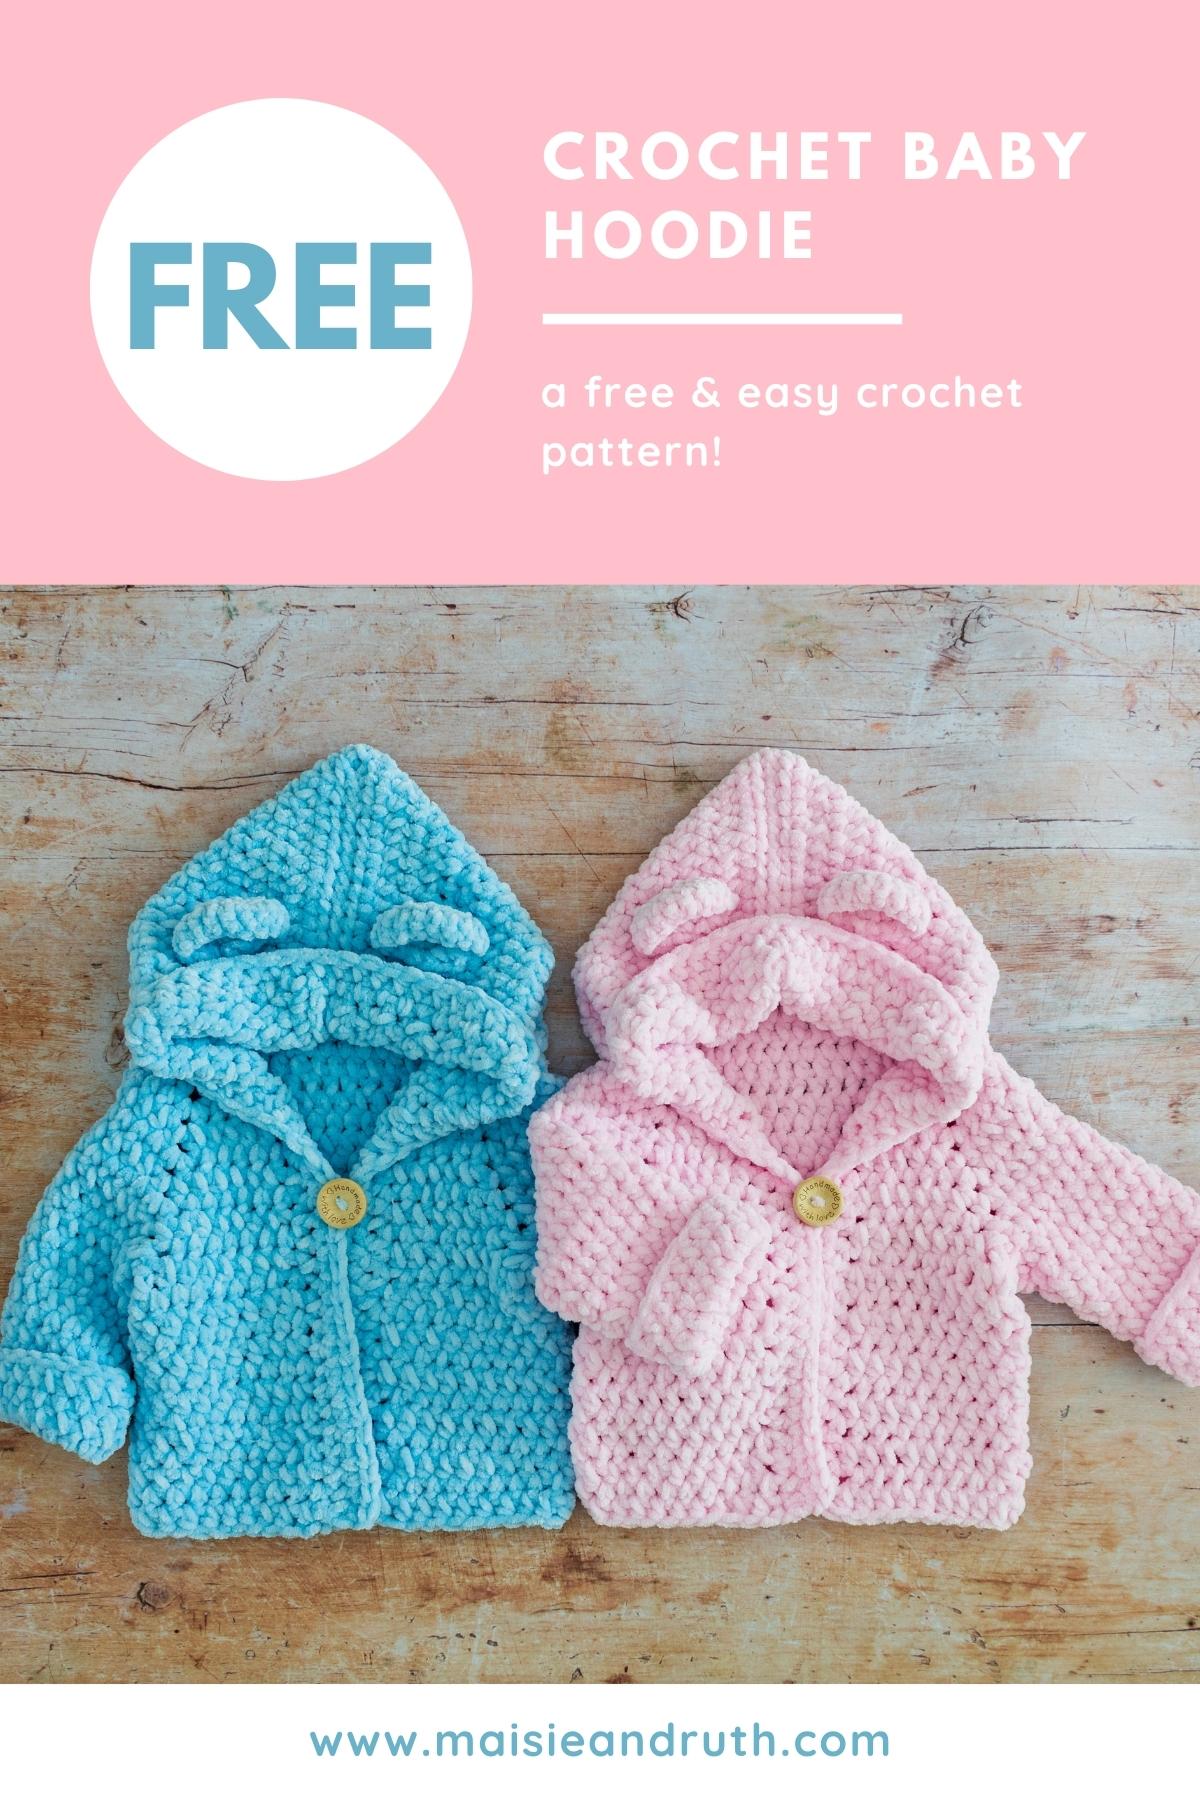
I’m so excited to share an updated version of this much-loved crochet hoodie pattern! The pattern was previously available in sizes up to 6 months, but it has now been expanded to include sizes all the way up to 10 years!
You’ll find the free written pattern below, along with a full video tutorial to guide you through each step. If you prefer a clean, ad-free experience, a printable PDF version is also available in my shop here.

Reasons This Pattern Shines
- Now available in sizes Newborn–10 Years!
- Adorable design with cozy bear ears, that add the sweetest touch.
- Beginner-friendly stitches, perfect for all skill levels (US Crochet Terms).
- Works up quickly with chunky yarn for a fast, satisfying project.
- Makes a thoughtful handmade gift for baby showers or new arrivals.
- Step-by-step video tutorial included for extra guidance.
- Option to grab the ad-free, printable PDF for easy offline use.

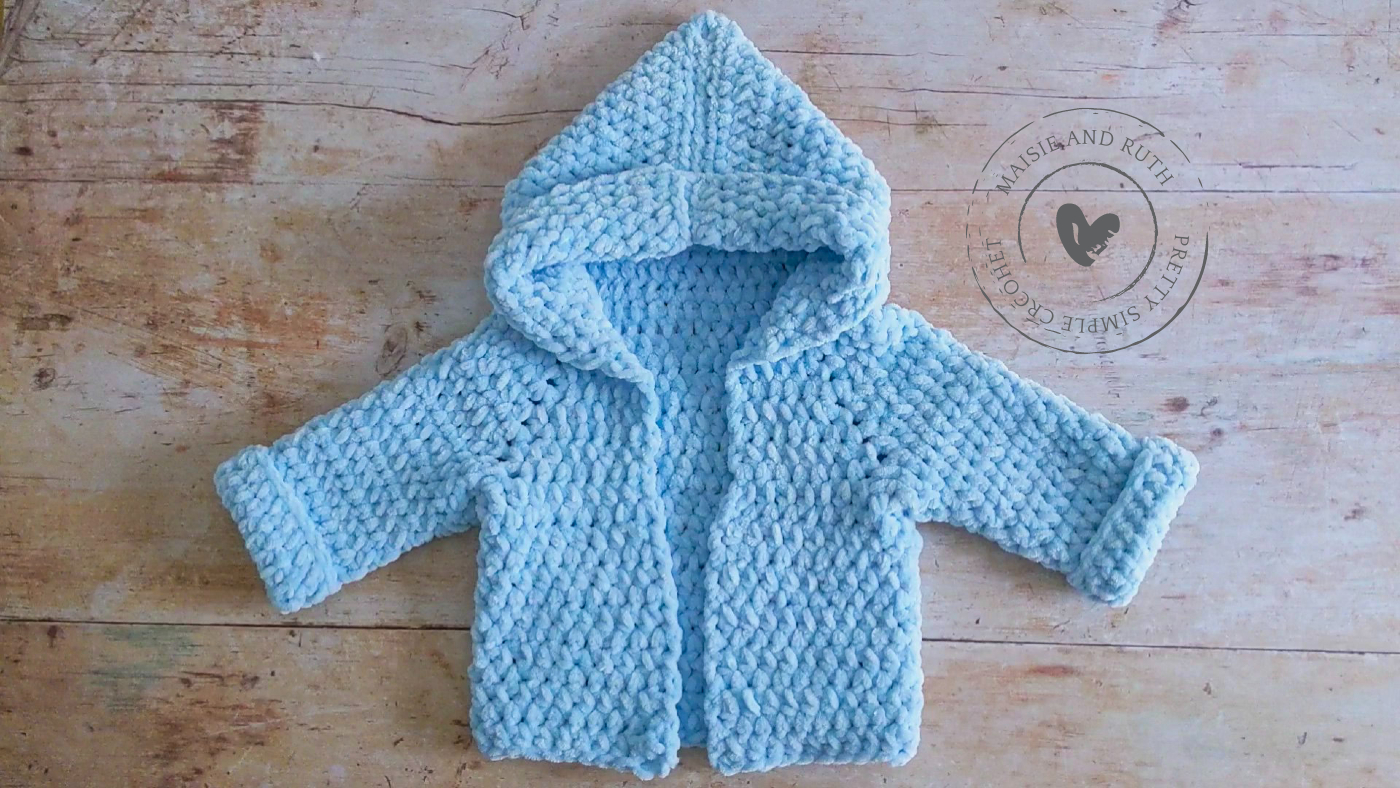
The Coziest Crochet Baby Hoodie You’ll Ever Make
Formerly known simply as my Crochet Baby Hoodie with Ears, this design has grown into something even more special and is now officially called the Snuggle Bear Kids Hoodie — a cozy, bear-eared hoodie pattern designed for babies and kids.
The biggest update? This pattern now includes expanded sizing from newborn through age 10 years, making it perfect for growing little ones, siblings, and even matching sets.
If you’ve made this hoodie before, you can continue using the same trusted construction and techniques you know and love — now with additional size options.

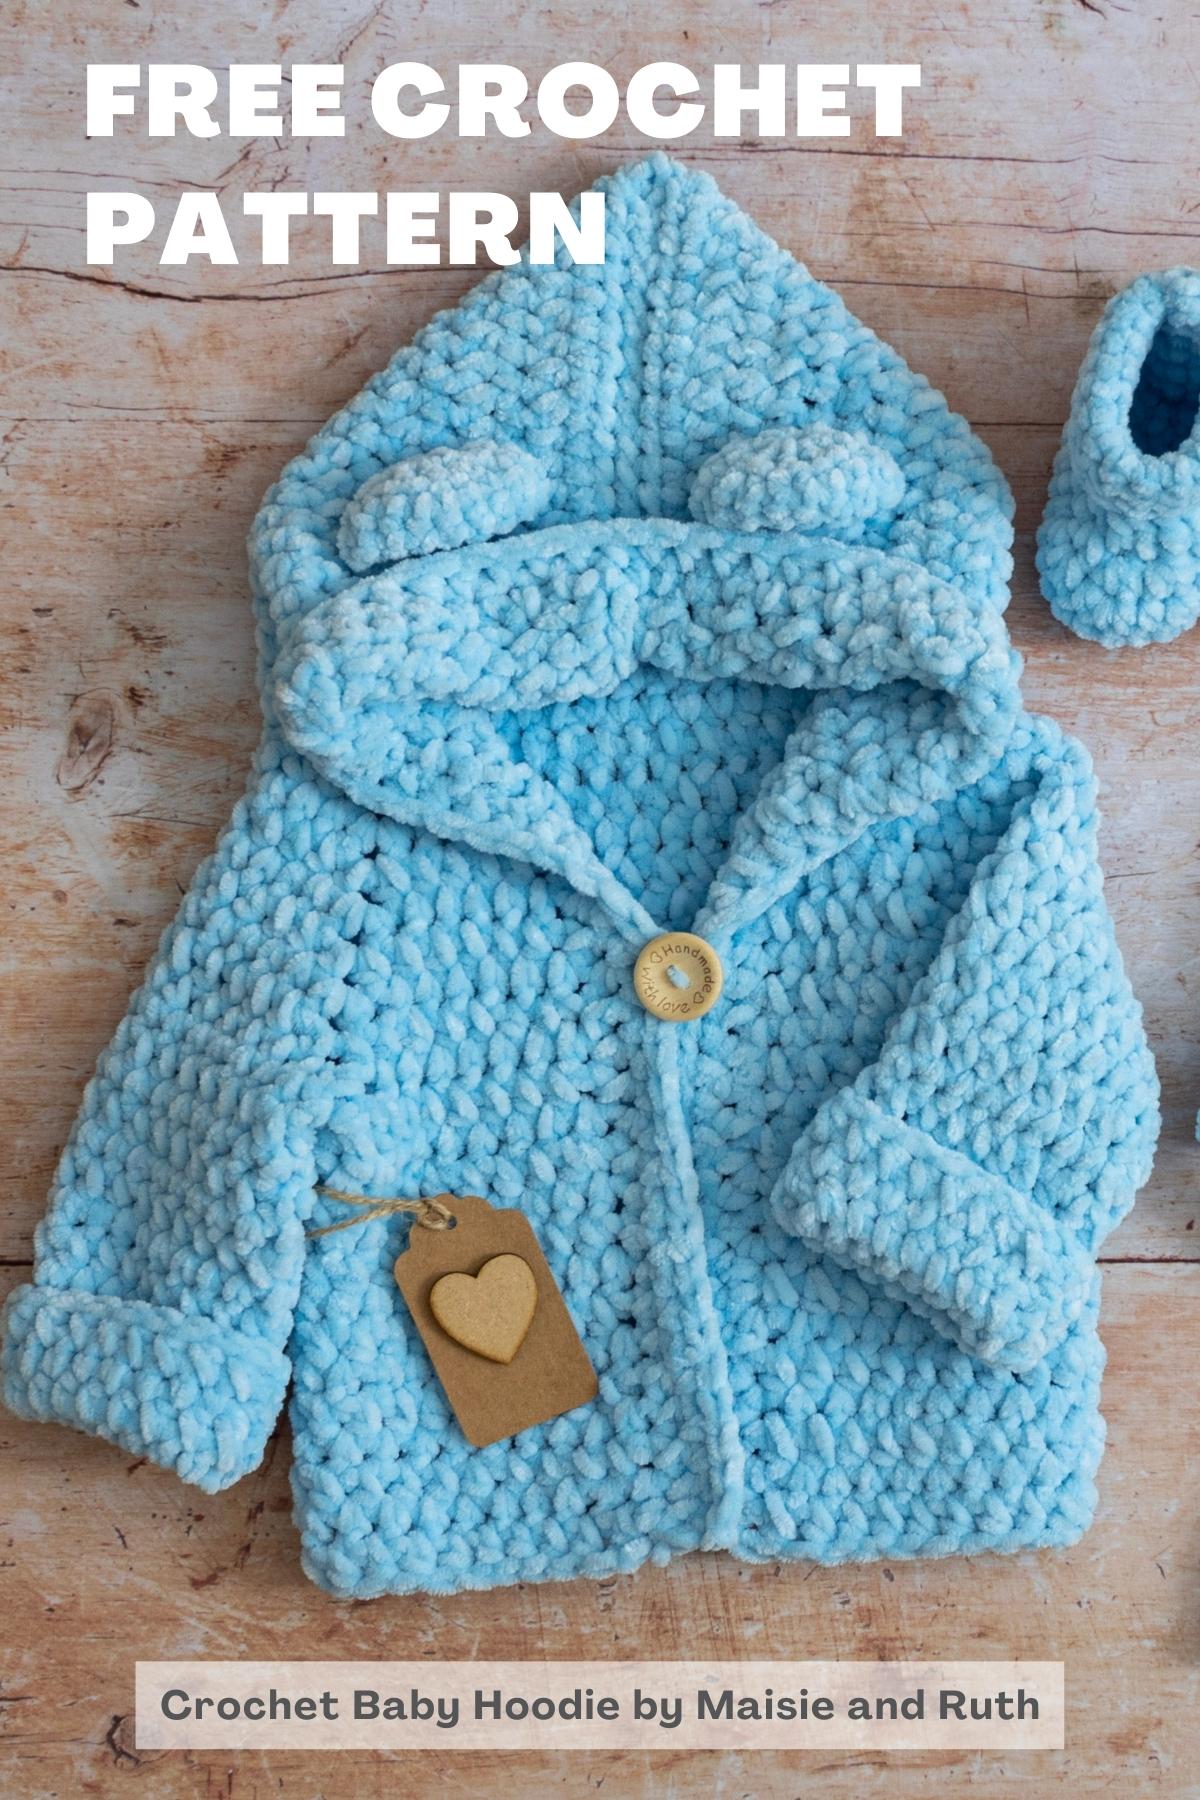
Warm and Cozy
This hoodie is designed with comfort, softness, and cuteness in mind. Worked in ultra-soft, chunky chenille yarn, it creates a plush, snuggly fabric that little ones adore. The sweet bear ears add a playful touch that makes this hoodie extra special and gift-worthy.
The pattern includes clear written instructions and a step-by-step video tutorial, making it approachable for confident beginners and enjoyable for experienced crocheters.

Yarn Used
The Snuggle Bear Kids Hoodie is designed to be made with James C. Brett Flutterby Chunky, a wonderfully soft chunky (weight 5) yarn that’s 100% chenille. This plush yarn creates a snug, cozy fabric that’s super cuddly — perfect for baby and kids’ wear.
Its softness is ideal for little ones’ sensitive skin, and the bulky weight means your hoodie works up quickly without compromising warmth or structure.
While James C. Brett Flutterby Chunky is my recommended yarn for achieving the look and feel shown in the photos, there are many other great options you can substitute if you prefer a different brand or colour. Here are some suitable alternatives:

This Hoodie Is Part of a Cozy Matching Set
The Snuggle Bear Kids Hoodie is part of my growing Cloud Collection, a coordinated set of soft, squishy crochet patterns designed to mix and match beautifully:
Together, these patterns make a perfect handmade gift set for baby showers, birthdays, or cozy everyday wear.

The crochet baby hoodie is part of a set consisting of a hat, booties, mittens and baby blanket.
Simple Design
The Snuggle Bear Kids Hoodie is a top-down design, so you’ll begin working from the neck edge downwards. Basic stitches are used to make the hoodie, namely the half double crochet stitch.
It’s important to note that instead of crocheting through the top of each stitch, you’ll work your stitches in the spaces in between each stitch. This creates a very attractive and unique texture.
To finish your hoodie, you can add a couple of adorable little bear ears on top!


Print This Pattern
Prefer a Printable Version? You can purchase the ad-free, printable PDF of this crochet baby hoodie pattern! It includes all the same information as the free version, plus lots more!
The PDF pattern is thoughtfully colour-coded for ease of use, with each size clearly distinguished in alternating red and blue text (for example, newborn in red, 0–3 months in blue, 3–6 months in red etc), making it simple to follow along without confusion.
The Snuggle Bear Kids Hoodie is also part of a Crochet Pattern eBook Bundle! Check it out here

Ad-Free Download
PDF PRINTABLE PATTERN
- Easy-to-read (no ads!)
- Print-friendly & tablet-friendly
- Bonus sections: schematic, size charts, colour-coded instructions
Thank you for supporting my shop!
Alright, grab your yarn and hooks — it’s time to bring your Snuggle Bear Kids Hoodie to life!

Snuggle Bear Kids Hoodie: A Free Crochet Baby Hoodie Pattern
This post for a crochet baby hoodie pattern may contain affiliate links, which means I’ll receive a commission if you purchase through my links, at no extra cost to you. Please read full disclosure for more information.
Please carefully read all the information below.
LEVEL

Easy – (see details of project levels at the Craft Yarn Council).
Enjoying the video? Join my YouTube membership to support the channel!
Pattern Notes
- Quick tip: read these notes first… it’ll make everything easier!
- US standard crochet terms are used throughout.
- Take time to check gauge before starting the garment.
- Numbers given are for smallest size, with numbers for larger sizes in
- ( ) brackets . E.g. newborn (0–3 mos: 3–6 mos: 6–12 mos: 1–2 yrs) (3–4 yrs: 5–6 yrs: 7–8 yrs: 9–10 yrs).
- If an instruction does not apply to a particular size then a – is used instead of a number. E.g. – (–: 3: 3: 4) (4: 4: 5: 5) means that the newborn and 0–3 mos sizes do not apply to this instruction.
- Circle the size you wish to make beforehand —both stitch and row counts (you can purchase the ad-free PDF pattern here).
- From row 2 of the yoke onwards, you’ll work your half double crochets in the spaces in between each stitch (as opposed to crocheting through the top of each stitch).
- When working the yoke, main body and hood sections, the chain 2 turning chain does not count as the first stitch of the next row. Therefore, you should make the first half double crochet of the row in the first space, at the base of the chain 2.
- When working the sleeves, the chain 2 turning chain counts as the first stitch of the next round. Therefore, you should make the first half double crochet of the round in the next space.
Materials
Yarn
#5 / chunky / bulky / 12 ply
James C. Brett Flutterby Chunky, 191 yds / 3.5 oz (175m / 100g). 100% polyester (chenille). Colours featured in this pattern are as follows: Baby Blue & Baby Pink
Yarn amounts for sizes newborn (0–3 mos: 3–6 mos: 6–12 mos: 1–2 yrs) (3–4 yrs: 5–6 yrs: 7–8 yrs: 9–10 yrs):
2 (3, 3, 4, 4) (4, 6, 7, 7) balls
358 (421, 492, 640, 735) (950, 1094, 1218, 1330) yards
Crochet Hooks (All Sizes):
Other Materials
- Yarn needle (for weaving in ends)
- Scissors
- Stitch marker (optional: to mark start of row / round)
- Buttons: 1x button for each size as follows: 25mm (25mm, 25mm, 30mm, 30mm) (30mm, 30mm, 30mm, 30mm)
Gauge / Tension
In order to achieve the correct size and fit , it is important to test your gauge with a sample square before you begin.
If your tension is tight (too many stitches to 4″), try using a larger hook.
If your tension is loose (fewer stitches to 4″), use a smaller hook.
With a J (6mm) hook: 12 stitches & 10 rows = 4″ (10cm) in half double crochet worked in the spaces in between each stitch (after blocking).
With a K (6.5mm) hook: 11 stitches & 9 rows = 4″ (10cm) in half double crochet worked in the spaces in between each stitch (after blocking).
Finished Sizes
The sizes in this pattern are based on the standard baby and child measurements from the Craft Yarn Council, and this garment is designed with 2–3″ positive ease for a comfortable fit and room to move.
Sizes newborn (0–3 mos: 3–6 mos: 6–12 mos: 1–2 yrs) (3–4 yrs: 5–6 yrs: 7–8 yrs: 9–10 yrs):
To fit chest (IN): 14 (16, 17, 18, 20) (23, 25, 26.5, 28)
Finished chest (IN): 16 (18, 20, 21, 23) (26, 28, 30, 31)
Construction
- This garment is crocheted from the top down, beginning in rows to form the yoke.
- Once the yoke is complete, it is split to create the armholes.
- The body is worked next in rows until the required length is reached.
- The sleeves are then worked around the armholes created earlier and are crocheted in the round.
- After the sleeves are complete, the yarn is re-attached to the neck corner and the hood is worked in rows.
- Once the required height is achieved, the hood is sewn together using the whip stitch.
- To finish, a quick and simple 2-row edging is worked around the entire hoodie for a clean, polished look.
Stitches & Abbreviations (US Crochet Terms)
beg – beginning
ch(s) – chain(s)
circ. – circumference
fasten off – To fasten off securely, chain 1, cut yarn leaving a 5 – 6” tail. Pull the tail through the loop that is on your hook. Tighten gently.
hdc – half double crochet: Yarn over (yo), insert hook into next space, yo, pull up a loop (3 loops on hook). Yo, pull through all 3 loops. 1 half double crochet completed.
hdc2tog – half double crochet two together (also known as a hdc decrease):
Yarn over (yo), insert hook into next space, yo, pull up a loop (3 loops on hook). Yo, insert hook into next space, yo, pull up a loop (5 loops on hook). Yo, pull through all 5 loops. Hdc2tog completed.
RS – right side: The side of your work that you want to have on display.
sc – single crochet: Insert hook into stitch, yarn over (yo), pull up a loop (2 loops on hook). Yo, pull through both loops on hook. 1 single crochet completed.
sk – skip: Do not crochet into this stitch / space.
sl st – slip stitch: Insert hook into stitch, yarn over (yo), pull up a loop, you will have 2 loops on your hook. Pull the first loop through the second loop. 1 slip stitch completed.
sp(s) – space(es)
st(s) – stitch(es)
V-st – (1hdc, ch2, 1hdc) into the same space
WS – wrong side: The back / inside of your crochet piece.
( ) – Sets of stitches to be worked as many times as directed or sets of stitches to be worked within one stitch or space.
[ ] – The total number of stitches at the end of a row.
Instructions
Yoke
Starting with a J (6mm) crochet hook:
Chain 37 (42: 47: 52: 52) (57: 57: 62: 62)
Row 1. 1hdc in 3rd ch from hook, 1hdc in next 2 (3: 4: 5: 5) (6: 6: 7: 7) ch, V-st in next ch (see abbreviations above), 1hdc in next 7 (8: 9: 10: 10) (11: 11: 12: 12) ch, V-st in next ch, 1hdc in next 10 (11: 12: 13: 13) (14: 14: 15: 15) ch, V-st in next ch, 1hdc in next 7 (8: 9: 10: 10) (11: 11: 12: 12) ch, V-st in next ch, 1hdc in next 4 (5: 6: 7: 7) (8: 8: 9: 9) ch, TURN [ch2, 39 (44: 49: 54: 54) (59: 59: 64: 64) hdc, 4x ch2 sps].
Starting from row 2, and throughout the remainder of the pattern, you’ll work your half double crochets in the spaces in between each stitch.
Row 2. Do not work over yarn tail: Ch2, 1hdc in first sp (at base of ch2), 1hdc in next 3 (4: 5: 6: 6) (7: 7: 8: 8) sps, V-st in next ch2 sp, 1hdc in next 8 (9: 10: 11: 11) (12: 12: 13: 13) sps, V-st in next ch2 sp, 1hdc in next 11 (12: 13: 14: 14) (15: 15: 16: 16) sps, V-st in next ch2 sp, 1hdc in next 8 (9: 10: 11: 11) (12: 12: 13: 13) sps, V-st in next ch2 sp, 1hdc in next 3 (4: 5: 6: 6) (7: 7: 8: 8)sps, 1hdc in sp between last st and beg ch2, TURN [ch2, 43 (48: 53: 58: 58) (63: 63: 68: 68) hdc, 4x ch2 sps].
Row 3. Ch2, 1hdc in first sp, 1hdc in next 3 (4: 5: 6: 6) (7: 7: 8: 8) sps, V-st in next ch2 sp, 1hdc in next 9 (10: 11: 12: 12) (13: 13: 14: 14) sps, V-st in next ch2 sp, 1hdc in next 12 (13: 14: 15: 15) (16: 16: 17: 17) sps, V-st in next ch2 sp, 1hdc in next 9 (10: 11: 12: 12) (13: 13: 14: 14) sps, V-st in next ch2 sp, 1hdc in next 4 (5: 6: 7: 7) (8: 8: 9: 9) sps, 1hdc in sp between last st and beg ch2, TURN [ch2, 47 (52: 57: 62: 62) (67: 67: 72: 72) hdc, 4x ch2 sps].
Row 4. Ch2, 1hdc in first sp, 1hdc in next 4 (5: 6: 7: 7) (8: 8: 9: 9)sps, V-st in next ch2 sp, 1hdc in next 10 (11: 12: 13: 13) (14: 14: 15: 15) sps, V-st in next ch2 sp, 1hdc in next 13 (14: 15: 16: 16) (17: 17: 18: 18) sps, V-st in next ch2 sp, 1hdc in next 10 (11: 12: 13: 13) (14: 14: 15: 15) sps, V-st in next ch2 sp, 1hdc in next 4 (5: 6: 7: 7) (8: 8: 9: 9) sps, 1hdc in sp between last st and beg ch2, TURN [ch2, 51 (56: 61: 66: 66) (71: 71: 76: 76) hdc, 4x ch2 sps].
Row 5. Ch2, 1hdc in first sp, 1hdc in next 4 (5: 6: 7: 7) (8: 8: 9: 9) sps, V-st in next ch2 sp, 1hdc in next 11 (12: 13: 14: 14) (15: 15: 16: 16) sps, V-st in next ch2 sp, 1hdc in next 14 (15: 16: 17: 17) (18: 18: 19: 19) sps, V-st in next ch2 sp, 1hdc in next 11 (12: 13: 14: 14) (15: 15: 16: 16) sps, V-st in next ch2 sp, 1hdc in next 5 (6: 7: 8: 8) (9: 9: 10: 10) sps, 1hdc in sp between last st and beg ch2, TURN [ch2, 55 (60: 65: 70: 70) (75: 75: 80: 80) hdc, 4x ch2 sps].
Row 6. Ch2, 1hdc in first st, 1hdc in next 5 (6: 7: 8: 8) (9: 9: 10: 10) sps, V-st in next ch2 sp, 1hdc in next 12 (13: 14: 15: 15) (16: 16: 17: 17) sps, V-st in next ch2 sp, 1hdc in next 15 (16: 17: 18: 18) (19: 19: 20: 20) sps, V-st in next ch2 sp, 1hdc in next 12 (13: 14: 15: 15) (16: 16: 17: 17) sps, V-st in next ch2 sp, 1hdc in next 5 (6: 7: 8: 8) (9: 9: 10: 10) sps, 1hdc in sp between last st and beg ch2, TURN [ch2, 59 (64: 69: 74: 74) (79: 79: 84: 84) hdc, 4x ch2 sps].
Row 7. Ch2, 1hdc in first sp, 1hdc in next 5 (6: 7: 8: 8) (9: 9: 10: 10) sps, V-st in next ch2 sp, 1hdc in next 13 (14: 15: 16: 16) (17: 17: 18: 18) sps, V-st in next ch2 sp, 1hdc in next 16 (17: 18: 19: 19) (20: 20: 21: 21) sps, V-st in next ch2 sp, 1hdc in next 13 (14: 15: 16: 16) (17: 17: 18: 18) sps, V-st in next ch2 sp, 1hdc in next 6 (7: 8: 9: 9) (10: 10: 11: 11) sps, 1hdc in sp between last st and beg ch2, TURN [ch2, 63 (68: 73: 78: 78) (83: 83: 88: 88) hdc, 4x ch2 sps].
Sizes 3–6 mos, 6–12 mos, 1–2 yrs, 3–4 yrs, 5–6 yrs, 7–8 yrs, 9–10 yrs only:
Row 8. Ch2, 1hdc in first sp, 1hdc in next – (–: 8: 9: 9) (10: 10: 11: 11) sps, V-st in next ch2 sp, 1hdc in next – (–: 16: 17: 17) (18: 18: 19: 19) sps, V-st in next ch2 sp, 1hdc in next – (–: 19: 20: 20) (21: 21: 22: 22) sps, V-st in next ch2 sp, 1hdc in next – (–: 16: 17: 17) (18: 18: 19: 19) sps, V-st in next ch2 sp, 1hdc in next – (–: 8: 9: 9) (10: 10: 11: 11) sps, 1hdc in sp between last st and beg ch2, TURN [ch2, – (–: 77–82–82) (87–87–92–92) hdc, 4x ch2 sps].
Sizes 6–12 mos, 1–2 yrs, 3–4 yrs, 5–6 yrs, 7–8 yrs, 9–10 yrs only:
Row 9. Ch2, 1hdc in first sp, 1hdc in next – (–: –: 9: 9) (10: 10: 11: 11) sps, V-st in next ch2 sp, 1hdc in next – (–: –: 18: 18) (19: 19: 20: 20) sps, V-st in next ch2 sp, 1hdc in next – (–: –: 21: 21) (22: 22: 23: 23) sps, V-st in next ch2 sp, 1hdc in next – (–: –: 18: 18) (19: 19: 20: 20) sps, V-st in next ch2 sp, 1hdc in next – (–: –: 10: 10) (11: 11: 12: 12) sps, 1hdc in sp between last st and beg ch2, TURN [ch2, – (–: –: 86–86) (91–91–96–96) hdc, 4x ch2 sps].
Sizes 1–2 yrs, 3–4 yrs, 5–6 yrs,7–8 yrs, 9–10 yrs only:
Row 10. Ch2, 1hdc in first sp, 1hdc in next – ( –: –: –: 10) (11–11–12–12) sps, V-st in next ch2 sp, 1hdc in next – (–: –: –: 19) (20: 20: 21: 21) sps, V-st in next ch2 sp, 1hdc in next – (–: –: –: 22) (23: 23: 24: 24) sps, V-st in next ch2 sp, 1hdc in next – (–: –: –: 19) (20: 20:21: 21) sps, V-st in next ch2 sp, 1hdc in next – (–: –: –: 10) (11: 11: 12: 12) sps, 1hdc in sp between last st and beg ch2, TURN [ch2, – (–: –: –: 90) (95: 95: 100: 100) hdc, 4x ch2 sps].
Sizes 3–4 yrs, 5–6 yrs, 7–8 yrs, 9–10 yrs only:
Row 11. Ch2, 1hdc in first sp, 1hdc in next (11: 11: 12: 12) sps, V-st in next ch2 sp, 1hdc in next (21: 21: 22: 22) sps, V-st in next ch2 sp, 1hdc in next (24: 24: 25: 25) sps, V-st in next ch2 sp, 1hdc in next (21: 21: 22: 22) sps, V-st in next ch2 sp, 1hdc in next (12: 12: 13: 13) sps, 1hdc in sp between last st and beg ch2, TURN [ch2, (99: 99: 104: 104) hdc, 4x ch2 sps].
Sizes 5–6 yrs,7–8 yrs,9–10 yrs only:
Row 12. Ch2, 1hdc in first sp, 1hdc in next (–: 12: 13: 13) sps, V-st in next ch2 sp, 1hdc in next (–: 22: 23: 23) sps, V-st in next ch2 sp, 1hdc in next (–: 25: 26: 26) sps, V-st in next ch2 sp, 1hdc in next (–: 22: 23: 23) sps, V-st in next ch2 sp, 1hdc in next (–: 12: 13: 13) sps, 1hdc in sp between last st and beg ch2, TURN [ch2, (–: 103: 108: 108)hdc, 4x ch2 sps].
Sizes 7–8 yrs, 9–10 yrs only:
Row 13. Ch2, 1hdc in first sp, 1hdc in next (–: –: 13: 13) sps, V-st in next ch2 sp, 1hdc in next (–: –: 24: 24) sps, V-st in next ch2 sp, 1hdc in next (–: –: 27: 27) sps, V-st in next ch2 sp, 1hdc in next (–: –: 24: 24) sps, V-st in next ch2 sp, 1hdc in next (–: –: 14: 14) sps, 1hdc in sp between last st and beg ch2, TURN [ch2, (–: –: 112: 112) hdc, 4x ch2 sps].
Size 9–10 yrs only:
Row 14. Ch2, 1hdc in first sp, 1hdc in next 14 sps, V-st in next ch2 sp, 1hdc in next 25 sps, V-st in next ch2 sp, 1hdc in next 28 sps, V-st in next ch2 sp, 1hdc in next 25 sps, V-st in next ch2 sp, 1hdc in next 14 sps, 1hdc in sp between last st and beg ch2, TURN [ch2, 116 hdc, 4x ch2 sps].
Before moving on to the next section, the height of the yoke from the neck edge should measure as follows (approximately):
Newborn and 0–3 mos: 3″ (8cm)
3–6 mos: 3.5″ (9cm)
6–12 mos: 4″ (10cm)
1–2 yrs: 4.25″ (11cm)
3–4 yrs: 4.75″ (12cm)
5–6 yrs: 5″ (13cm)
7–8 yrs: 5.5″ (14cm)
9–10 yrs: 6″ (15cm)
💡 Tired of scrolling?
You can grab the printable, ad-free PDF version of the Snuggle Bear Kids Hoodie here:
It’s much easier to follow and perfect for printing or using on your mobile or tablet.
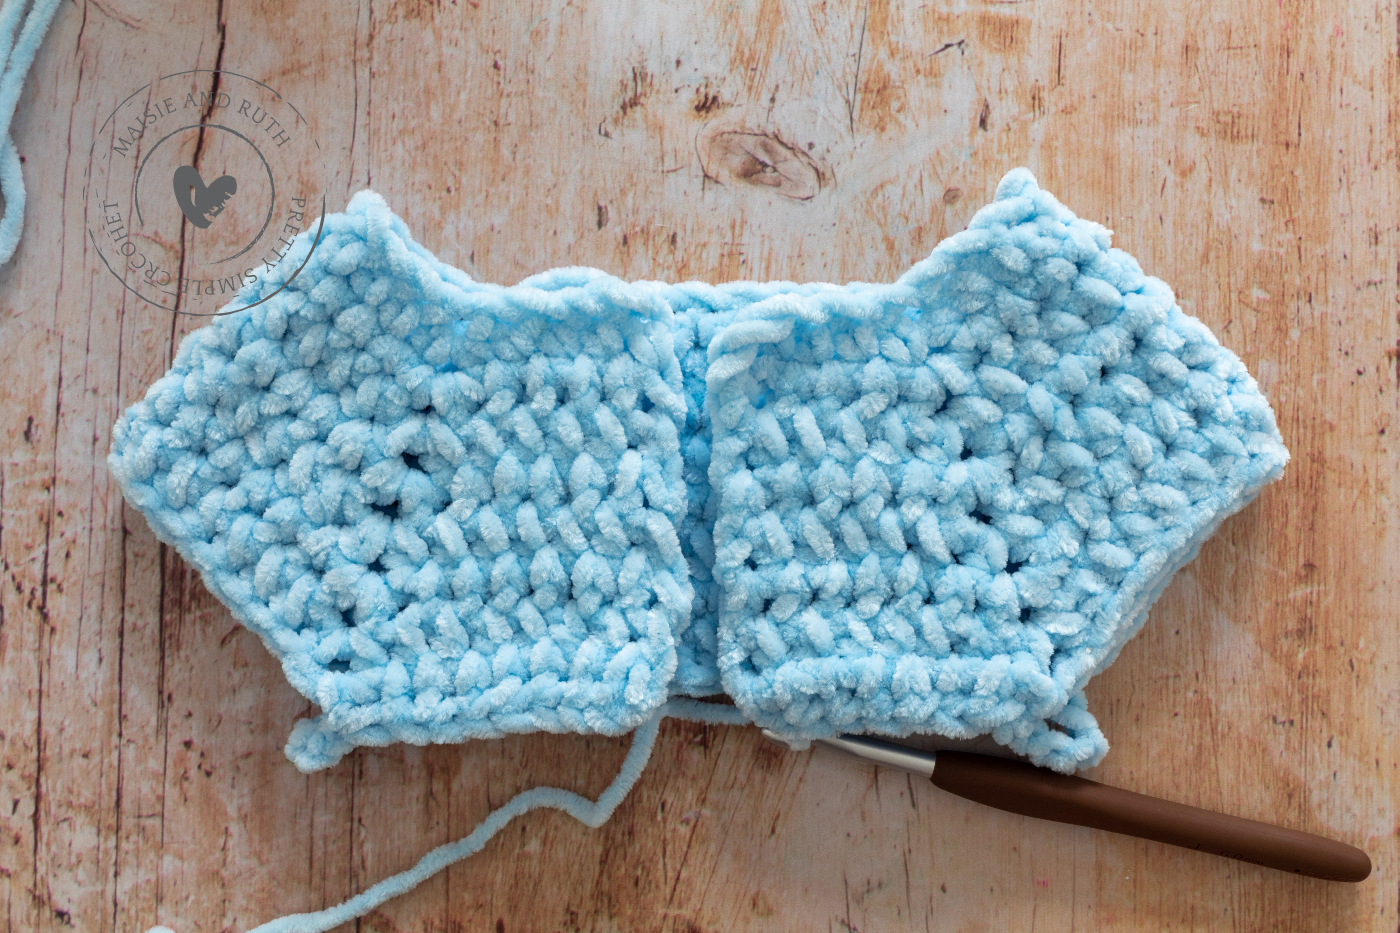
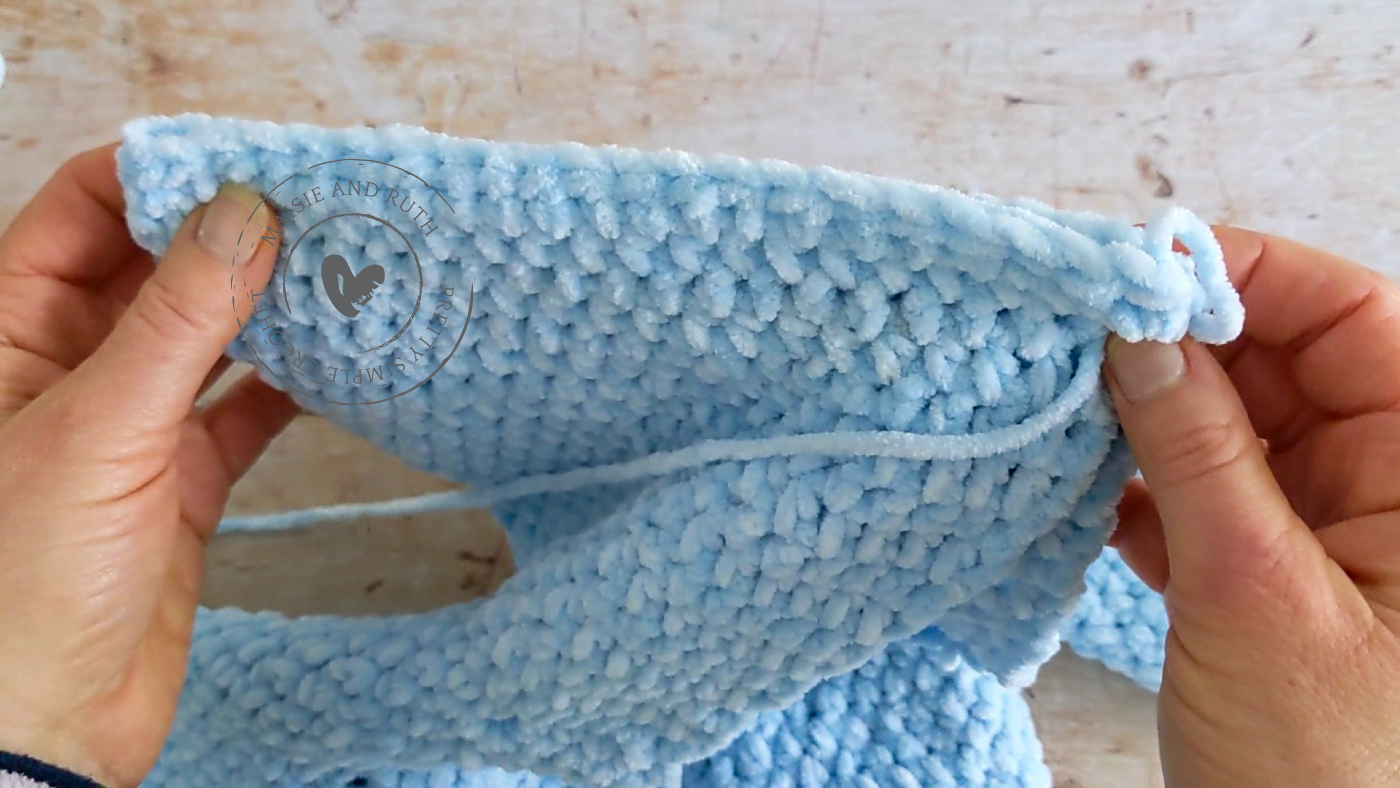
Divide for Armholes
For all 9 sizes:
You will create two armholes in the next row.
Next row. Ch2, 1hdc in first sp, 1hdc in next 6 (7: 8: 10: 10) (12: 12: 14: 14) sps, (1hdc, ch 5 [5: 5: 5: 7] [8: 9: 8: 9]) in next ch2 sp, sk next 15 (16: 18: 20: 21) (23: 24: 26: 27) sts, 1hdc in next ch2 sp, 1hdc in next 17 (18: 20: 22: 23) (25: 26: 28: 29) sps, (1hdc, ch 5 [5: 5: 5: 7] [8: 9: 8: 9]) in next ch2 sp, sk next 15 (16: 18: 20: 21) (23: 24: 26: 27) sts, 1hdc in next ch2 sp, 1hdc in next 6 (7: 9: 10: 11) (12: 13: 14: 15) sps, 1hdc in sp between last st and beg ch2, TURN [ch2, 35 (38: 43: 48: 50) (55: 57: 62: 64) hdc, 2x ch5 sps].
As you can see from the image below, you’ve divided your hoodie for the sleeves and have created two armholes:
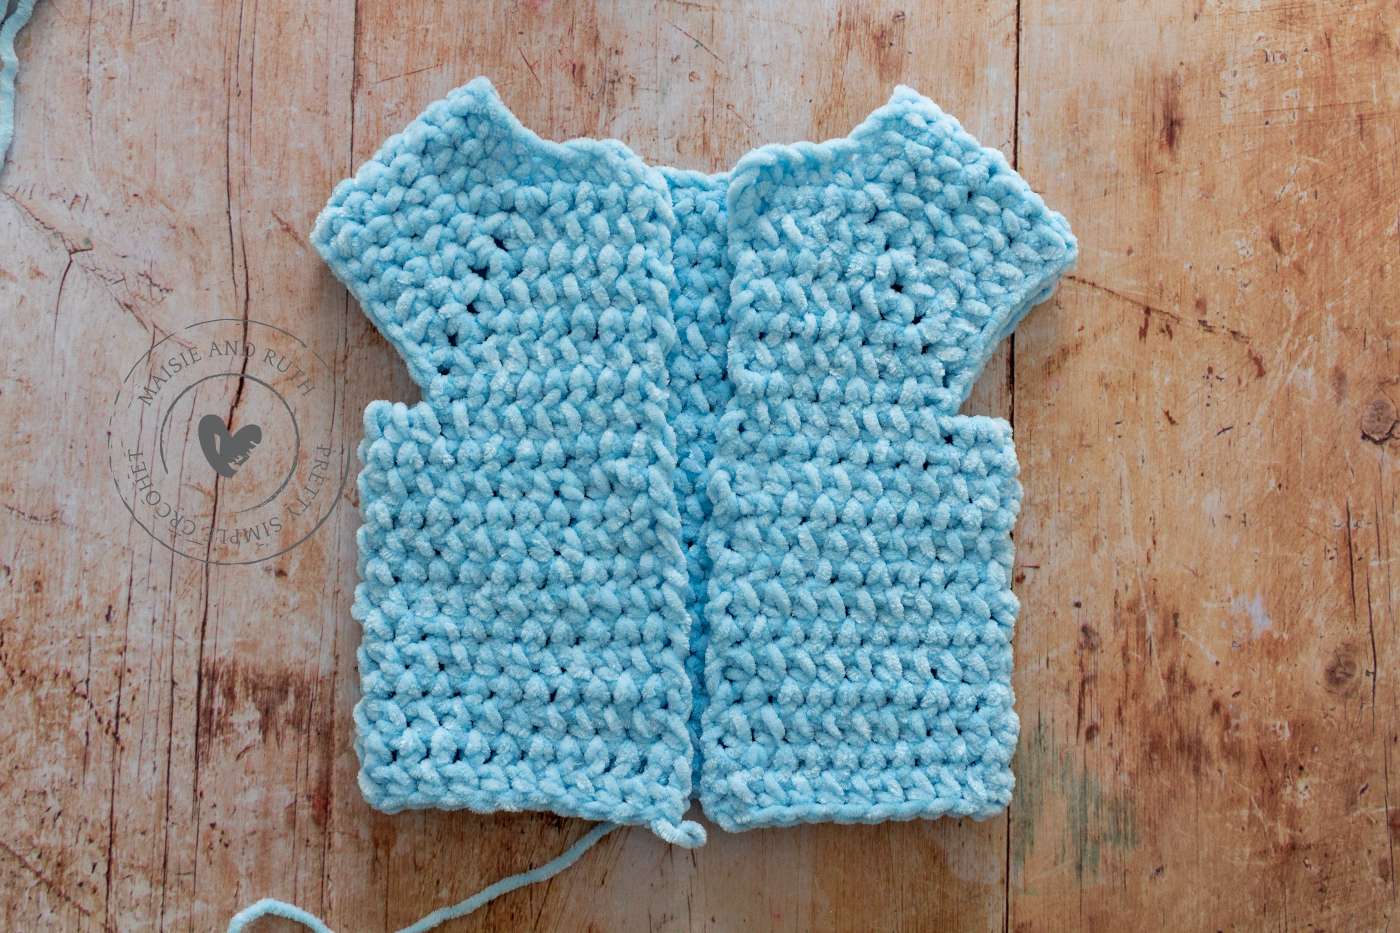
Body
Change to a K (6.5mm) crochet hook.
Row 1. Ch2, 1hdc in first sp, 1hdc in next 6 (7: 9: 10: 11) (12: 13: 14: 15) sps, 5 (5: 5: 5: 7) (8: 9: 8: 9) hdc in next ch5 sp, 1hdc in next 18 (19: 21: 23: 24) (26: 27: 29: 30) sps, 5 (5: 5: 5: 7) (8: 9: 8: 9) hdc in next ch5 sp, 1hdc in next 7 (8: 9: 11: 11) (13: 13: 15: 15) sps, 1hdc in sp between last st and beg ch2, TURN [ch2, 43 (46: 51: 56: 62) (69: 73: 76: 80) hdc].
Row 2. Ch2, 1hdc in first sp, 1hdc in next 41 (44: 49: 54: 60) (67: 71: 74: 78) sps, ending with 1hdc in sp between last st and beg ch2, TURN [ch2, 43 (46: 51: 56: 62) (69: 73: 76: 80) hdc].
Rows 3 to 11 (13: 14: 16: 18) (22: 24: 26: 28). Repeat row 2 {there should be 21 (23: 25: 28: 31) (36: 39: 42: 45)} rows in total from the neck edge.
Cut yarn, fasten off and weave in ends.
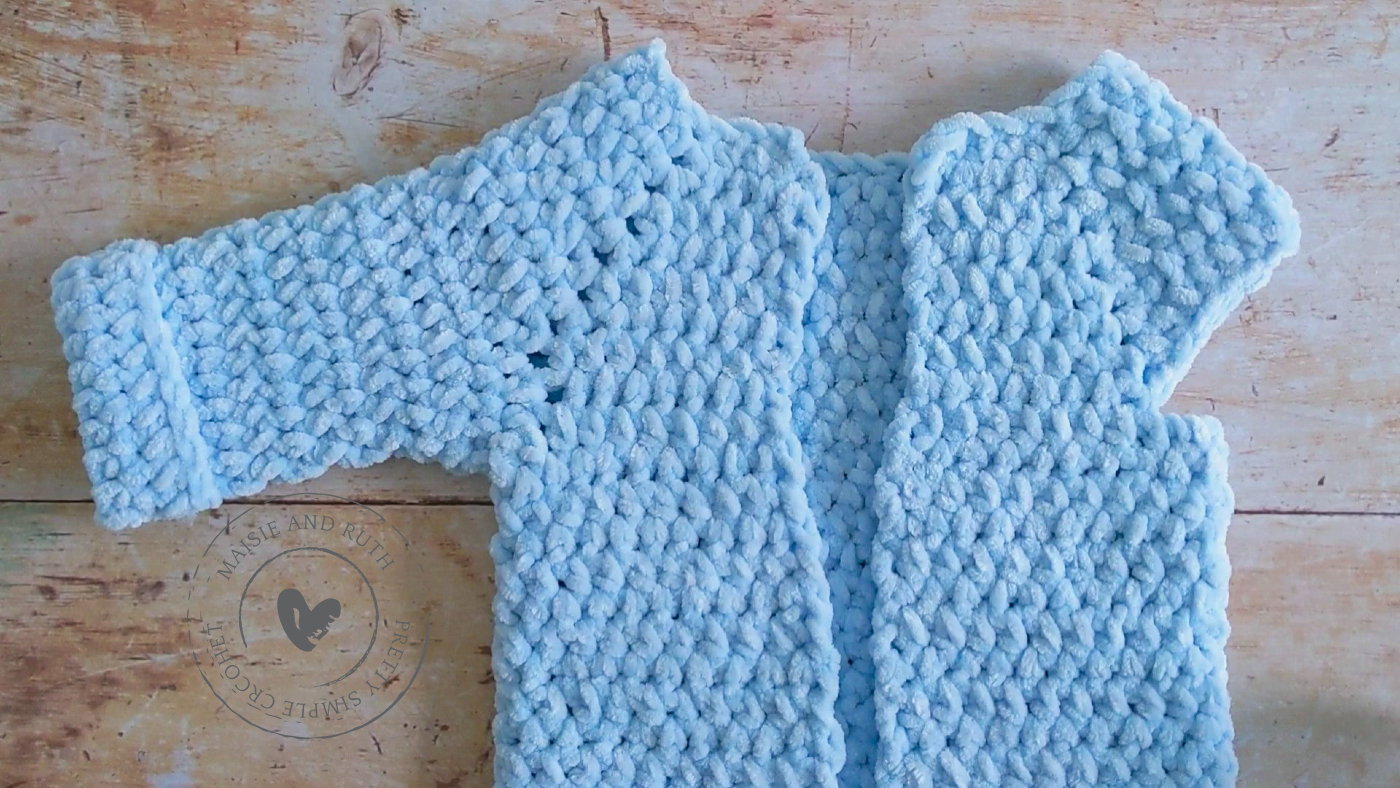
The photo below shows you how the hoodie should be shaping up at the end of this section.
Right Sleeve
Change back to your J (6mm) crochet hook.
It’s time to work on the sleeves now and you’ll begin with the right sleeve first.
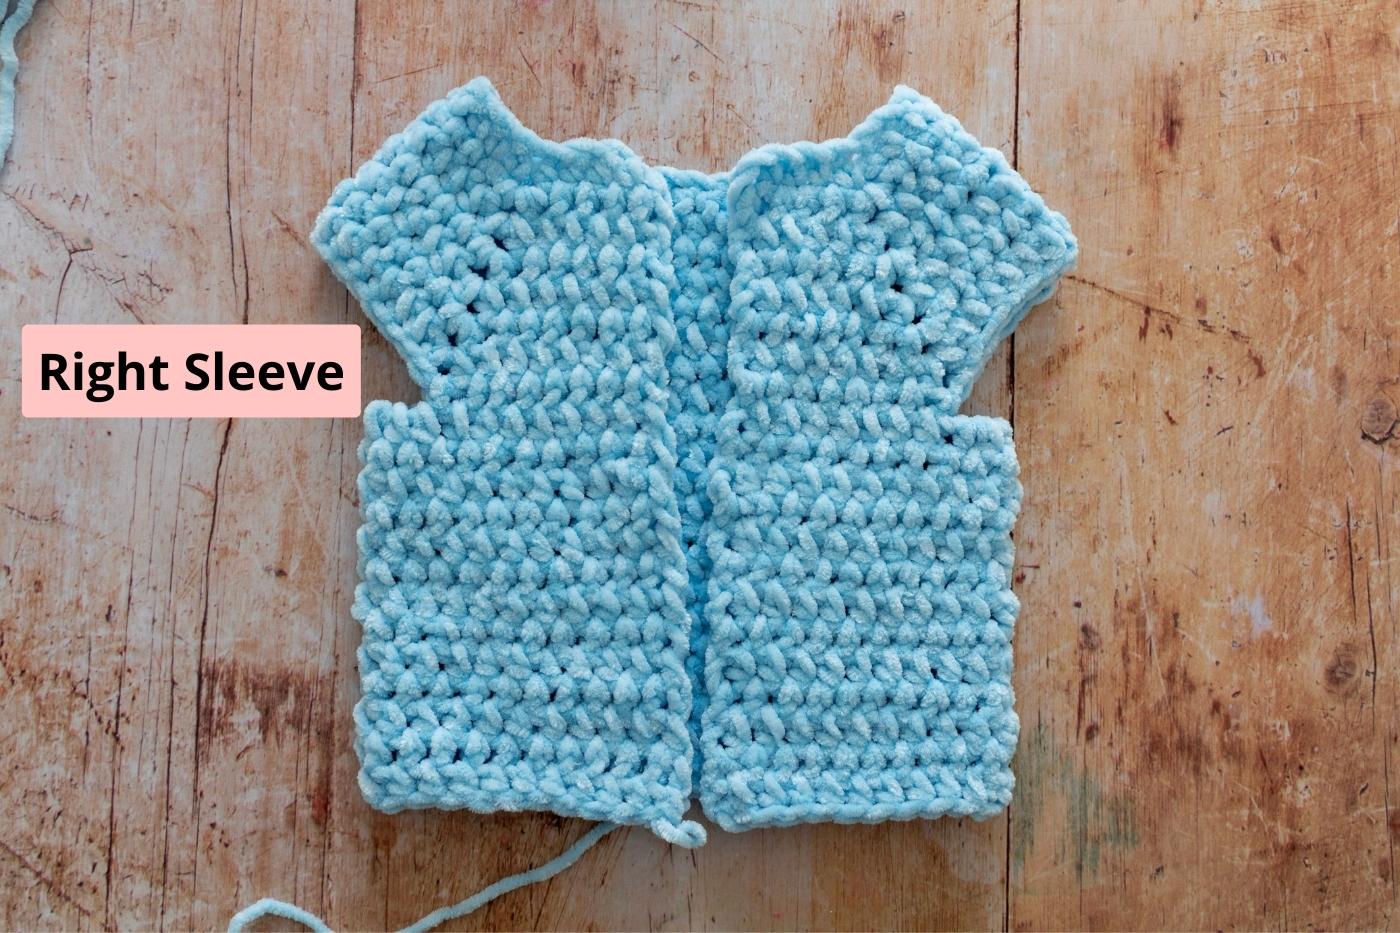
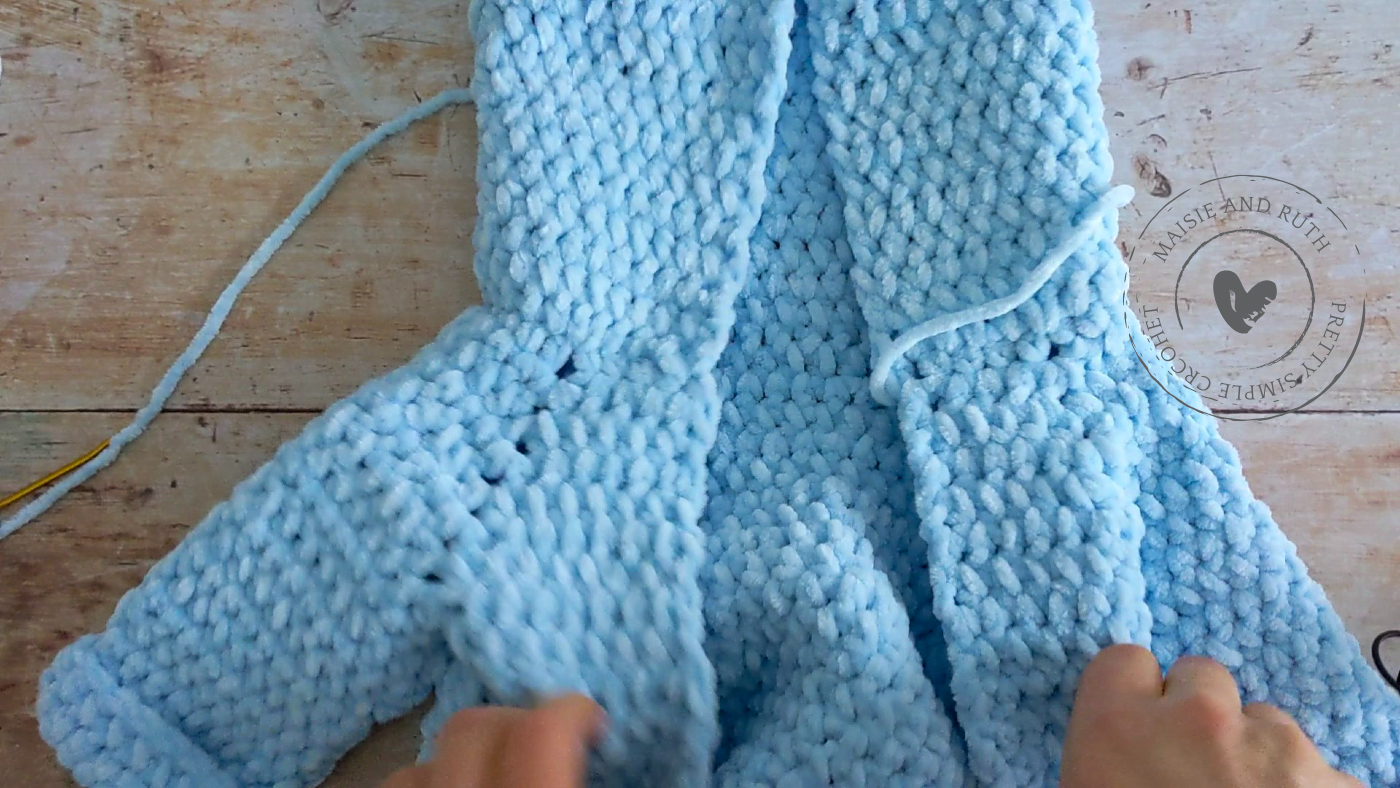
Come to the underarm section of your sleeve.
Re-attach your yarn and start working in the space between the last and second-last stitch, as shown by my hook below:

Round 1: Ch2, 1hdc in next 23 (24: 26: 28: 31) (34: 36: 37: 39) sps around armhole, sl st in sp between beg ch2 and 1st hdc to join, TURN [ch2 & 23 (24: 26: 28: 31) (34: 36: 37: 39) hdc].
Round 2: Ch2, hdc2tog over the first 2 sps, 1hdc in next 19 (20: 22: 24: 27) (30: 32: 33: 35) sps, hdc2tog over last 2 sps, sl st in sp between beg ch2 and 1st hdc to join, TURN [ch2 & 21 (22: 24: 26: 29) (32: 34: 35: 37) hdc].
Round 3: Ch2, hdc2tog over the first 2 sps, 1hdc in next 17 (18: 20: 22: 25) (28: 30: 31: 33) sps, hdc2tog over last 2 sps, sl st in sp between beg ch2 and 1st hdc to join, TURN [ch2 & 19 (20: 22: 24: 27) (30: 32: 33: 35) hdc].
Round 4: Ch2, hdc2tog over the first 2 sps, 1hdc in next 17 (18: 20: 22: 25) (28: 30: 31: 33) sps, sl st in sp between beg ch2 and 1st hdc to join, TURN [ch2 & 18 (19: 21: 23: 26) (29: 31: 32: 34) hdc].
Round 5: Ch2, 1hdc in first sp, 1hdc in next 17 (18: 20: 22: 25) (28: 30: 31: 33) sps, sl st in sp between beg ch2 and 1st hdc to join, TURN [ch2 & 18 (19: 21: 23: 26) (29: 31: 32: 34) hdc].
Rounds 6 to 16 (18: 19: 23: 25) (30: 33: 35: 38). Repeat Round 5.
Cut yarn, fasten off and weave in ends.
Turn the sleeve up to create a little cuff.
Left Sleeve
Apart from where you’ll re-attach your yarn, the left sleeve is worked in exactly the same way as the right sleeve.
Re-attach your yarn and start working in the space between the last and second-last stitch, as shown by my hook in the photo below:

Work the left sleeve by following the instructions for the right sleeve above.
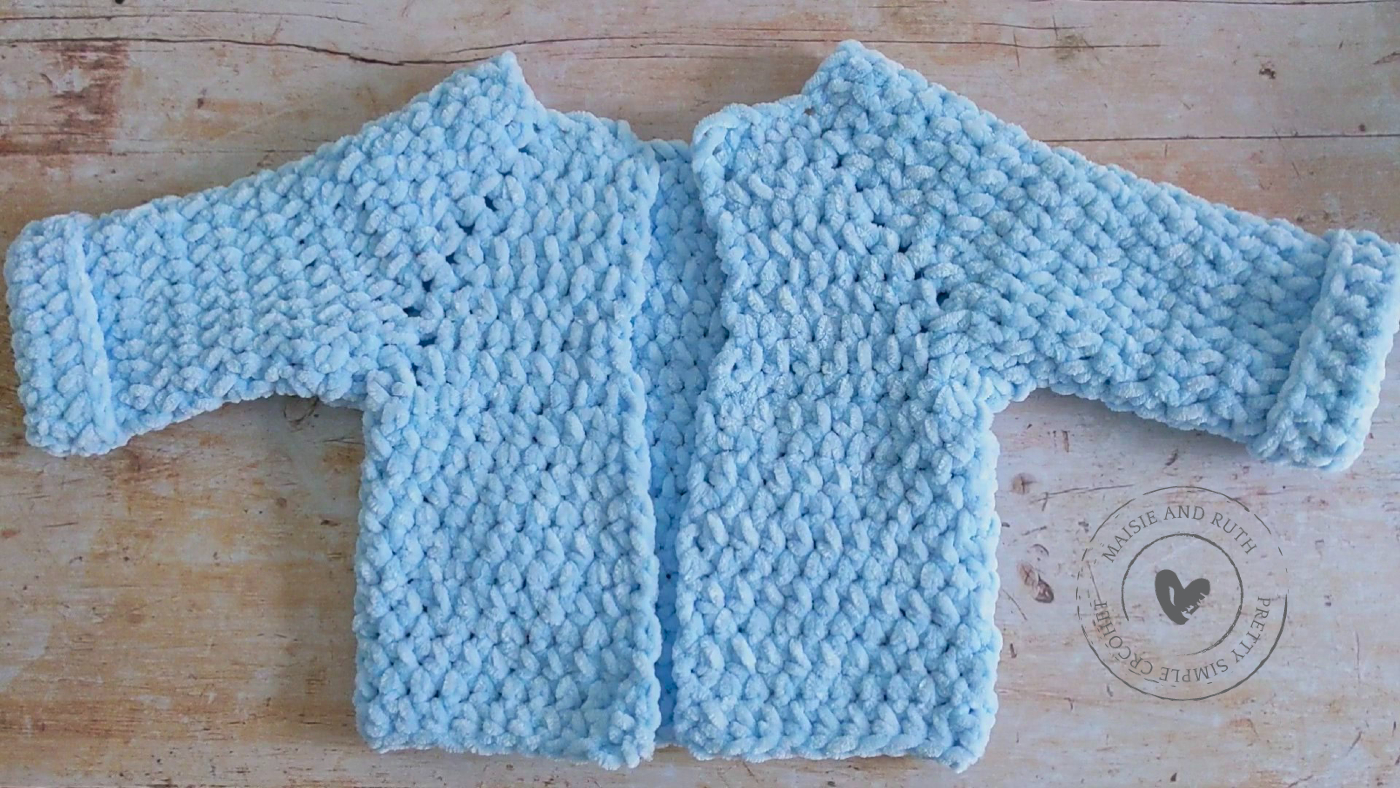
Both sleeves are now completed:
Hood
Using your J (6mm) crochet hook:
Start in the upper front edge of left front (the yarn tail will be on this side):

Re-attach your yarn to the space in the top corner:

Row 1. Ch2 and turn your work, 1hdc in first sp, 1hdc in next 3 (4: 5: 6: 6) (7: 7: 8: 8) sps, 2hdc in next sp, 1hdc in next 8 (9: 10: 11: 11) (12: 12: 13: 13) sps, 2hdc in next sp, 1hdc in next 11 (12: 13: 14: 14) (15: 15: 16: 16) sps, 2hdc in next sp, 1hdc in next 8 (9: 10: 11: 11) (12: 12: 13: 13) sps, 2hdc in next sp, 1hdc in next 3 (4: 5: 6: 6) (7: 7: 8: 8) sps, 1hdc in sp between last st and beg ch2, TURN [ch2, 43 (48: 53: 58: 58) (63: 63: 68: 68) hdc].
Row 2. Ch2, 1hdc in first sp, 1hdc in next 41 (46: 51: 56: 56) (61: 61: 66: 66) sps, 1hdc in sp between last st and beg ch2, TURN [ch2, 43 (48: 53: 58: 58) (63: 63: 68: 68) hdc].
Rows 3 to 17 (18: 19: 20: 22) (24: 24: 25: 25). Repeat row 2.
Cut yarn, leaving a long tail for sewing.
Sewing The Hood
You’ll sew the hood together with the right side facing out:
Bring the two sides of the top of the hood together:
With your needle, whip stitch the two sides together (insert your needle through the front loops on the side nearest to you; go through the back loops on the opposite side of the hood). Refer to video here
Once you’ve finished sewing the hood, bring your yarn to the inside of your work and weave the tail in.
Fold the hood over to create a little brim:
Edging
Use your J (6mm) crochet hook.
The edging is made in two continuous rounds.
Starting in the lower front edge of right front, re-attach yarn to the corner space:

Round 1. Ch1, 1hdc in first sp, 1hdc in next 20 (22: 24: 27: 30) (35: 38: 41: 44) sps up right front, 1hdc in next 35 (37: 39: 41: 45) (49: 49: 51: 51) sps around hood, 1hdc in next 21 (23: 25: 28: 31) (36: 39: 42: 45) sps down left front, TURN [77 (83: 87: 97: 107) (121: 127: 135: 141) hdc].
Round 2. Ch1, 1hdc in first sp, 1hdc in next 60 (64: 68: 73: 80) (89: 92: 97: 100) sps, ch2, 1hdc in next sp (button loop made – check button fits, ch more or less if necessary), 1hdc in next 14 (16: 16: 21: 24) (29: 32: 35: 38) sps, 1hdc in sp between last st and beg ch1 [77 (83: 87: 97: 107) (121: 127: 135: 141) hdc].
Cut yarn, fasten off and weave in ends.
Sew your button on the left front of the cardigan, making sure that it’s aligned with the button loop on the right front.
Ears (Make 2):
Using your J (6mm) crochet hook:
Make a magic ring or ch 6 and sl st to 1st chain to form a circle.
Round 1. Ch1 (does not count as your 1st st here and throughout), 8 (8: 9: 10: 10) (11: 11: 12: 12) sc in centre of ring, sl st to 1st sc to join [8 (8: 9: 10: 10) (11: 11: 12: 12) sc].
Round 2. Ch1, 2sc in same st (at base of ch1), 2sc in next 7 (7: 8: 9: 9) (10: 10: 11: 11) sts, sl st to 1st sc to join [16 (16: 18: 20: 20) (22: 22: 24: 24) sc].
Rounds 3 to 4. Ch1, 1sc in same st (at base of ch1), 1sc in next 15 (15: 17: 19: 19) (21: 21: 23: 23) sts, sl st to 1st sc to join [16 (16: 18: 20: 20) (22: 22: 24: 24) sc].
Sizes newborn, 0–3 mos, 3–6 mos only:
Cut yarn, leaving a long tail for sewing on to hood.
Sizes 6–12 mos, 1–2 yrs, 3–4 yrs, 5–6 yrs, 7–8 yrs, 9–10 yrs only:
Round 5. Ch1, 1sc in same st (at base of ch1), 1sc in next – (–: –: 19: 19) (21: 21: 23: 23) sts, sl st to 1st sc to join [– (–: –: 20: 20) (22: 22: 24: 24) sc].
Cut yarn, leaving a long tail for sewing on to hood.
Position your ears on the hood, just above the rolled up brim (or wherever you think looks best).
I like to pin the ears in place to make sewing them on to the hood easier.
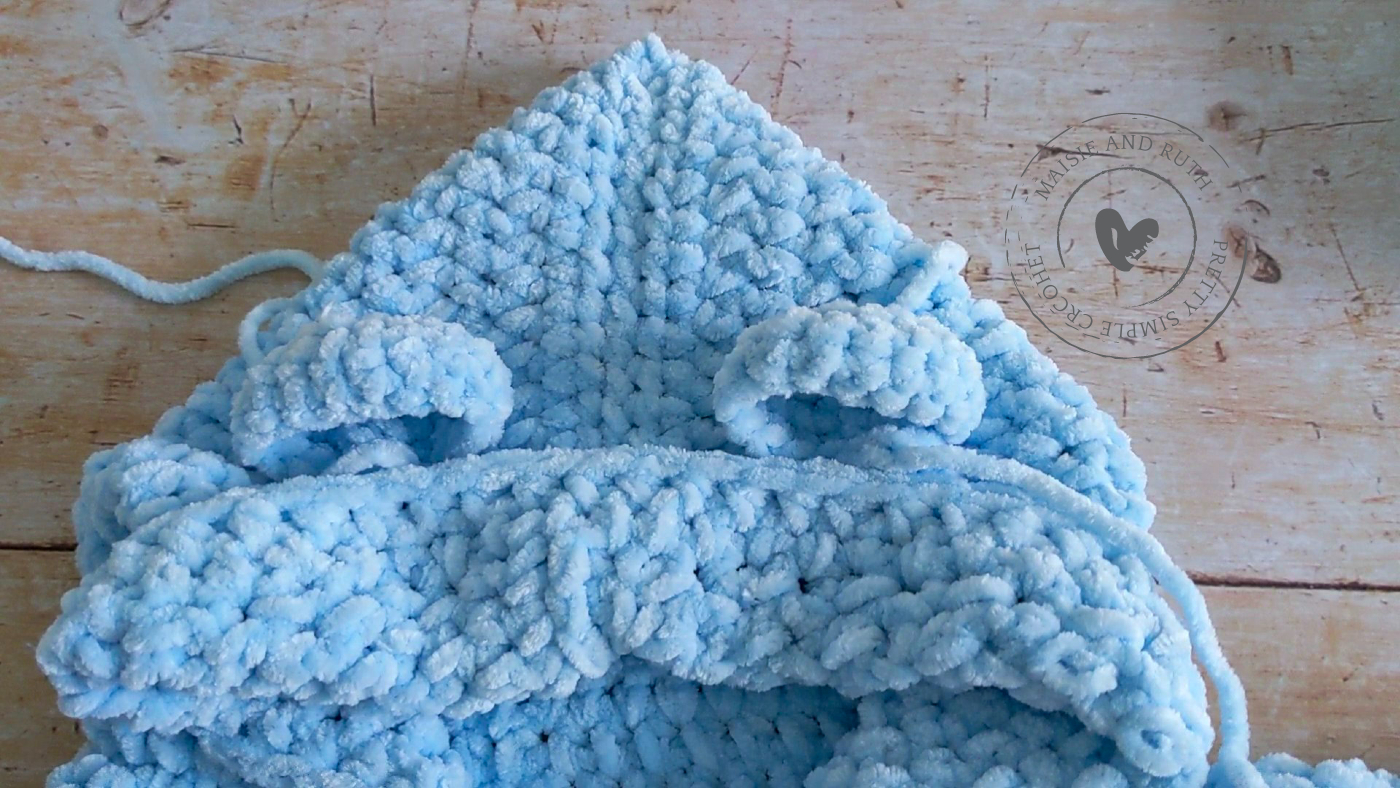
And that’s your super cute Snuggle Bear Kids Hoodie all finished! I loved making and sharing this pattern with you. If you’d like a keepsake version to crochet from your favourite chair, you can purchase the ad-free, PDF pattern here

Helpful Links
- 🧶 Watch the full video tutorial – Follow along step by step on YouTube.
- 💛 Join the Maisie and Ruth Community – Share your finished projects, chat with fellow crocheters, and be inspired.
- 🛍️ Shop printable PDF patterns – Browse the complete collection of ad-free PDF patterns on Etsy.
- 📺 Join YouTube Membership – Get early access to new patterns and exclusive perks.
PATTERN SUPPORT
Need Help with a Pattern?
We’ve got you! 😊
If you need a hand, come hang out with us in our Facebook group—it’s the best place to ask questions, share your makes, and cheer each other on.
We’ve also put together a step-by-step YouTube tutorial you can follow along with—this should answer most of your questions along the way!
Pop into the Facebook group and join our cozy little community—we’d absolutely love to see you there!💛
SHARE YOUR WORK!
I really hope that you enjoyed this free crochet pattern! I would LOVE to see photos of your completed project… please tag me on Instagram using @maisieandruth and / or #maisieandruth
And remember to pin this pattern for later if you can’t make it right now!
COPYRIGHT
Copyright © 2021 by Maisie and Ruth Limited. All rights reserved. This crochet baby hoodie pattern is for personal viewing only. You may view it for free on this blog, but it is protected under applicable copyrights, trademarks, and other proprietary (including but not limited to intellectual property) rights.
You may not copy, redistribute, or sell this pattern in any form, including digital, printed or photographic formats without permission. Sharing this pattern (in whole or in part) on social media, websites, or messaging platforms is strictly prohibited. This is a theft of the author’s intellectual property, which may result in civil or criminal penalties.
Thank you for respecting my work and for your continued support — it truly means a lot!
FAQs (Frequently Asked Questions)
What size does this hoodie pattern fit?
The pattern is written for nine baby sizes, so you can make it for newborn (0–3 mos: 3–6 mos: 6–12 mos: 1–2 yrs) (3–4 yrs: 5–6 yrs: 7–8 yrs: 9–10 yrs).
What yarn should I use?
A soft, chunky (bulky) weight yarn works best for this hoodie. Choose the recommended yarn or a cozy and baby-friendly yarn from the yarn substitute section above.
How long does it take to make?
Thanks to the chunky yarn and simple stitches, this hoodie works up quickly—many crocheters finish it over a weekend!
Do I need to be an experienced crocheter?
Not at all! The pattern uses simple stitches and includes a step-by-step video tutorial to help you along the way.
Can I sell items I make from this pattern?
Yes, you’re welcome to sell finished hoodies made from this pattern. I ask that you credit me as the designer and link back to the pattern when possible. More information is here
Where can I get the printable PDF?
You can find the ad-free, printable PDF version of this pattern in my shop for easy access whenever you need it.


Bellissimo, mi serve taglia per 9/12 mesi mi puoi Aiutare?Grazie
Grazie molte! Vorrei aggiungere presto altre taglie 💞
Bravo pour ce beau manteau. Vous m’avez donné envie de le réaliser. Je vais m’y mettre dès demain et je vous montrerai ma réalisation. Merci pour vos explications très claires et la vidéo aide beaucoup également. Merci pour toutes ces précisions. Cest avec plaisir que je me suis abonnée à votre site.
Fabienne
Merci Fabienne! 🥰 Je suis très contente que ce petit design te plaise! S’il vous plaît profiter de faire le manteau. Et merci beaucoup pour votre abonnement, j’apprécie vraiment 💝
so very cute
Thank you so much! 🥰
I love the way you explain how to crochet that beautiful sweater. I would love to make it but I need it in bigger sizes
Thank you, Leah! Bigger sizes will be coming (hopefully over the next couple of weeks) 💕