


Learn how to make a Crochet Waffle Stitch Baby Blanket with my FREE crochet pattern!
There’s also a step-by-step VIDEO tutorial to accompany the pattern. And to purchase an ad-free printable version, please visit my Etsy store HERE

QUICK AND EASY BLANKET (WITH WONDERFUL TEXTURE)
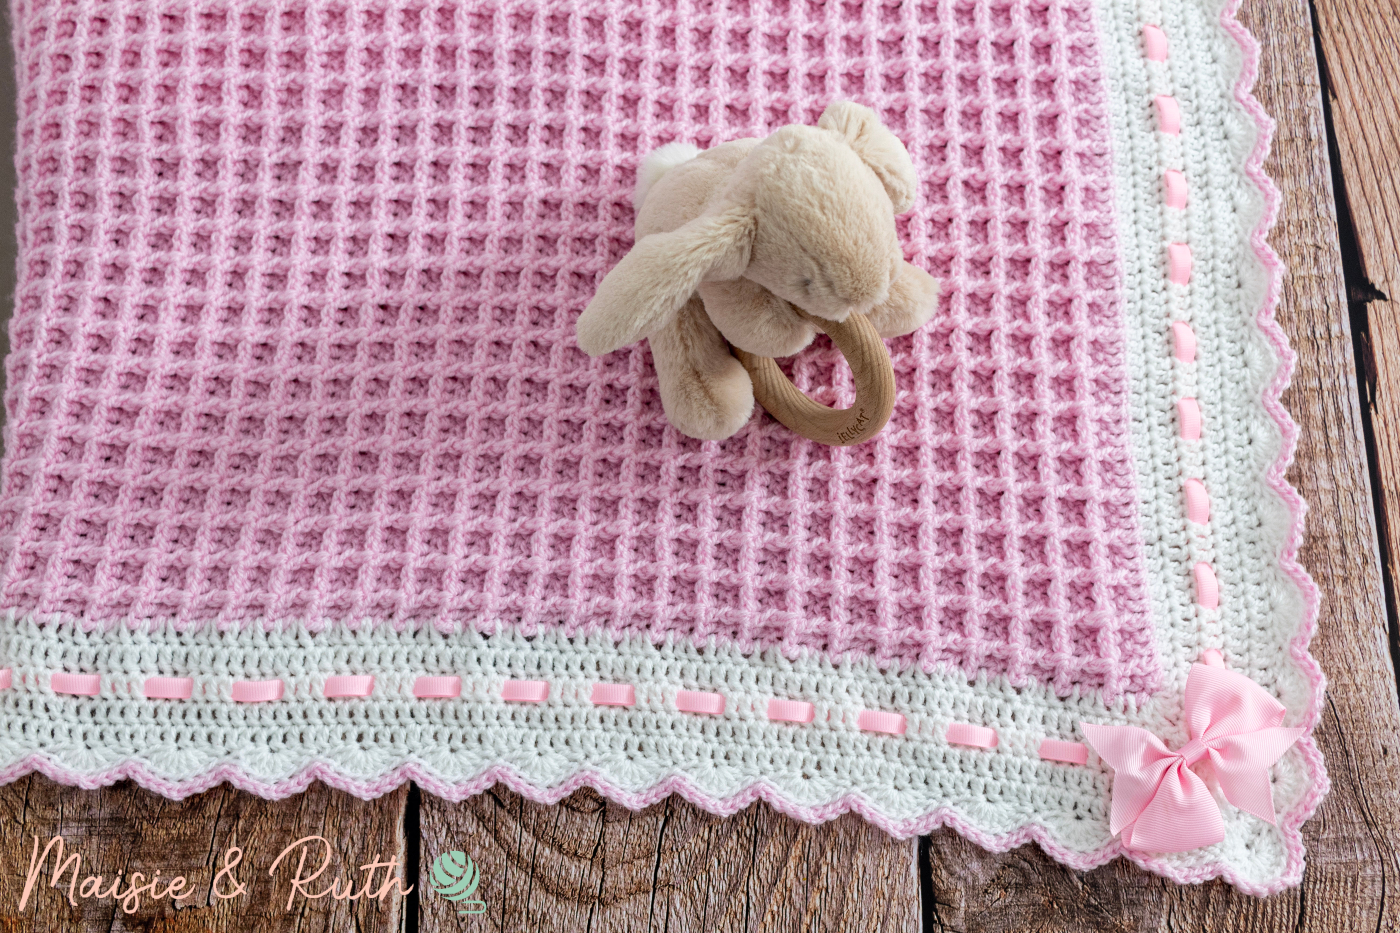
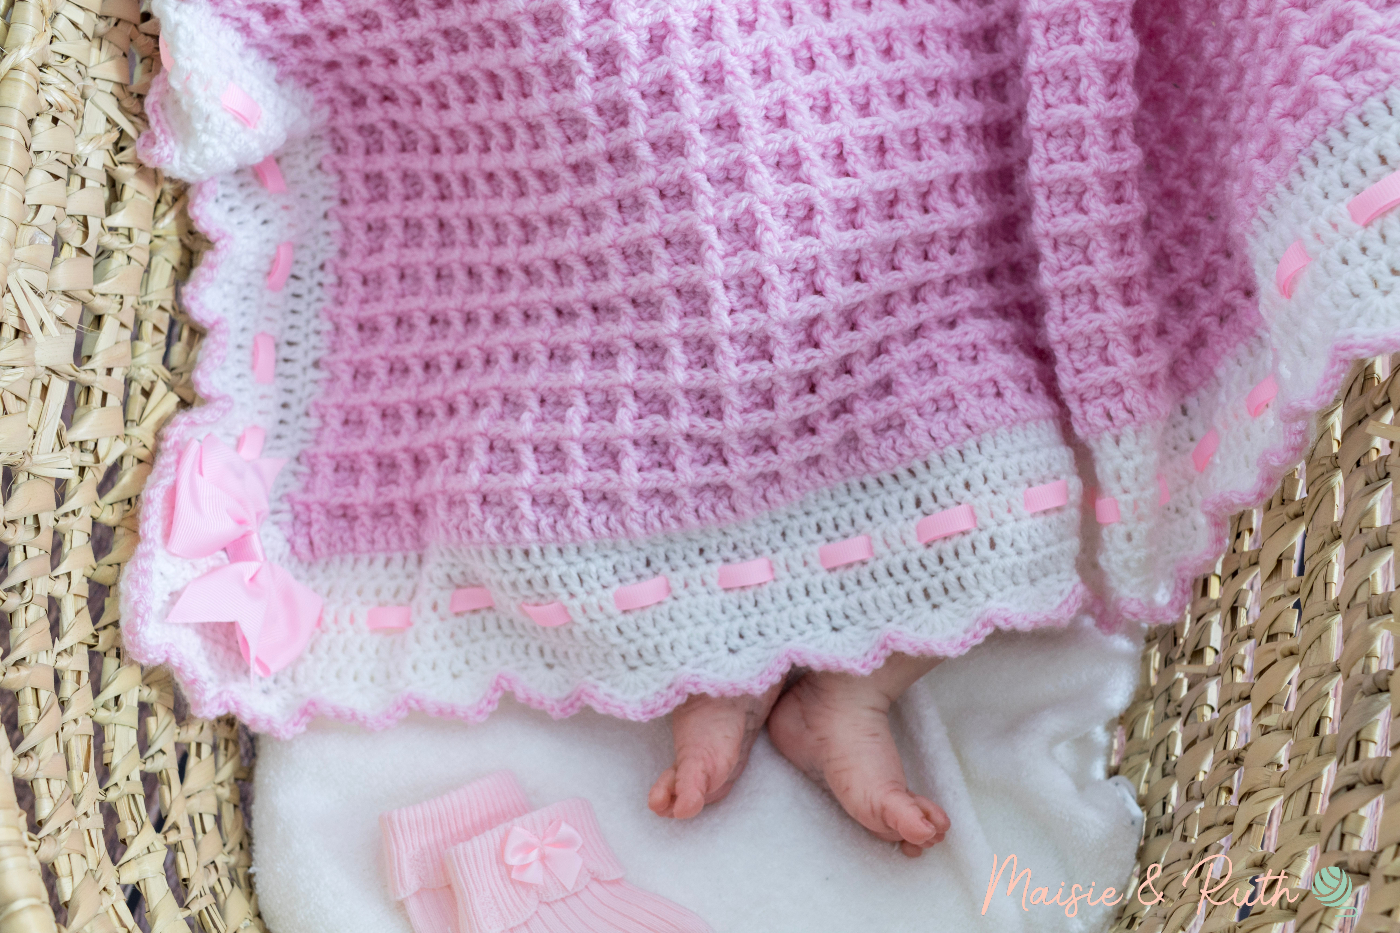
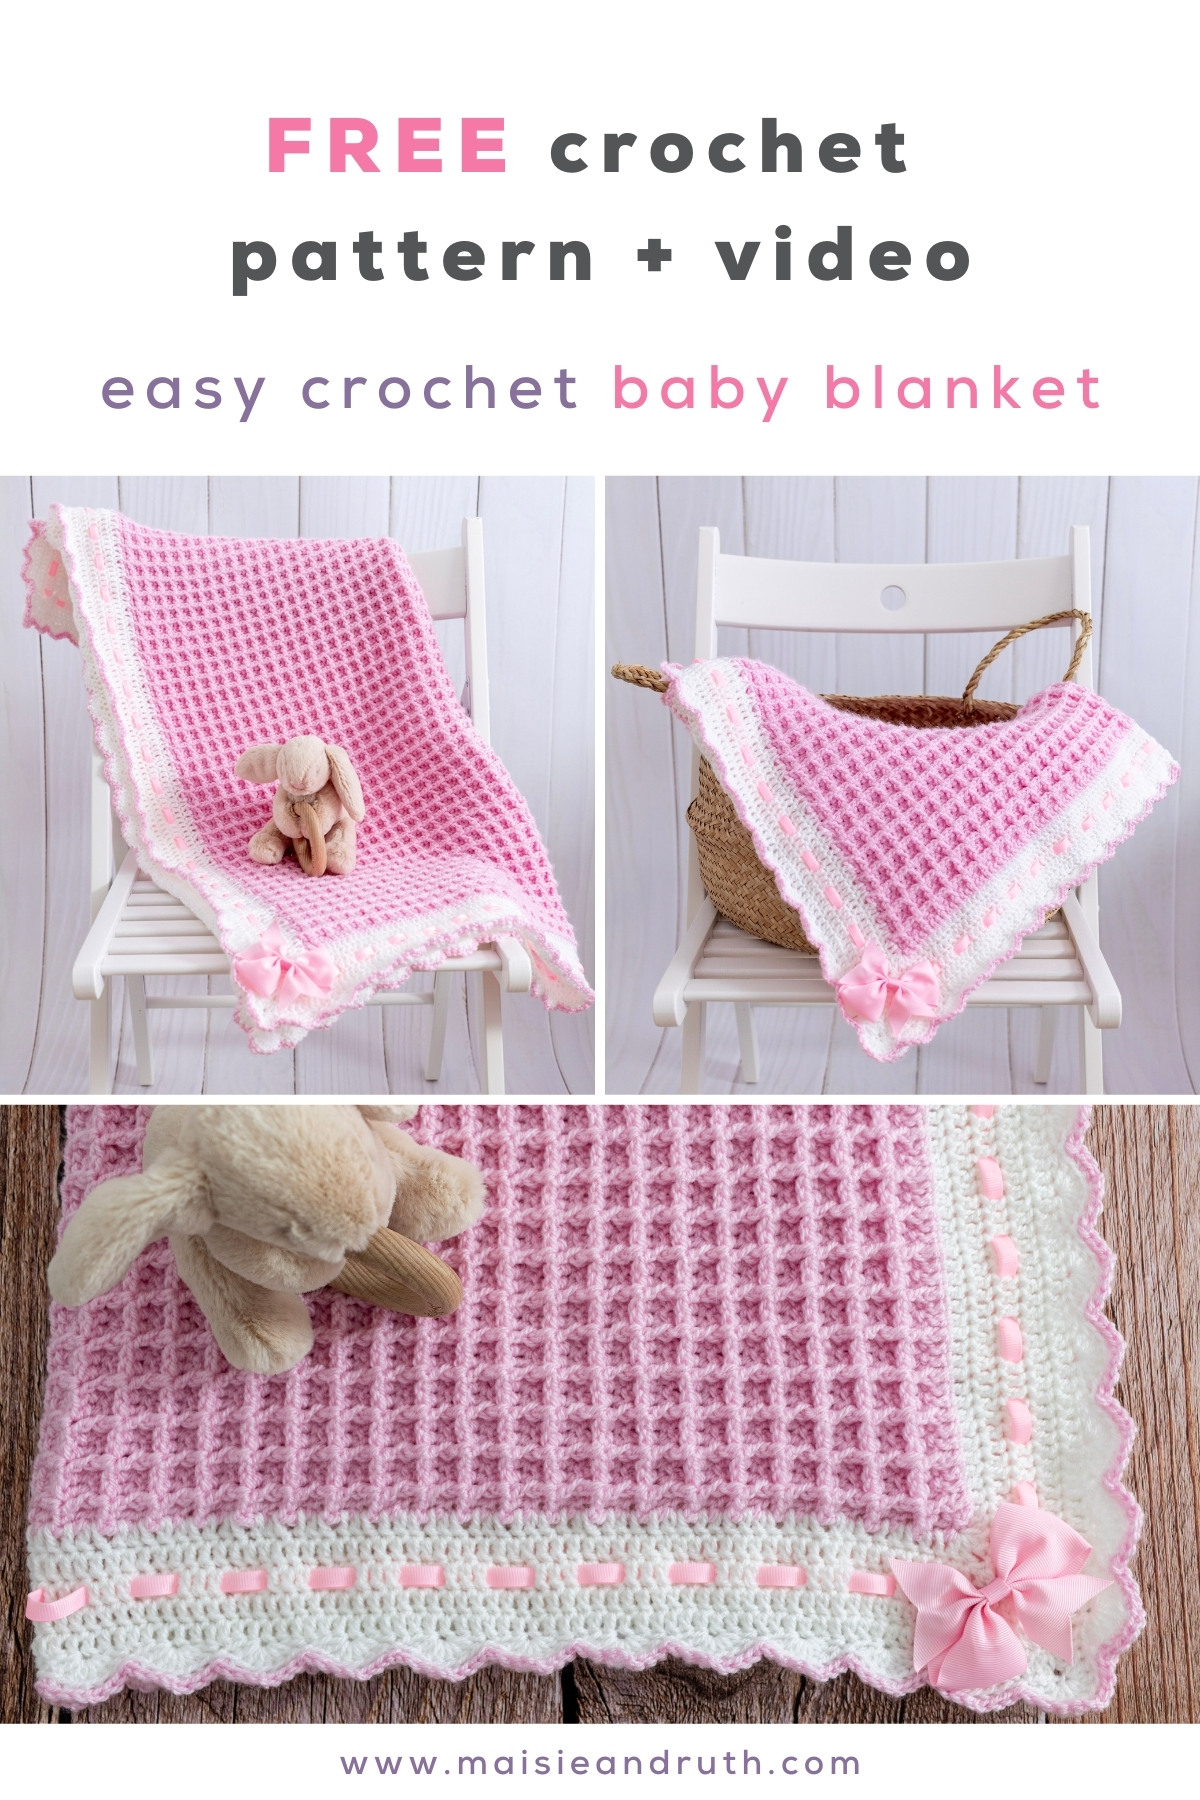
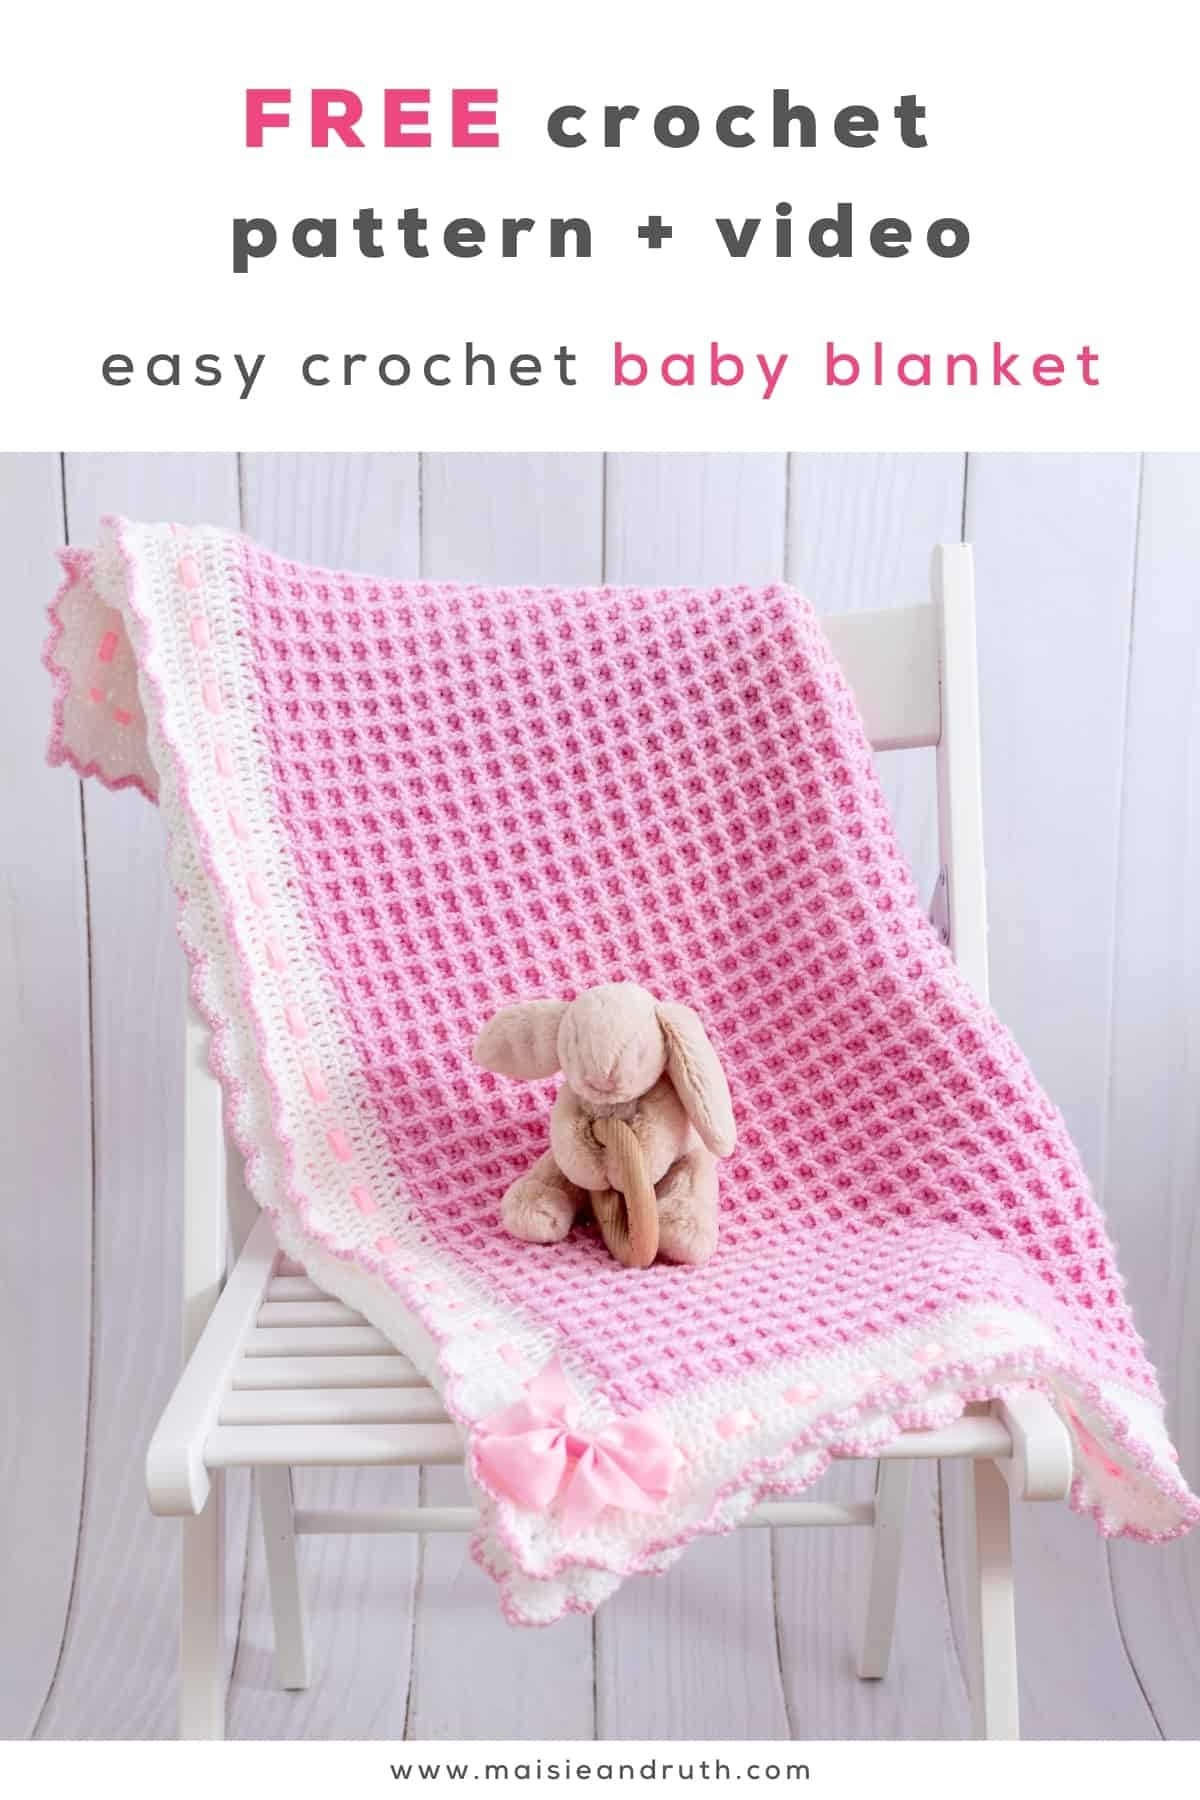
The Annabel Baby Blanket is made up from the gorgeous waffle stitch. Not only is it very attractive, with amazing texture, but it’s also easy to work up.
And with a simple 2-row repeat, you’ll be able to make it in no time!
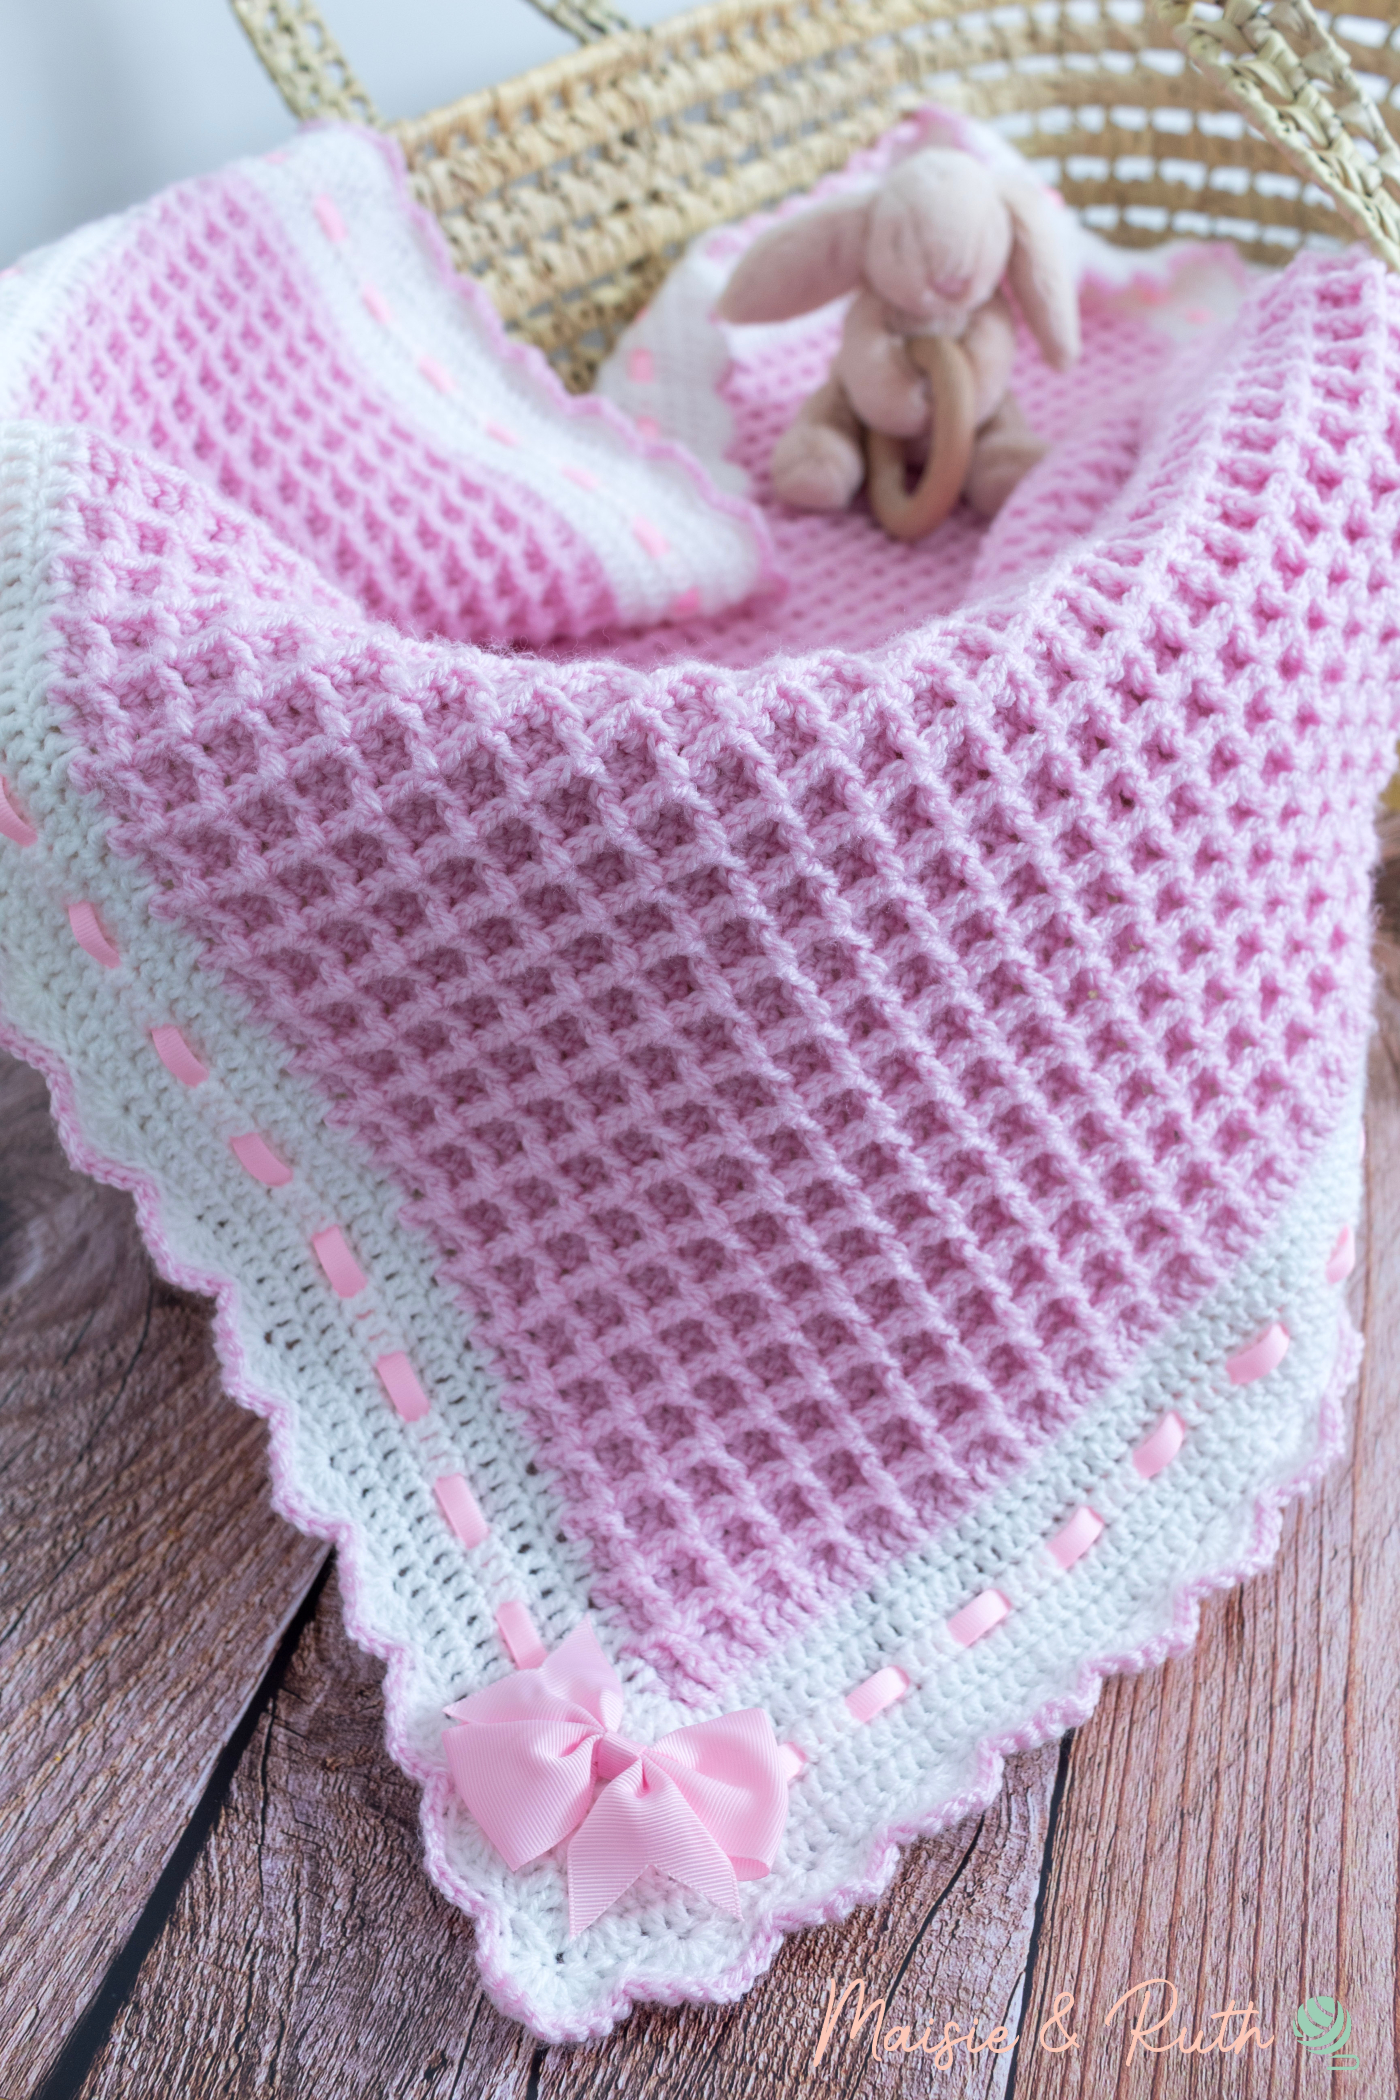
The blanket is finished off with a simple border consisting of 5 rounds of double crochet stitches, one round of shell stiches, and a final round of single crochet stitches in a yarn of contrasting colour.
I weaved a ribbon through my border but you can omit this step if you wish… the blanket looks fabulous just as it is!
YARN
I made this crochet waffle stitch baby blanket from Paintbox Yarns Simply DK – a lightweight, category 3, DK yarn.
This yarn is such a great choice for baby blankets as it’s so soft and crochets up beautifully and evenly. It’s also machine-washable.
I chose to make the blanket using the very pretty pink shade of Candyfloss Pink. I’ve also made this blanket in a baby blue colour and it looks very pretty also.
There are currently 52 shades to choose from, so have fun browsing through all the bold and pastel shades on offer.
As far as hook sizes go, I decided to use a F (3.75mm) crochet hook rather than the recommended G (4mm) hook.
This pattern incorporates front post double crochet stitches, which can result in larger gaps appearing, so using a slightly smaller hook gives the blanket a daintier, more elegant look.
PDF PRINTABLE PATTERNS!
If you would prefer an ad-free, printable version of this pattern, you can purchase it from my Etsy store
Please sign up to the Maisie and Ruth newsletter to be informed of any upcoming sales and special offers.
Thank you for supporting my shop!
Let’s get started and learn how to make this super-squishy crochet waffle stitch baby blanket!
PATTERN FOR THE ANNABEL CROCHET WAFFLE STITCH BABY BLANKET
Before you begin, please carefully read all the information below… I’ve included useful points that will aid you in making this blanket.
If you are an experienced crocheter and do not require the aid of photos, scroll down to the bottom to get the full pattern set out in one go!
LEVEL
Easy (see details of project levels at the Craft Yarn Council).
MATERIALS
- Yarn: # 3, light worsted / DK / 8 ply
Colour A (main body of blanket): 6 balls of Paintbox Yarns Simply DK in the colour Candyfloss Pink (149), (3.5oz / 302 yds (276m / 100g).
Colour B (border of blanket): 1 ball of Paintbox Yarns Simply DK in the colour Paper White (100), (3.5oz / 302 yds (276m / 100g).
- Crochet Hook: F / 3.75mm for the blanket; G / 4mm for the border
- Scissors
- Yarn needle
- Ribbon (optional): 3.8yds (3.5m) approx. of ribbon size 5/8″ (14mm)
GAUGE / TENSION
20 sts and 14 rows = 4″ (10cm) in pattern
FINISHED SIZE
Square blanket: 34″ x 34″ (86.25 x 86.25 cm)
STITCHES & ABBREVIATIONS (US CROCHET TERMS)
beg – beginning
BLO – back loop only: Insert your hook and work the stitch into the back loop only.
ch(s) – chain(s)
dc – double crochet: Yarn over (yo), insert hook into stitch, yo, pull up a loop (3 loops on hook). Yo, pull through 2 loops (2 loops on hook). Yo, pull through remaining 2 loops. 1 double crochet completed.
RS – right side: The side of your work that you want to have on display – the ‘pretty’ side.
sc – single crochet: Insert hook into stitch, yarn over (yo), pull up a loop (2 loops on hook). Yo, pull through both loops on hook. 1 single crochet completed.
sk – skip: Do not crochet into this stitch / space.
sl st – slip stitch: Insert hook into stitch, yarn over (yo), pull up a loop, you will have 2 loops on your hook. Pull the first loop through the second loop. 1 slip stitch completed.
* to * – Repeat instructions between asterisks as many times as directed.
( ) – Sets of stitches to be worked as many times as directed.
[ ] – The total number of stitches at the end of a row.
SPECIAL STITCHES
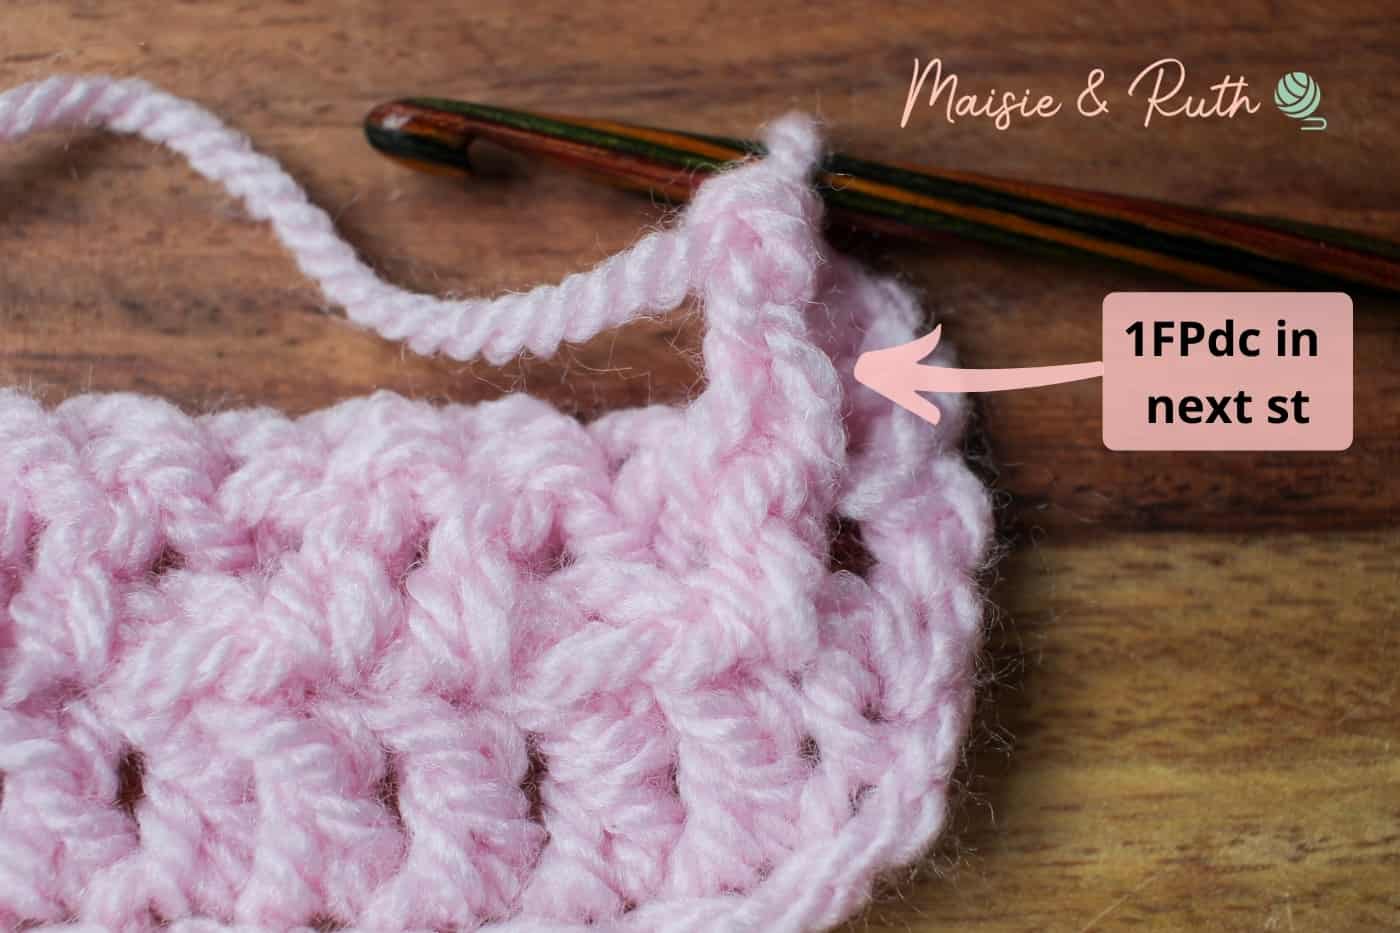
FPdc– front post double crochet: Yarn over (yo), insert hook from front to back to front around the post of the next stitch, yo, pull up a loop, 3 loops remaining on hook. Yo, pull up a loop and pull through 2 loops on hook, 2 loops remaining on hook. Yo, pull up a loop and pull through remaining 2 loops on hook. 1 FPdc completed.
shell – 6dc in next st
PATTERN NOTES
- US crochet terms used throughout.
- This blanket can be made in any size. Make your foundation chain to the required length, ensuring that it is a multiple of 3.
- 2-row pattern repeat (repeat rows 2 & 3).
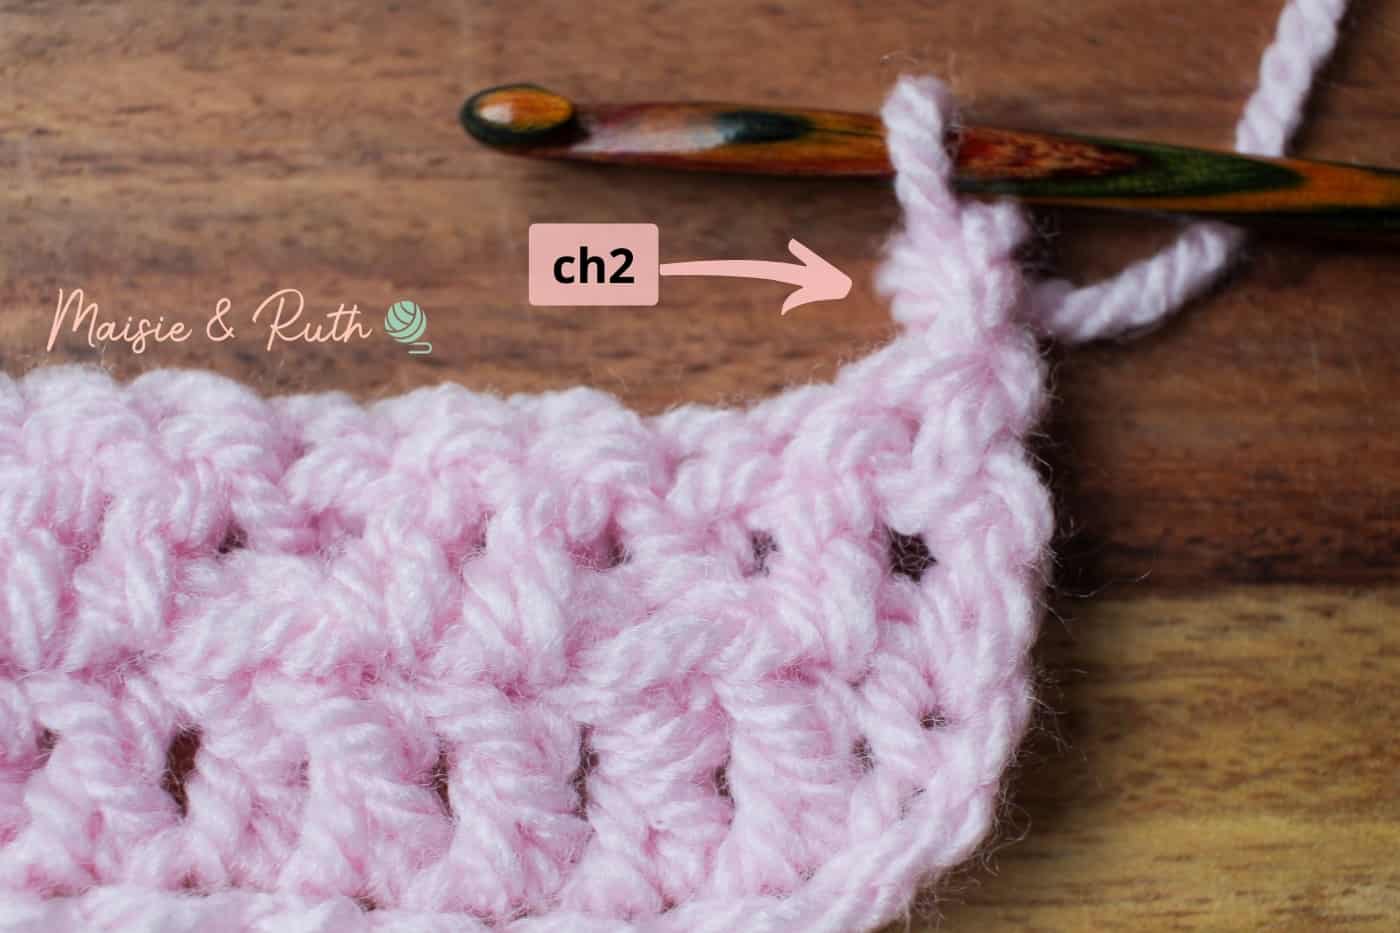
- The ch2 made at the beginning of each row counts as the first stitch of the row.
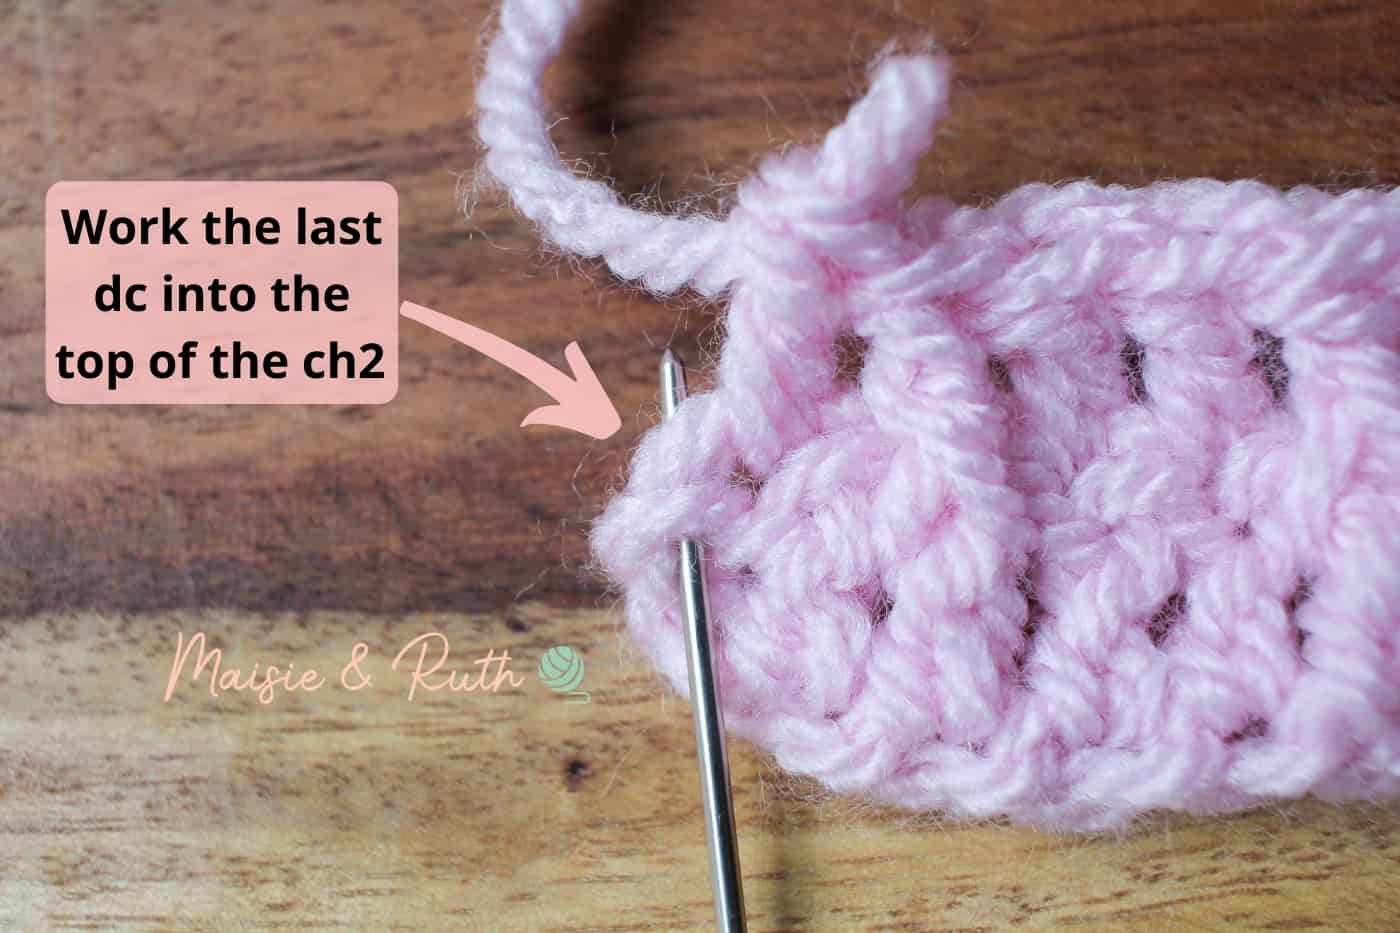
- At the end of rows, your last stitch should be worked into the top of the ch2 from the previous row.
- I have provided full written instructions at the beginning of each row. I then break down these instructions and provide photos of the required steps / stitches for greater clarification.
- In most of the instructional photos, I show you what your work should look like after you have finished crocheting that particular part of the pattern.
- You will follow the crochet stitches in the photo instructions from right to left.
PATTERN INSTRUCTIONS
Using Colour A and F (3.75mm) hook:
Ch 135
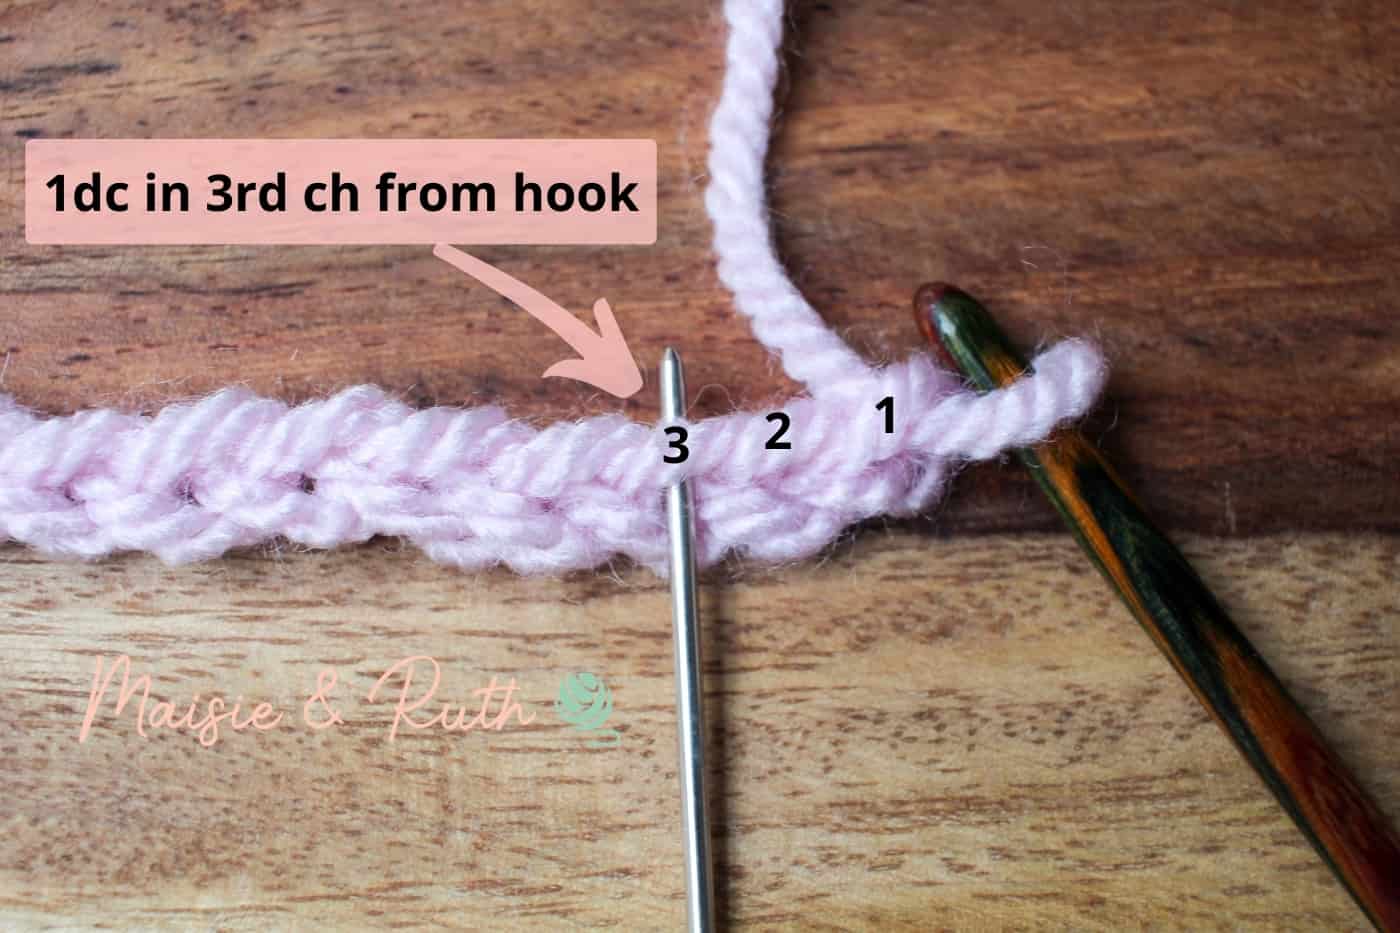
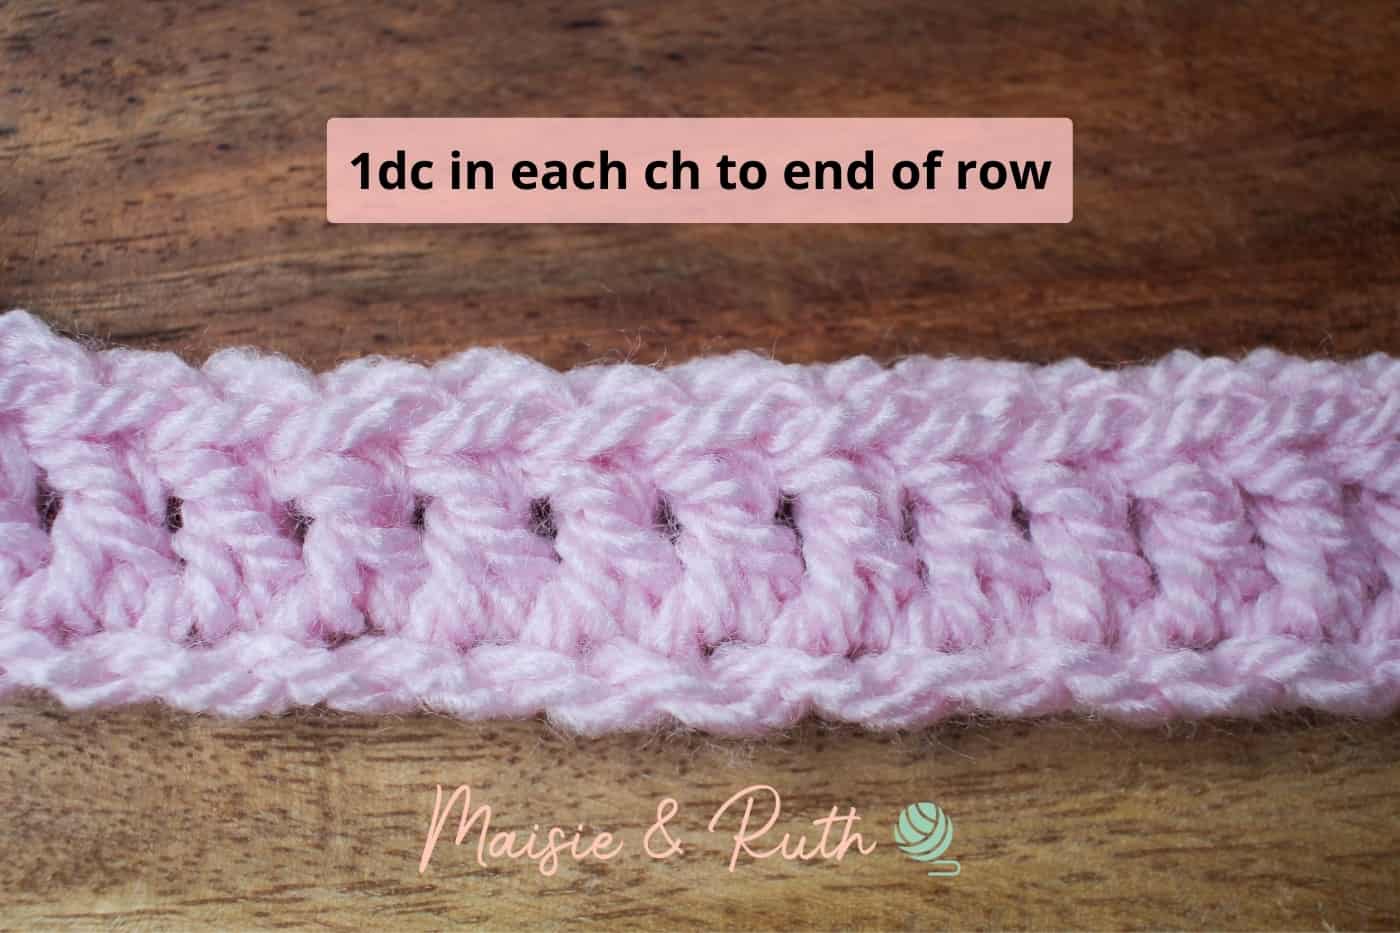
Row 1. 1dc in 3rd ch from hook (skipped 2 chs count as your 1st st), 1dc in each ch to end of row, TURN [134 sts].
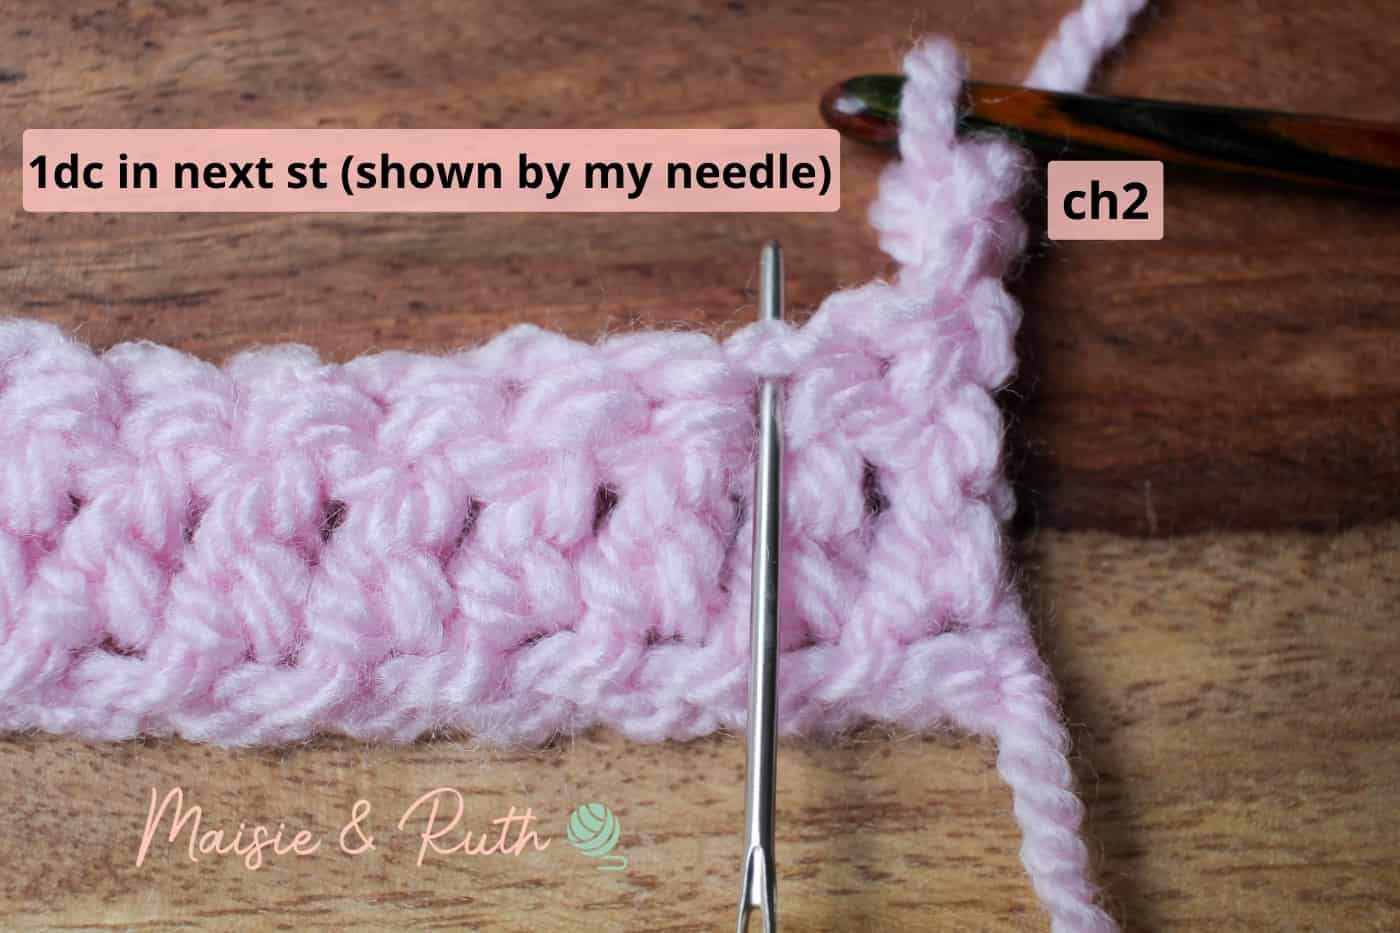
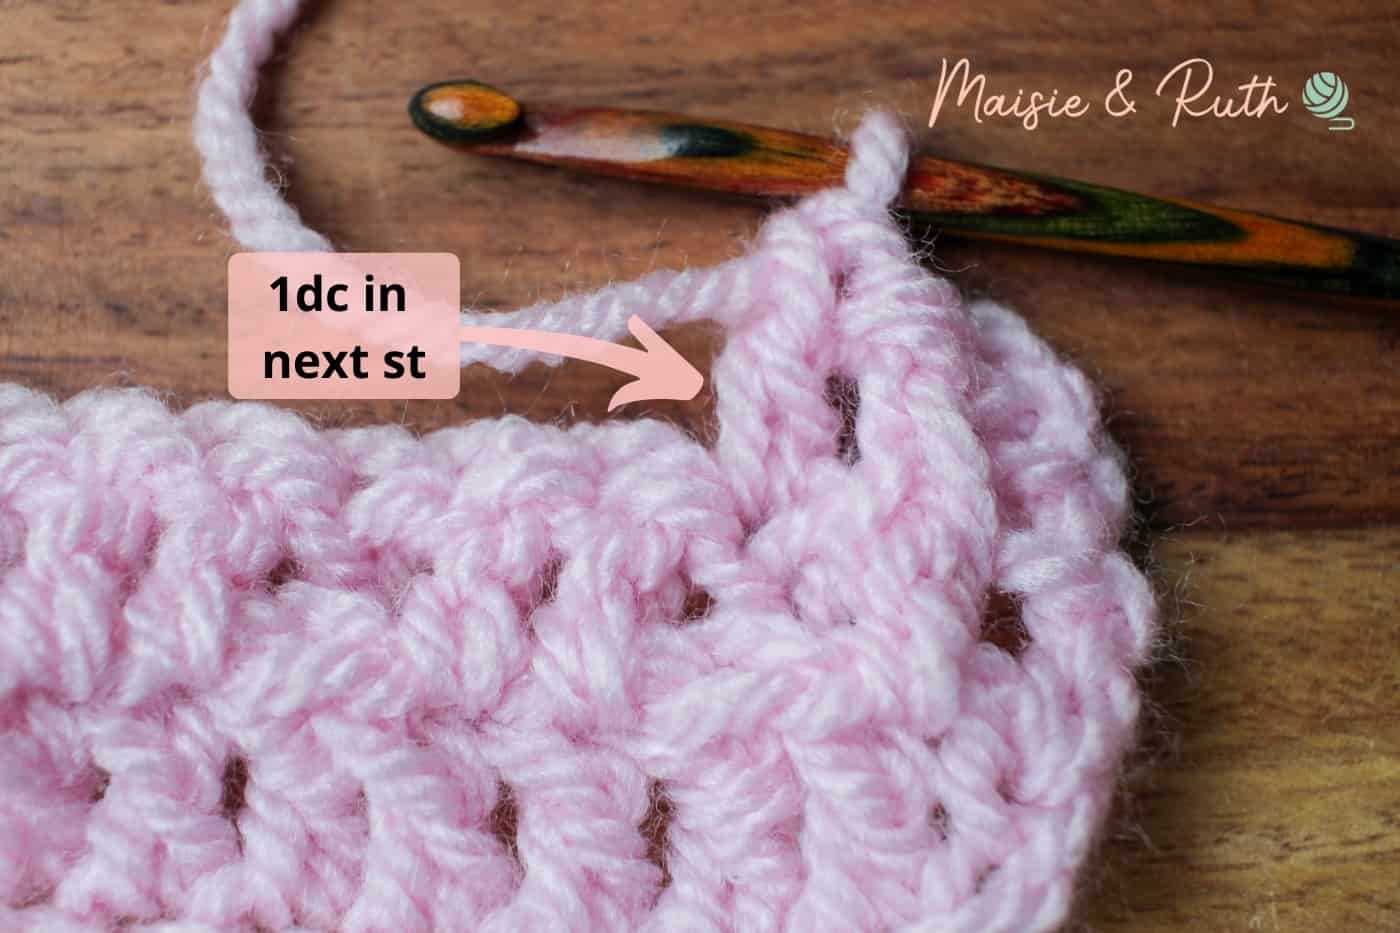
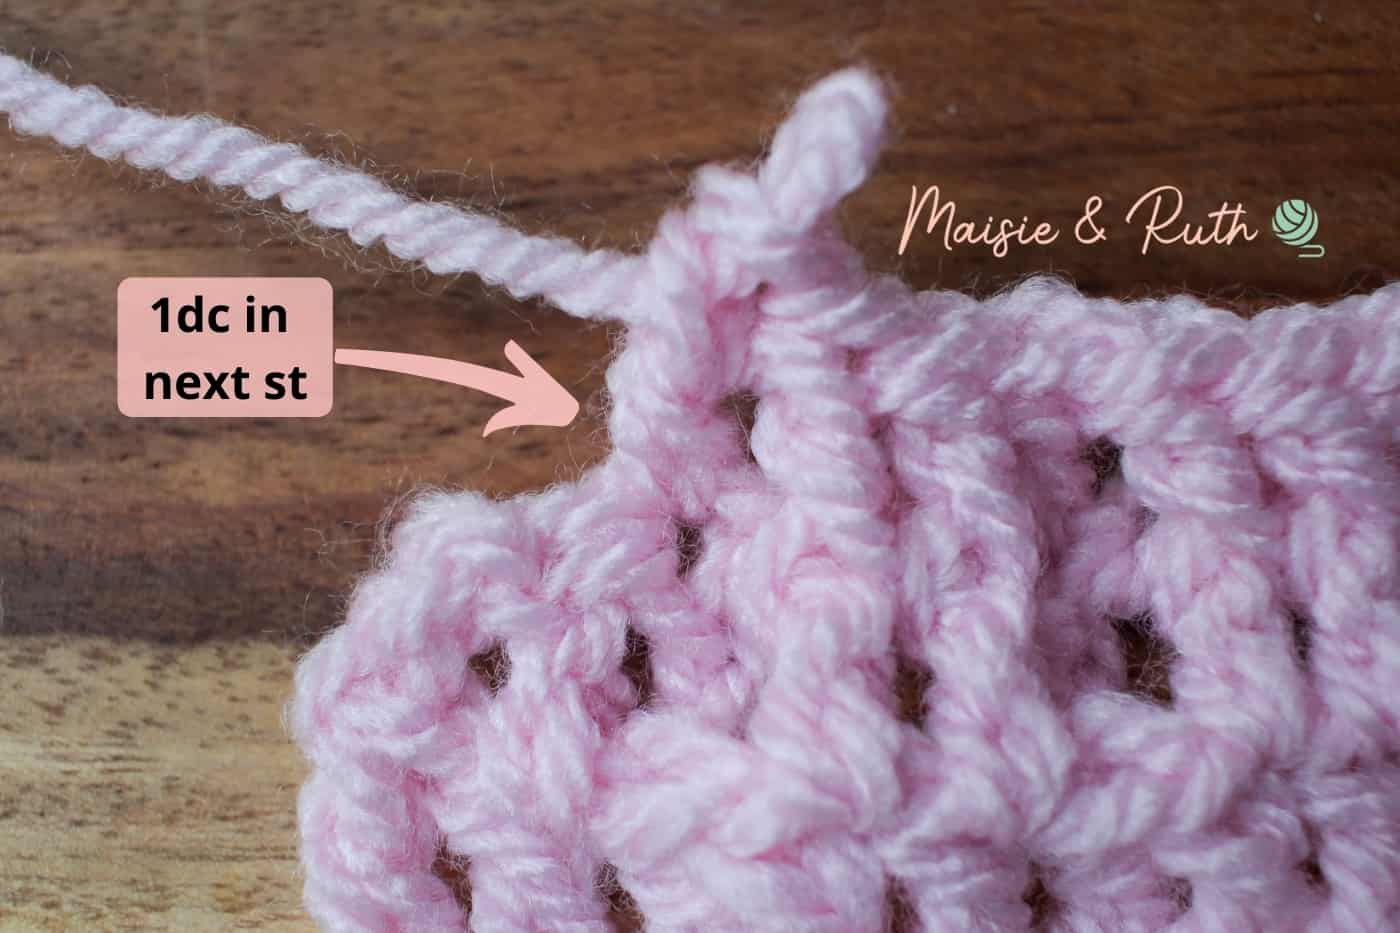
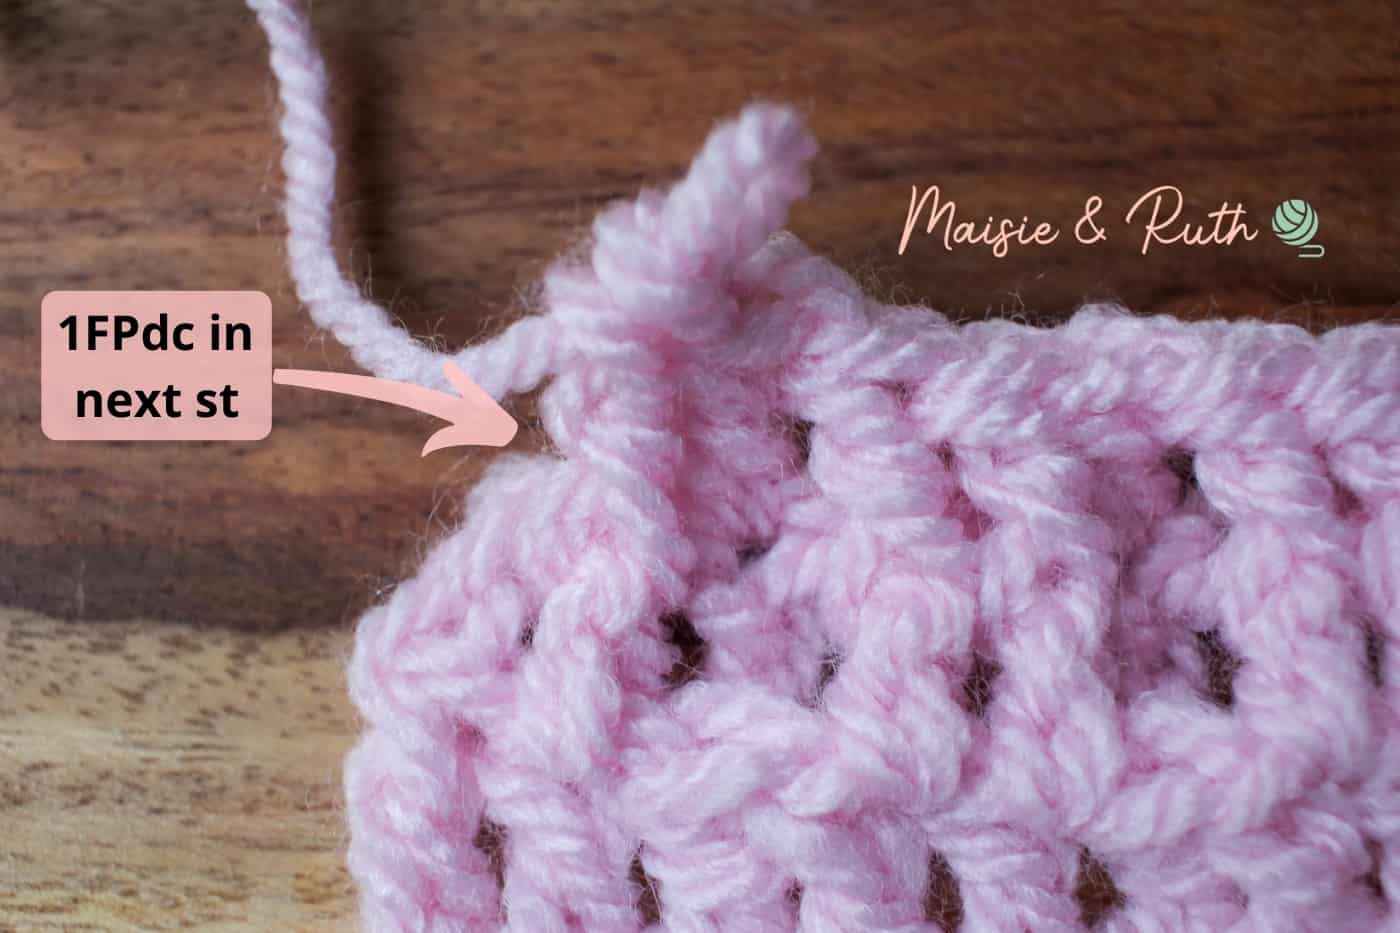
Row 2. Ch2 (counts as your first st here and throughout), 1dc in next st, *1FPdc in next st, 1dc in next 2sts*, repeat from * to * across to end of row, TURN [134 sts].
The following stitches that you will now work will form the row repeat (the stitches between * to *):
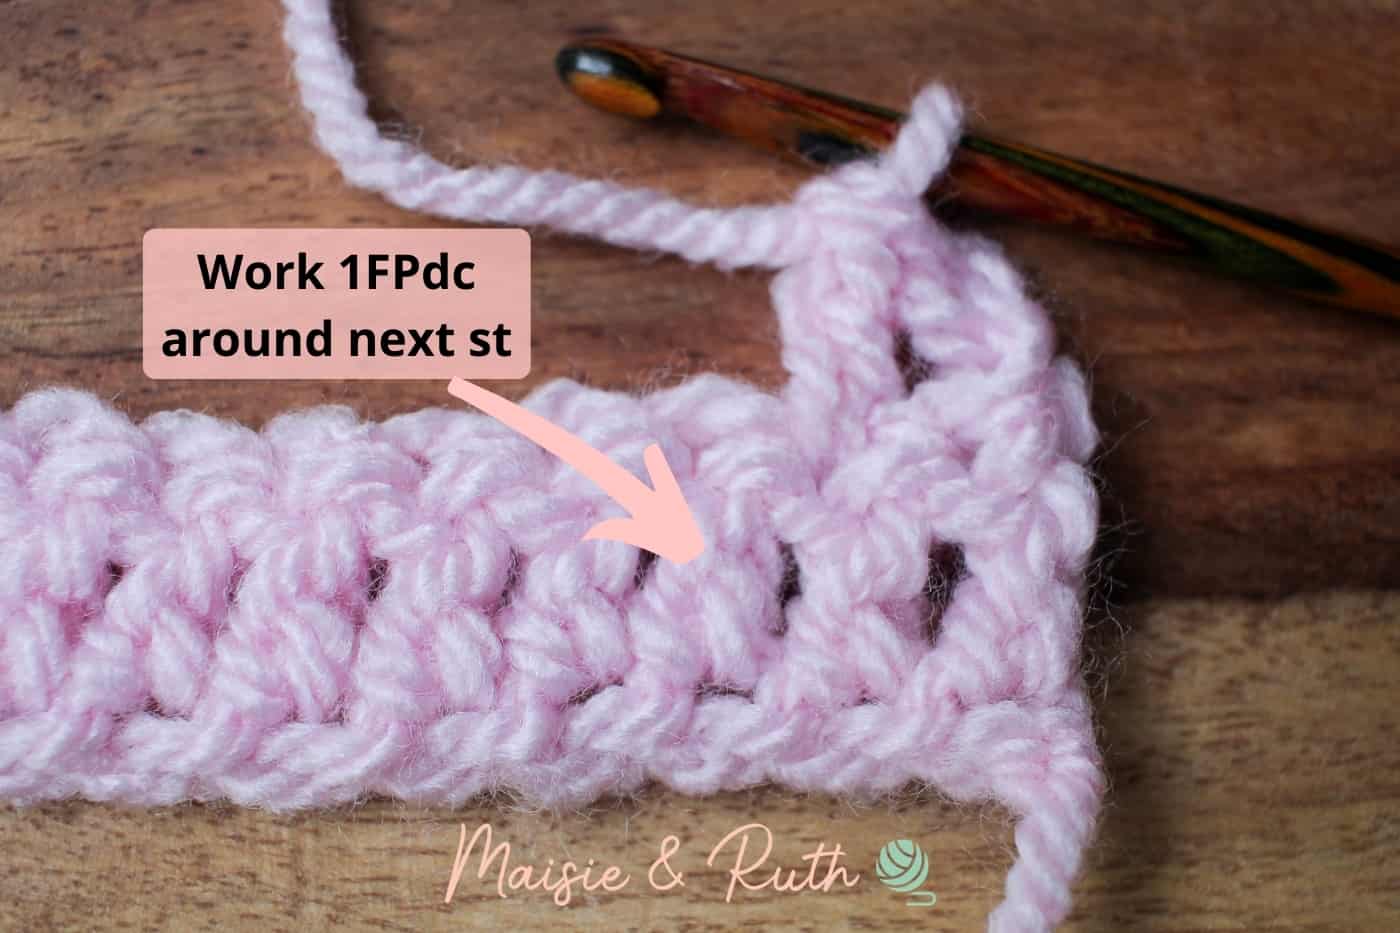

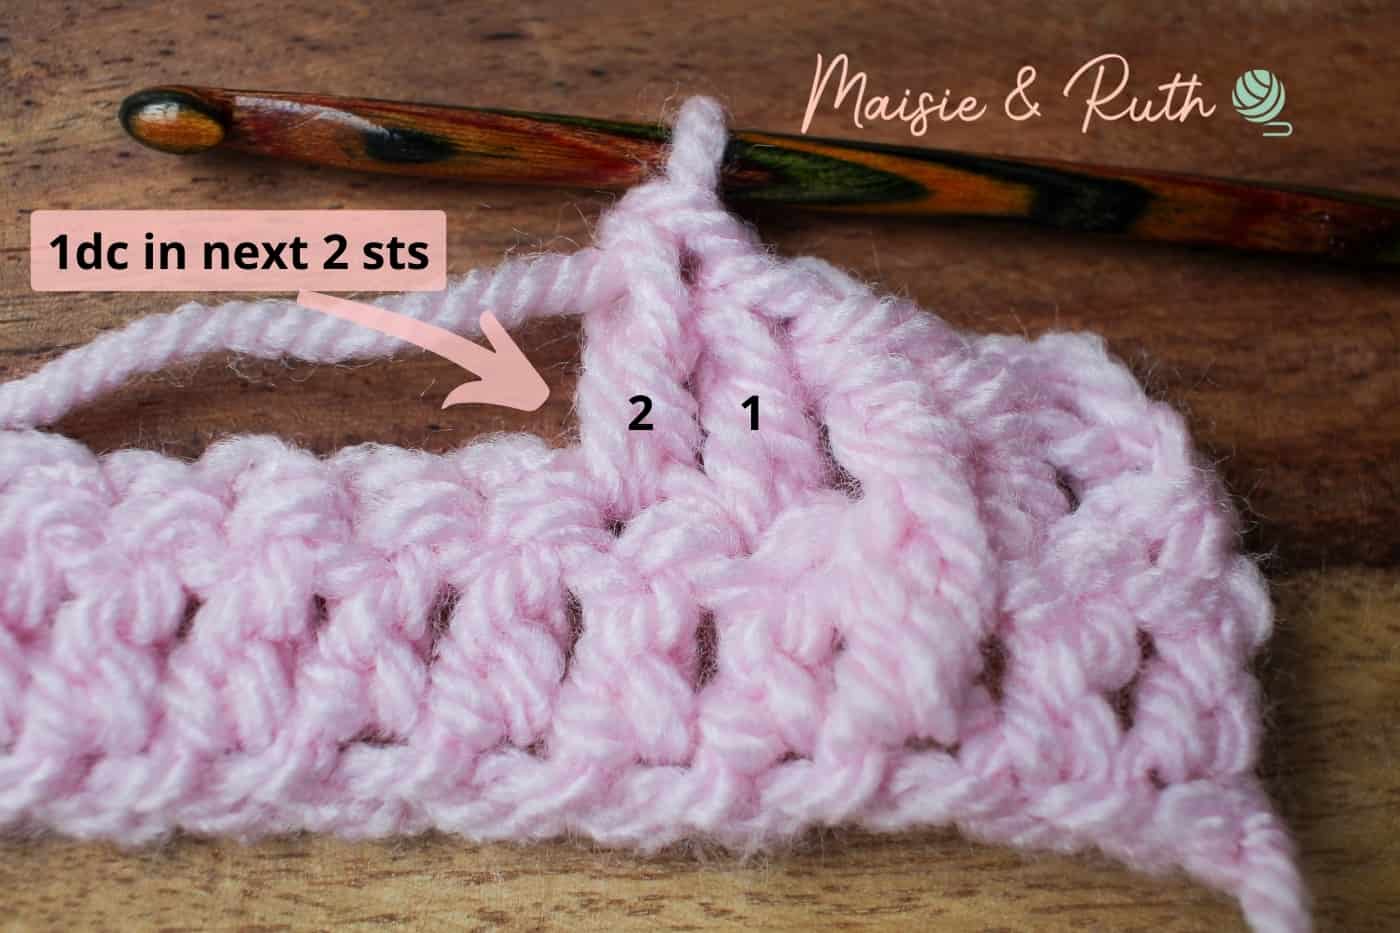
Work the row repeat across to the end of the row.
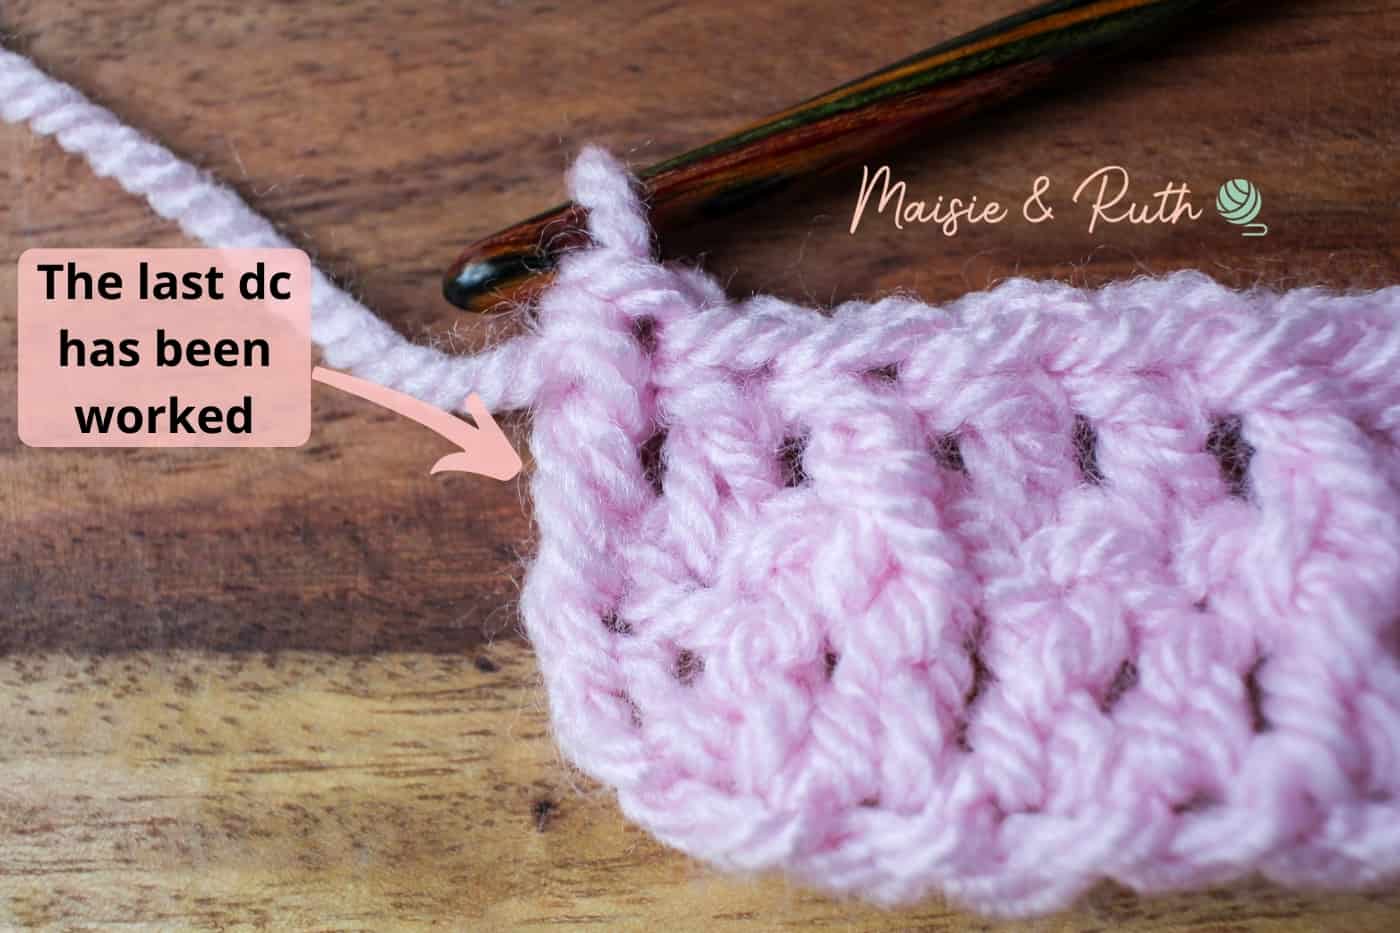
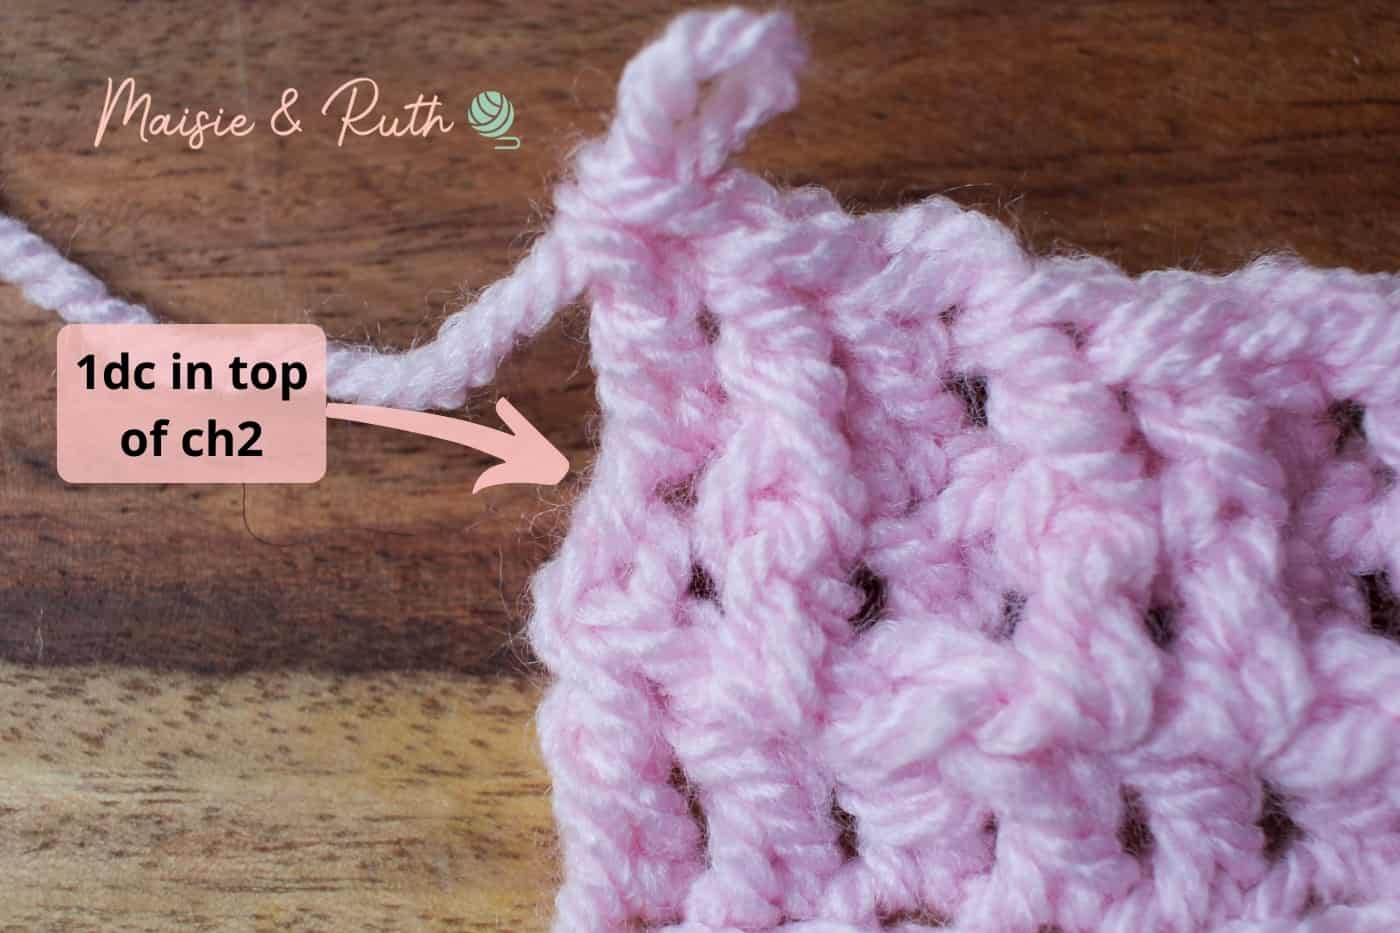
When you get to the end of the row, always make sure that you work your last dc into the top of the ch2 from the previous row:
Row 3. Ch2, 1FPdc in next st, *1dc in next st, 1FPdc in next 2 sts*, repeat from * to * until 3 sts remain, 1dc in next st, 1FPdc in next st, 1dc in top of beg ch2, TURN [134 sts].
The following stitches that you will now work will form the row repeat (the stitches between * to *):

Work the row repeat across the row to the last 3 sts.
Work the last 3 sts as follows:
Repeat rows 2 & 3 until your work measures 28″ (71cm).
Make sure that you finish your work at the end of a row 2 repeat.
BORDER
Watch the video tutorial below if you need further guidance when working the border.
You can skip straight to the border section by clicking on the timestamp located in the description box of the video.

Change to Colour B and G (4mm) hook:
With the RS of the blanket facing you, attach your yarn to the top of the ch2 in the top right hand corner of the blanket.
Round 1. Ch2 (counts as your first st here and throughout), 1dc in same st, then work dc sts evenly spaced all the way around outer edge of blanket, working (2dc, ch2, 2dc) in each corner; at the end of the round work 2dc in the corner, ch1, work 1sc in top of beg ch2 to join.
Rounds 2 – 5. Ch2, 1dc in same st, 1dc in each st around blanket, working (2dc, ch2, 2dc) in each ch2 corner space; at the end of the round work 2dc in the corner, ch1, work 1sc in top of beg ch2 to join.
Round 6. Ch2, 3dc in same st, sk 2 sts, sl st in next st, (*sk 2 sts, 6dc in next st, sk 2 sts, sl st in next st*, repeat from * to * until corner, work 8dc in ch2 corner space) 3 times, *sk 2 sts, 6dc in next st, sk 2 sts, sl st in next st*, repeat from * to * until last corner, 4dc in ch2 corner sp, sl st to top of beg ch2 to join.
NOTE: With round 6, depending on how many single crochet stitches you made around the blanket in round 1, you may need to improvise and skip a different number of stitches just before the corners to make the numbers work for you (in the video, I show you how to do this).
Cut yarn, fasten off and weave in ends.
Change back to Colour A:
Starting in one of the shell stitches, attach your yarn to the BLO of the 3rd dc.
NOTE: For the next round (round 7) you will be working in the BLO of each st all the way around the blanket.
Round 7. Ch3 (counts as a sc and ch2), 1sc in next 2 sts, sl st in next st, (*1sc in next 3 sts, ch2, 1sc in next 3 sts, sl st in next st*, work from * to * until corner, work 1sc in next 4sts, ch2, 1sc in next 4 sts, sl st in next st) all the way around blanket until 2 sts remain, 1 sc in next 2 sts, sl st to 1st ch of beg ch3 to join.
Cut yarn, fasten off, weave in ends.
OPTIONAL: Working in the 3rd round of the border, weave a ribbon in and out every 3 stitches. Then using a needle and thread, periodically secure the ribbon at the back with a few stitches to prevent baby from pulling it out.

PATTERN IN FULL
Using Colour A and F (3.75mm) hook:
Ch 135
Row 1. 1dc in 3rd ch from hook, 1dc in each ch to end of row, TURN [134 sts].
Row 2. Ch2 (counts as your first st), 1dc in next st, *1FPdc, 1dc in next 2sts*, repeat from * to * across to end of row, TURN [134 sts].
Row 3. Ch2, 1FPdc, *1dc in next st, 1FPdc in next 2 sts*, repeat from * to * until 3 sts remain, 1dc in next st, 1FPdc, 1dc in top of beg ch2, TURN [134 sts].
Repeat rows 2 & 3 until your work measures 28″ (71cm).
Make sure that you finish your work at the end of a row 2 repeat.
BORDER
Using Colour B and G (4mm) hook:
With the RS of the work facing you, attach your yarn to the top of the ch2 located in the top right hand corner of the blanket.
Round 1. Ch2 (counts as your first st here and throughout), 1dc in same st, then work dc sts evenly spaced all the way around outer edge of blanket, working (2dc, ch2, 2dc) in each corner; at the end of the round work 2dc in the corner, ch1, work 1sc in top of beg ch2 to join.
Rounds 2 – 5. Ch2, 1dc in same st, 1dc in each st around blanket, working (2dc, ch2, 2dc) in each ch2 corner space; at the end of the round work 2dc in the corner, ch1, work 1sc in top of beg ch2 to join.
Round 6. Ch2, 3dc in same st, sk 2 sts, sl st in next st, (*sk 2 sts, 6dc in next st, sk 2 sts, sl st in next st*, repeat from * to * until corner, work 8dc in ch2 corner space) 3 times, *sk 2 sts, 6dc in next st, sk 2 sts, sl st in next st*, repeat from * to * until last corner, 4dc in ch2 corner sp, sl st to top of beg ch2 to join.
Cut yarn, fasten off and weave in ends.
NOTE: With round 6, you may need to improvise and skip a different number of stitches just before the corners to make the numbers work for you (in the video, I show you how easy it is to do this).
Using Colour A:
Starting in one of the shell stitches, attach your yarn to the BLO of the 3rd dc.
NOTE: For the next round (round 7) you will be working in the BLO of each st all the way around the blanket.
Round 7. Ch3 (counts as a sc and ch2), 1sc in next 2 sts, sl st in next st, (*1sc in next 3 sts, ch2, 1sc in next 3 sts, sl st in next st*, work from * to * until corner, work 1sc in next 4sts, ch2, 1sc in next 4 sts, sl st in next st) all the way around blanket until 2 sts remain, 1 sc in next 2 sts, sl st to 1st ch of beg ch3 to join.
Cut yarn, fasten off, weave in ends.
OPTIONAL: In the 3rd row, weave a ribbon in and out every 3 stitches. Then using a needle and thread, periodically secure the ribbon at the back with a few stitches to prevent baby from pulling it out.
PIN IT FOR LATER!

MORE BABY BLANKET PATTERNS
I really hope that you enjoyed the tutorial for this crochet waffle stitch baby blanket.
Tag me in your photos on Instagram using @maisieandruth… I love to see photos of your work! 😊
Happy crocheting!


Very beautiful as all your other patterns!
Thank you very much!
You’re most welcome! That’s lovely of you to say, thank you very much! 🙂