


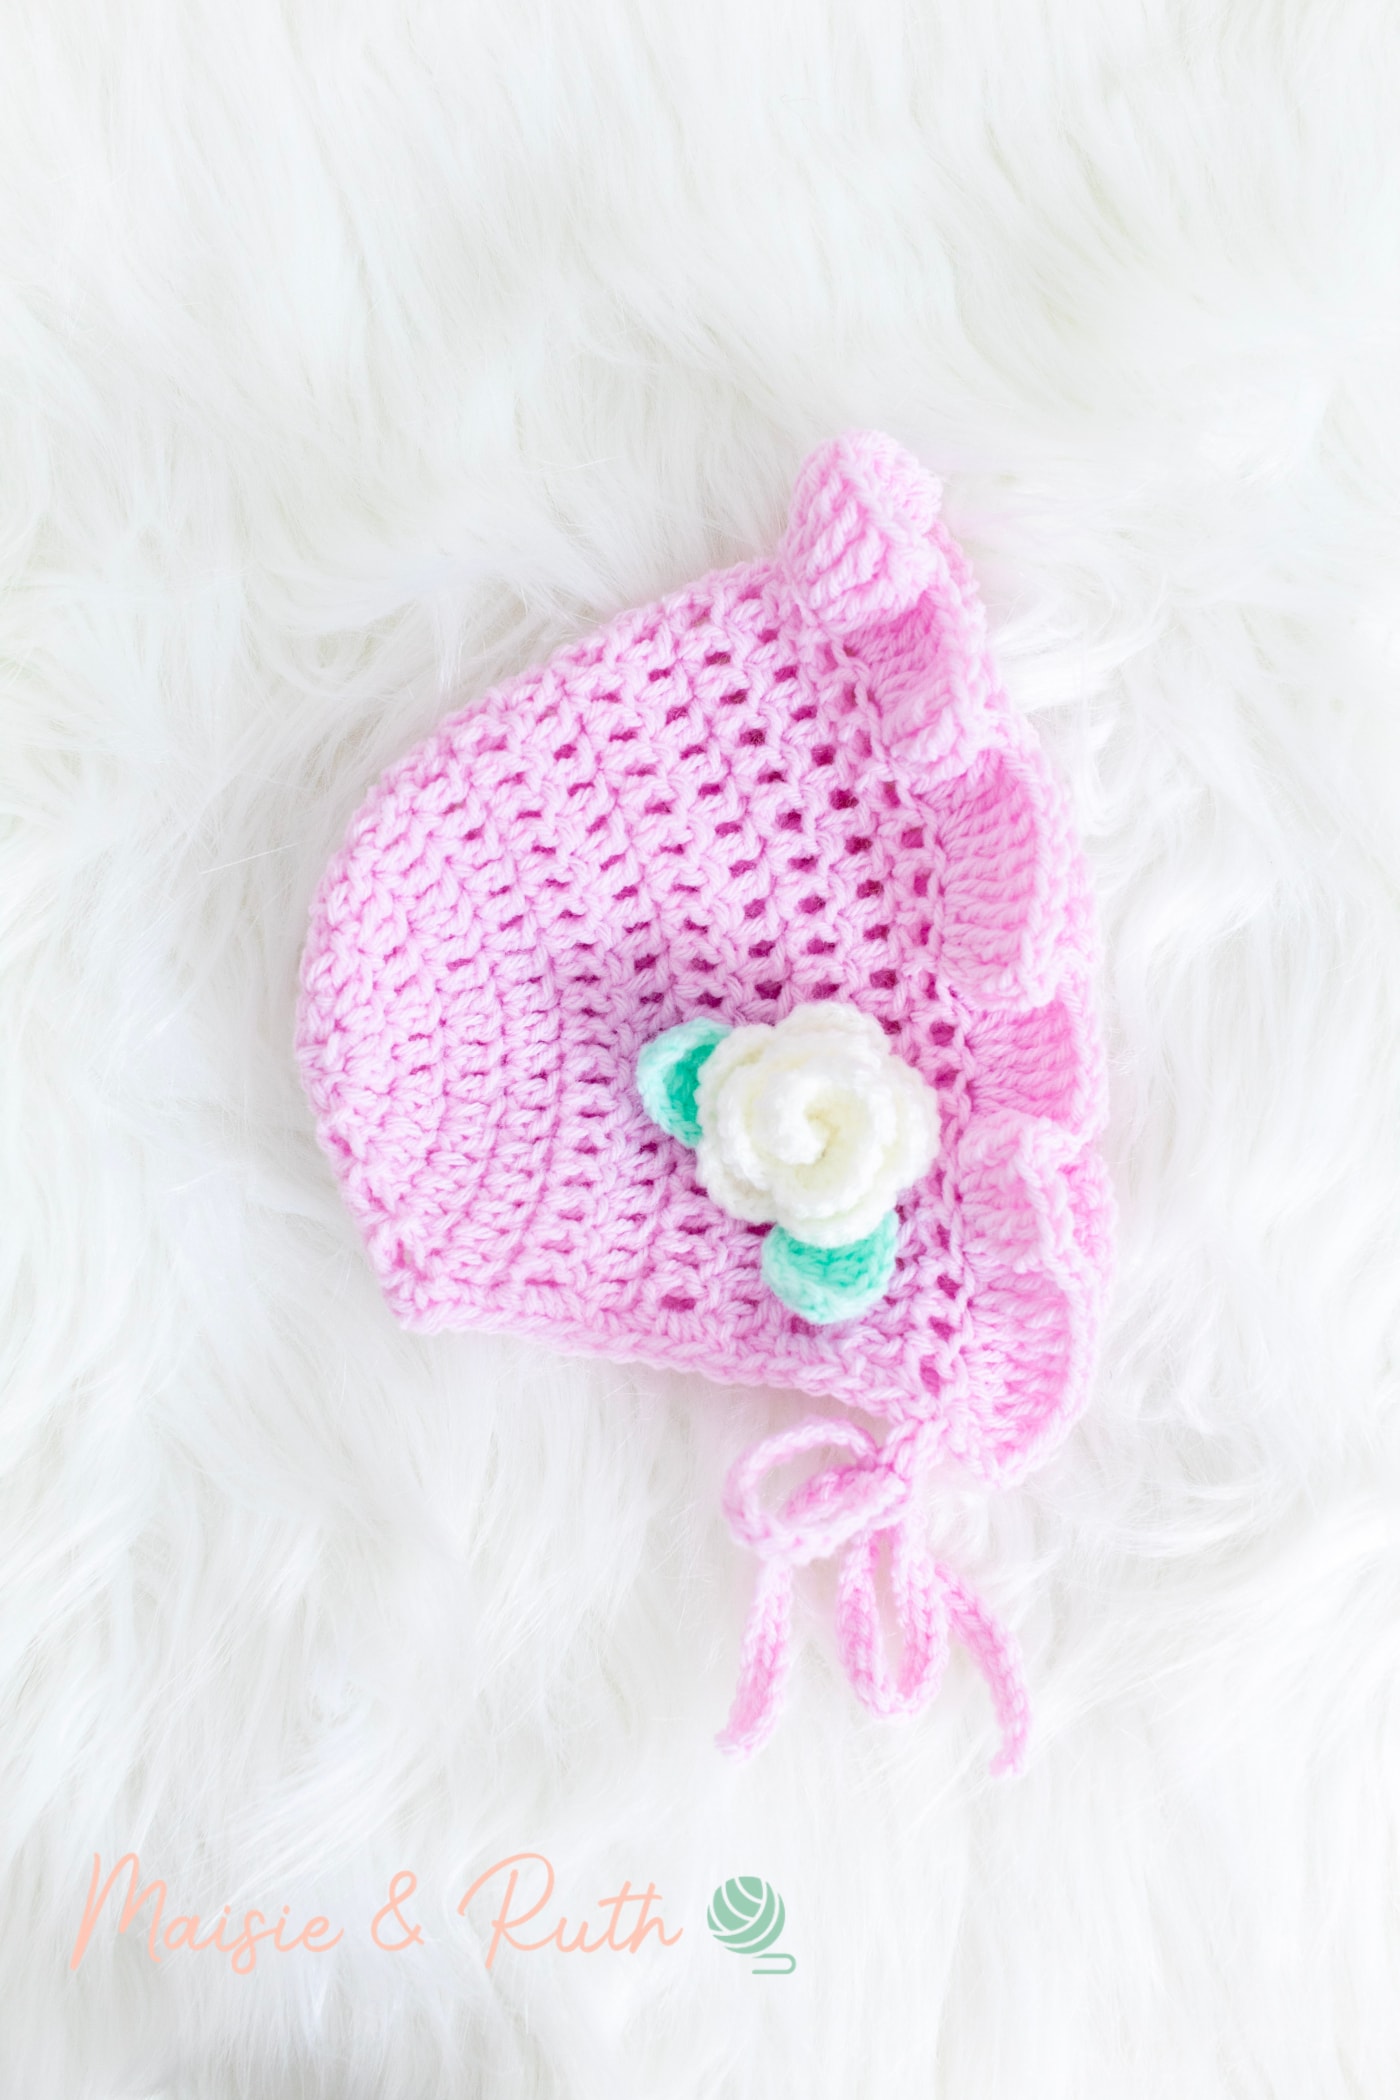
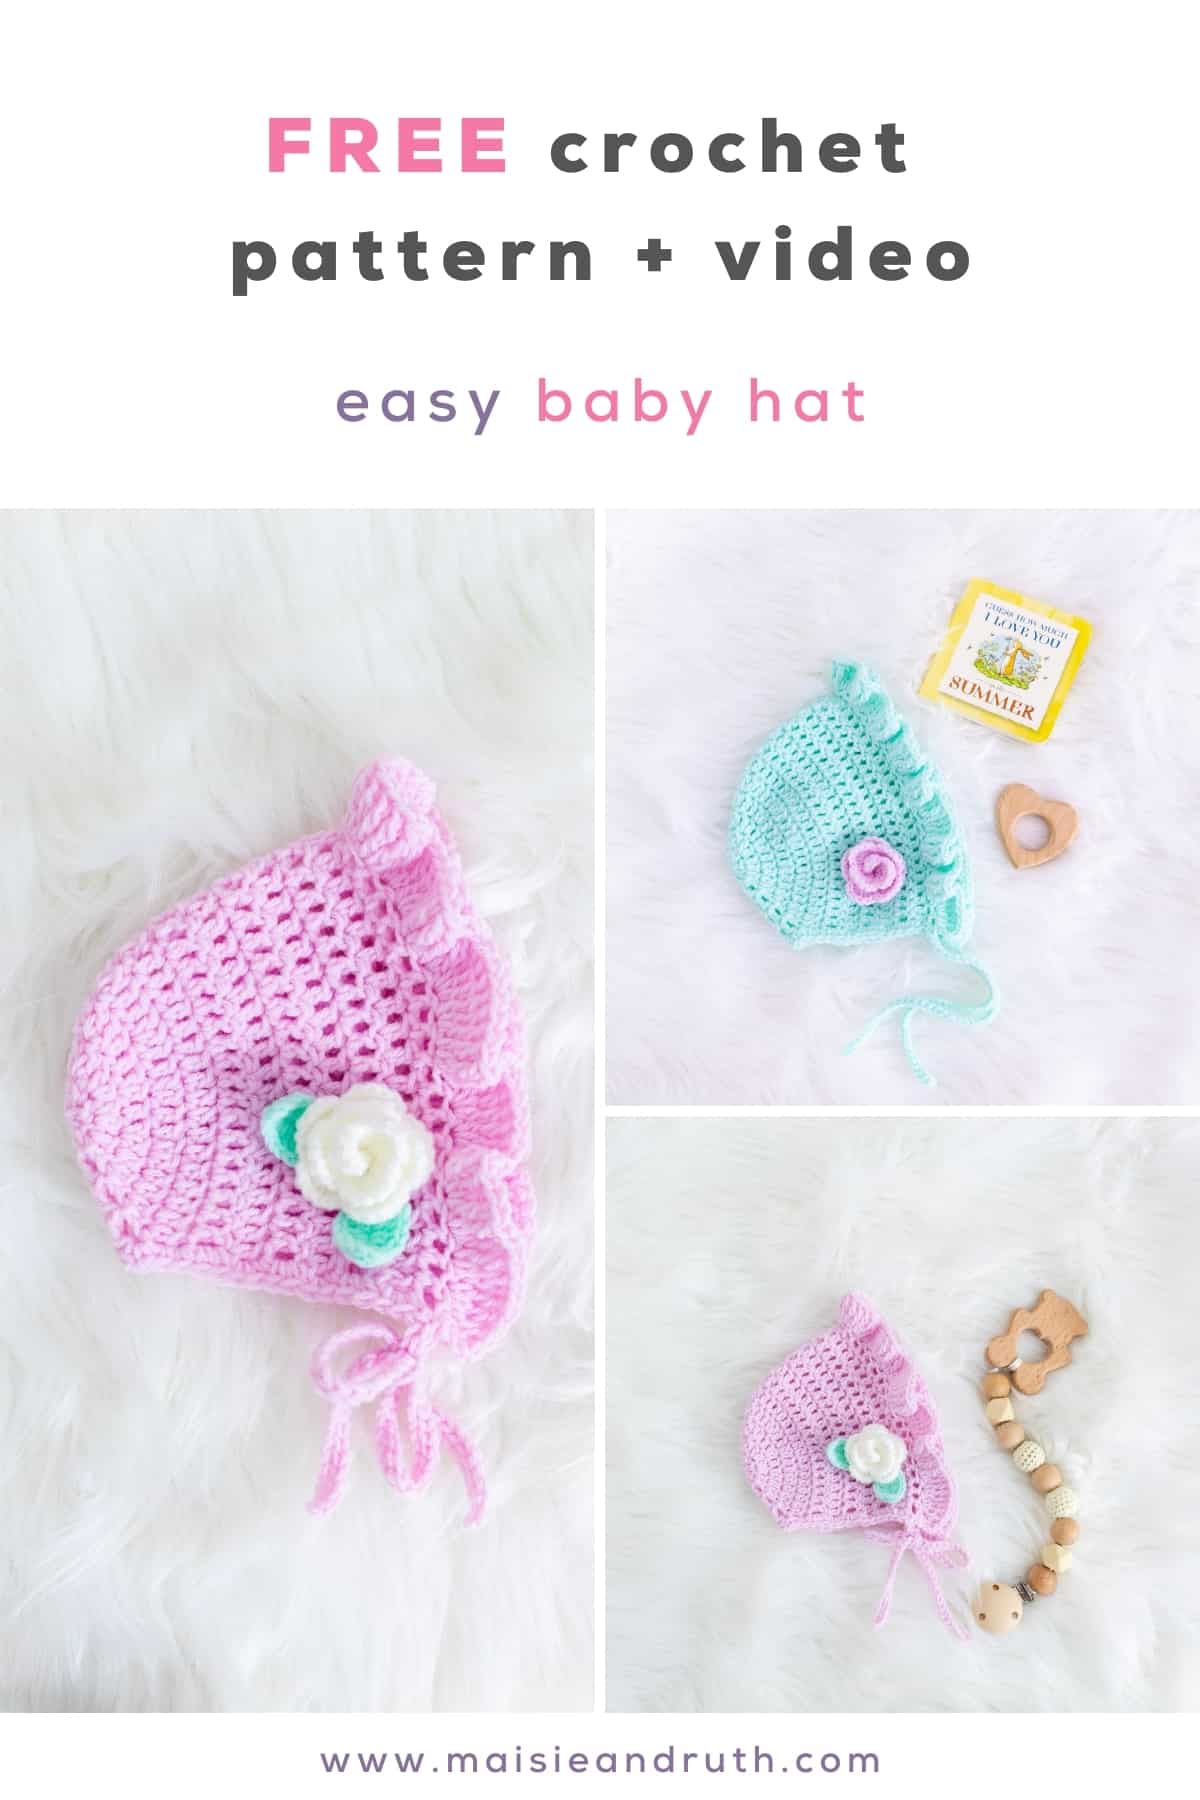
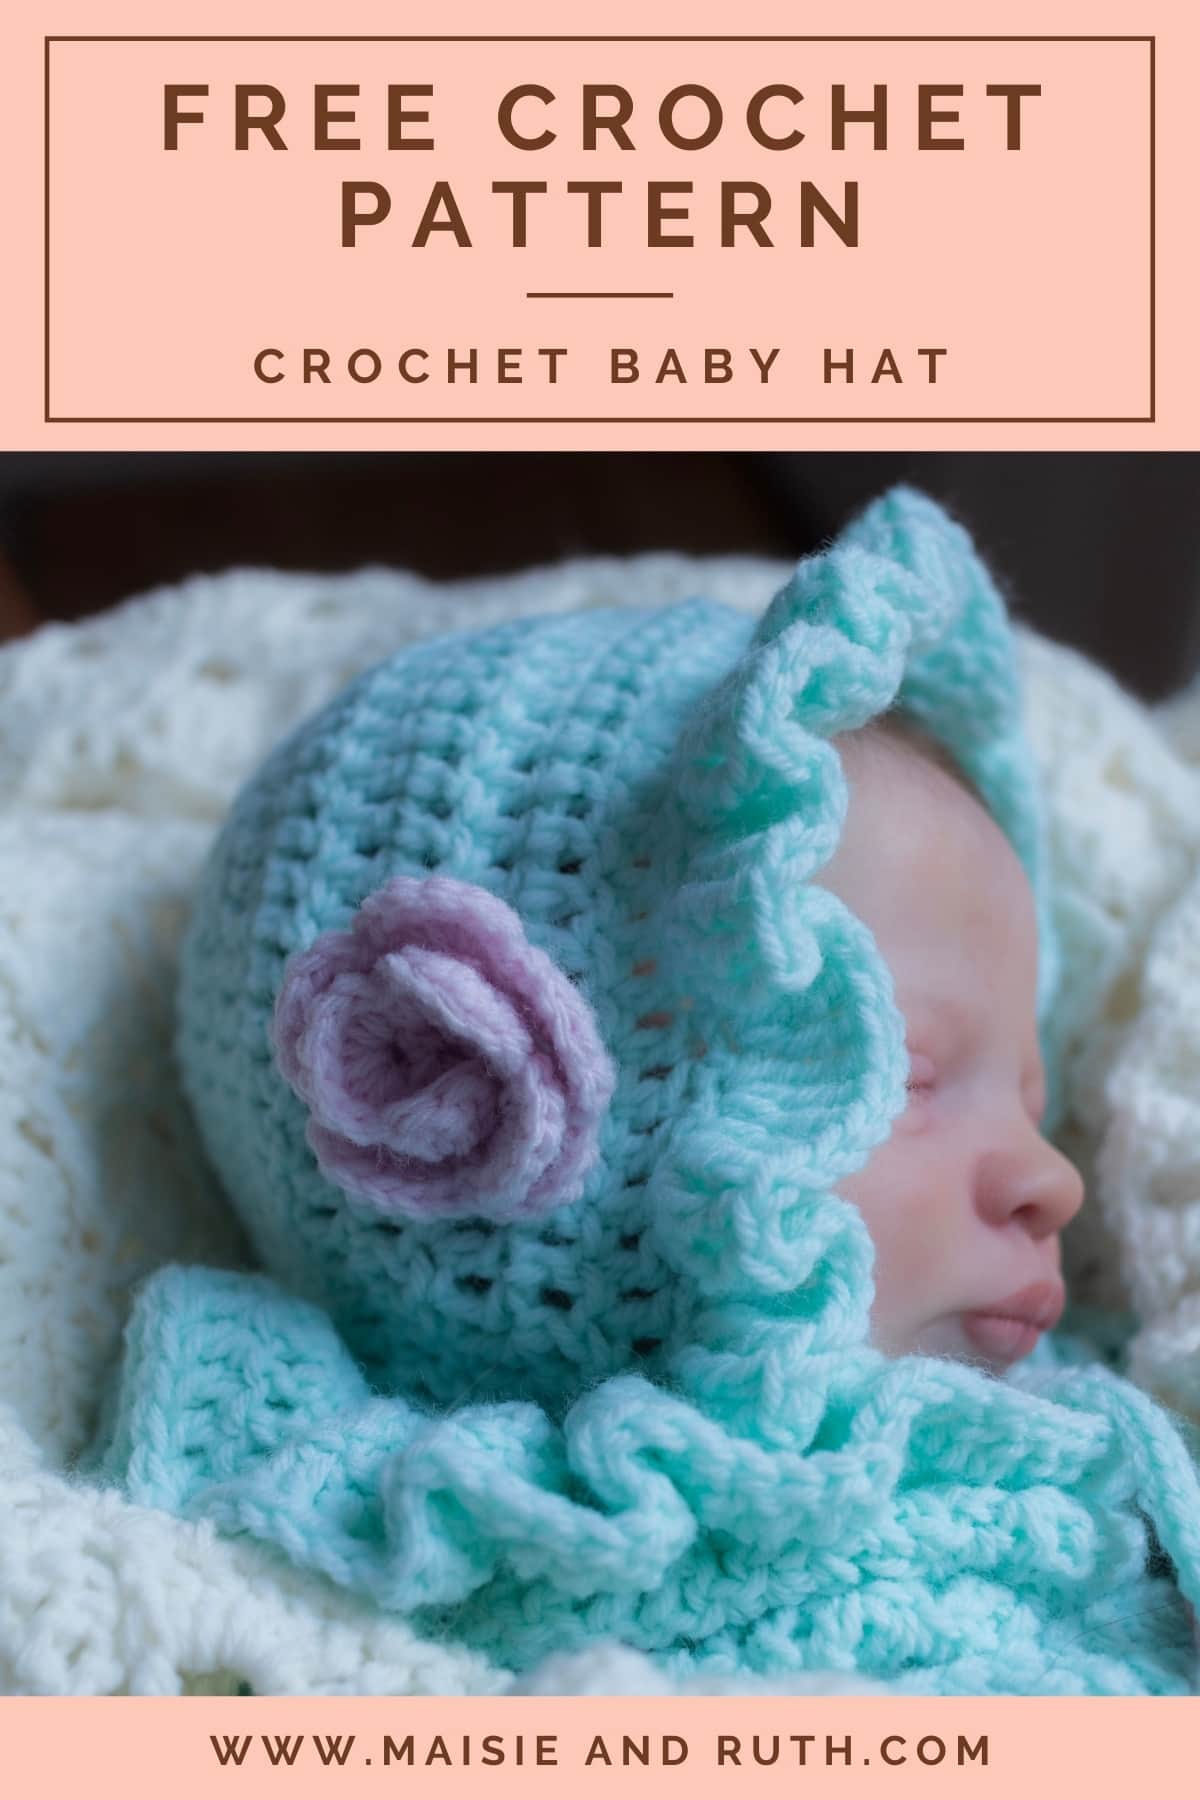
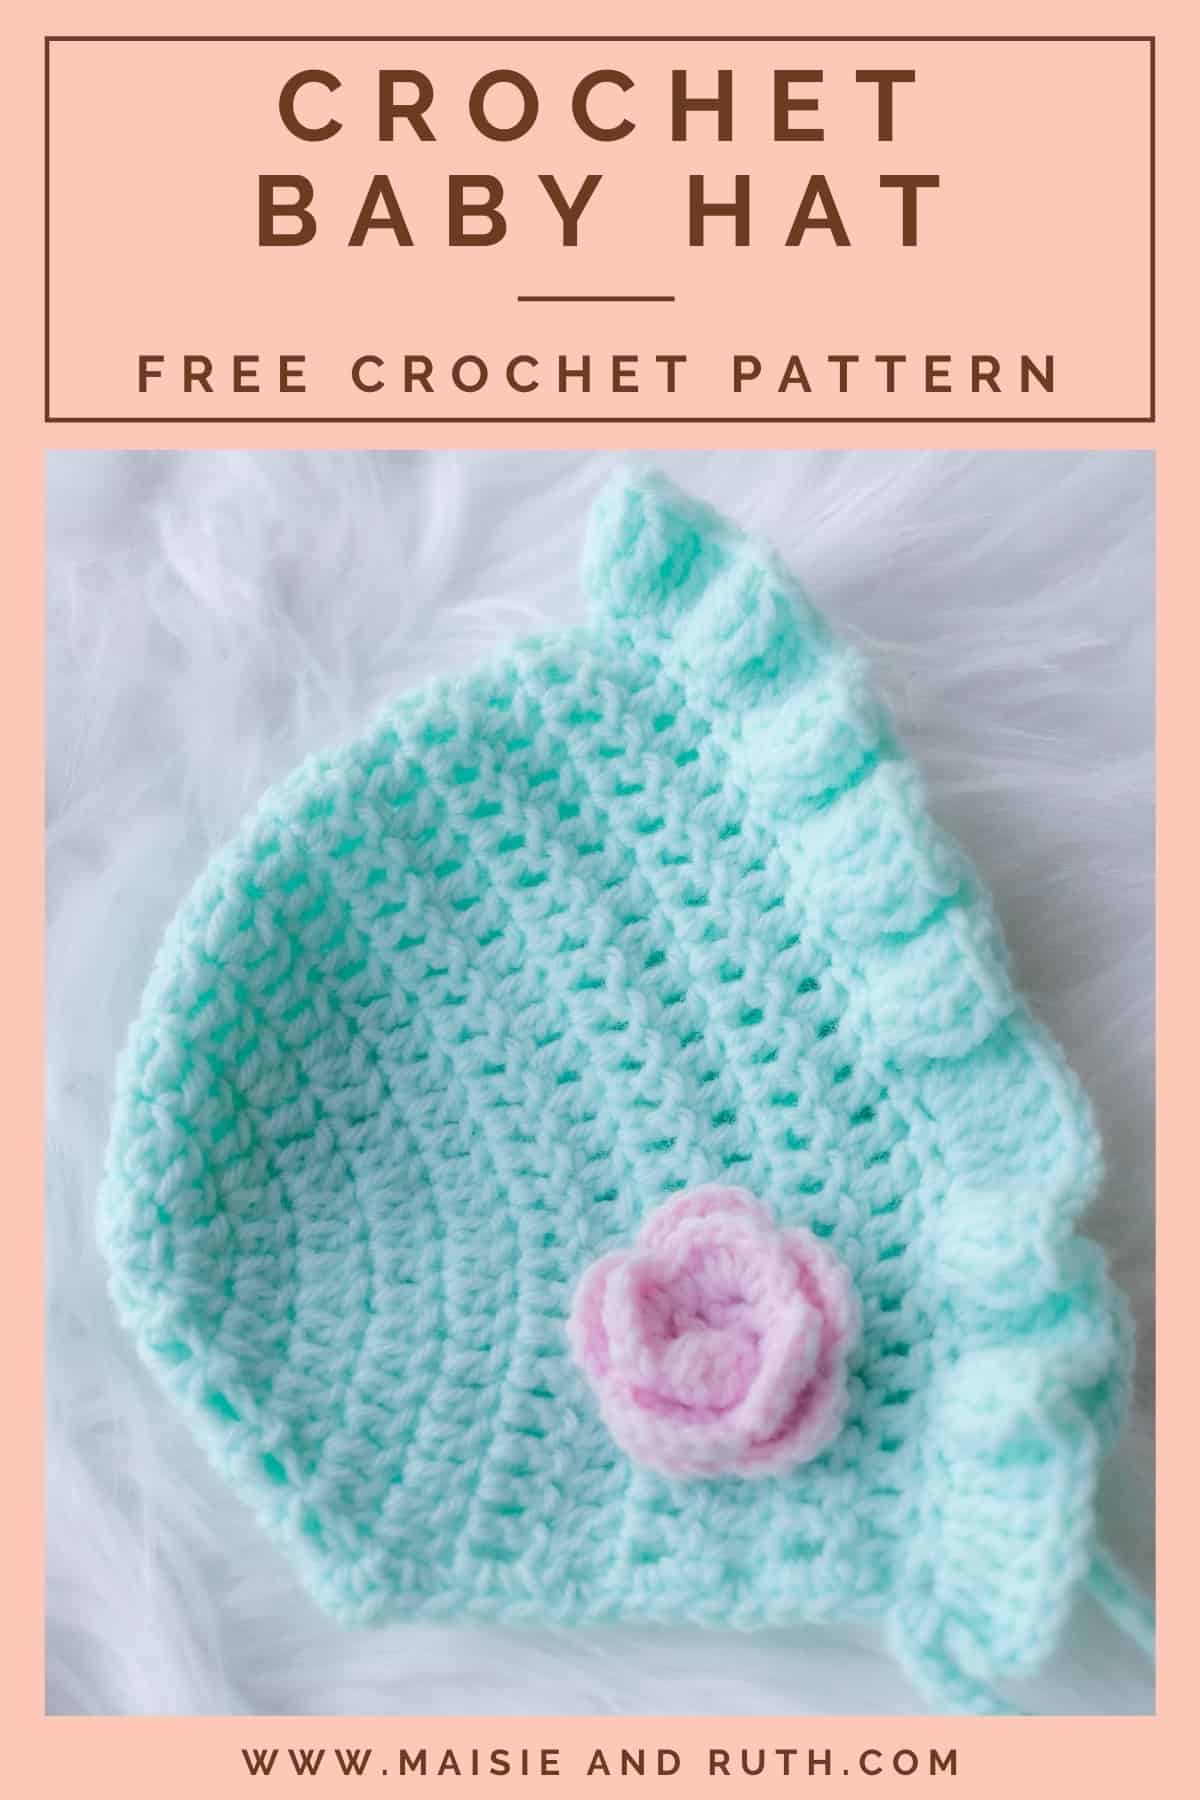
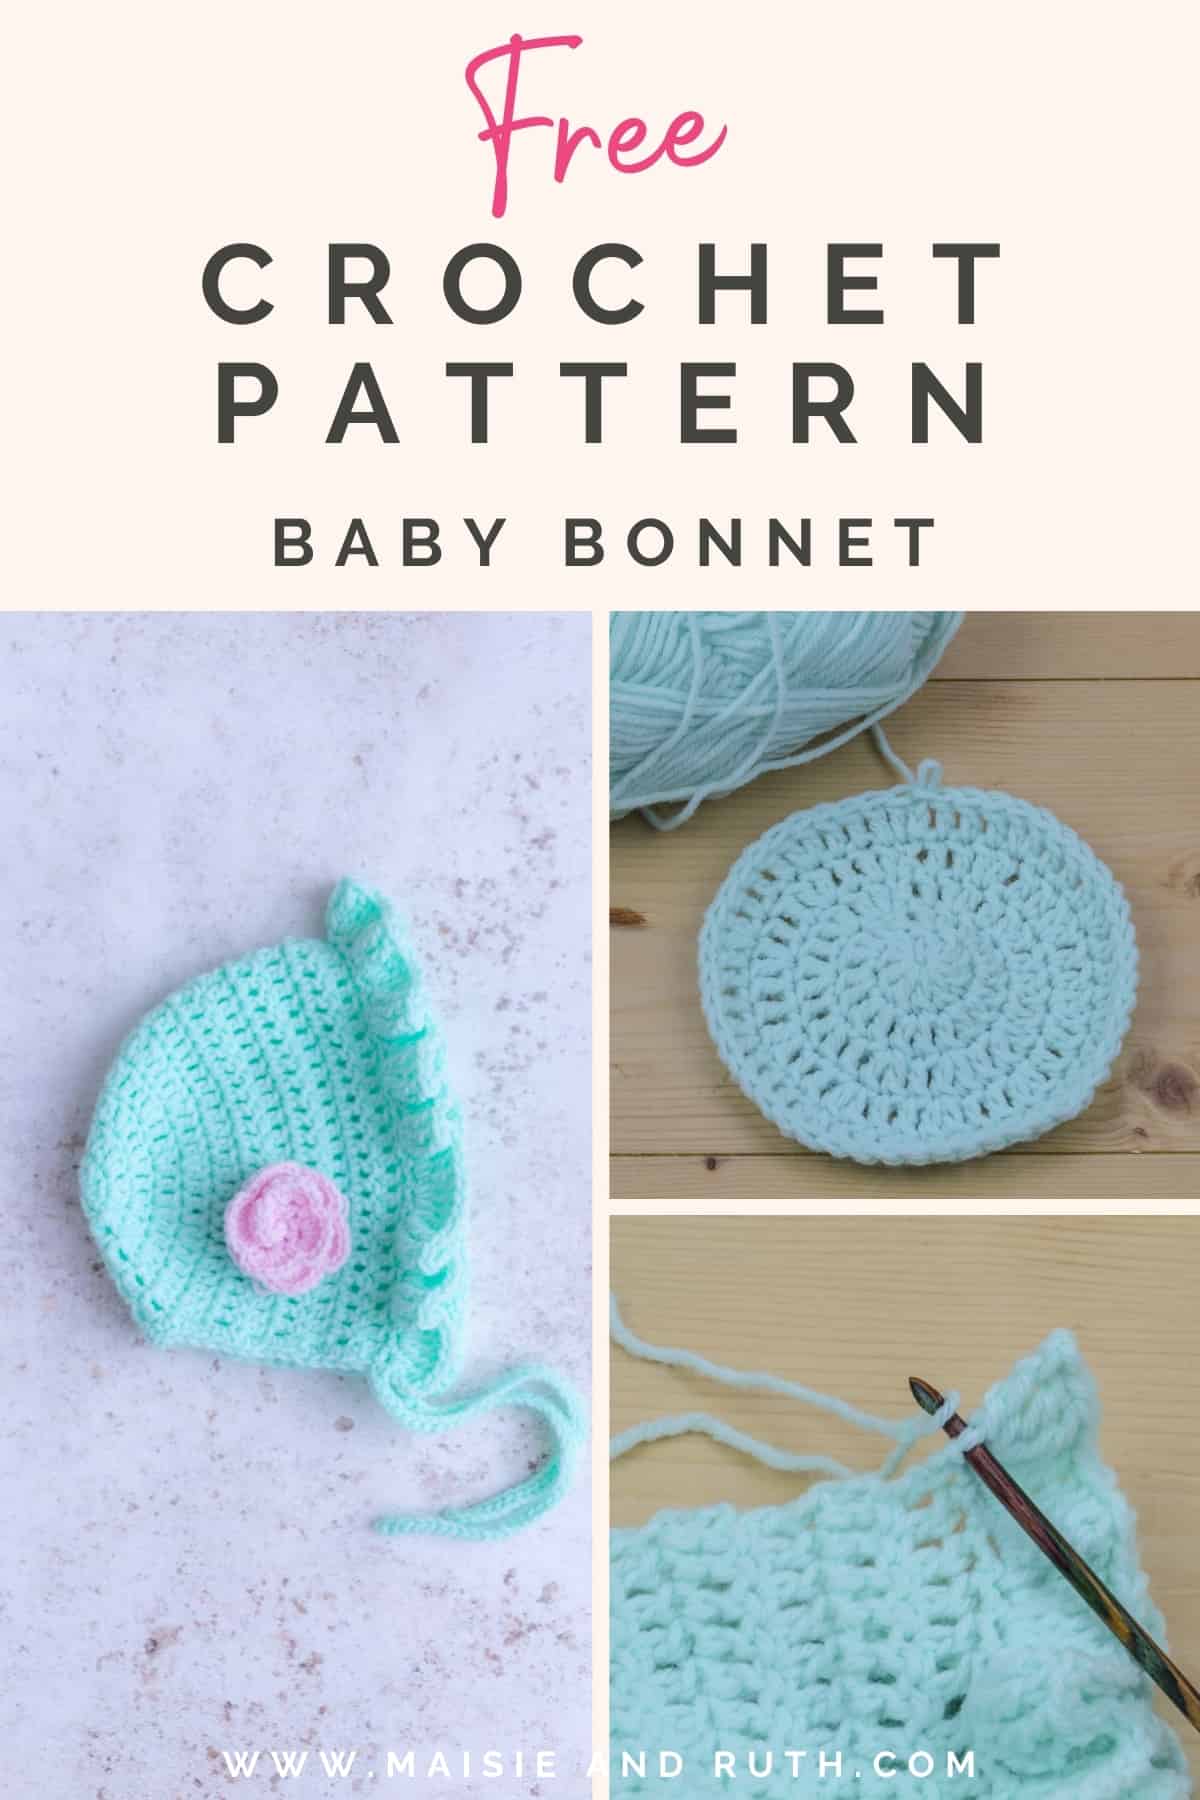
If you’re looking for an adorable Crochet Baby Hat Pattern that is quick and easy to work up, you’ll love my FREE pattern for the Bluebell Baby Bonnet!
There’s also a VIDEO TUTORIAL to accompany the pattern. And to purchase an ad-free printable version, please visit my Etsy store HERE

DESIGN OF THIS CROCHET BABY HAT PATTERN
Crochet baby hats are one of my favourite things to make as they are so darn cute!
Worked in the round for the most part, the construction of this baby hat is simple and is made up of basic crochet stitches (double and single crochet).
The hat is then finished off with a row of treble crochet increases to create a pretty ruffled edging.
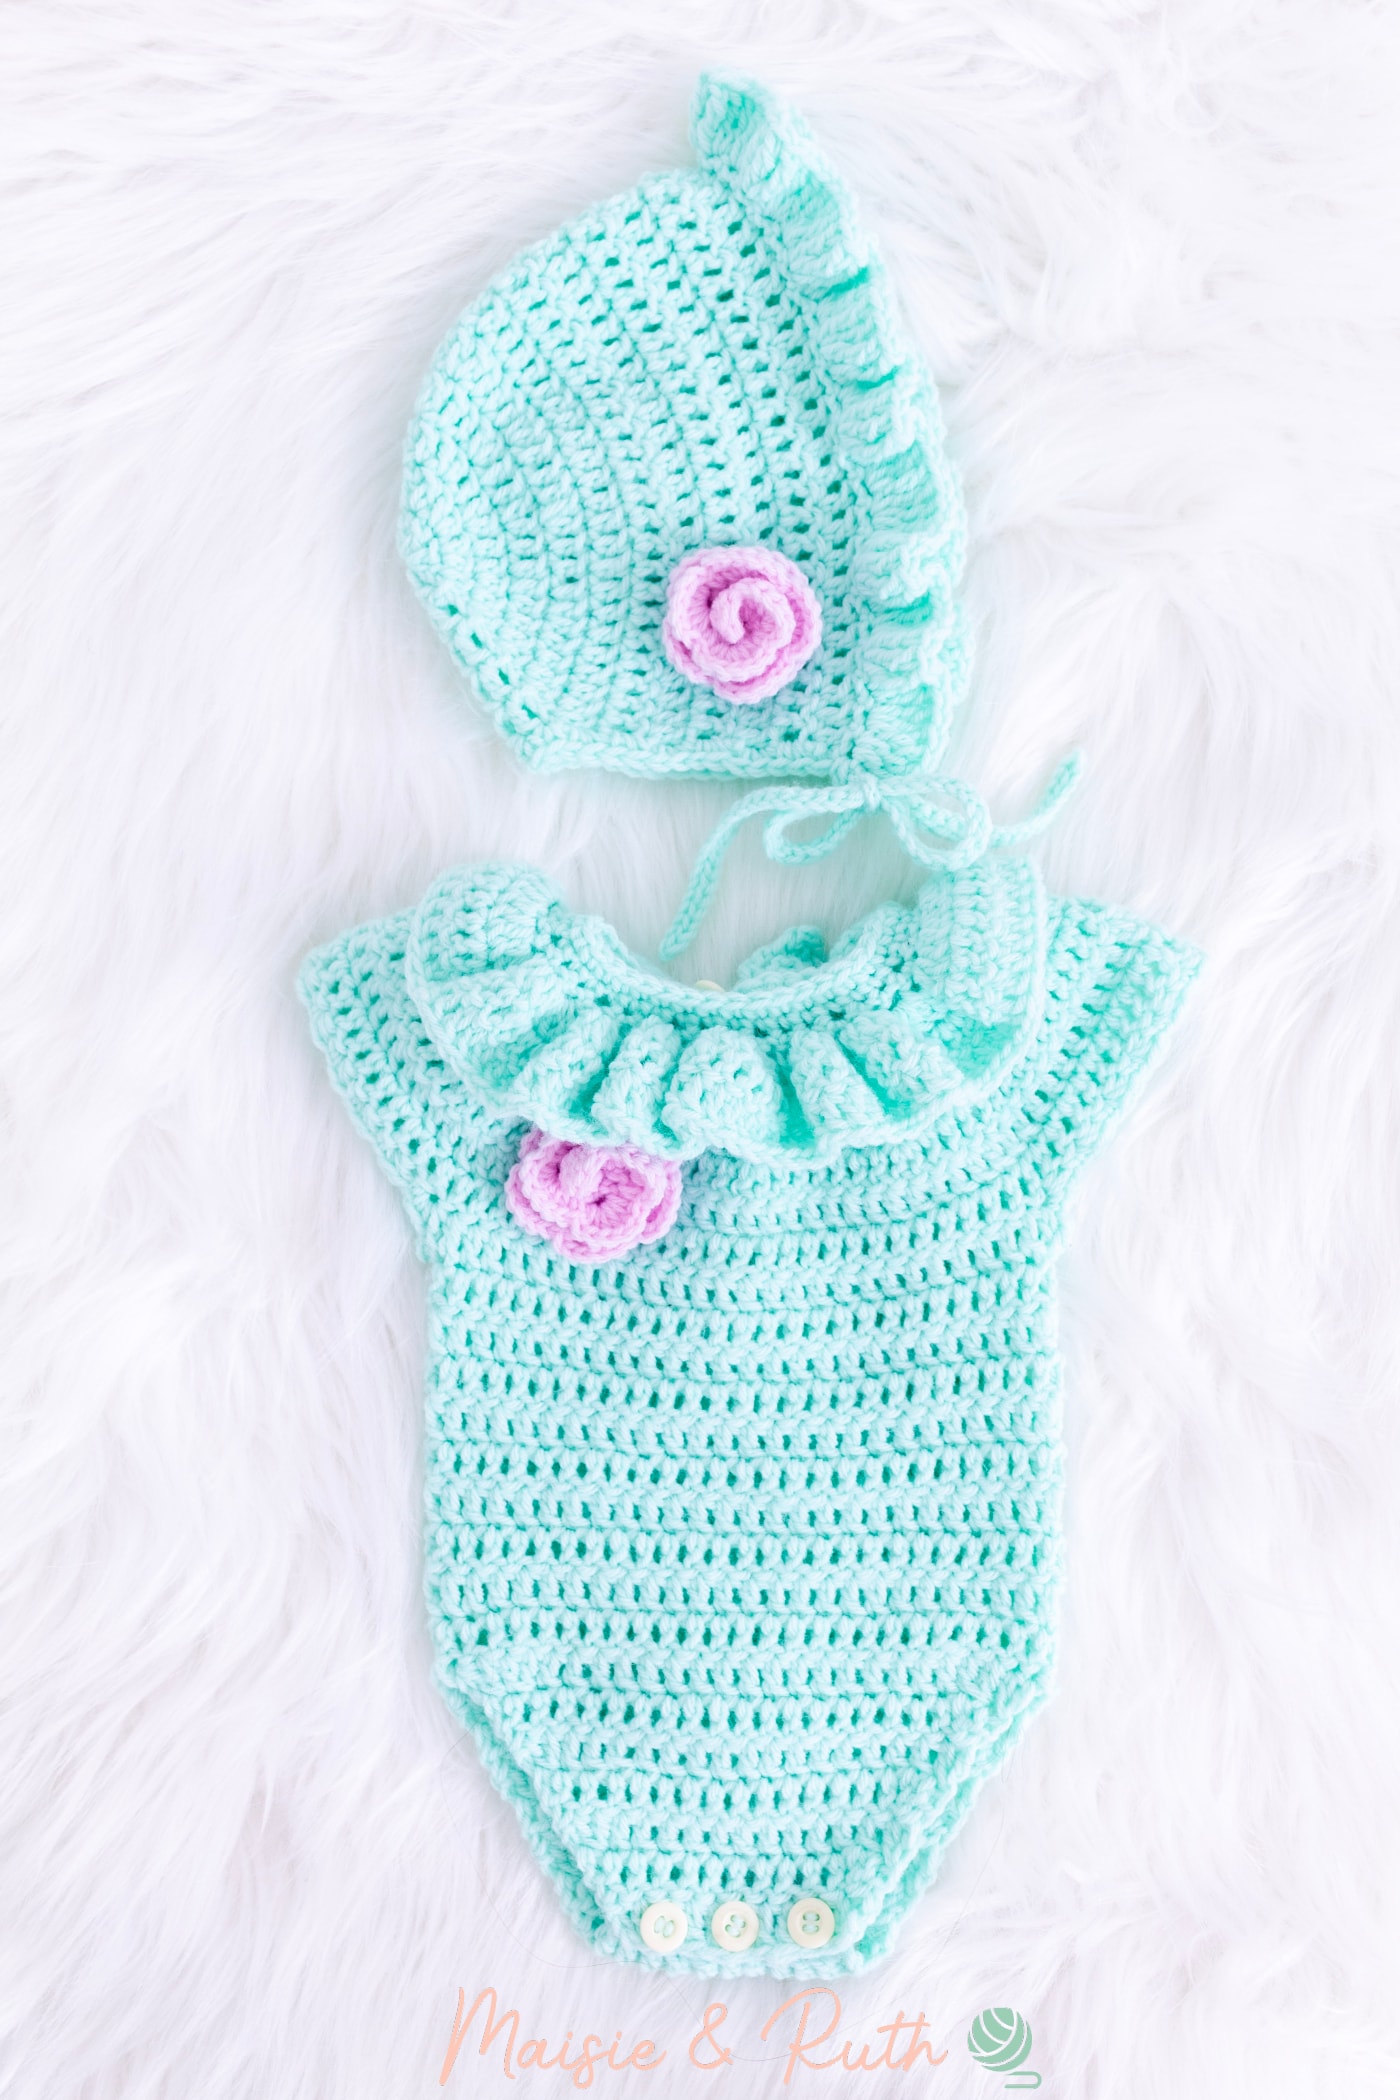
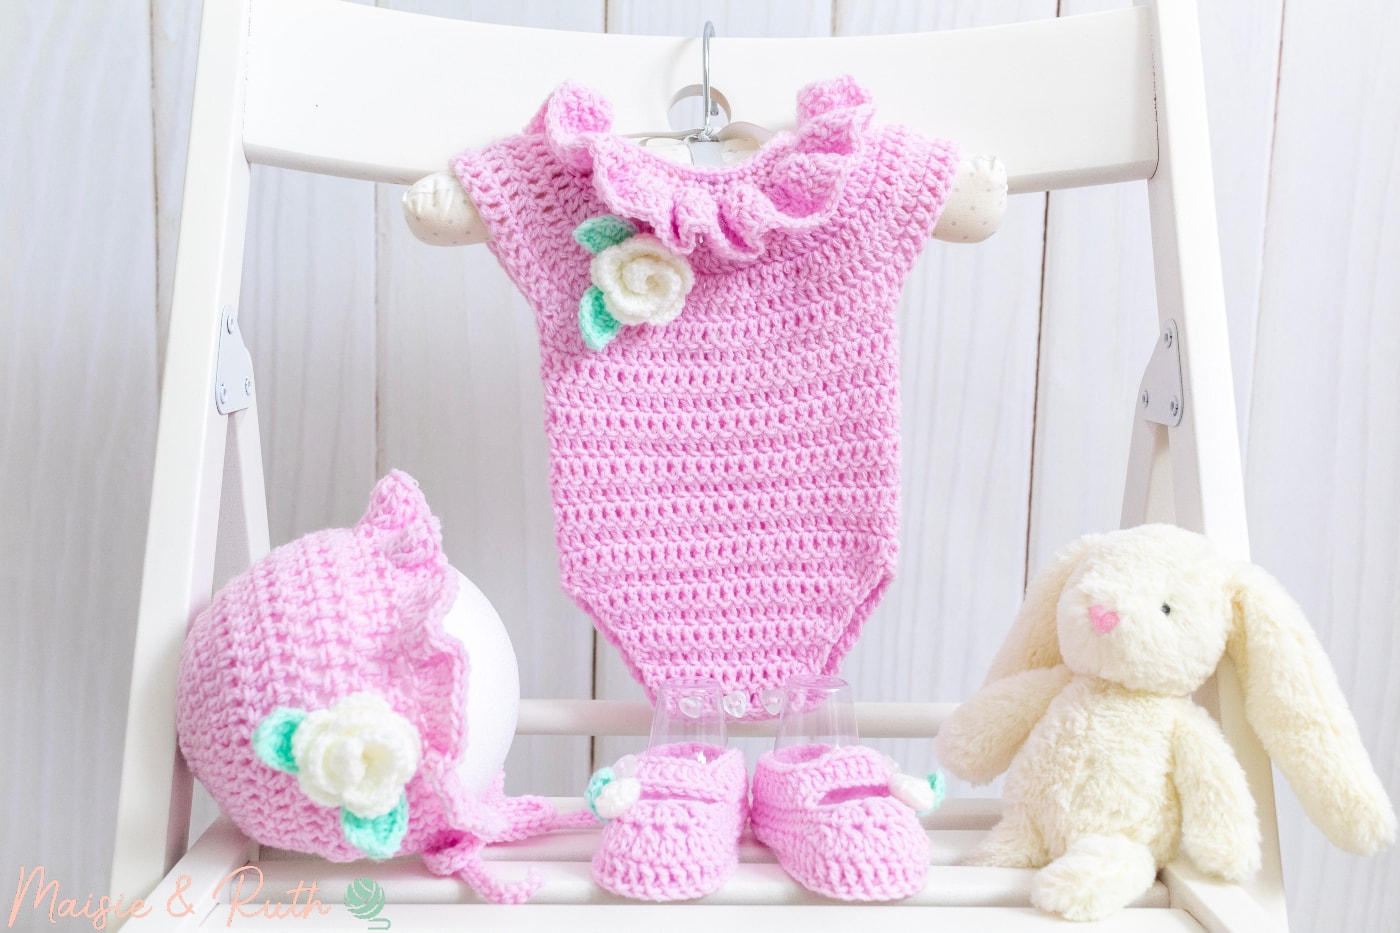
The Bluebell Baby Bonnet is cute just as it is but I decided to sew on a dainty crochet rose to give it that little extra touch of sweetness.
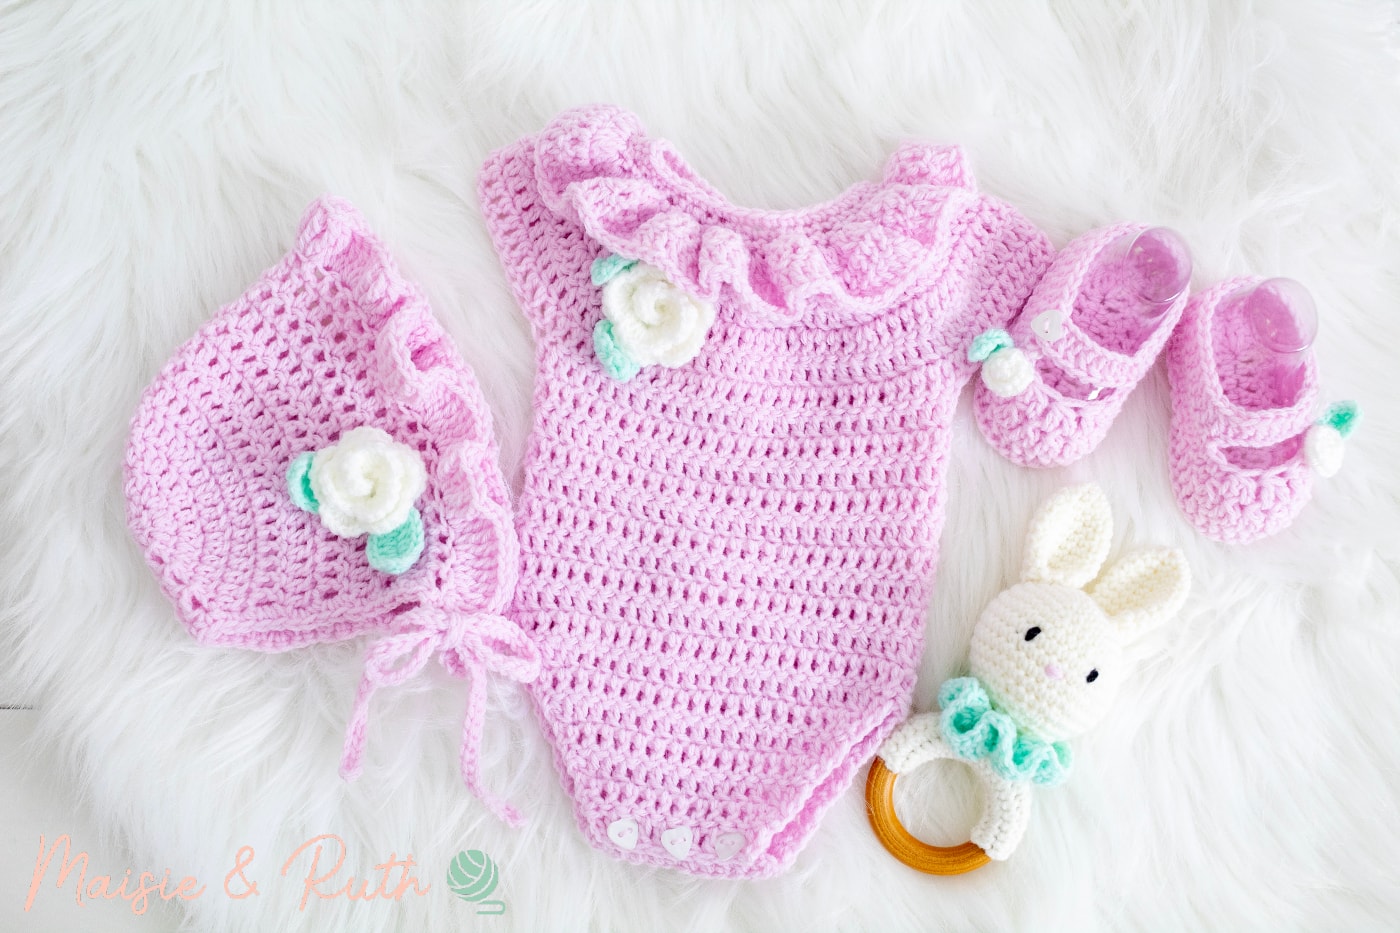
CROCHET BABY SET
This crochet baby hat pattern is part of a set… Bella the Bunny, the Freya Frilly Romper and the Gracie Baby Bootie.
The patterns for these items are all available for free on the Maisie and Ruth blog and I’ve included lots of photos of the process in order to guide you.
Make one, a couple, or all of them for a charming baby shower gift!
YARN USED
The yarn used in this crochet baby hat pattern is Paintbox Yarns Baby DK, a light Category 3 yarn.
This baby yarn, which is a perfect blend of acrylic and nylon, is one of my go-to yarns for baby garments as it’s so soft and has a lovely drape to it.
It also washes up nicely in the washing machine, and holds its shape and colour very well too.
I decided to work the bonnet up in two colours – Mint Green and Candyfloss Pink. Both these colours are light, summery pastel shades. I think that they suit the design of the hat very well.
SUBSTITUTE YARN
If you like to make baby garments from cotton yarn, you could substitute the Baby DK with Paintbox Yarns Cotton DK. This is another great yarn from Paintbox Yarns and the specified gauge for both yarns is identical (but always do a gauge swatch!).
PDF PRINTABLE PATTERNS!
If you would prefer an ad-free, printable version of this pattern, you can purchase it from my Etsy store
This hat is also part of a Pattern Bundle! Check it out here
Thank you for supporting my shop!
Let’s take a look now and see how you can create this charming little baby bonnet…
THE BLUEBELL BABY BONNET: A CROCHET BABY HAT PATTERN
Before you begin, please carefully read all the information below… I’ve included useful points that will aid you in making this blanket.
LEVEL
Easy (see details of project levels at the Craft Yarn Council).
PATTERN NOTES
- US crochet terms used throughout.
- The crown of the hat will be worked in rounds.
- After round 4 (newborn) or round 5 (0 – 3 months), you will work in rows, turning at the end of each row.
- When working in rounds: The ch2 made at the beginning of the round counts as the first dc of the round. Therefore, you should join the round by making a slip stitch into the top of the beginning ch2.
- When working in rows: The ch2 does not count as the first stitch of the row. Therefore, you should make the first stitch of the row in the same stitch (at the base of the ch1 or ch2). At the end of rows, do not crochet your last stitch into the top of the ch2.
- For the ties of the bonnet I chained 42, however feel free to adjust this number if you would like longer or shorter ties.
MATERIALS
- Yarn: #3, light worsted / DK / 8 ply. I used 1 ball of Paintbox Yarns Baby DK
- The green bonnet was worked up in the colour Mint Green (760), 183 yds/ 1.8oz (167m / 50g)
- The pink bonnet was made using the colour Candyfloss Pink (749)
- Crochet Hook: G (4mm)
- Scissors
- Tapestry needle
GAUGE / TENSION
15 stitches and 9 rows = 4 inches (10cm) in double crochet
In order to achieve the correct size and fit, it is important to test your gauge with a sample square before you begin.
If your tension is tight (too many stitches to 4″), try using a larger hook.
If your tension is loose (fewer stitches to 4″), use a smaller hook.
FINISHED SIZES
Newborn:
5″ from front to back
5.25″ tall
0 – 3 months:
5.25″ from front to back
6.75″ tall
These measurements exclude the ties and the ruffled edge.
STITCHES AND ABBREVIATIONS (US CROCHET TERMS)
beg -beginning
ch(s) – chain(s)
dc – double crochet: Yarn over (yo), insert hook into stitch, yo, pull up a loop (3 loops on hook). Yo, pull through 2 loops (2 loops on hook). Yo, pull through remaining 2 loops. 1 double crochet completed.
fasten off – To fasten off securely, work one chain, then cut the yarn leaving a 5 – 6” tail. Pull the tail through the loop that is on your hook. Tighten gently.
RS – right side: The side of your work that you want to have on display – the ‘pretty’ side.
sc – single crochet: Insert hook into stitch, yarn over (yo), pull up a loop (2 loops on hook). Yo, pull through both loops on hook. 1 single crochet completed.
sl st – slip stitch: Insert hook into stitch, yarn over (yo), pull up a loop, you will have 2 loops on your hook. Pull the first loop through the second loop. 1 slip stitch completed.
st(s) – stitch(es)
WS – wrong side: The back of your crochet piece.
* to * – Repeat instructions between asterisks as many times as directed.
[ ] – The total number of stitches you should have at the end of a row / round.
USEFUL TUTORIALS
- How to Crochet in the Round
- How to Increase in Crochet
- Crochet Turning Chain (Does it Count as a Stitch?)
PATTERN INSTRUCTIONS (NEWBORN)
CROWN
Make a magic circle (if you do not like the magic circle method, see the Alternative Round 1 below).
Round 1. Ch2 (counts as your first dc here and throughout crown), 9dc in the circle, sl st to top of beg ch2 to join [10 sts].
Alternative Round 1. Ch2, 10dc in the 2nd ch from the hook, sl st to 1st dc to join [10 sts].
Round 2. Ch2, 1dc in same st, 2dc in next 9 sts, sl st to top of ch2 to join [20 sts].
Round 3. Ch2, 1dc in same st, 1dc in next st, *2DC in next st, 1dc in next st*, repeat from * to * for a total of 9 times, sl st to top of ch2 to join [30 sts].
Round 4. Ch2, 1dc in same st, 1dc in next 2 sts, *2dc in next st, 1dc in next 2 sts*, repeat from * to * for a total of 9 times, sl st to top of ch2 to join [40 sts].
At the end of round 4, your bonnet should measure 3 1/2″ in diameter.
MAIN BODY OF BONNET
NOTE: From this point, you will now work back and forth in rows instead of rounds.
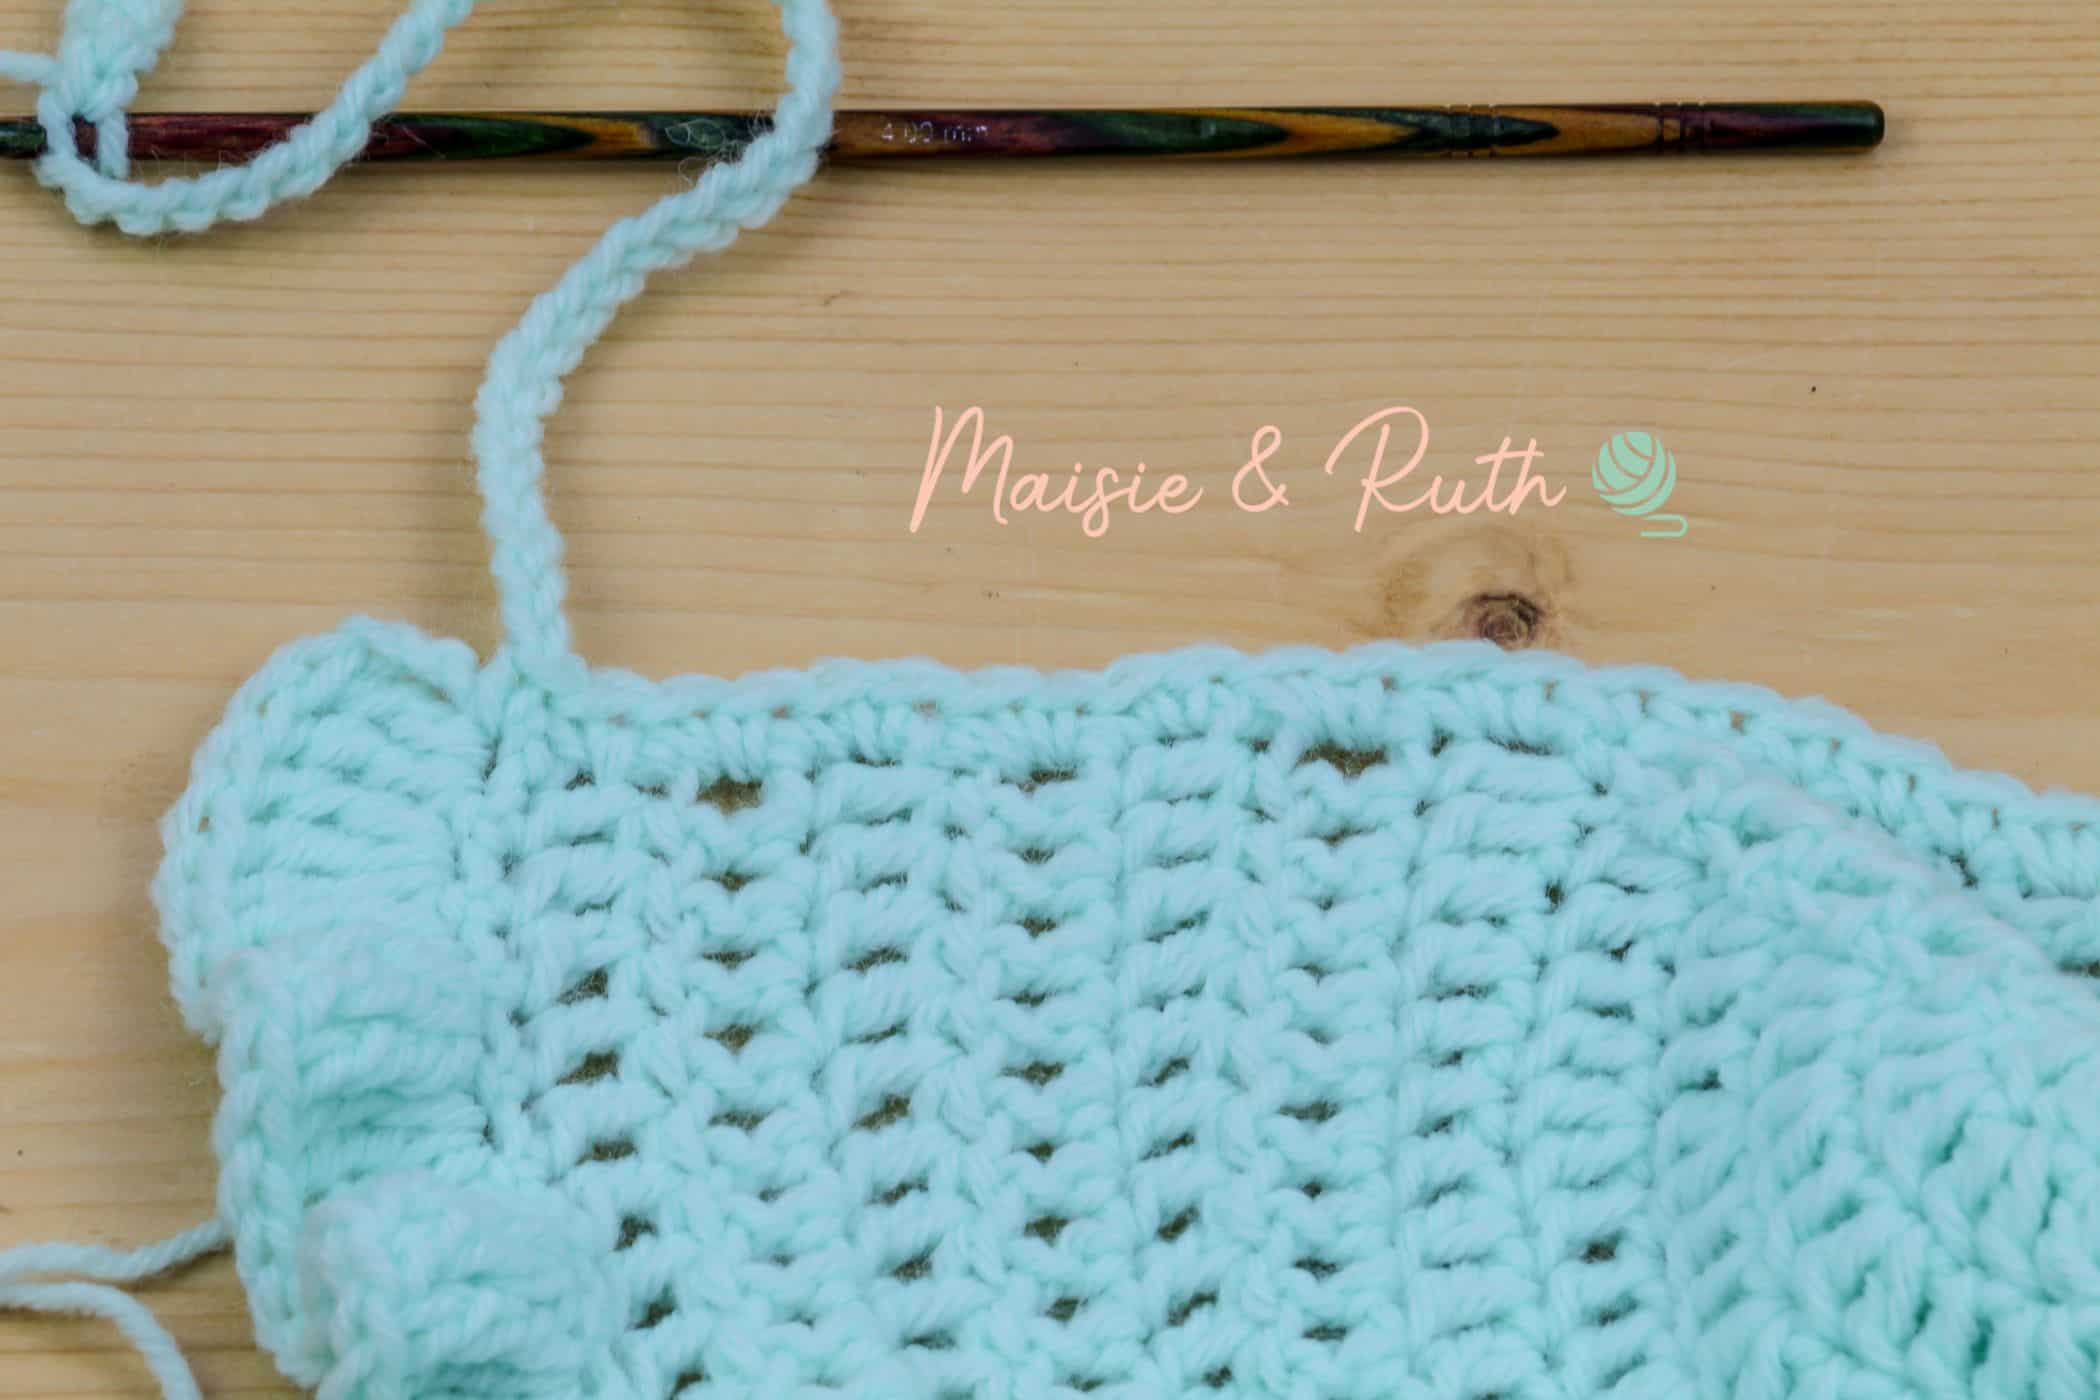
Rows 1 – 8. Ch2 (does not count as your first dc), 1dc in same st, 1dc in next 37 sts, TURN [38 sts].
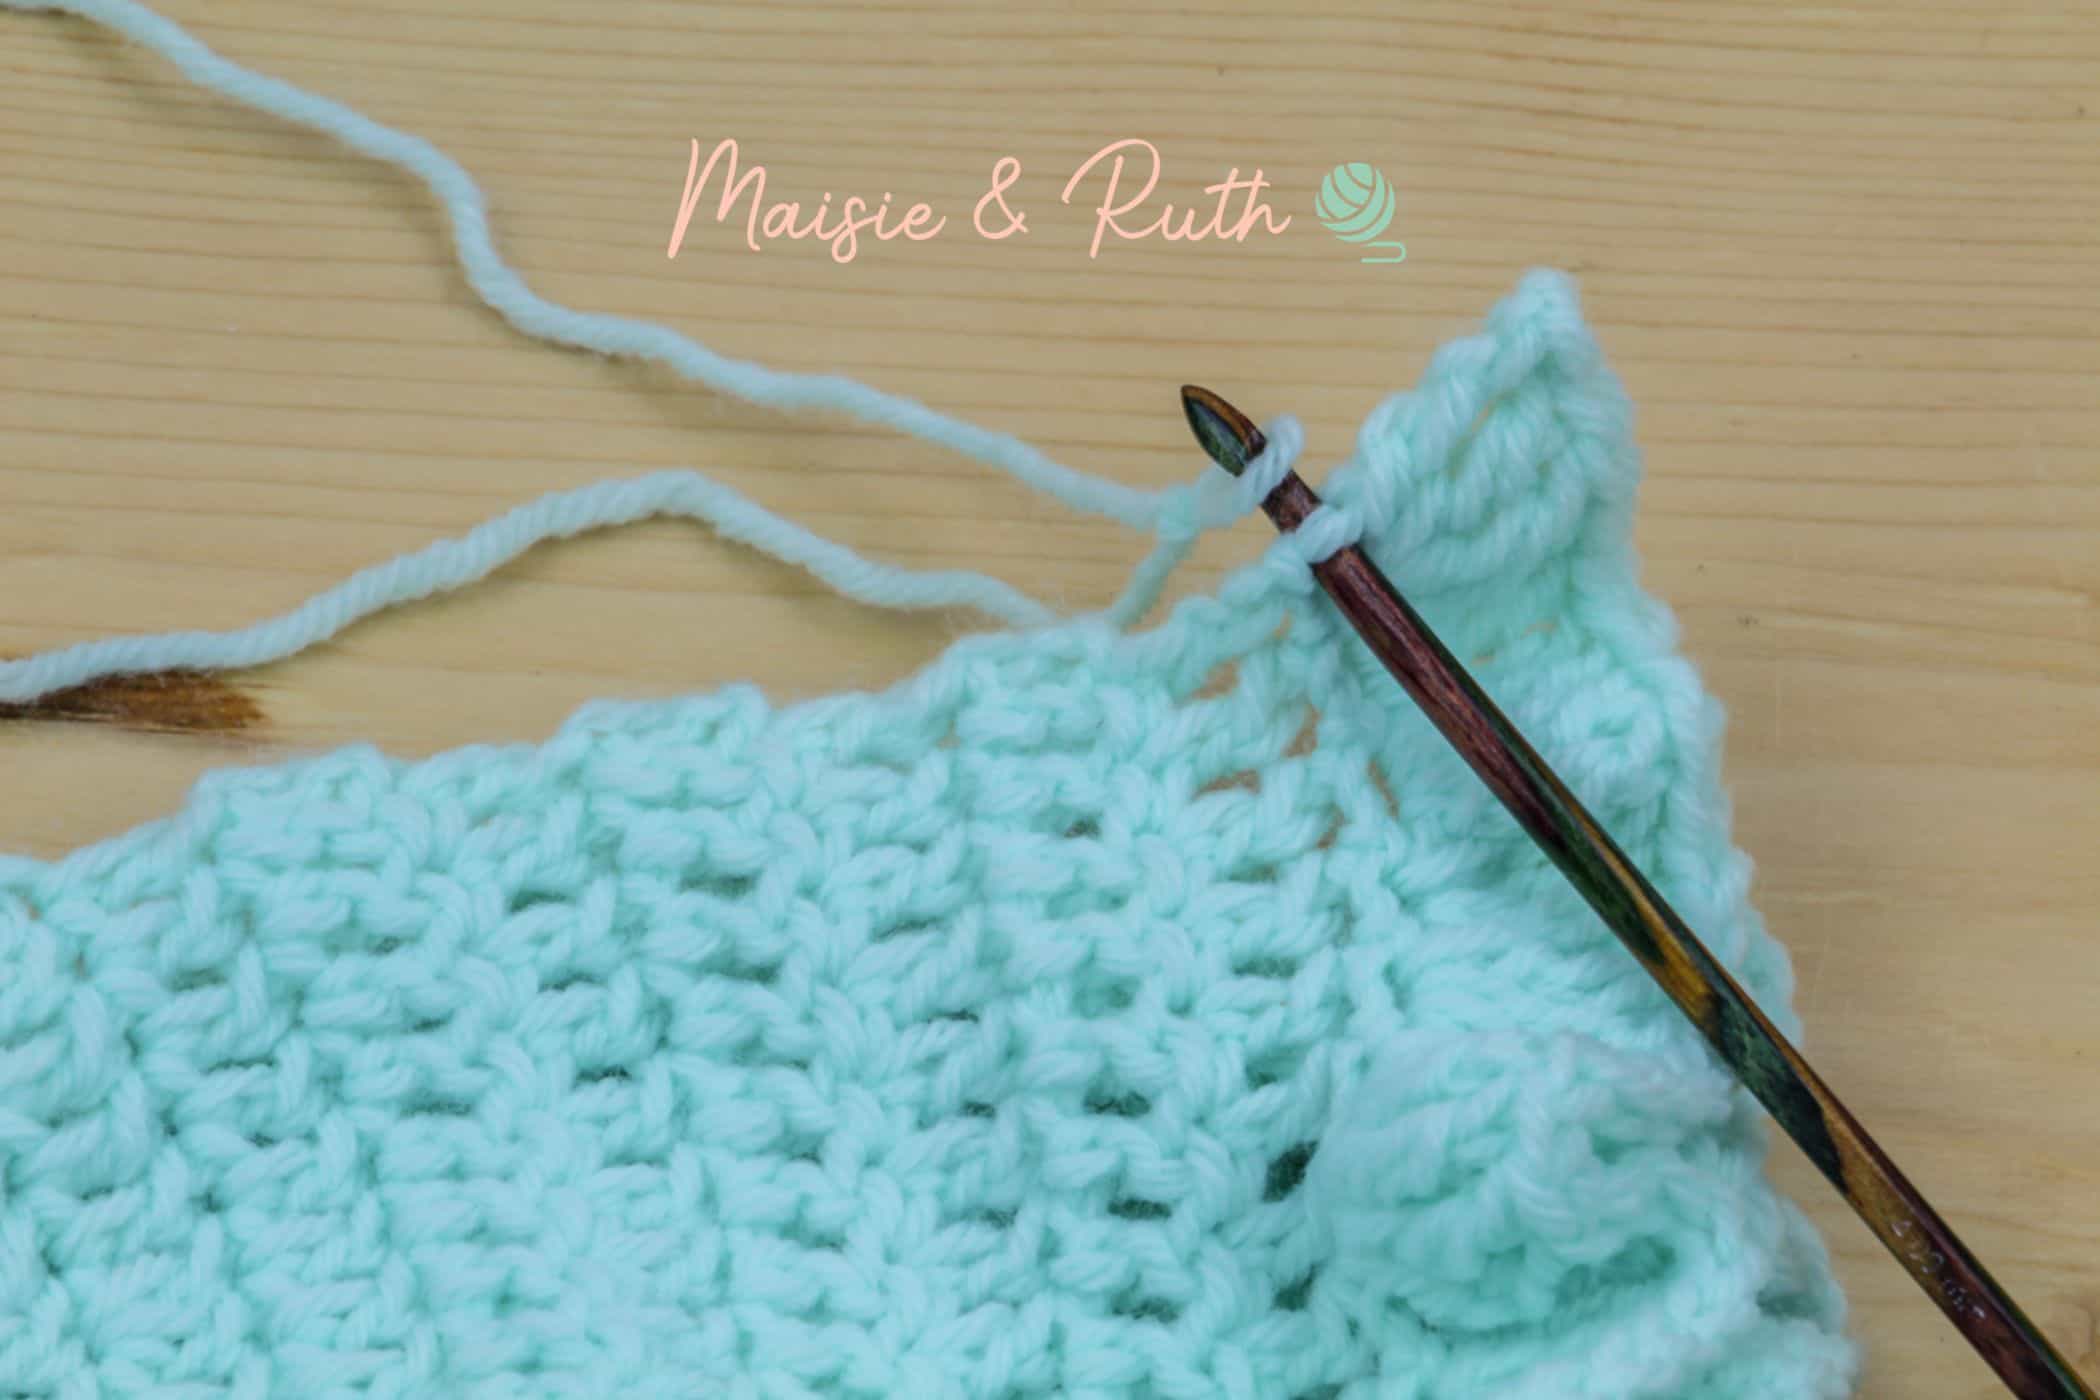
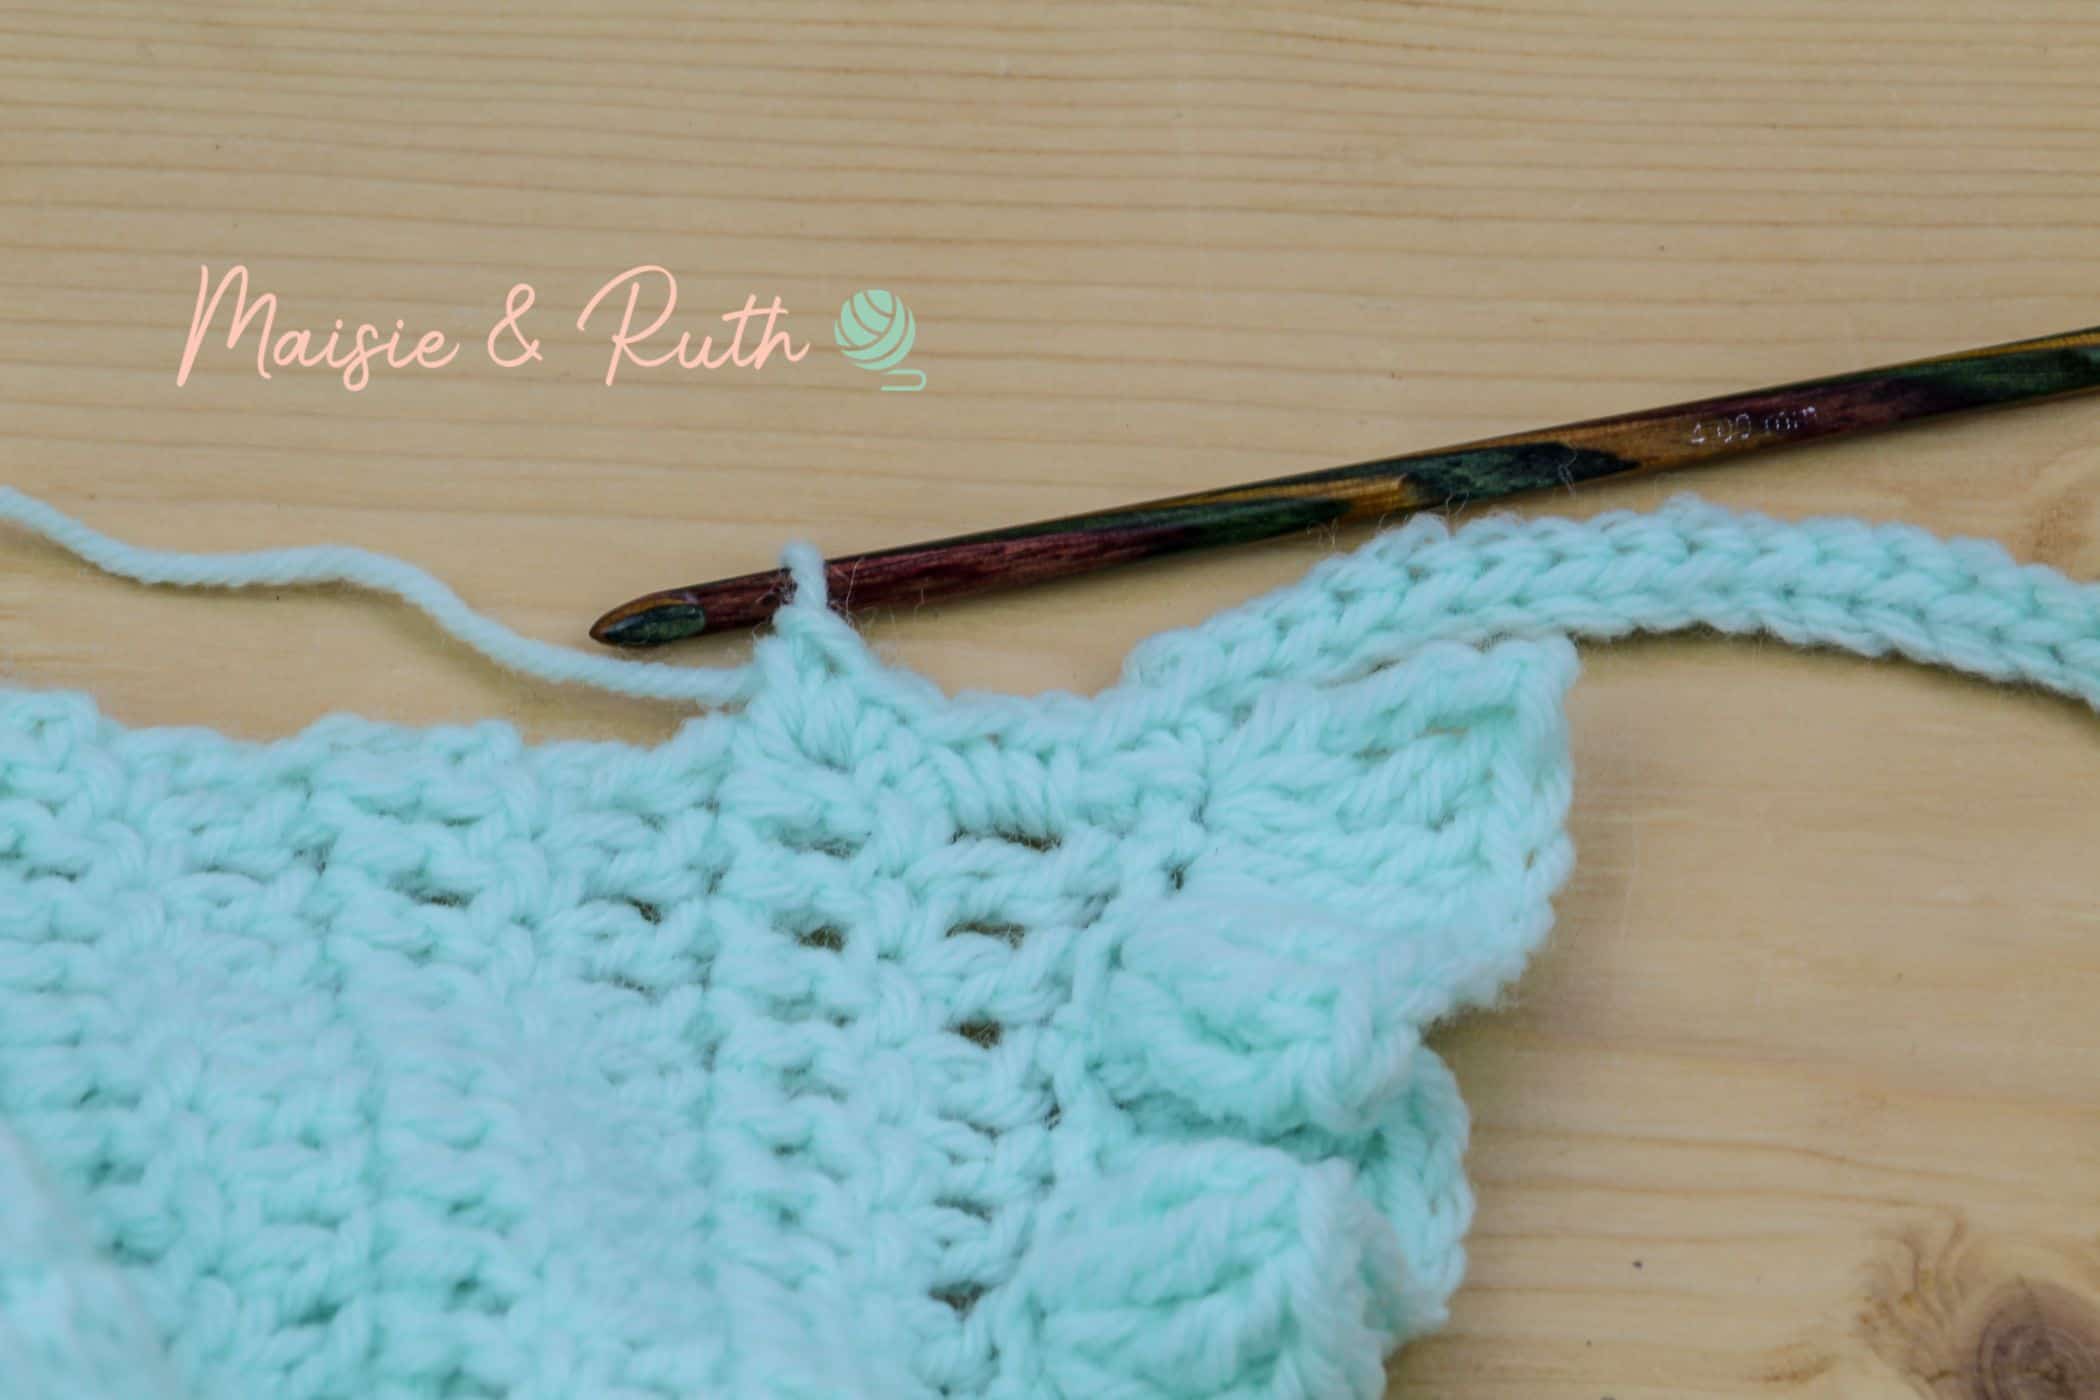
Row 9. (Ruffled edging). Ch3 (counts as your first tr), 1tr in same st, *3tr in next st*, repeat from * to * until 1 st remains, 2tr in last st [ 112sts].
Cut yarn, fasten off and weave in ends.
TIES AND NECK OPENING
You will now work on the ties and neck opening of your bonnet (photo tutorial below).
PATTERN INSTRUCTIONS (0-3 MONTHS)
CROWN
Make a magic circle (if you do not like the magic circle method, see the Alternative Round 1 below).
Round 1. Ch2 (counts as your first dc here and throughout crown), 9dc in the circle, sl st to top of beg ch2 to join [10 sts].
Alternative Round 1. Ch2, 10dc in the 2nd ch from the hook, sl st to 1st dc to join [10 sts].
Round 2. Ch2, 1dc in same st, 2dc in next 9 sts, sl st to top of ch2 to join [20 sts].
Round 3. Ch2, 1dc in same st, 1dc in next st, *2DC in next st, 1dc in next st*, repeat from * to * for a total of 9 times, sl st to top of ch2 to join [30 sts].
Round 4. Ch2, 1dc in same st, 1dc in next 2 sts, *2dc in next st, 1dc in next 2 sts*, repeat from * to * for a total of 9 times, sl st to top of ch2 to join [40 sts].
Round 5. Ch2, 1dc in same st, 1dc in next 3sts, *2dc in next st, 1dc in next 3 sts*, repeat from * to * for a total of 9 times, sl st to top of ch2 to join [50 sts].
At the end of round 5, your bonnet should measure 4″ in diameter:
MAIN BODY OF BONNET
NOTE: From this point, you will now work back and forth in rows instead of rounds.
Rows 1 – 7. Ch2 (does not count as your first dc), 1dc in same st, 1dc in next 46 sts, TURN [47 sts].
Row 8. Ch1 (does not count as your first sc), 1sc in same st, 1sc in next 46 sts, TURN [47 sts].
Row 9 (Ruffled edging). Ch3 (counts as your first tr), 1tr in same st, *3tr in next st*, repeat from * to * until 1 st remains, 2tr in last st [139 sts].
Cut yarn, fasten off and weave in ends.
TIES AND NECK OPENING OF BONNET (BOTH SIZES)
To begin working on the ties, insert your hook and attach your yarn with a sl st to the end of row 13 (last row of sc sts):
Ch42:

Sl st in the 2nd ch from the hook and in every ch along:

When you arrive back down at the bottom of the ch, make 1sc in the st where you attached your yarn and continue to place sc sts evenly along the neck opening (I make 2sc at the end of each row of dc):
When you reach row 13 at the other side of the bonnet, ch42:
Sl st in the 2nd ch from hook and in every ch until you reach the bottom of your second tie, sl st into the 1st ch that you made to join.
Cut yarn, fasten off and weave in ends.
PIN IT FOR LATER!
I hope that you enjoyed this crochet baby hat pattern 😊
I love to see your finished projects… if you share the Bluebell Bonnet or any other of my items on Instagram, tag me using @maisieandruth.
Happy crocheting!


