


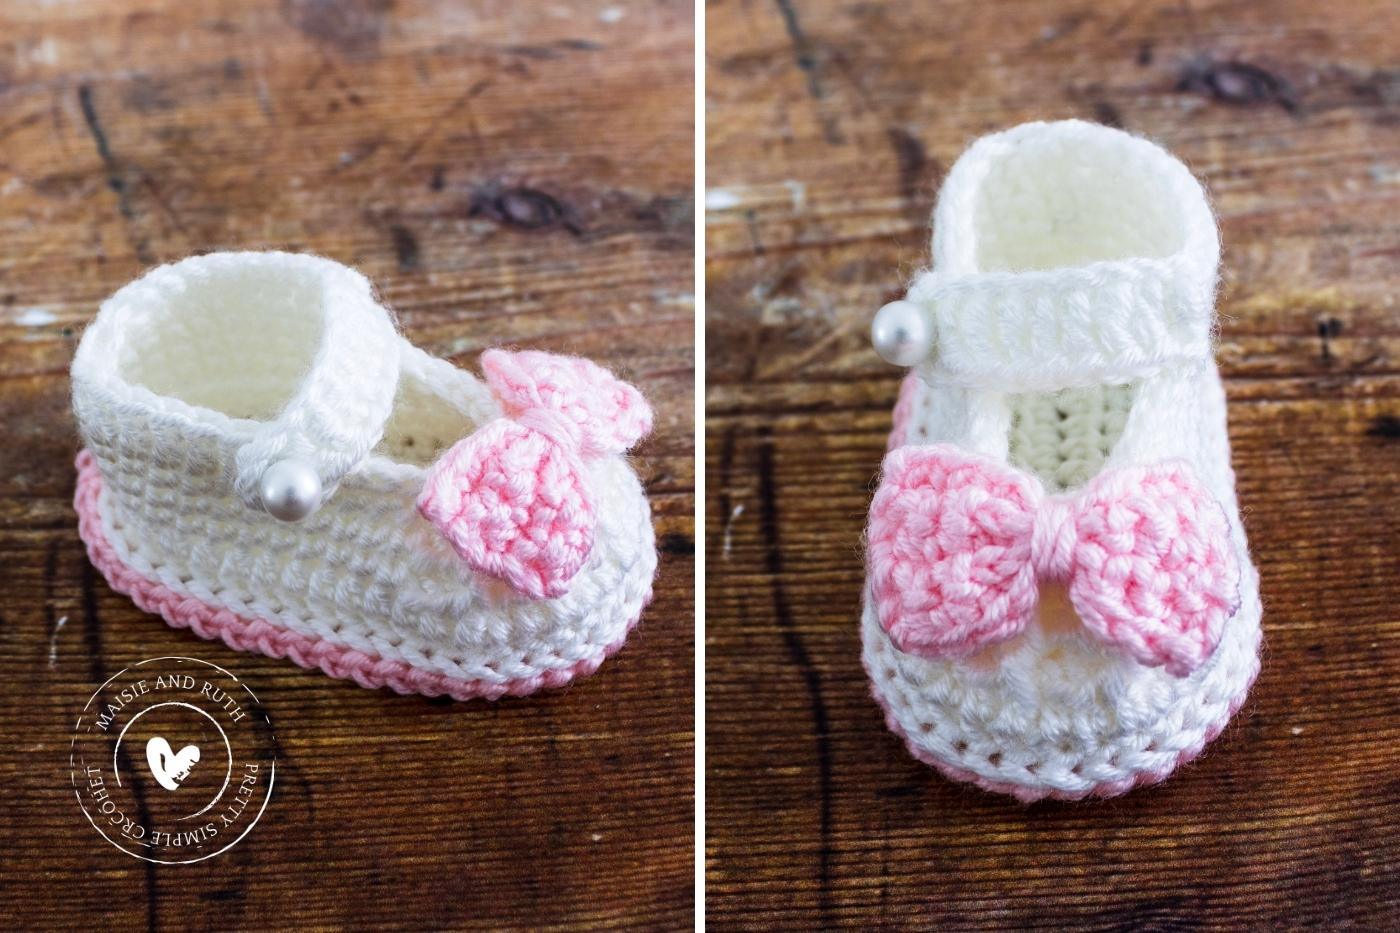
These little Crochet Bow Baby Booties are just too cute to handle! Follow along with the FREE pattern in order to make them!
If you need further assistance, then you can watch the VIDEO tutorial also. And to purchase an ad-free printable version, please visit the Etsy store HERE

STYLISH SHOES FOR BABY!
If you’re in need of a quick, last minute present for a baby shower, then these super cute baby booties would make an ideal gift!
They’re great stash busters, are really quick to work up and are a pretty easy design also.
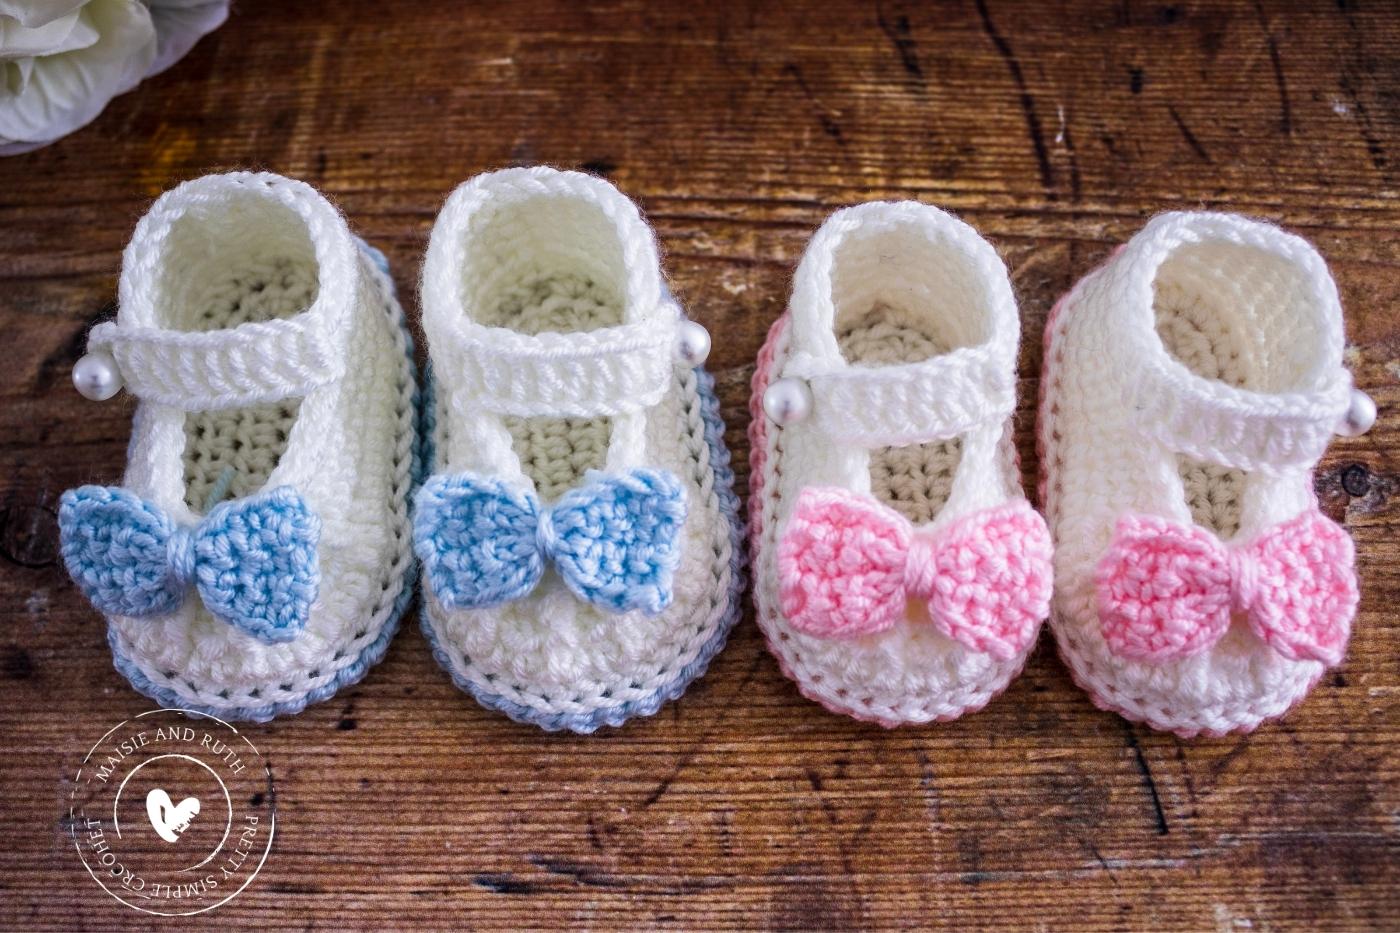
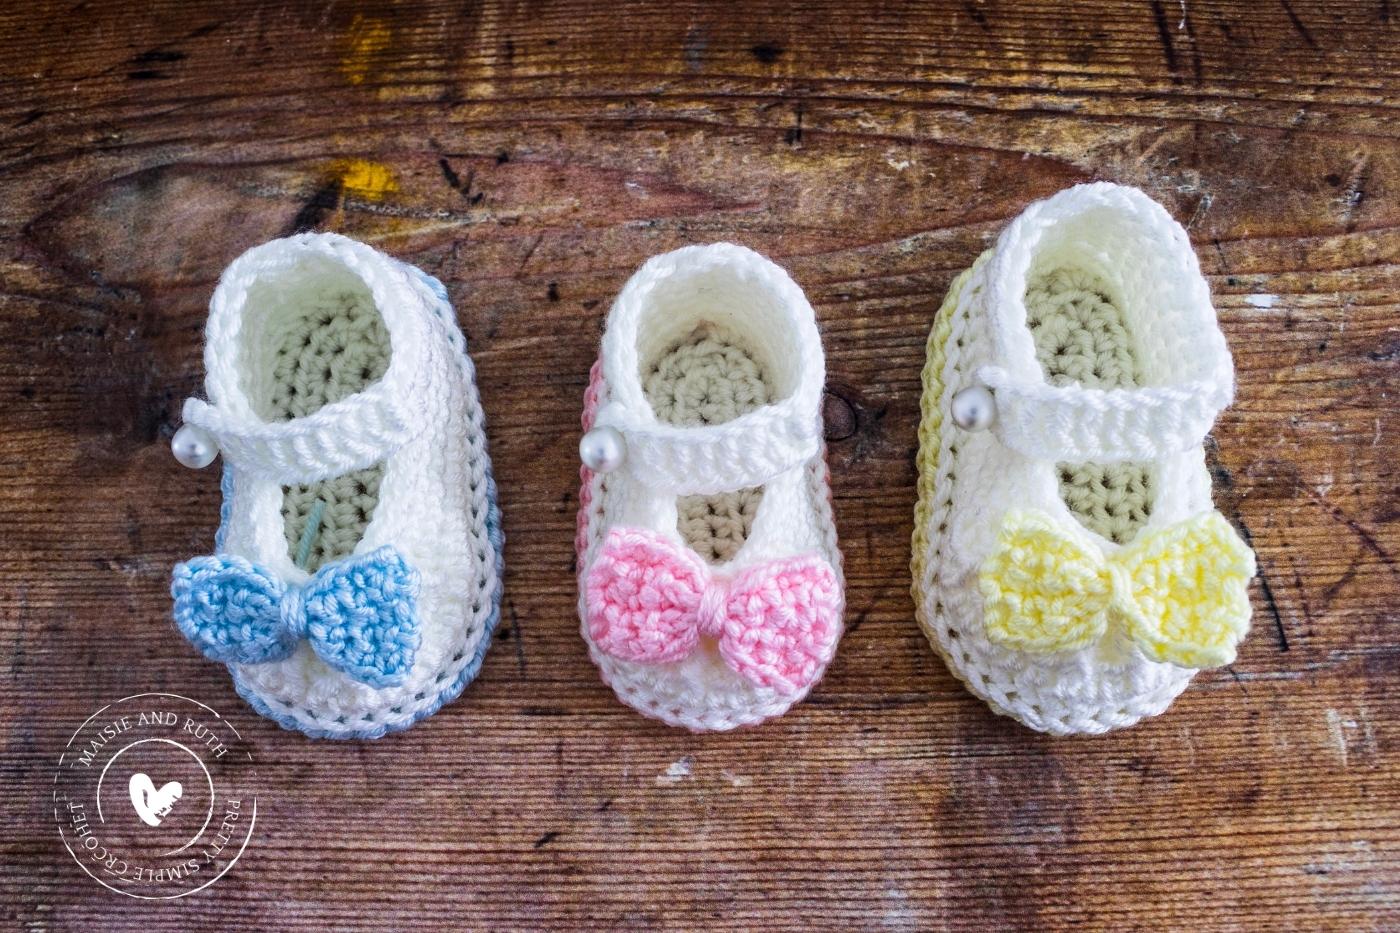
I decided to make and attach a little crochet bow to my baby shoes. However I think they would look equally as adorable with a small flower sewn on too!
You can also have fun making these booties in different colours if you’re not a big fan of the pastel shades that I opted for.
ADORABLE BABY SET
Working up baby items is such a favourite activity amongst crocheters as, due to their smaller size, they’re much quicker to complete!
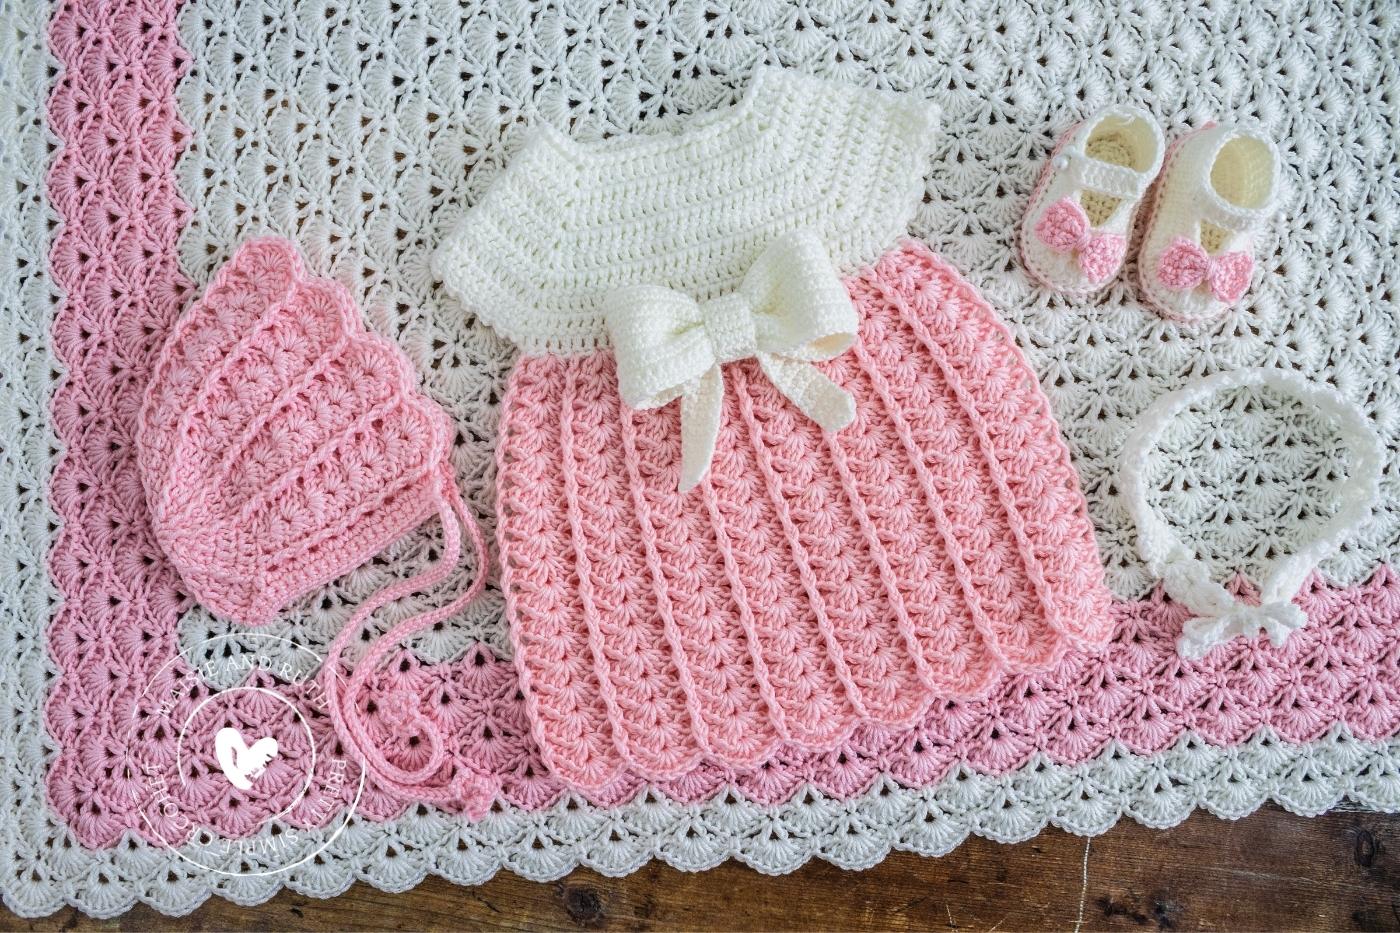
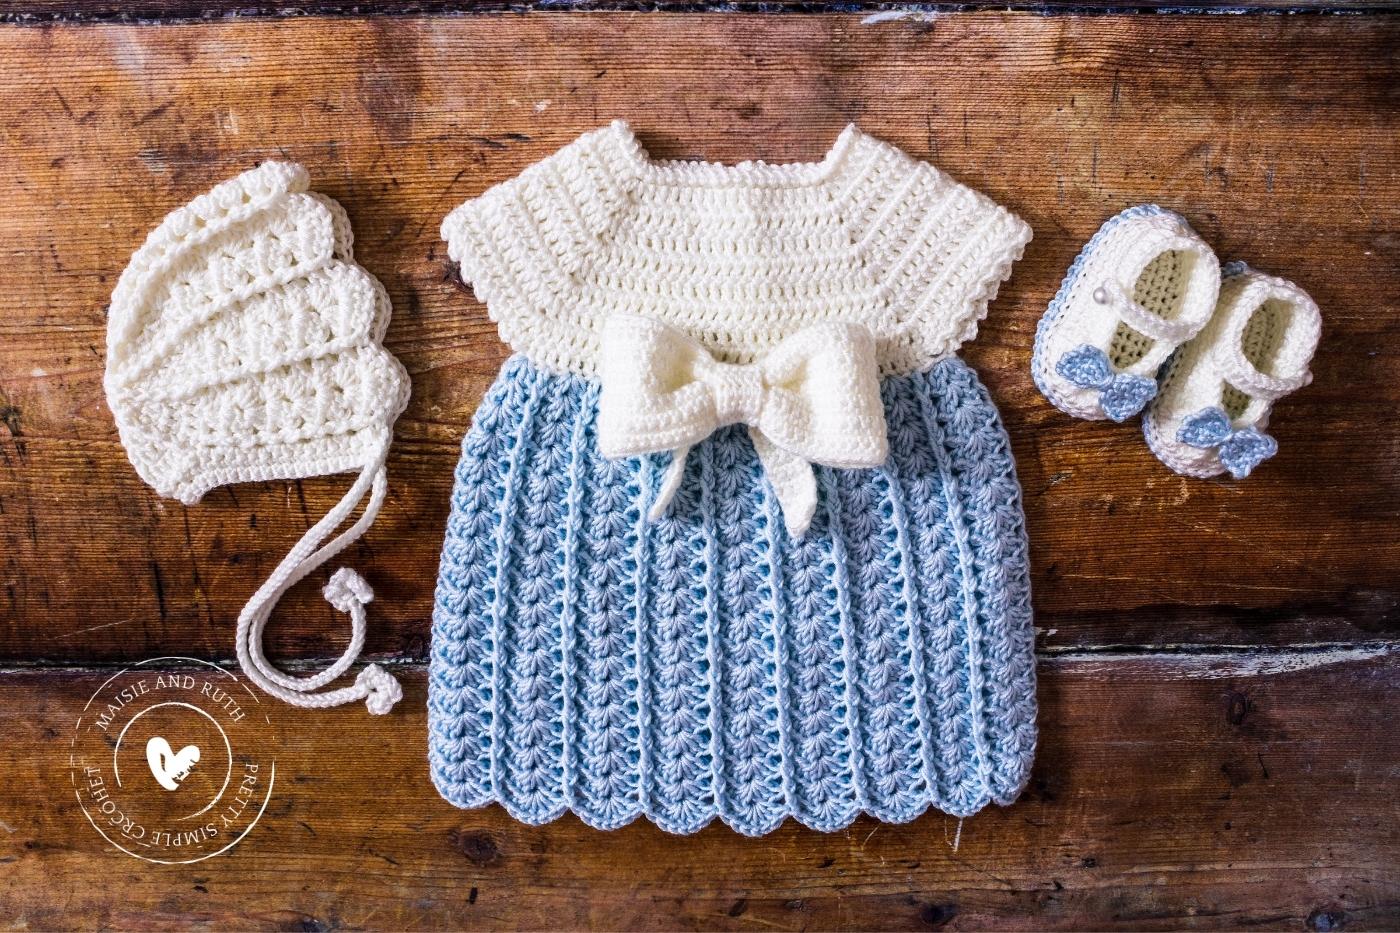
And if you have a little bit of extra time, you might like to turn your hand to making these crochet bow baby booties along with the other items from the set (see image below).
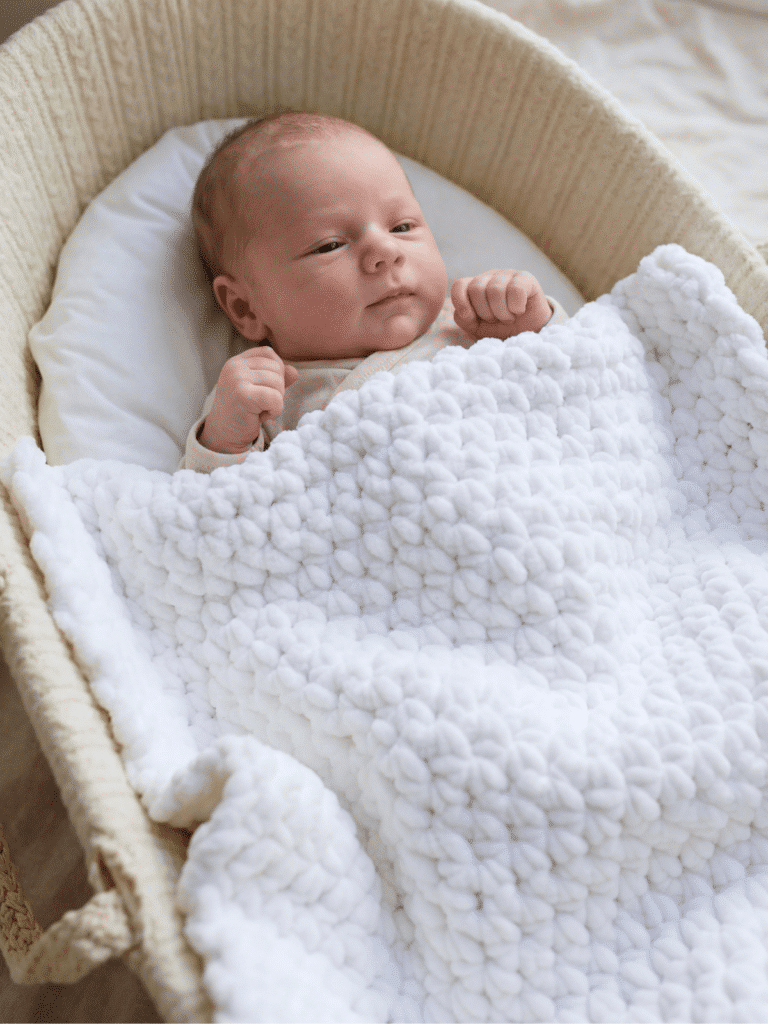
There’s a stylish baby dress, sweet little bonnet, cute headband and a gorgeous baby blanket that you can make for expecting parent(s).
VIDEO TUTORIAL
Crochet along with me to make this baby booties! Just click on the play button below:
PIN IT FOR LATER!
If you can’t make these crochet bow baby booties right now, then you can always pin it for later!
You can also follow me on Pinterest here
Let’s dive into the free pattern now…
Make the baby booties along with the matching dress and bonnet.
PDF PRINTABLE PATTERNS!
If you would prefer an ad-free, printable version of this pattern, you can purchase it from my Etsy store
These booties are also part of a Pattern Bundle! Check it out here
Thank you for supporting my shop!
CROCHET BOW BABY BOOTIES: A FREE PATTERN
Please carefully read all the information below.
LEVEL

“Projects may include simple stitch patterns, color work, and/or shaping”.
Source: Craft Yarn Council of America’s www.YarnStandards.com
PATTERN NOTES
- US crochet terminology used throughout.
- You can use any #3 / DK / 8 ply yarn for this project, provided that you meet the gauge / tension below.
- There is one set of instructions for sizes newborn, 0-3 months & 3-6 months.
- And another set of instructions for sizes 6-9 months and 9-12 months.
- Use the hook size according to the size of bootie that you wish to make (details below in ‘Materials’).
- The bootie is made in rounds.
- The instructions are the same for both the left and the right shoe (rounds 1-8) apart from when making the strap in round 9.
- The ch1 and ch2 at the beginning of each round do not count as a stitch. Therefore, you should make the first stitch of the round in the same stitch (at the base of the ch1 or ch2).
- As the ch1 or ch2 at the beginning of rounds does not count as a stitch, you should join the round by making a slip stitch into the very first dc or sc stitch of the round.
- When counting the total number of stitches at the end of each round, please be careful not to include the ch1 or ch2 in the final stitch count.
- For beginners, it will be helpful to place a stitch marker in the first dc or sc made at the beginning of each round to ensure that you slip stitch into this particular stitch when joining at the end of the round.
- If you would like to make a bigger bow for your bootie, please use a bigger crochet hook. If you would like to make a smaller bow, please use a smaller hook.
MATERIALS
- Yarn: Category #3 / light worsted / DK / 8 ply yarn. For all sizes, I used Sirdar Snuggly Soothing, 241 yds / 3.5 oz (220m / 100g) in two colours:
Colour A (for the bootie): 1 x ball (I used less than 2 oz. / 50 g from 1 ball)
Colour B (for the edging and bow): 1 x ball (I used only a scrap amount from 1 ball)
- Crochet hook: Newborn 3mm; 0–3 months E (3.5mm); 3–6 months & 6-9 months G (4mm); 9-12 months size 7 (4.5mm)
- Yarn needle (the bent tip makes sewing and weaving in ends much easier)
- Scissors (super sharp… and pretty)
- (Optional) 1 x stitch marker (these interlocking ones will not fall out!)
GAUGE / TENSION
To check your gauge / tension, work the first three rounds of the relevant pattern below.
To check that you’re okay for size, the length of your sole (which is also the completed length of your baby bootie) should measure as follows:
Newborn (3mm hook): 3” (8cm)
0–3 months (E / 3.5mm hook): 3.5″ (9cm)
3–6 months (G / 4mm hook): 4″ (10cm)
6-9 months (G / 4mm hook): 4.5″ (11cm)
9-12 months (Size 7 / 4.5mm hook): 4.75″ (12cm)
STITCHES & ABBREVIATIONS (US CROCHET TERMS)
BBO – back bump only: Insert your hook into the back bump of the next stitch (the back bump sits directly behind the back loop of the stitch; please see the video tutorial if you require further assistance).
BLO – back loop only: Insert your hook and work the stitch into the back loop only.
ch(s) – chain(s)
dc – double crochet: Yarn over (yo), insert hook into stitch, yo, pull up a loop (3 loops on hook). Yo, pull through 2 loops (2 loops on hook). Yo, pull through remaining 2 loops. 1 double crochet completed.
fasten off – To fasten off securely, work one chain, then cut the yarn leaving a 5 – 6” tail. Pull the tail through the loop that is on your hook. Tighten gently.
hdc – half double crochet: Yarn over (yo), insert hook into stitch, yo, pull up a loop (3 loops on hook). Yo, pull through all 3 loops. 1 half double crochet completed.
sc – single crochet: Insert hook into stitch, yarn over (yo), pull up a loop (2 loops on hook). Yo, pull through both loops on hook. 1 single crochet completed.
sk – skip: Do not crochet into this stitch / space.
sl st – slip stitch: Insert hook into stitch, yarn over (yo), pull up a loop, you will have 2 loops on your hook. Pull the first loop through the second loop. 1 slip stitch completed.
st(s) – stitch(es)
Turn: I prefer to turn my work clockwise.
SPECIAL STITCHES
BPsc – back post single crochet: Insert hook from back to front to back around the post of the next stitch, yarn over (yo), pull up a loop, 2 loops remaining on hook. Yo and pull through both loops on hook. 1 BPsc completed.
FPhdc- front post half double crochet: Yarn over (yo), insert hook from front to back to front around the post of the next stitch, yo, pull up a loop, 3 loops on hook. Yo, pull through all 3 loops on hook. 1 FPhdc completed.
( ) – Sets of stitches to be worked as many times as directed.
[ ] – The total number of stitches at the end of a row.
PATTERN INSTRUCTIONS (NEWBORN, 0-3 MONTHS & 3-6 MONTHS)
SOLE
With Colour A:
Ch 11 (relaxed, not too tight)
Round 1. 1hdc in 2nd ch from hook, 1hdc in next 8 ch, 6 hdc in last ch, working up other side of ch, 1hdc in next 8 ch, 2hdc in last ch, sl st to 1st hdc to join, DO NOT TURN [25 hdc].
Round 2. Ch2 (does not count as your 1st st here and throughout), 2hdc in same st (at base of ch2), 1hdc in next 8 sts, 2hdc in next 6 sts, 1hdc in next 8 sts, 2hdc in last 2 sts, sl st to 1st hdc to join, DO NOT TURN [34 hdc].
Round 3. Ch2, 2hdc in same st (at base of ch2), 2hdc in next st, 1hdc in next 9 sts, (2hdc in next st, 1hdc in next st) 6 times, 1hdc in next 9 sts, 2hdc in last 2 sts, sl st to 1st hdc to join, DO NOT TURN [44 hdc].
MIDDLE SECTION
Round 4. Ch1, BPsc in same st (at base of ch1), BPsc in next 43 sts, sl st to 1st BPsc to join, DO NOT TURN [44 BPsc].
Round 5. Ch2, 1hdc in same st (at base of ch2), 1hdc in next 43 sts, sl st to 1st hdc to join, DO NOT TURN [44 hdc].
SHAPE TOE
NOTE: Over the next two rounds you will be asked to work into the BBO (back bump only) of certain stitches (see ‘Stitches and Abbreviations above). If you find that this is too tricky, you can work into the back loop instead.
Round 6. Ch1, 1sc in same st (at base of ch1), 1sc in next 13 sts, (FPhdc in next st, 1hdc in BBO of next 2 sts) 6 times, 1sc in next 12 sts, sl st to 1st sc to join, DO NOT TURN [44 sts].
Round 7. Ch1, 1sc in same st (at base of ch1), 1sc in next 13 sts, (FPhdc in next st, sk next st, 1hdc in BBO of next st) 6 times, 1sc in next 12 sts, sl st to 1st sc to join, DO NOT TURN [38 sts].
Round 8. Ch1, 1sc in same st (at base of ch1), 1sc in next 13 sts, (FPhdc in next st, sk next st) 6 times, 1sc in next 12 sts, DO NOT TURN [32 sts].
STRAP (FOR RIGHT SHOE)
Round 9. Ch2, 1dc in same st (at base of ch2), 1dc in next 9 sts, work strap as follows: ch 14, 1dc in 6th ch from hook (buttonhole made), 1dc in next 8 ch, sl st into bottom of last dc worked, sl st in next 14 sts, 1dc in next 8 sts, sl st to 1st dc to join.
Cut yarn, fasten off and weave in ends.
STRAP (FOR LEFT SHOE)
Round 9. Ch2, 1dc in same st (at base of ch2), 1dc in next 9 sts, sl st in next 15 sts, work strap as follows: ch 14, 1dc in 6th ch from hook (buttonhole made), 1dc in next 8ch, 1dc into bottom of last sl st worked, 1dc in next 7 sts, sl st to 1st dc to join.
Cut yarn, fasten off and weave in ends.
EDGING AROUND SOLE (FOR BOTH LEFT AND RIGHT SHOE)
With Colour B:
Beginning at the centre back of shoe, attach yarn to the BLO of any st made in round 4.
Round 1. Ch1, (sl st, ch1) in same st (at base of ch1), (sl st, ch1) in BLO of next 43 sts, sl st in to bottom of 1st st of the round to join.
Cut yarn, fasten off and weave in ends.
BOW
With Colour B and a G (4mm) hook:
Ch 9
Row 1. 1sc in 2nd ch from hook, 1sc in next 2 chs, sl st in next 2 chs, 1sc in next 3 chs, TURN [8 sts].
Row 2. 1sc in same st, 1sc in next 2 sts, sl st in next 2 sts, 1sc in next 3 sts, TURN [8 sts].
Rows 3 – 5. Repeat row 2.
Cut yarn, fasten off, weave in ends.
Cut a long piece of yarn and wrap TIGHTLY around centre of bow.
Sew bow onto centre front of shoe.
PATTERN INSTRUCTIONS (6-9 MONTHS & 9-12 MONTHS)
SOLE
With Colour A:
Ch 13 (relaxed, not too tight)
Round 1. 1hdc in 2nd ch from hook, 1hdc in next 10 ch, 8 hdc in last ch, working up other side of ch, 1hdc in next 10 ch, 2hdc in last ch, sl st to 1st hdc to join, DO NOT TURN [31 hdc].
Round 2. Ch2 (does not count as your 1st st here and throughout), 2hdc in same st (at base of ch2), 1hdc in next 10 sts, 2hdc in next 8 sts, 1hdc in next 10 sts, 2hdc in last 2 sts, sl st to 1st hdc to join, DO NOT TURN [42 hdc].
Round 3. Ch2, 2hdc in same st (at base of ch2), 2hdc in next st, 1hdc in next 11 sts, (2hdc in next st, 1hdc in next st) 8 times, 1hdc in next 11 sts, 2hdc in last 2 sts, sl st to 1st hdc to join, DO NOT TURN [54 hdc].
MIDDLE SECTION
Round 4. Ch1, BPsc in same st (at base of ch1), BPsc in next 53 sts, sl st to 1st BPsc to join, DO NOT TURN [54 BPsc].
Round 5. Ch2, 1hdc in same st (at base of ch2), 1hdc in next 53 sts, sl st to 1st hdc to join, DO NOT TURN [54 hdc].
SHAPE TOE
NOTE: Over the next two rounds you will be asked to work into the BBO (back bump only) of certain stitches (see ‘Stitches and Abbreviations above). If you find that this is too tricky, you can work into the back loop instead.
Round 6. Ch1, 1sc in same st (at base of ch1), 1sc in next 15 sts, (FPhdc in next st, 1hdc in BBO of next 2 sts) 8 times, 1sc in next 14 sts, sl st to 1st sc to join, DO NOT TURN [54 sts].
Round 7. Ch1, 1sc in same st (at base of ch1), 1sc in next 15 sts, (FPhdc in next st, sk next st, 1hdc in BBO of next st) 8 times, 1sc in next 14 sts, sl st to 1st sc to join, DO NOT TURN [46 sts].
Round 8. Ch1, 1sc in same st (at base of ch1), 1sc in next 15 sts, (FPhdc in next st, sk next st) 8 times, 1sc in next 14 sts, DO NOT TURN [38 sts].
STRAP (FOR RIGHT SHOE)
Round 9. Ch2, 1dc in same st (at base of ch2), 1dc in next 11 sts, work strap as follows: ch 14, 1dc in 6th ch from hook (buttonhole made), 1dc in next 8 ch, sl st into bottom of last dc worked, sl st in next 16 sts, 1dc in next 10 sts, sl st to 1st dc to join.
Cut yarn, fasten off and weave in ends.
STRAP (FOR LEFT SHOE)
Round 9. Ch2, 1dc in same st (at base of ch2), 1dc in next 11 sts, sl st in next 17 sts, work strap as follows: ch 14, 1dc in 6th ch from hook (buttonhole made), 1dc in next 8ch, 1dc into bottom of last sl st worked, 1dc in next 9 sts, sl st to 1st dc to join.
Cut yarn, fasten off and weave in ends.
EDGING AROUND SOLE (FOR BOTH LEFT AND RIGHT SHOE)
With Colour B:
Beginning at the centre back of shoe, attach yarn to the BLO of any st made in round 4.
Round 1. Ch1, (sl st, ch1) in same st (at base of ch1), (sl st, ch1) in BLO of next 53 sts, sl st in to bottom of 1st st of the round to join.
Cut yarn, fasten off and weave in ends.
BOW
With Colour B and a G (4mm) hook:
Ch 9
Row 1. 1sc in 2nd ch from hook, 1sc in next 2 chs, sl st in next 2 chs, 1sc in next 3 chs, TURN [8 sts].
Row 2. 1sc in same st, 1sc in next 2 sts, sl st in next 2 sts, 1sc in next 3 sts, TURN [8 sts].
Rows 3 – 5. Repeat row 2.
Cut yarn, fasten off, weave in ends.
Cut a long piece of yarn and wrap TIGHTLY around centre of bow.
Sew bow onto centre front of shoe.
SHARE YOUR WORK!
I really hope that you enjoyed making these crochet bow baby booties!
I can’t wait to see photos of your finished booties and the colour combinations you decided upon (and if you made any other items from the set)… please tag me on Instagram using @maisieandruth and / or use #maisieandruth
And remember to pin this pattern for later if you can’t make it right now!
Happy crocheting,


Hi what does BBO mean?
Hi Carrie, BBO is the abbreviation for back bump only. I’ve updated the ‘Stitches & Abbreviations’ section with more information on this now – thank you! Working into the back bump makes the front post double crochet stitches more pronounced, however if you find it a little tricky to work into the back bump, you can work into the back loop of the next stitch instead.
I hope you enjoy working up these little booties! 💝